- Recommended for these people
- ・Those who are troubled by the fact that night scenes always end up blurry and they can't take good photos
・Those who want to take beautiful night scene photos without a tripod
・Those who want to leave a more atmospheric night scene photo
Have you ever tried taking photos of night scenes, only to find that the images came out blurry?
In this article, we'll introduce some easy-to-understand tips for taking night scene photos that even beginners can put into practice right away!
This page contains advertisements.
Use a tripod to prevent blurring when taking night shots
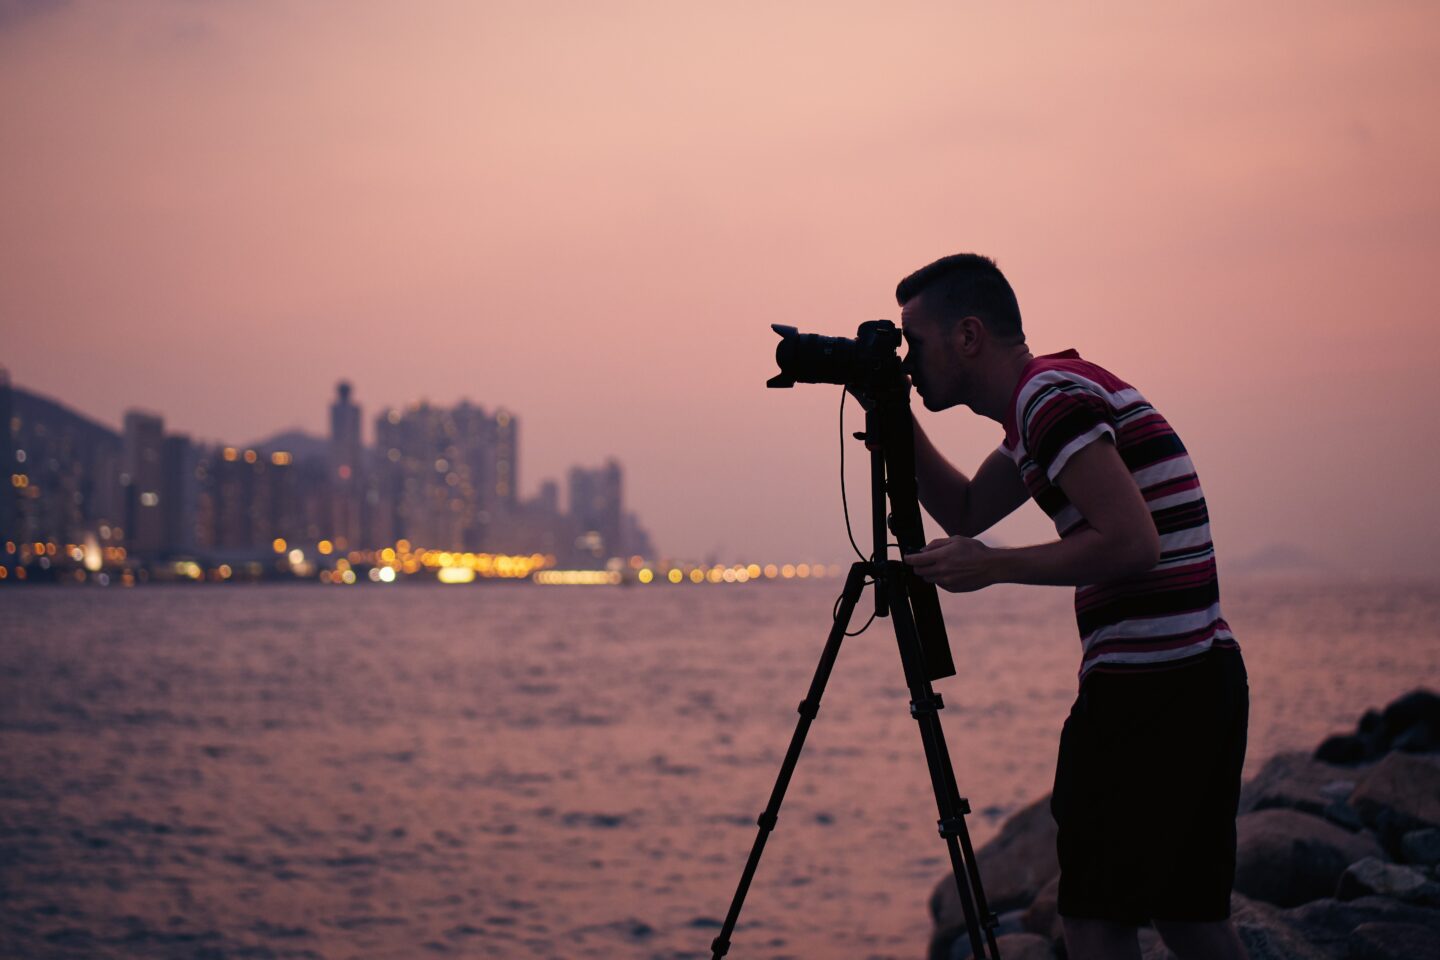
To take beautiful photos of night scenes, you use a method called "long exposure," which means opening the shutter for several seconds or more. If the camera moves even a little during that time, the night scene will be blurred, ruining your precious photo.
That's when a tripod comes in handy.
It holds the camera firmly in place, so you can take clear, blur-free photos of the night scene.
Tripods are also easy to buy on for just a few thousand yen. They are easy for even beginners to pick up, and there are many lightweight, compact models that are easy to carry around.
Furthermore, tripods are useful not only for night scenes,
・Starry sky photography
・Selfie group photos
・Time-lapse videos
・Landscape photography where you want to reduce blur
It can be used in a variety of situations.

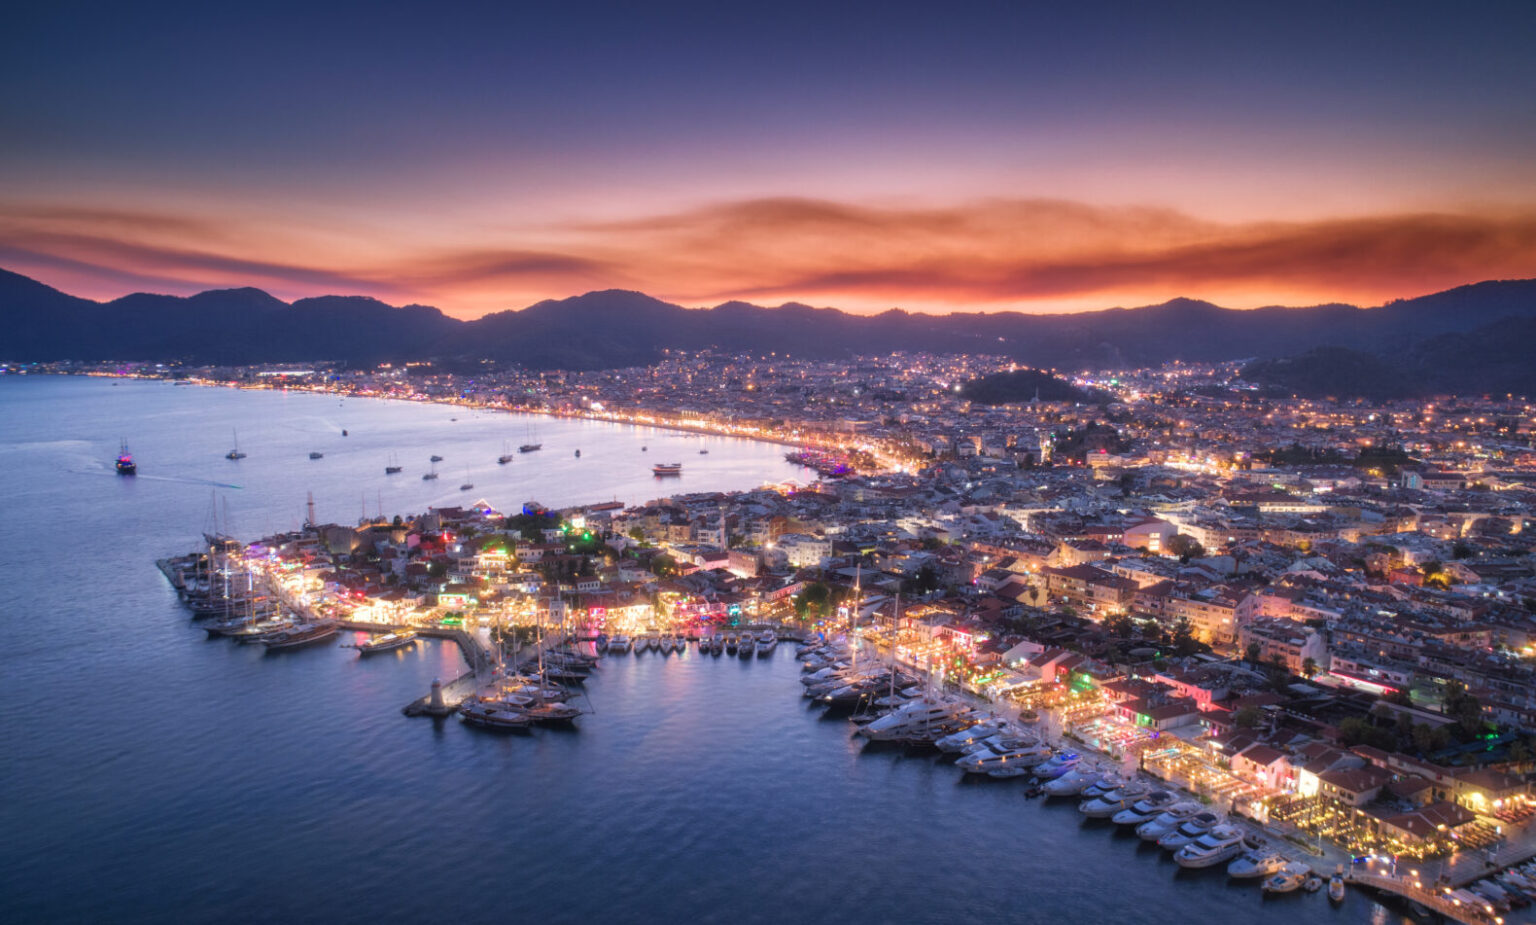
Twilight time for beautiful night views
If you have time, we recommend taking photos during twilight time.
Dusk time: Approximately 30 minutes after sunset.
Which is more beautiful: when the sun has completely gone down or when it's twilight?
The sun has completely gone down

twilight time
The sky at "twilight time" has a more beautiful gradation.
If you have the time and would prefer the twilight time, we recommend trying to take the photo about 30 minutes after sunset!
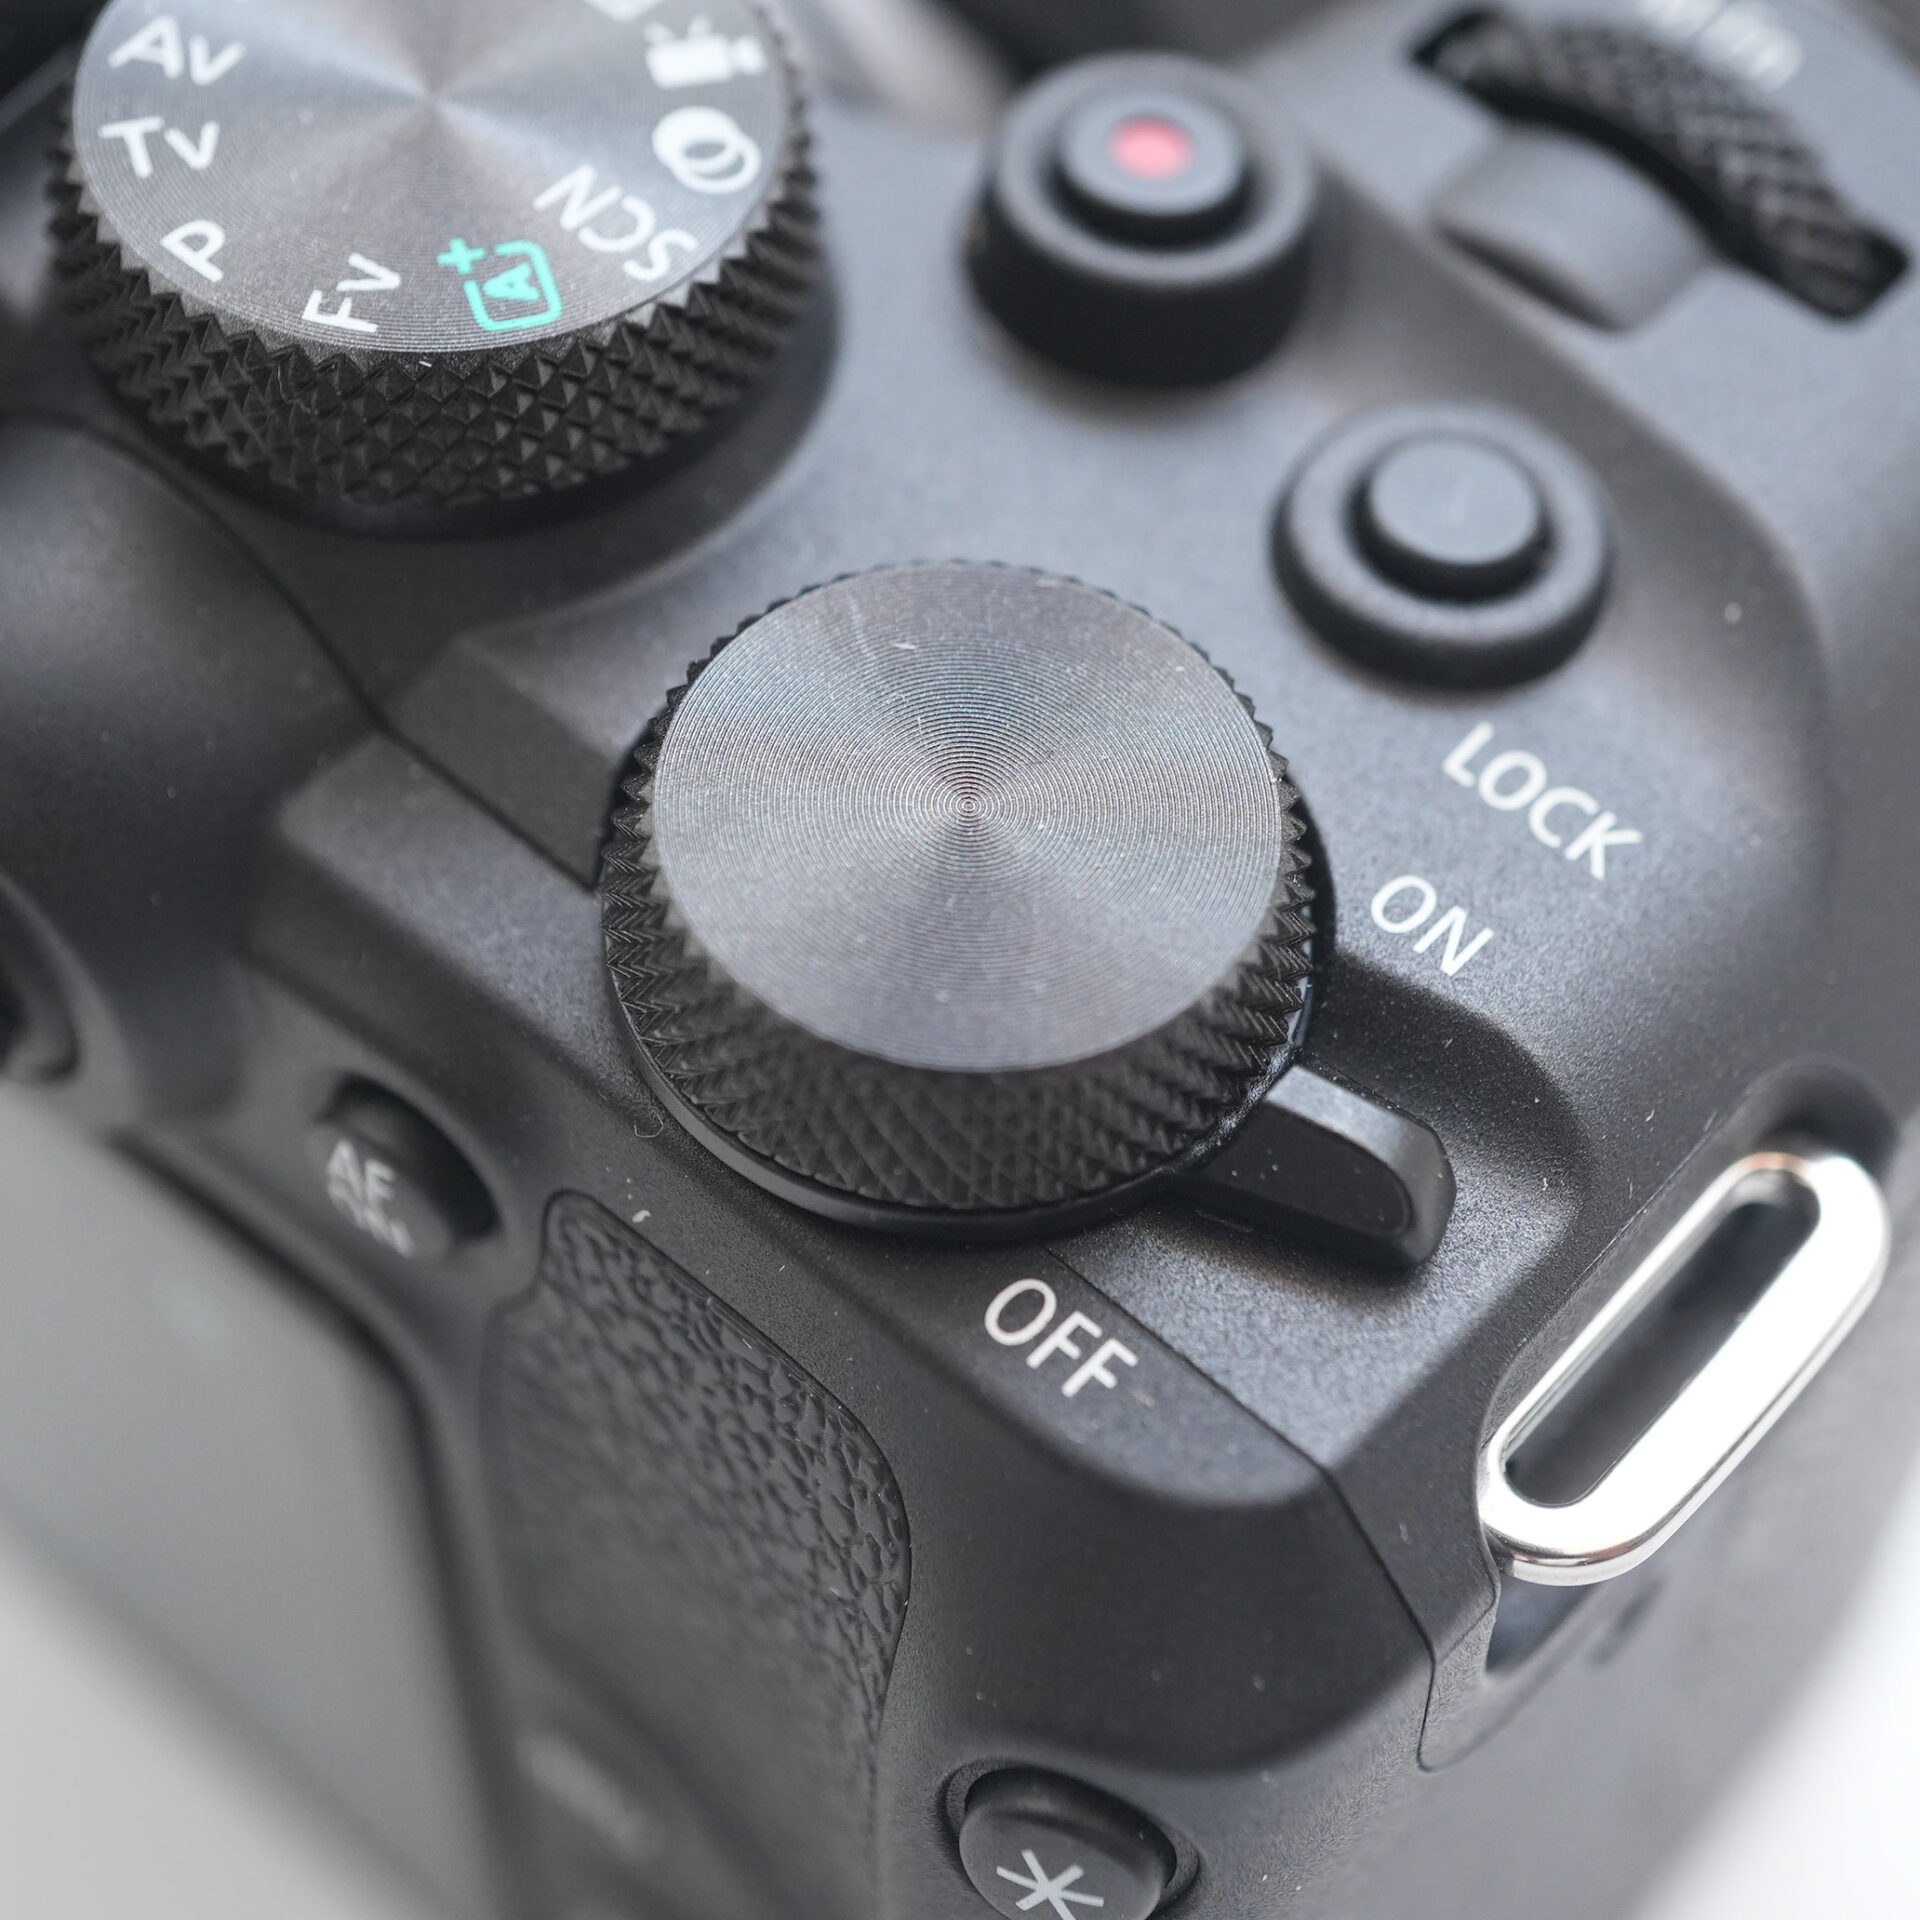
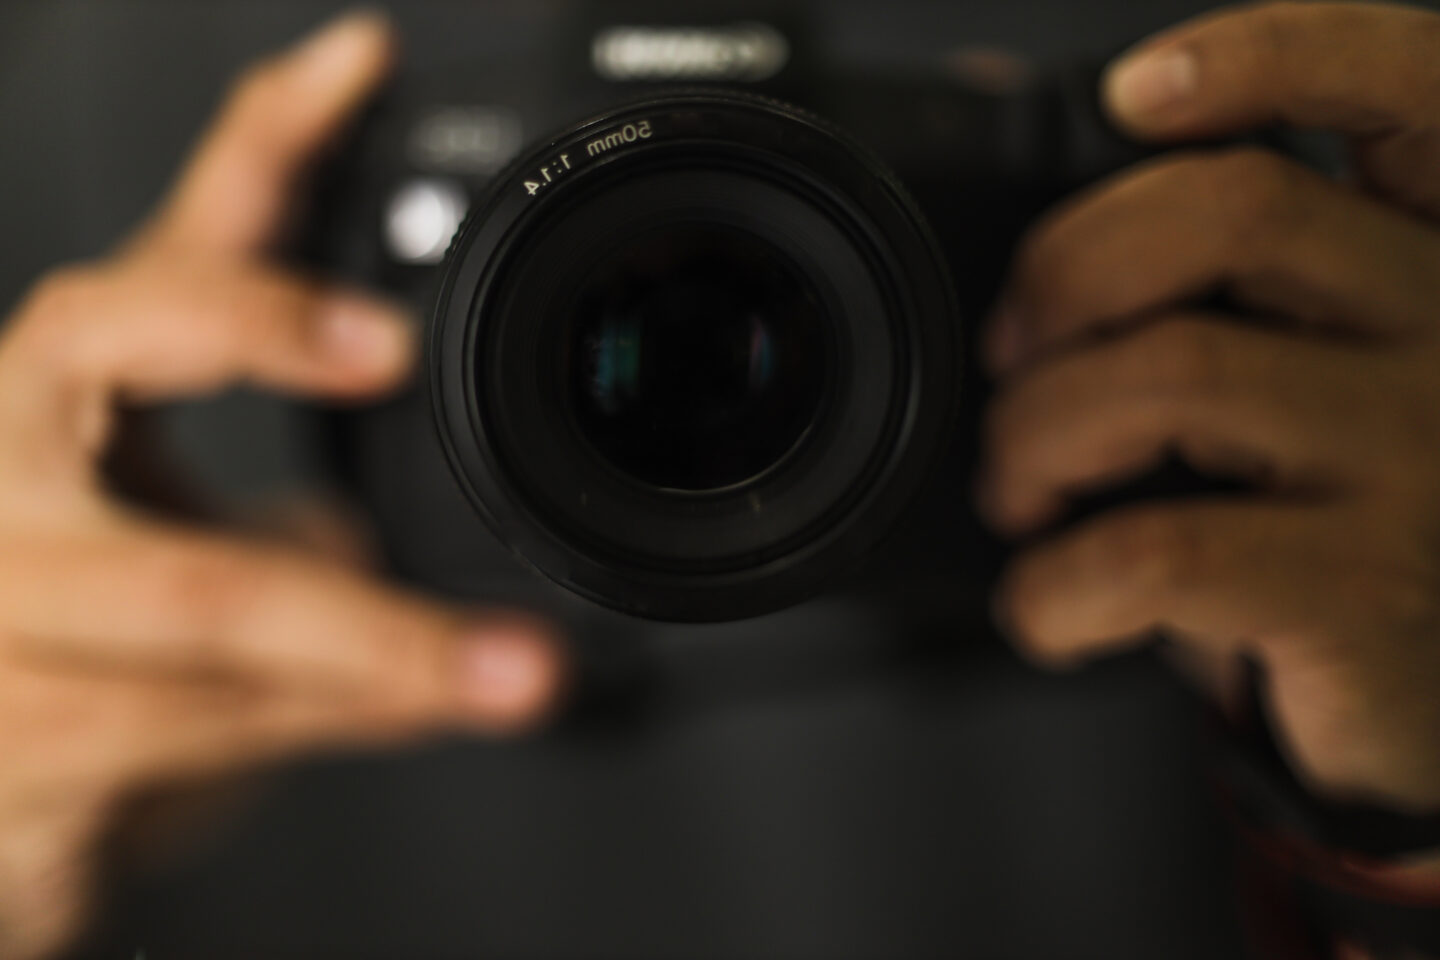
Taking night shots in M mode
M mode is a mode in which you can adjust all of the camera's exposure settings (F-stop, shutter speed, and ISO sensitivity) yourself.
Unlike auto mode or A mode (aperture priority), M mode is characterized by the fact that you can control the shooting entirely by your own sense, rather than leaving it up to the camera.
STEP.1
 |
| Set the dial to M. |
Benefits and precautions of setting F value to 8
The F-number (aperture value) affects the brightness and in-focus range (depth of field) of a photograph.
When photographing night scenes, setting the F-number to around 8 makes it easier to focus on the entire subject, from the foreground to the background, allowing you to depict cityscapes and buildings clearly.
- Advantages of F-number 8
- ・Deep depth of field, sharp overall image
Easy to focus on everything from the street lights in the foreground to the buildings in the background
・F-number range where lens resolution is most stable
Most lenses produce the clearest images at around F5.6 to F8
- Points to note and adjustment points
- ・Scenes with low light levels tend to be dark.
Use a longer shutter speed or increase the ISO to deal with this.
・Raising the F-number too much can cause diffraction.
We recommend checking the image quality before increasing the F-number to F11 or higher.
An F-stop of F8 is a very effective choice when you want to take a night scene photo that is crisp and sharp.
STEP.1
 |
| Turn the front ring |
STEP.2
 |
| Set F value to 8 |
Benefits and precautions of using an 8 second shutter speed
If you set the shutter speed to "8 seconds," the shutter will remain open for eight seconds, during which time the camera will record the light that comes in. This is the setting to use when you want to capture beautiful images of night scenes, star trails, light trails, etc.
STEP.1
 |
| Turn the dial on the back |
STEP.2
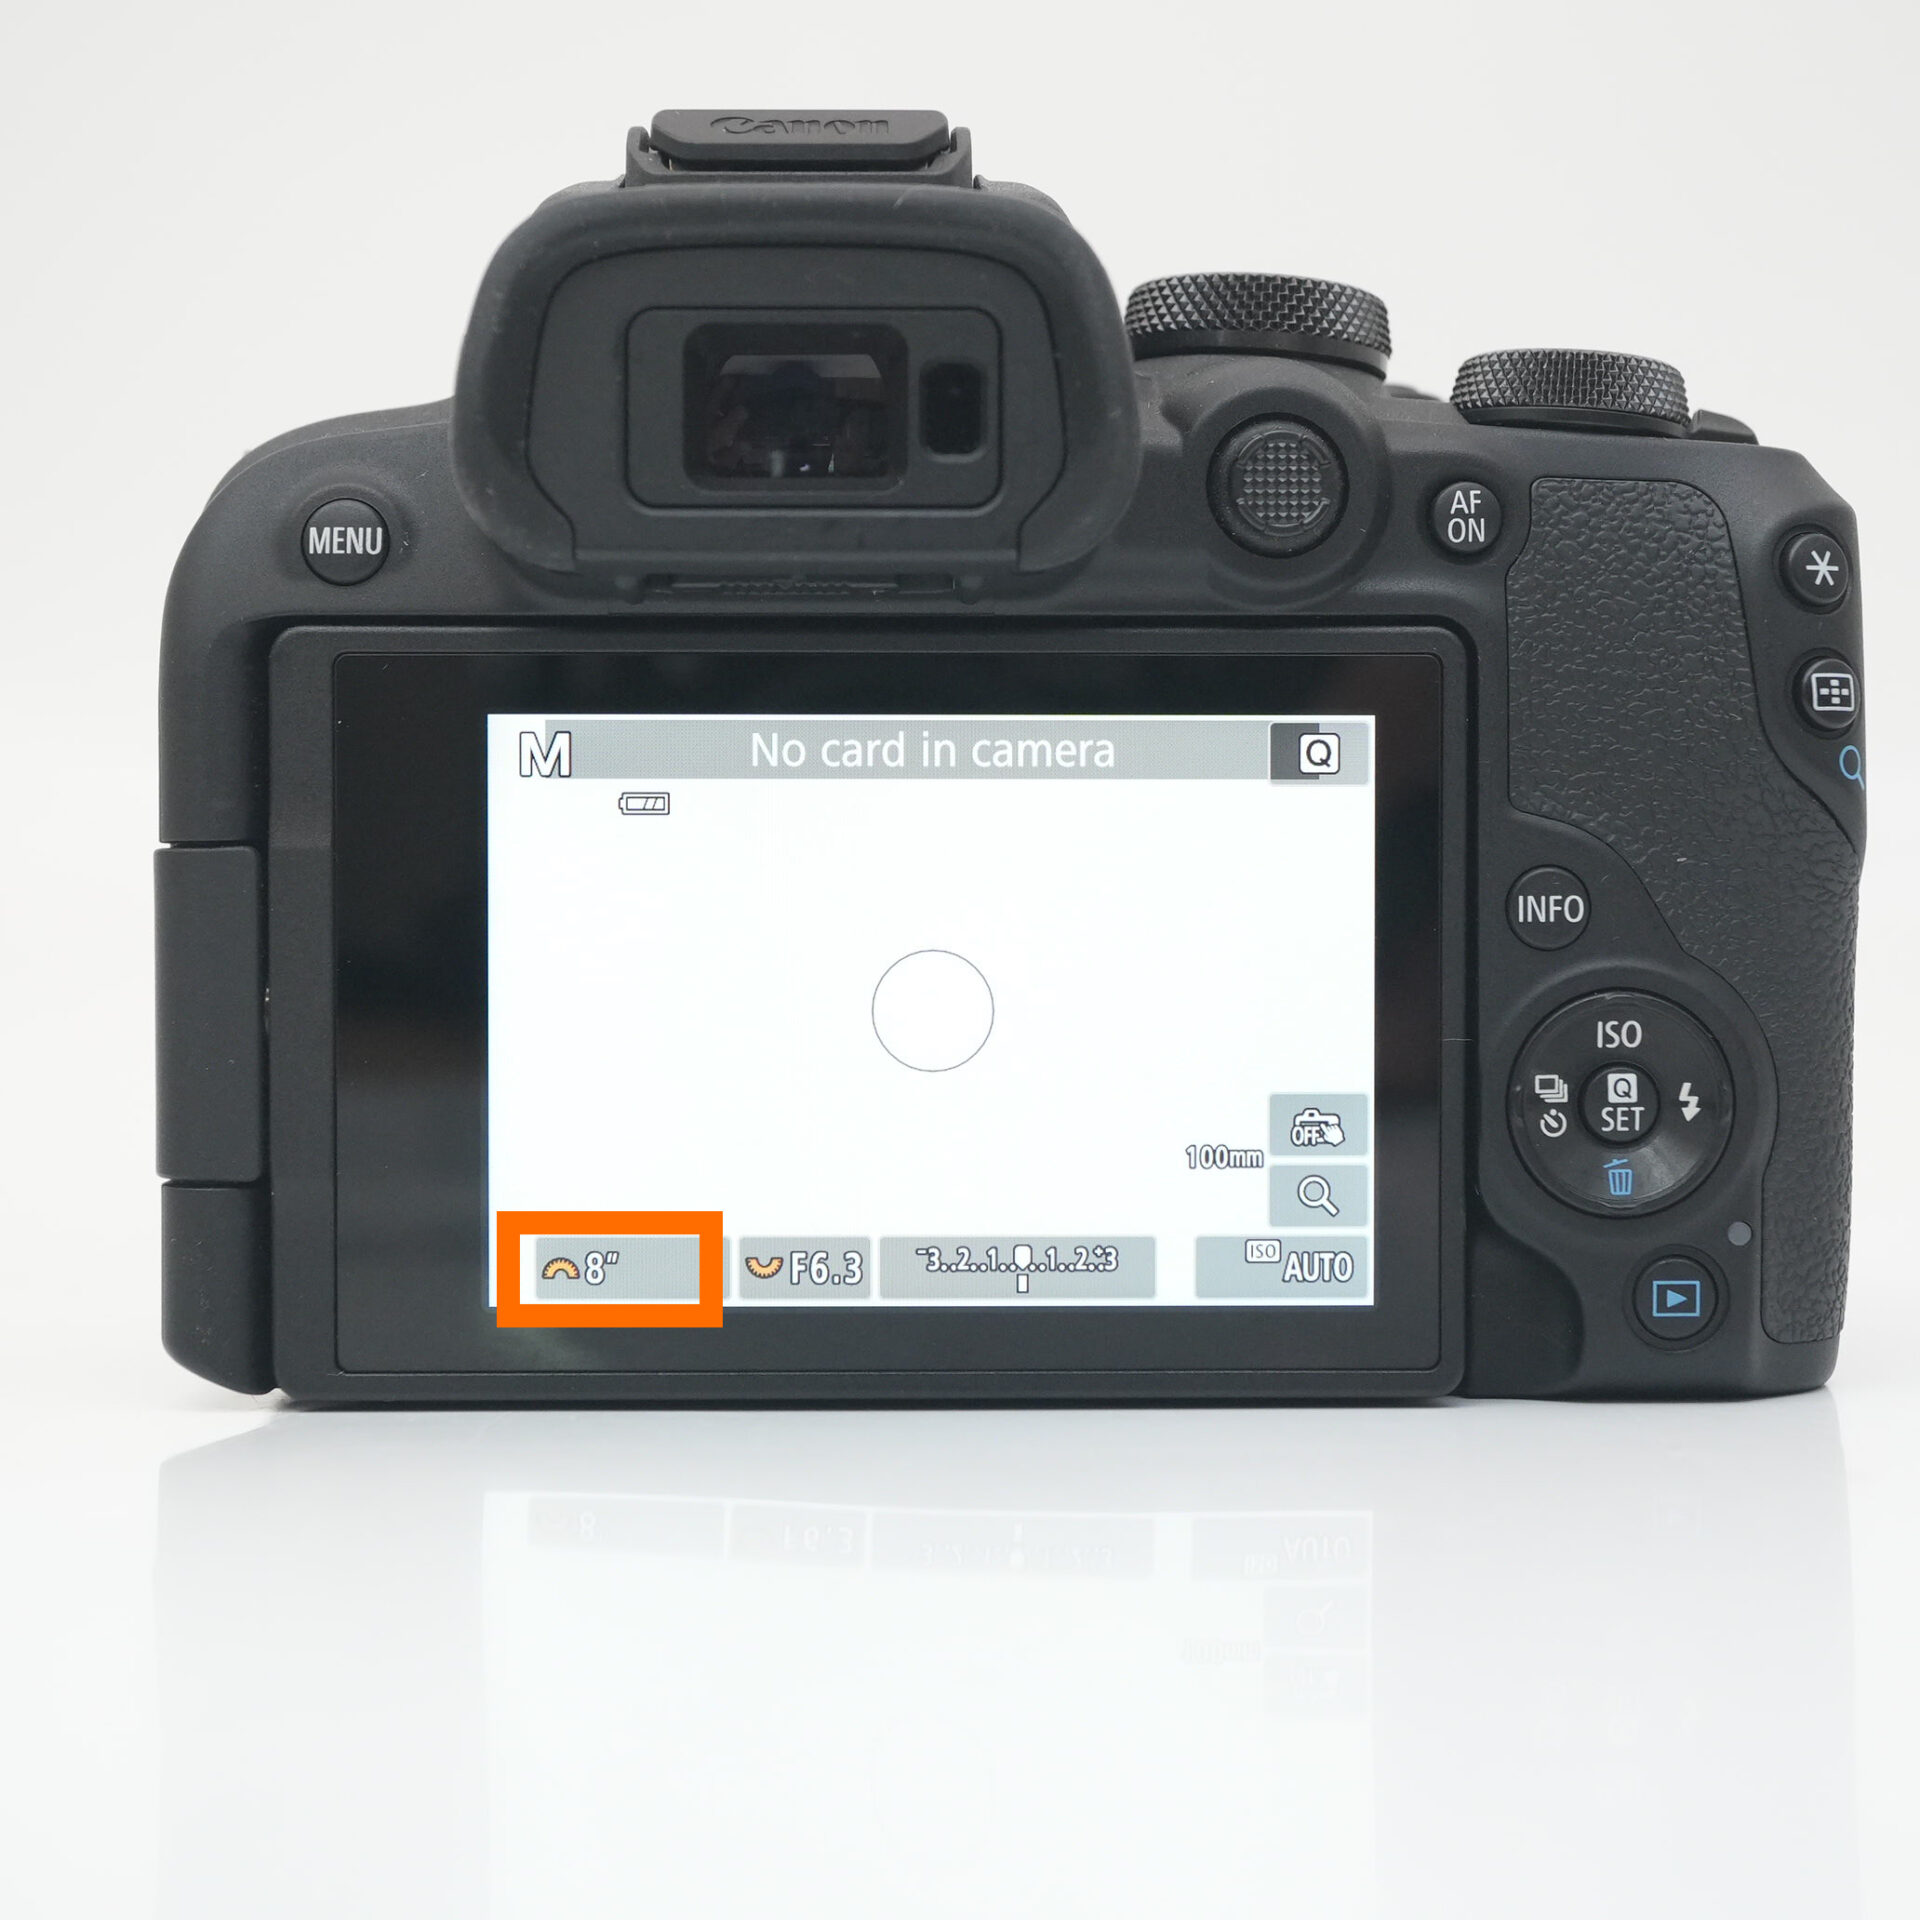 |
| Set the shutter speed to 8 seconds |
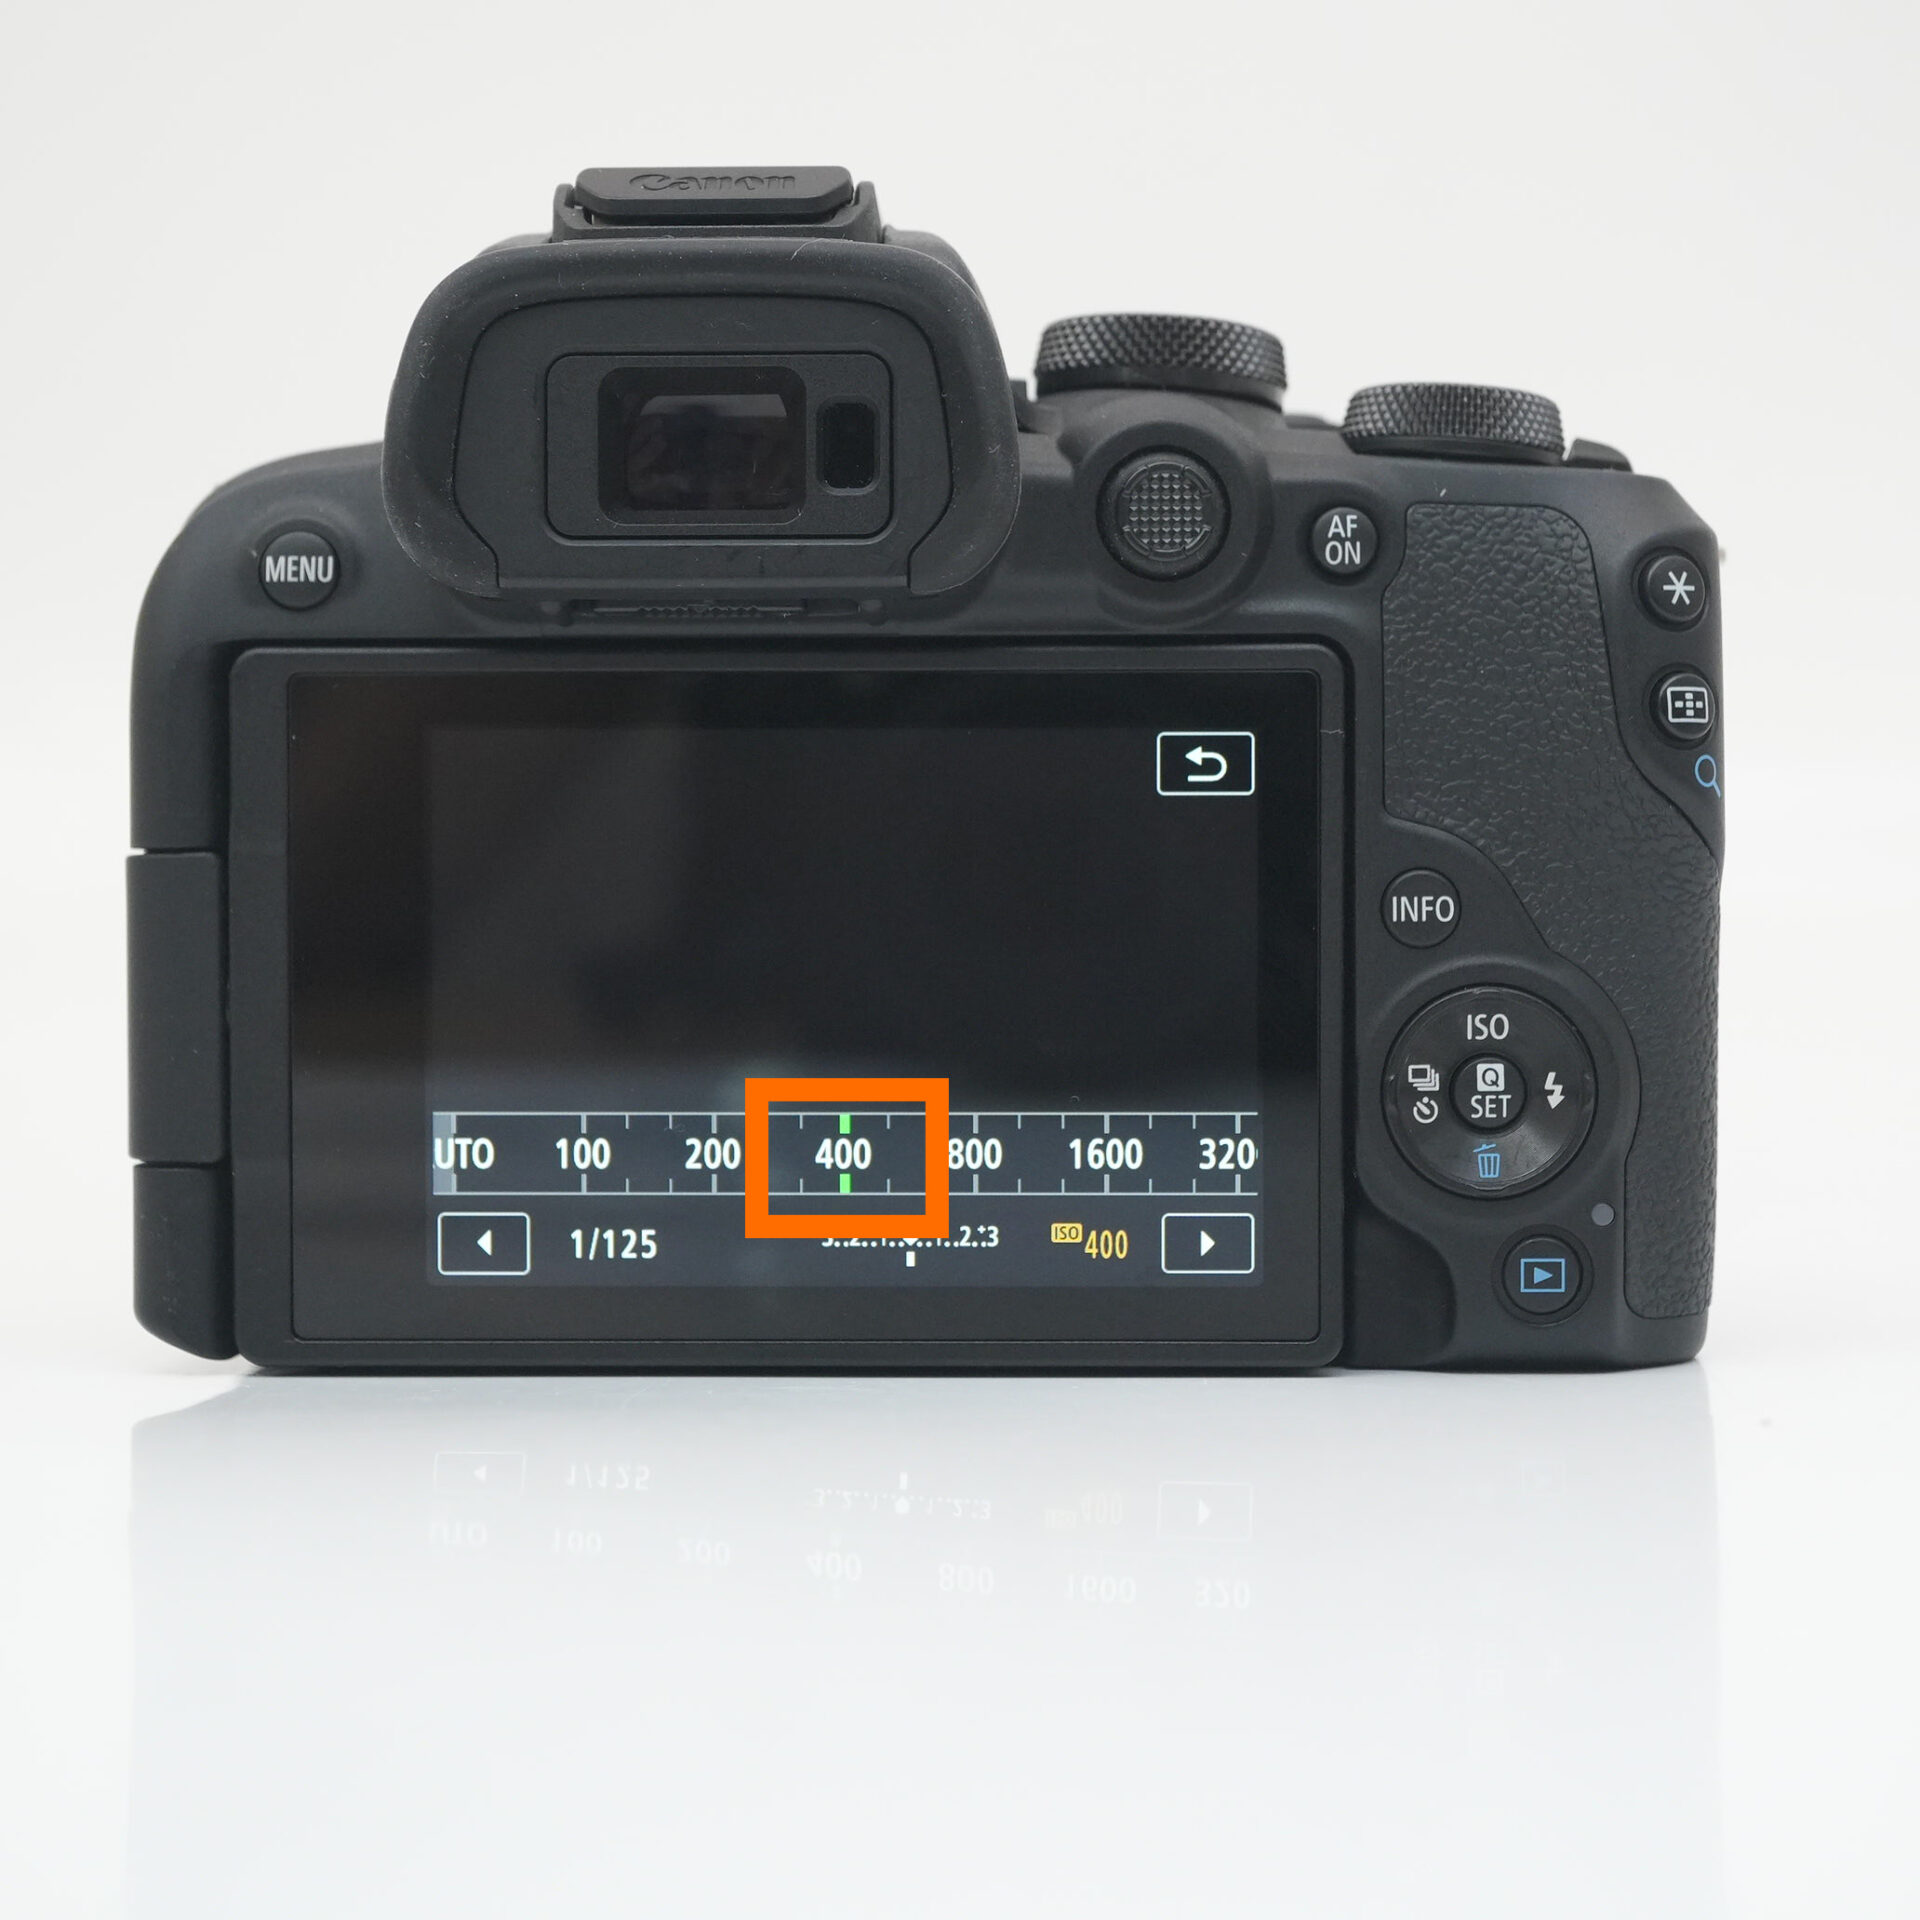
When shooting night scenes, start with ISO 400.
- What is ISO sensitivity?
- ISO sensitivity is a setting that indicates the "sensitivity to brightness" of the camera to capture light. The higher the number, the brighter the image you can take in dark places, but the more likely it is that noise (graininess) will occur.
For night scenes, a tripod is often used, and a longer shutter speed can be used, meaning sufficient brightness can be ensured even with a lower ISO, so we recommend setting the ISO at around 400 as a starting point.
ISO sensitivity adjustment
Using ISO 400 as the reference, adjust as follows.
| Situation | Suggested Adjustment |
|---|---|
| The image looks darker than expected | Gradually increase ISO to 800–1600 |
| Image is blurry, but you want to keep a fast shutter speed | Raise ISO to 2000 or higher to maintain brightness |
| The image is too bright or there's too much noise | Try lowering ISO to 80–200 |
- Key Point
- For night photography, it's best to start with an ISO setting of 400 as a baseline,
and then adjust it up or down depending on the scene.
By balancing brightness while keeping noise to a minimum,
you’ll be able to capture sharper and more beautiful night shots.
STEP.1
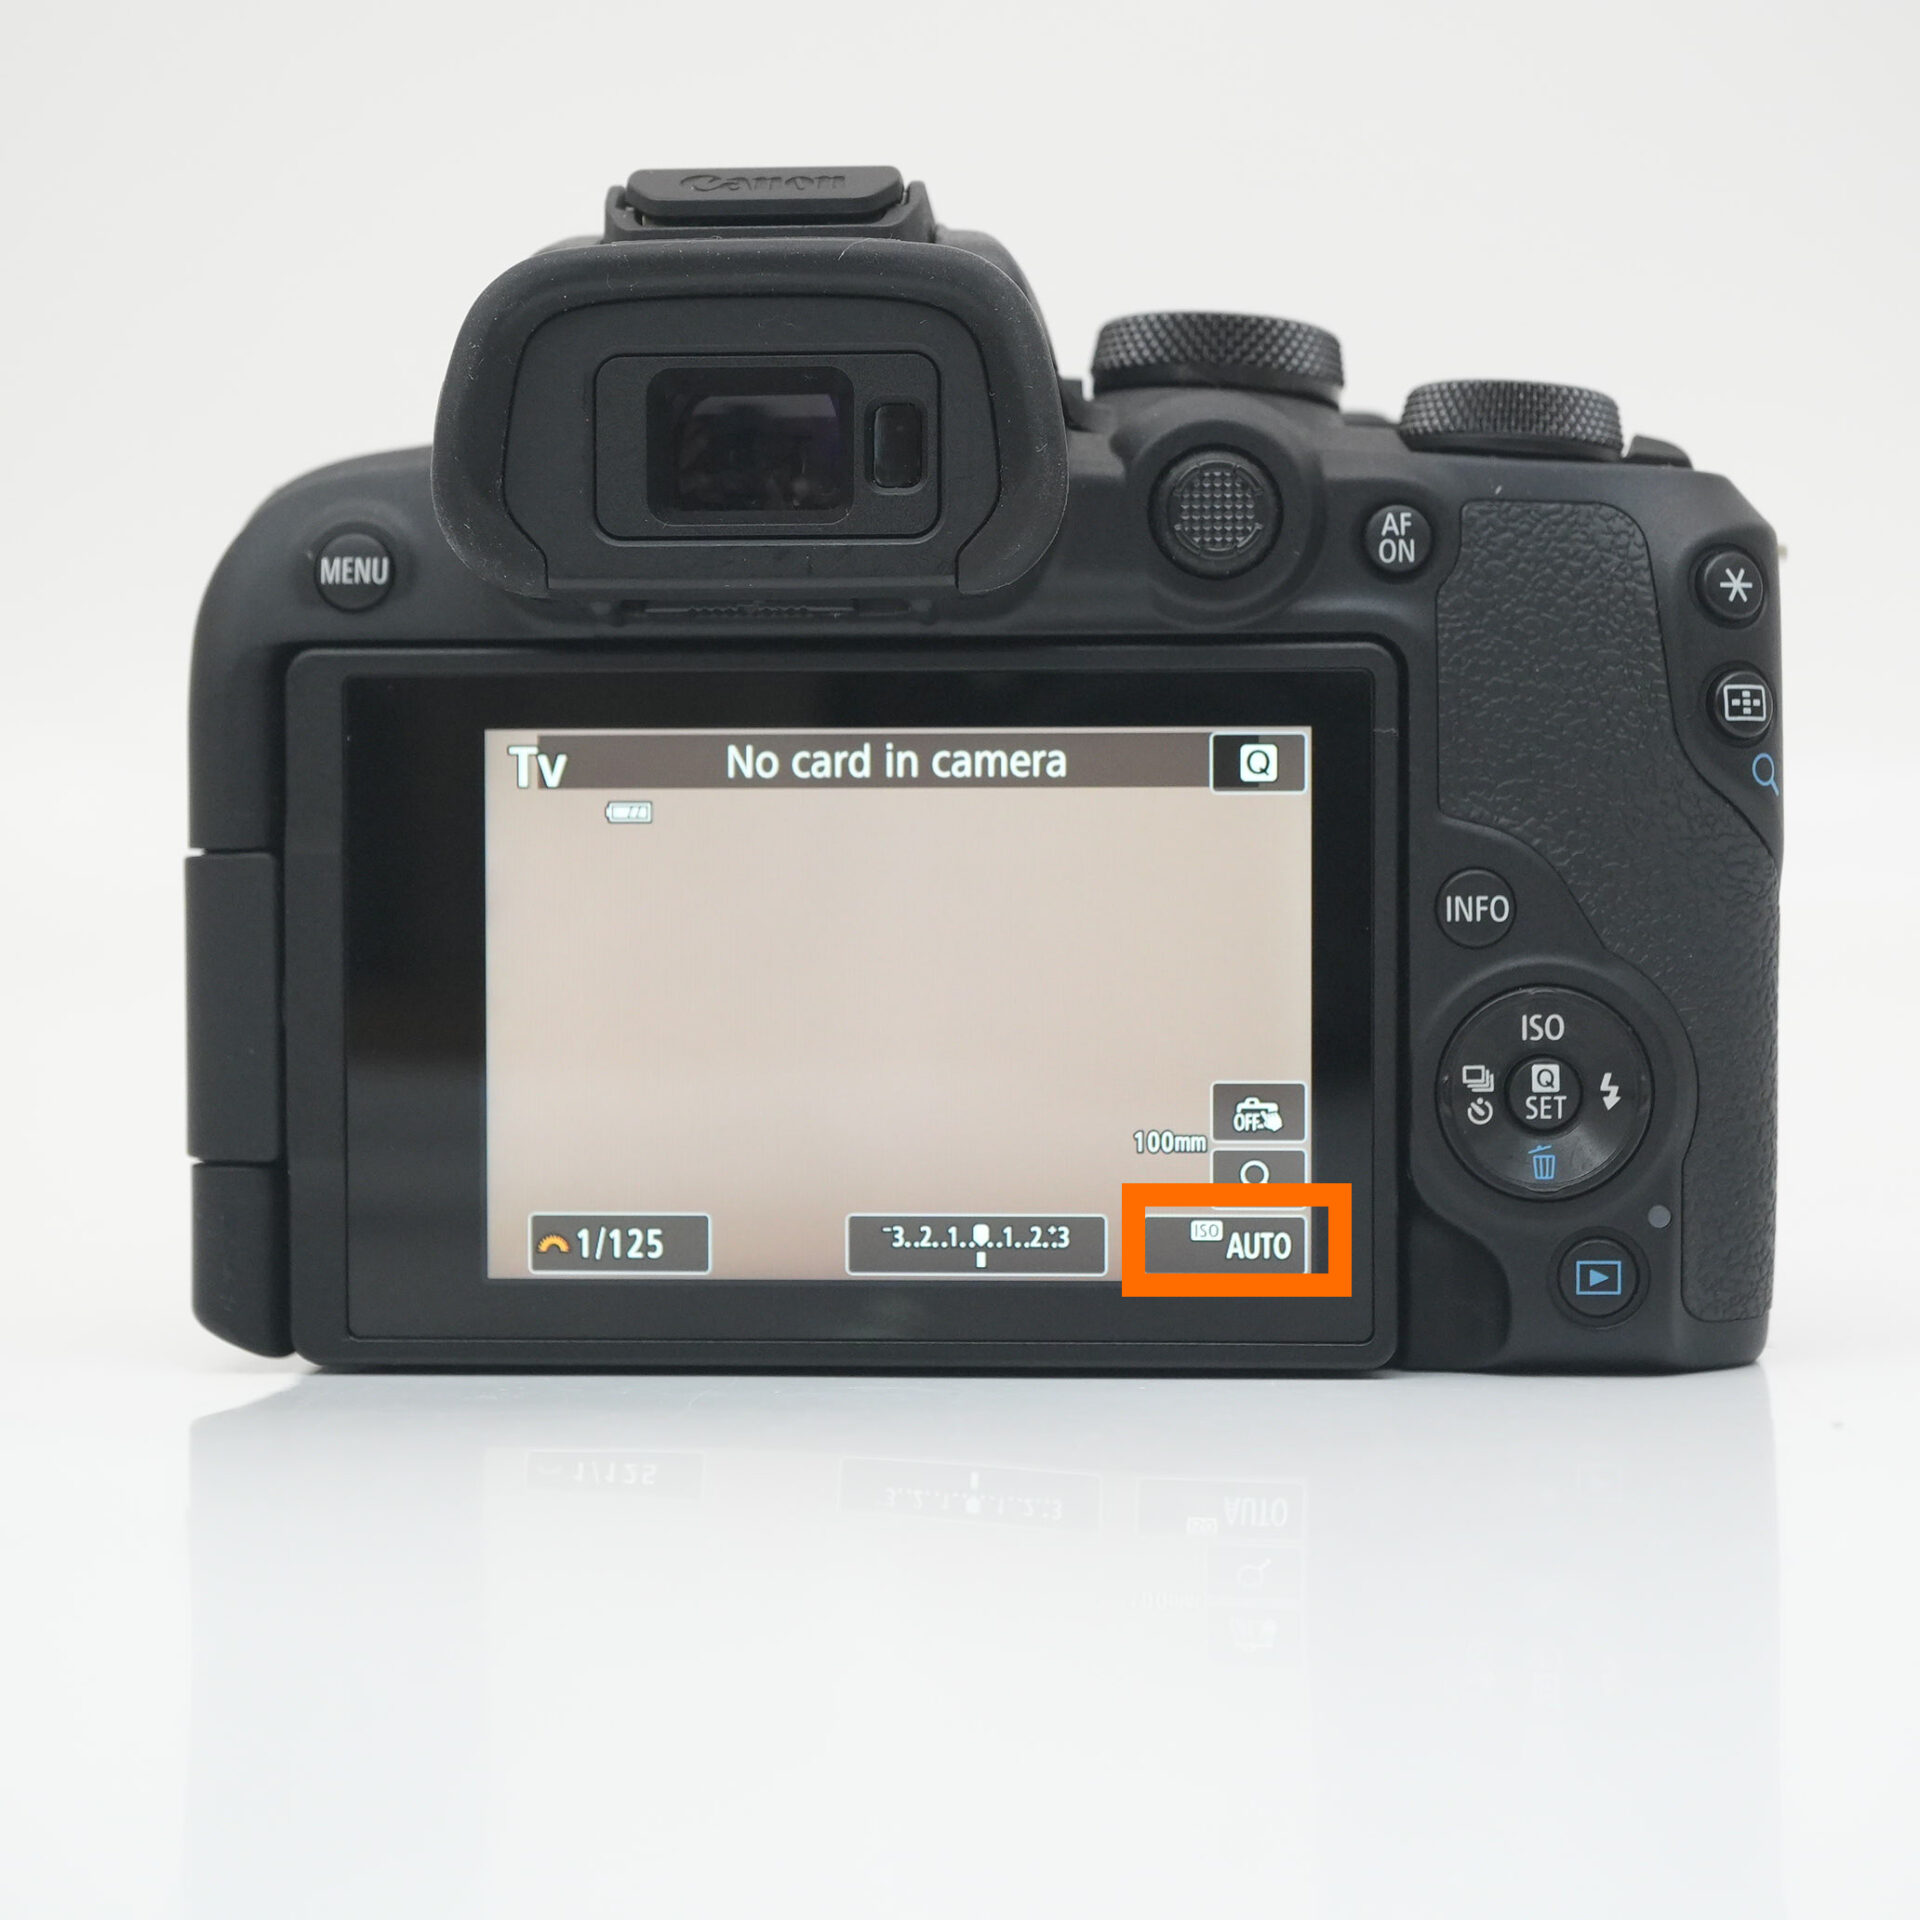 |
| Tap iso |
STEP.2
 |
| Set iso to 400 |
How to use manual focus and tips for shooting night scenes
- What is manual focus?
- Manual focus (MF) is a focusing method in which you adjust the focus by hand. Its major advantage is that you can focus on the desired location even in dark places or with detailed composition where autofocus is difficult.
- Reasons why MF is effective for night scenes
- ・AF is prone to confusion in dark places → MF allows you to focus reliably
・You can accurately focus on small points of light such as stars and street lights
STEP.1
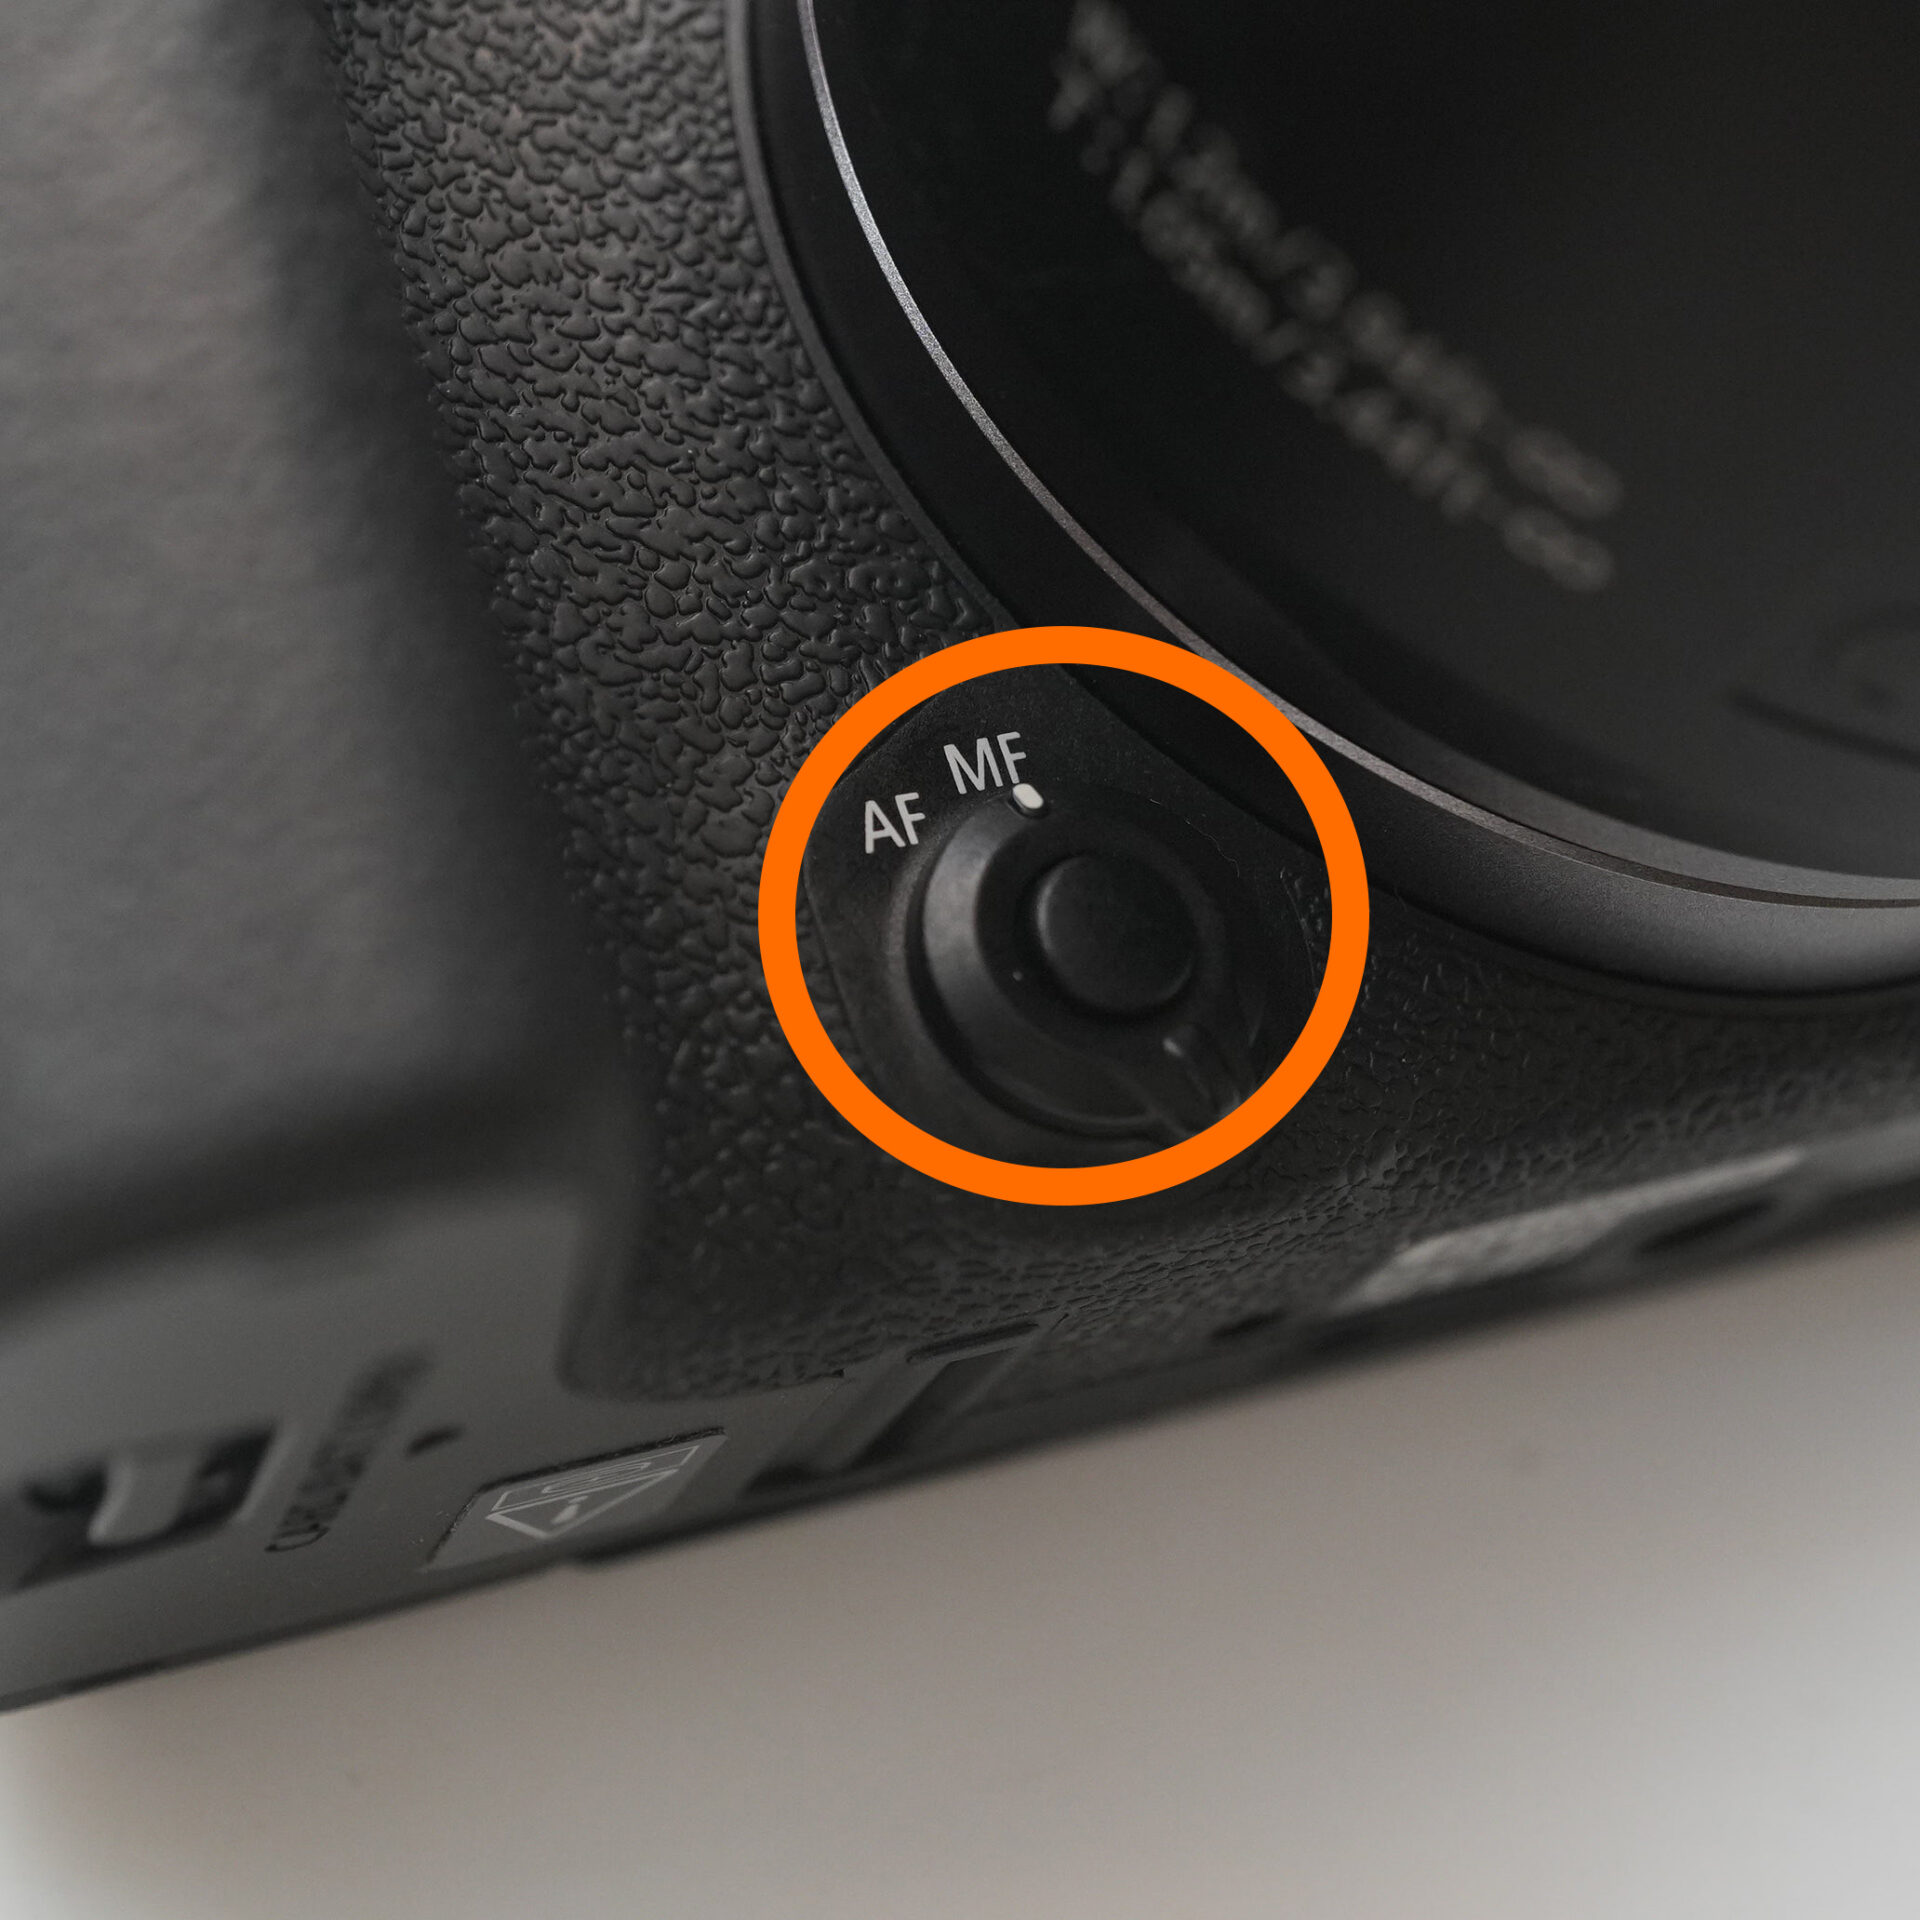 |
| Select MF on the front lever |
STEP.2
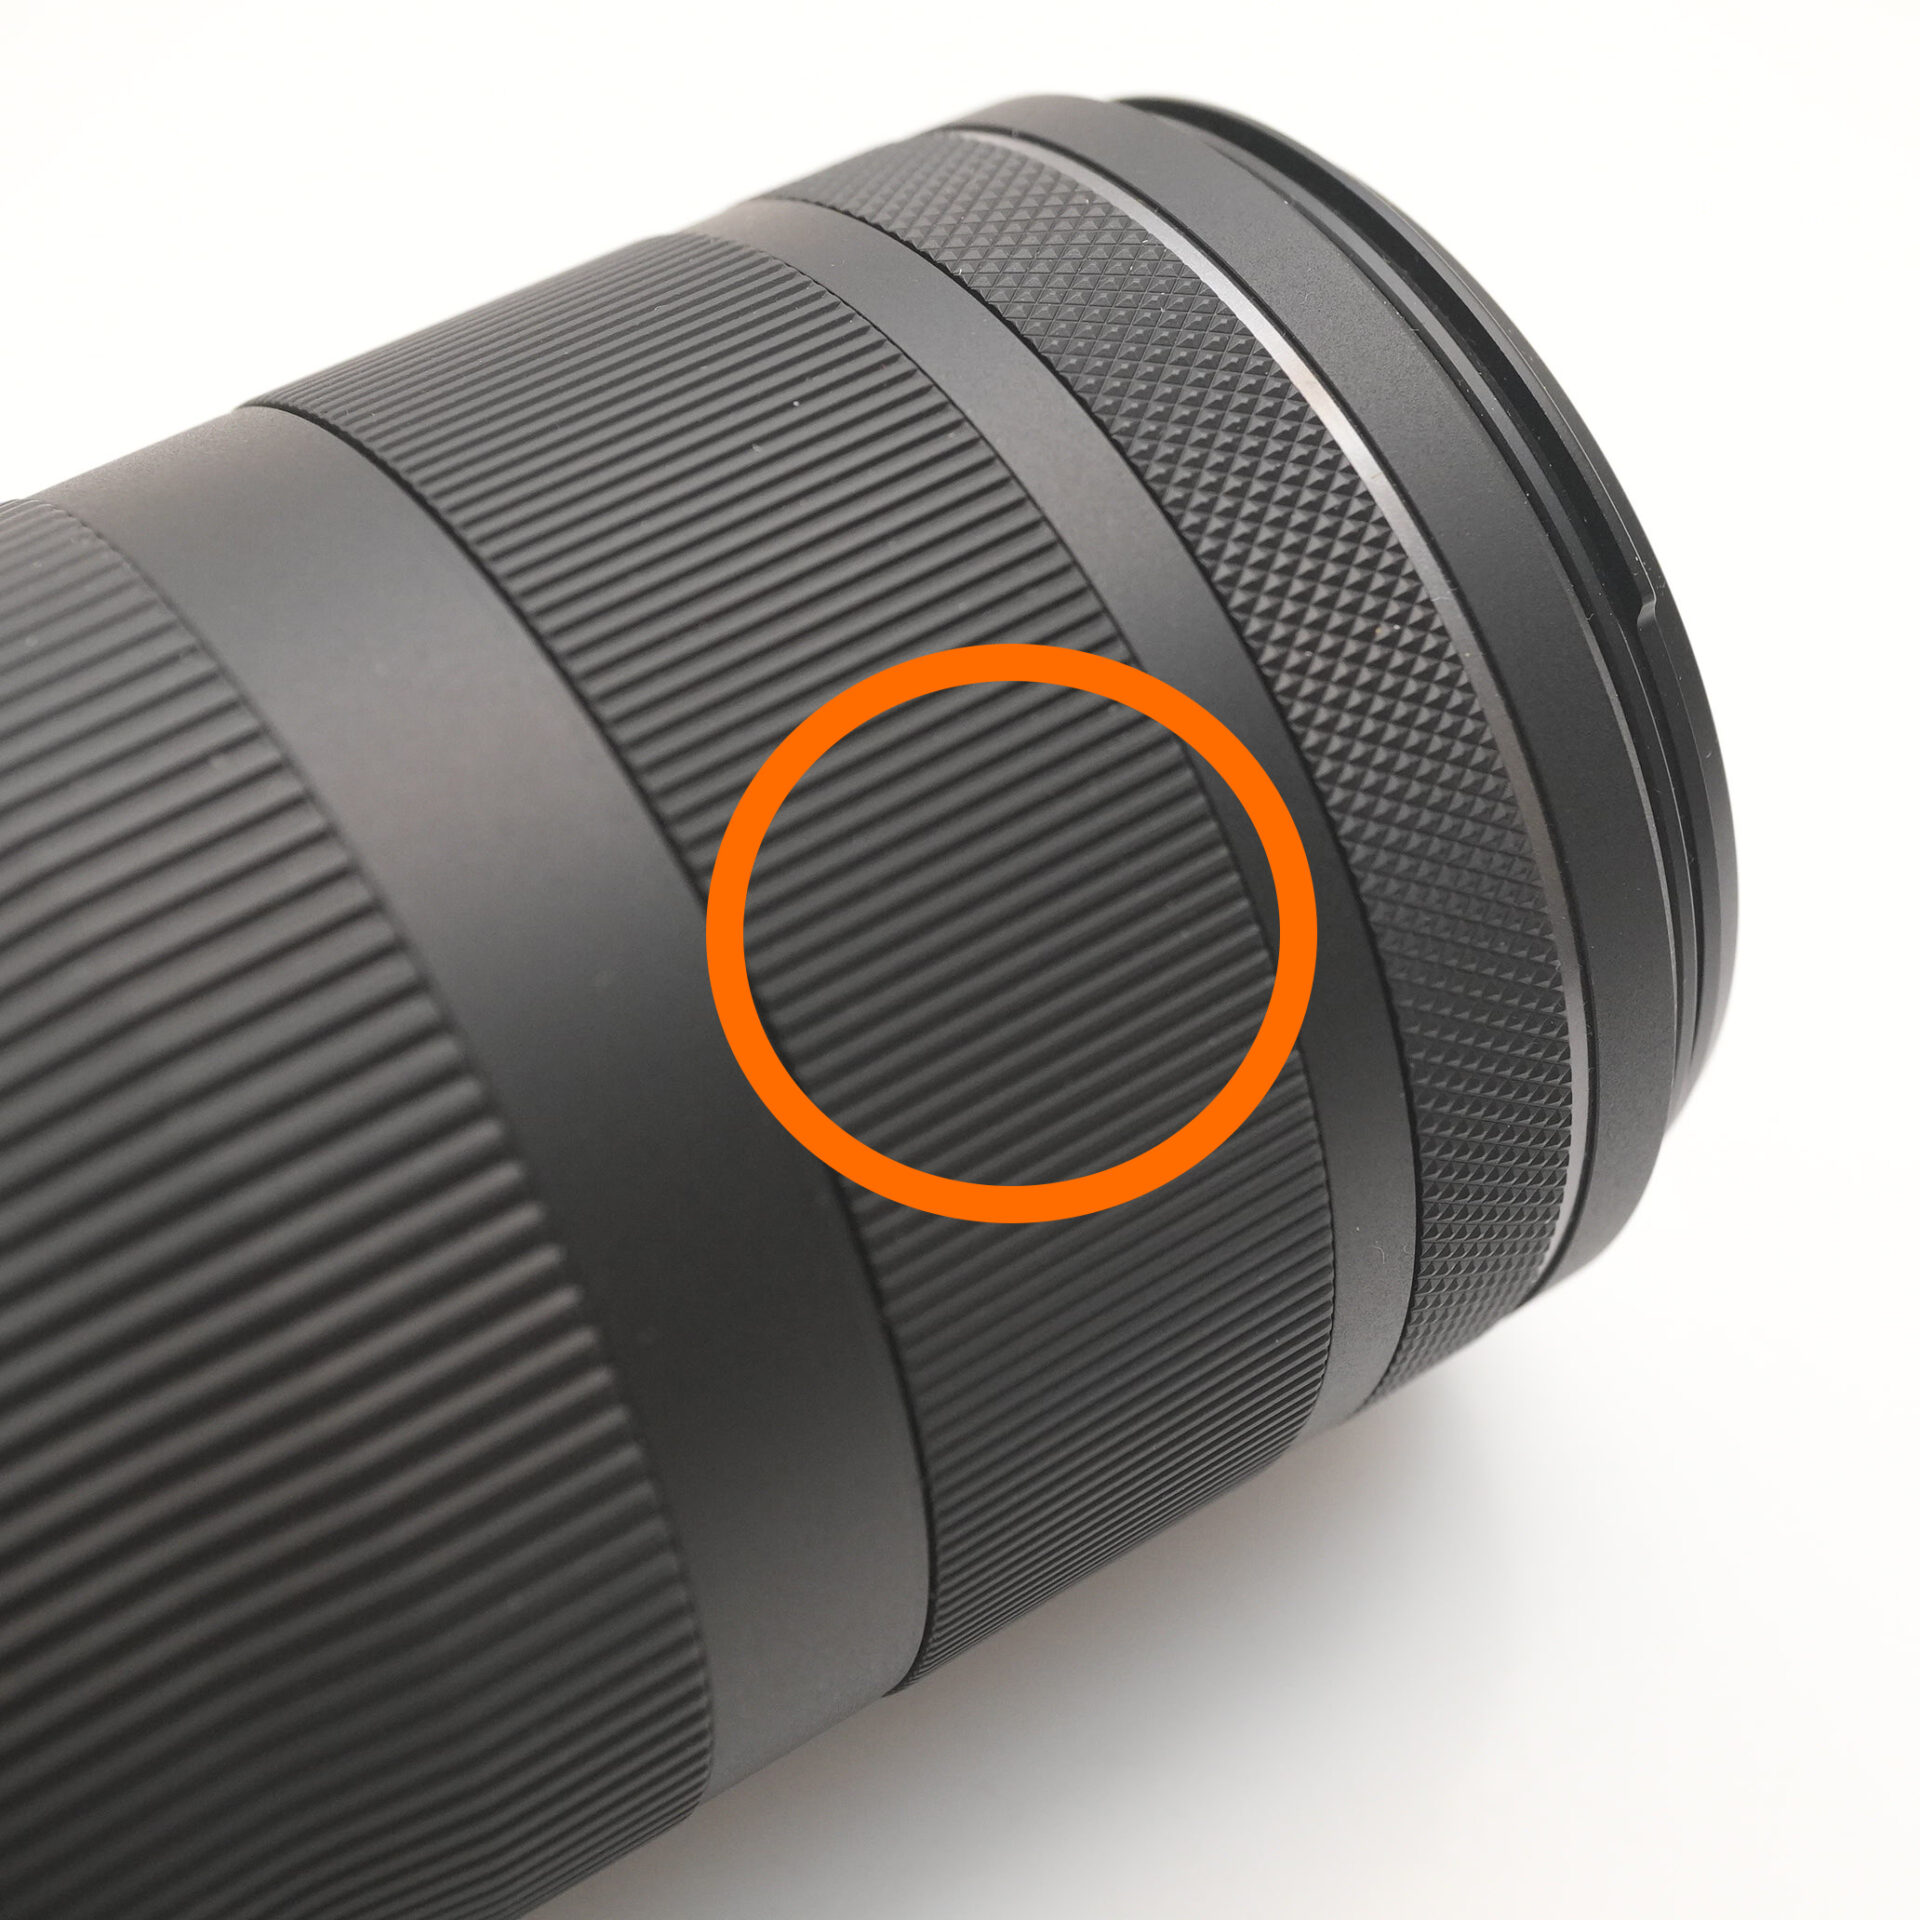 |
| Turn the manual ring |
How to focus in magnified view

When manually focusing, the screen may be small and it may be hard to check if the focus is correct. In such cases, the "Enlarged Display" function is useful.
STEP.1
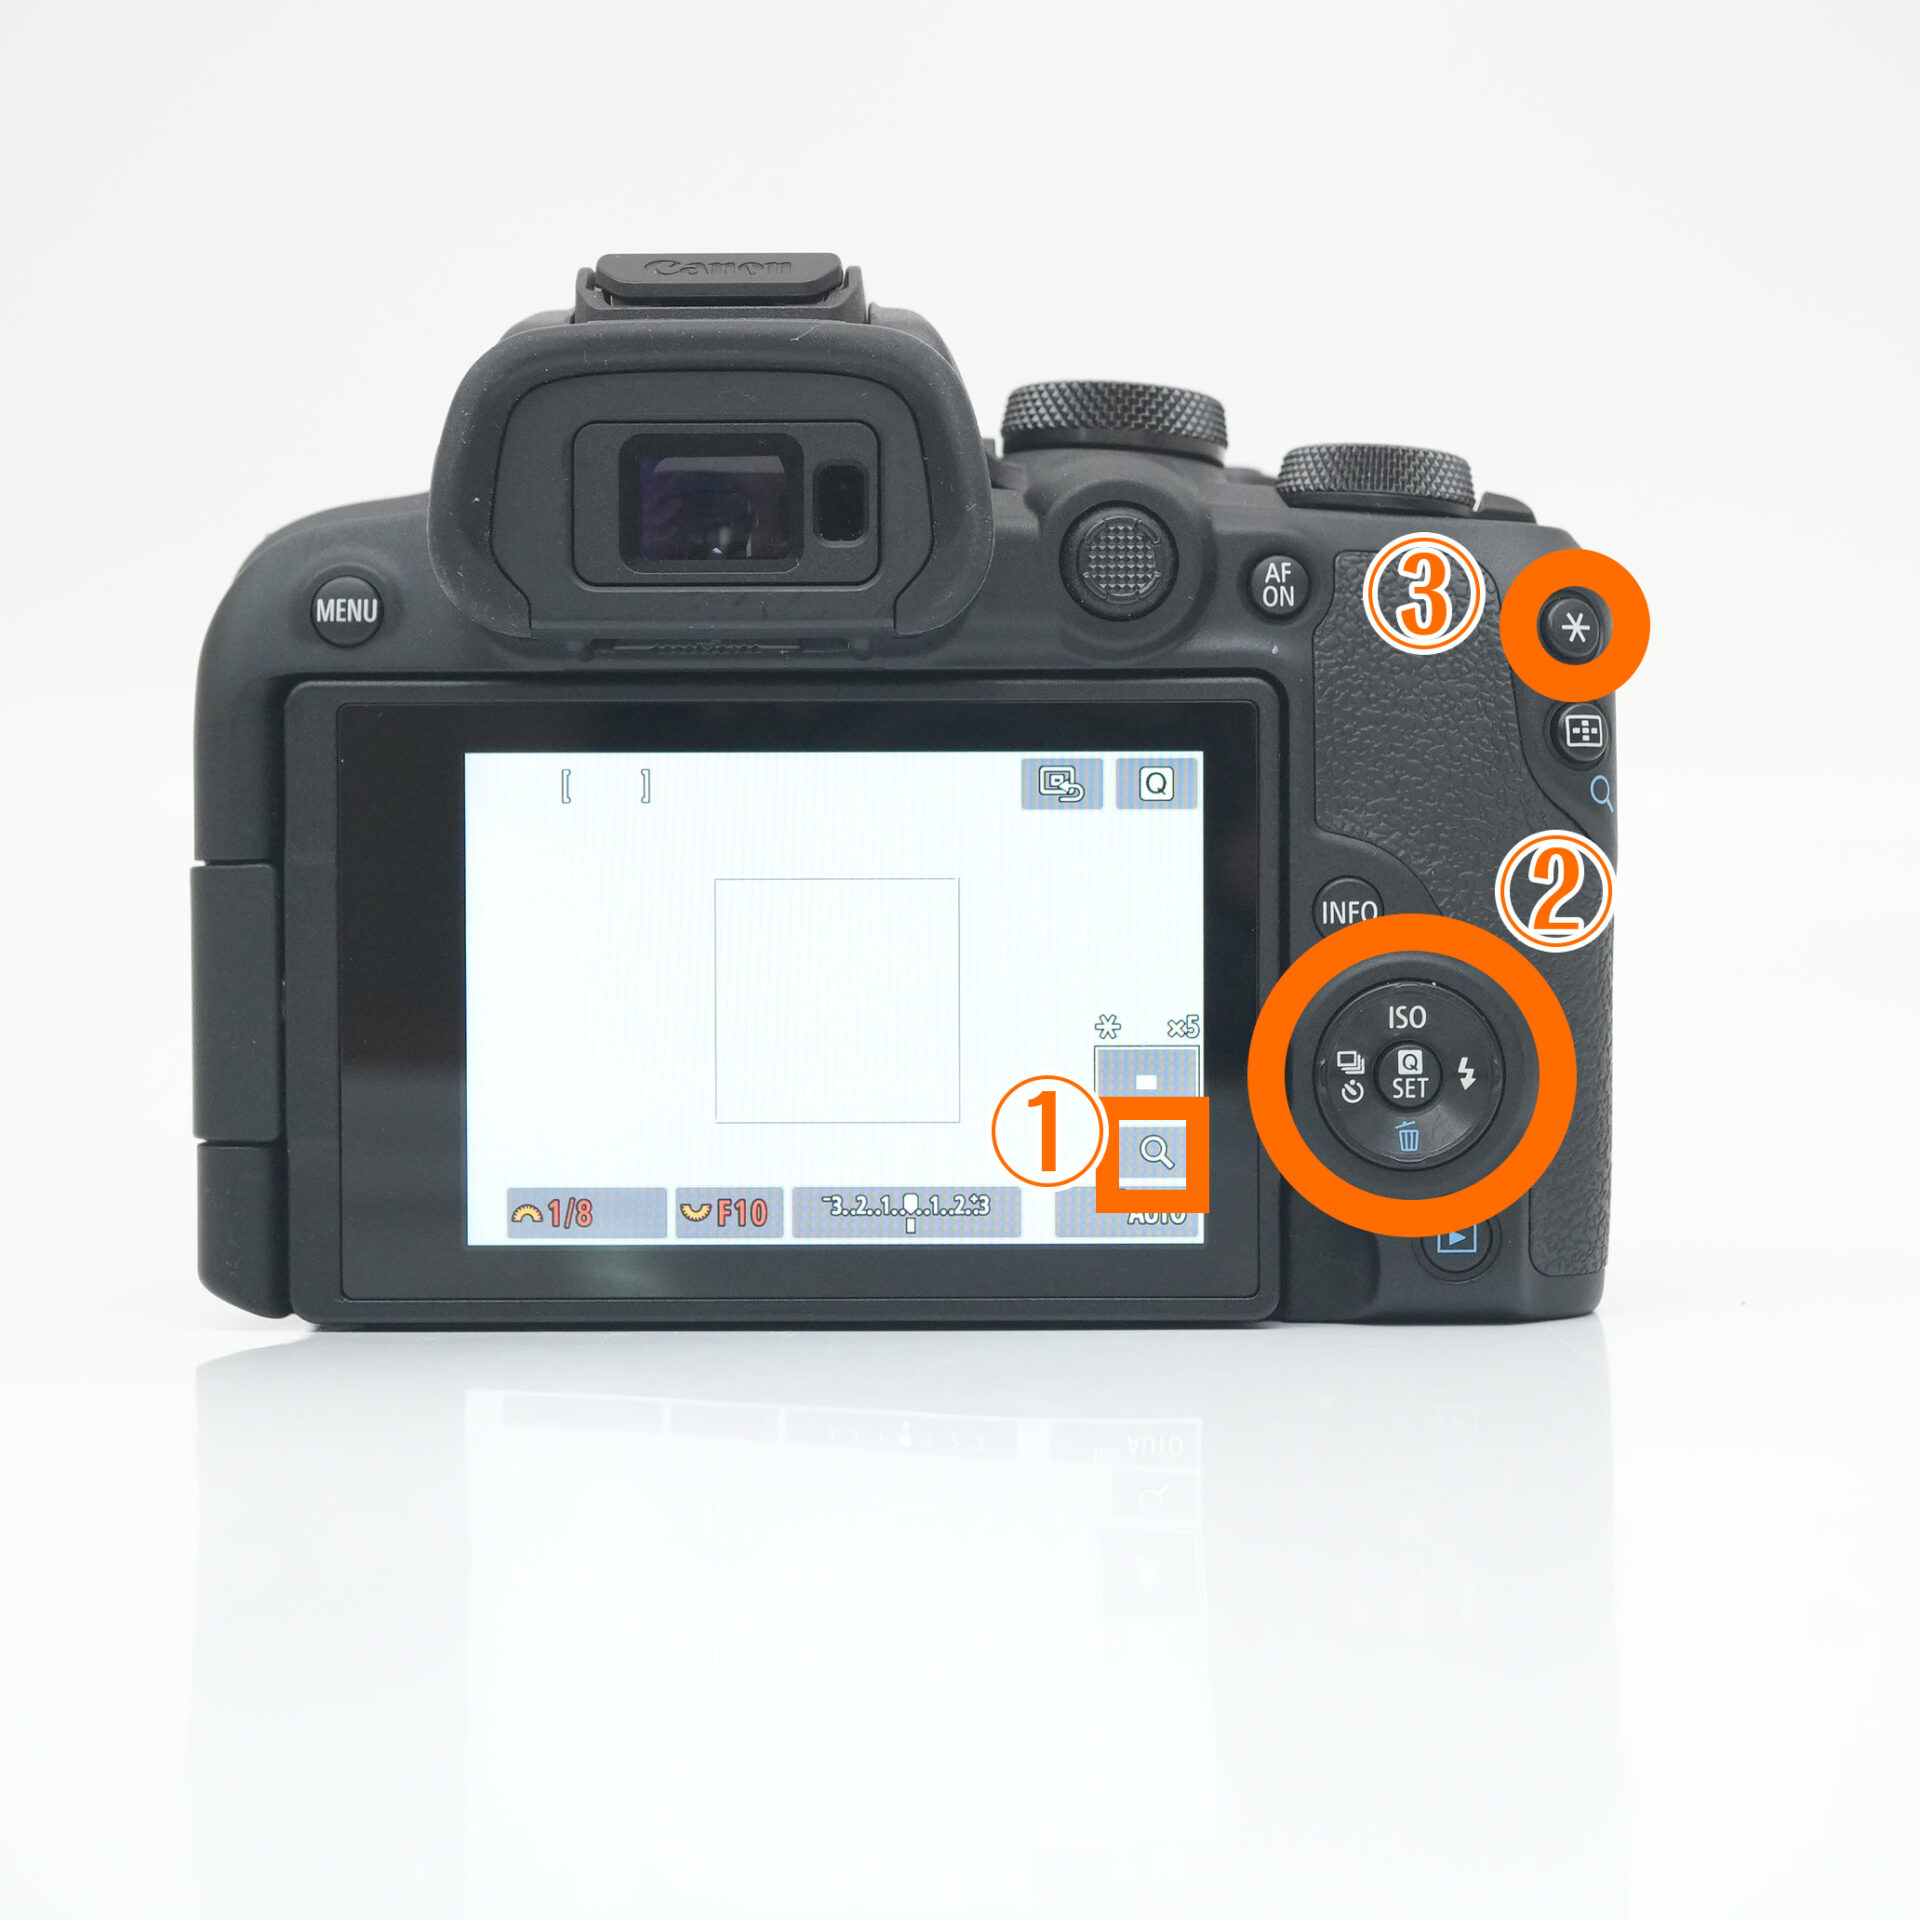 |
| Magnify with the magnifying glass icon AE lock button → Move with the cross keys |
If you don't have a smartphone, use the self-timer to take the photo.

If you can't use a smartphone, use your camera's self-timer function.
This will prevent blurring by avoiding the vibration that occurs after pressing the shutter button.
We recommend setting the timer to 2 to 10 seconds.
STEP.1
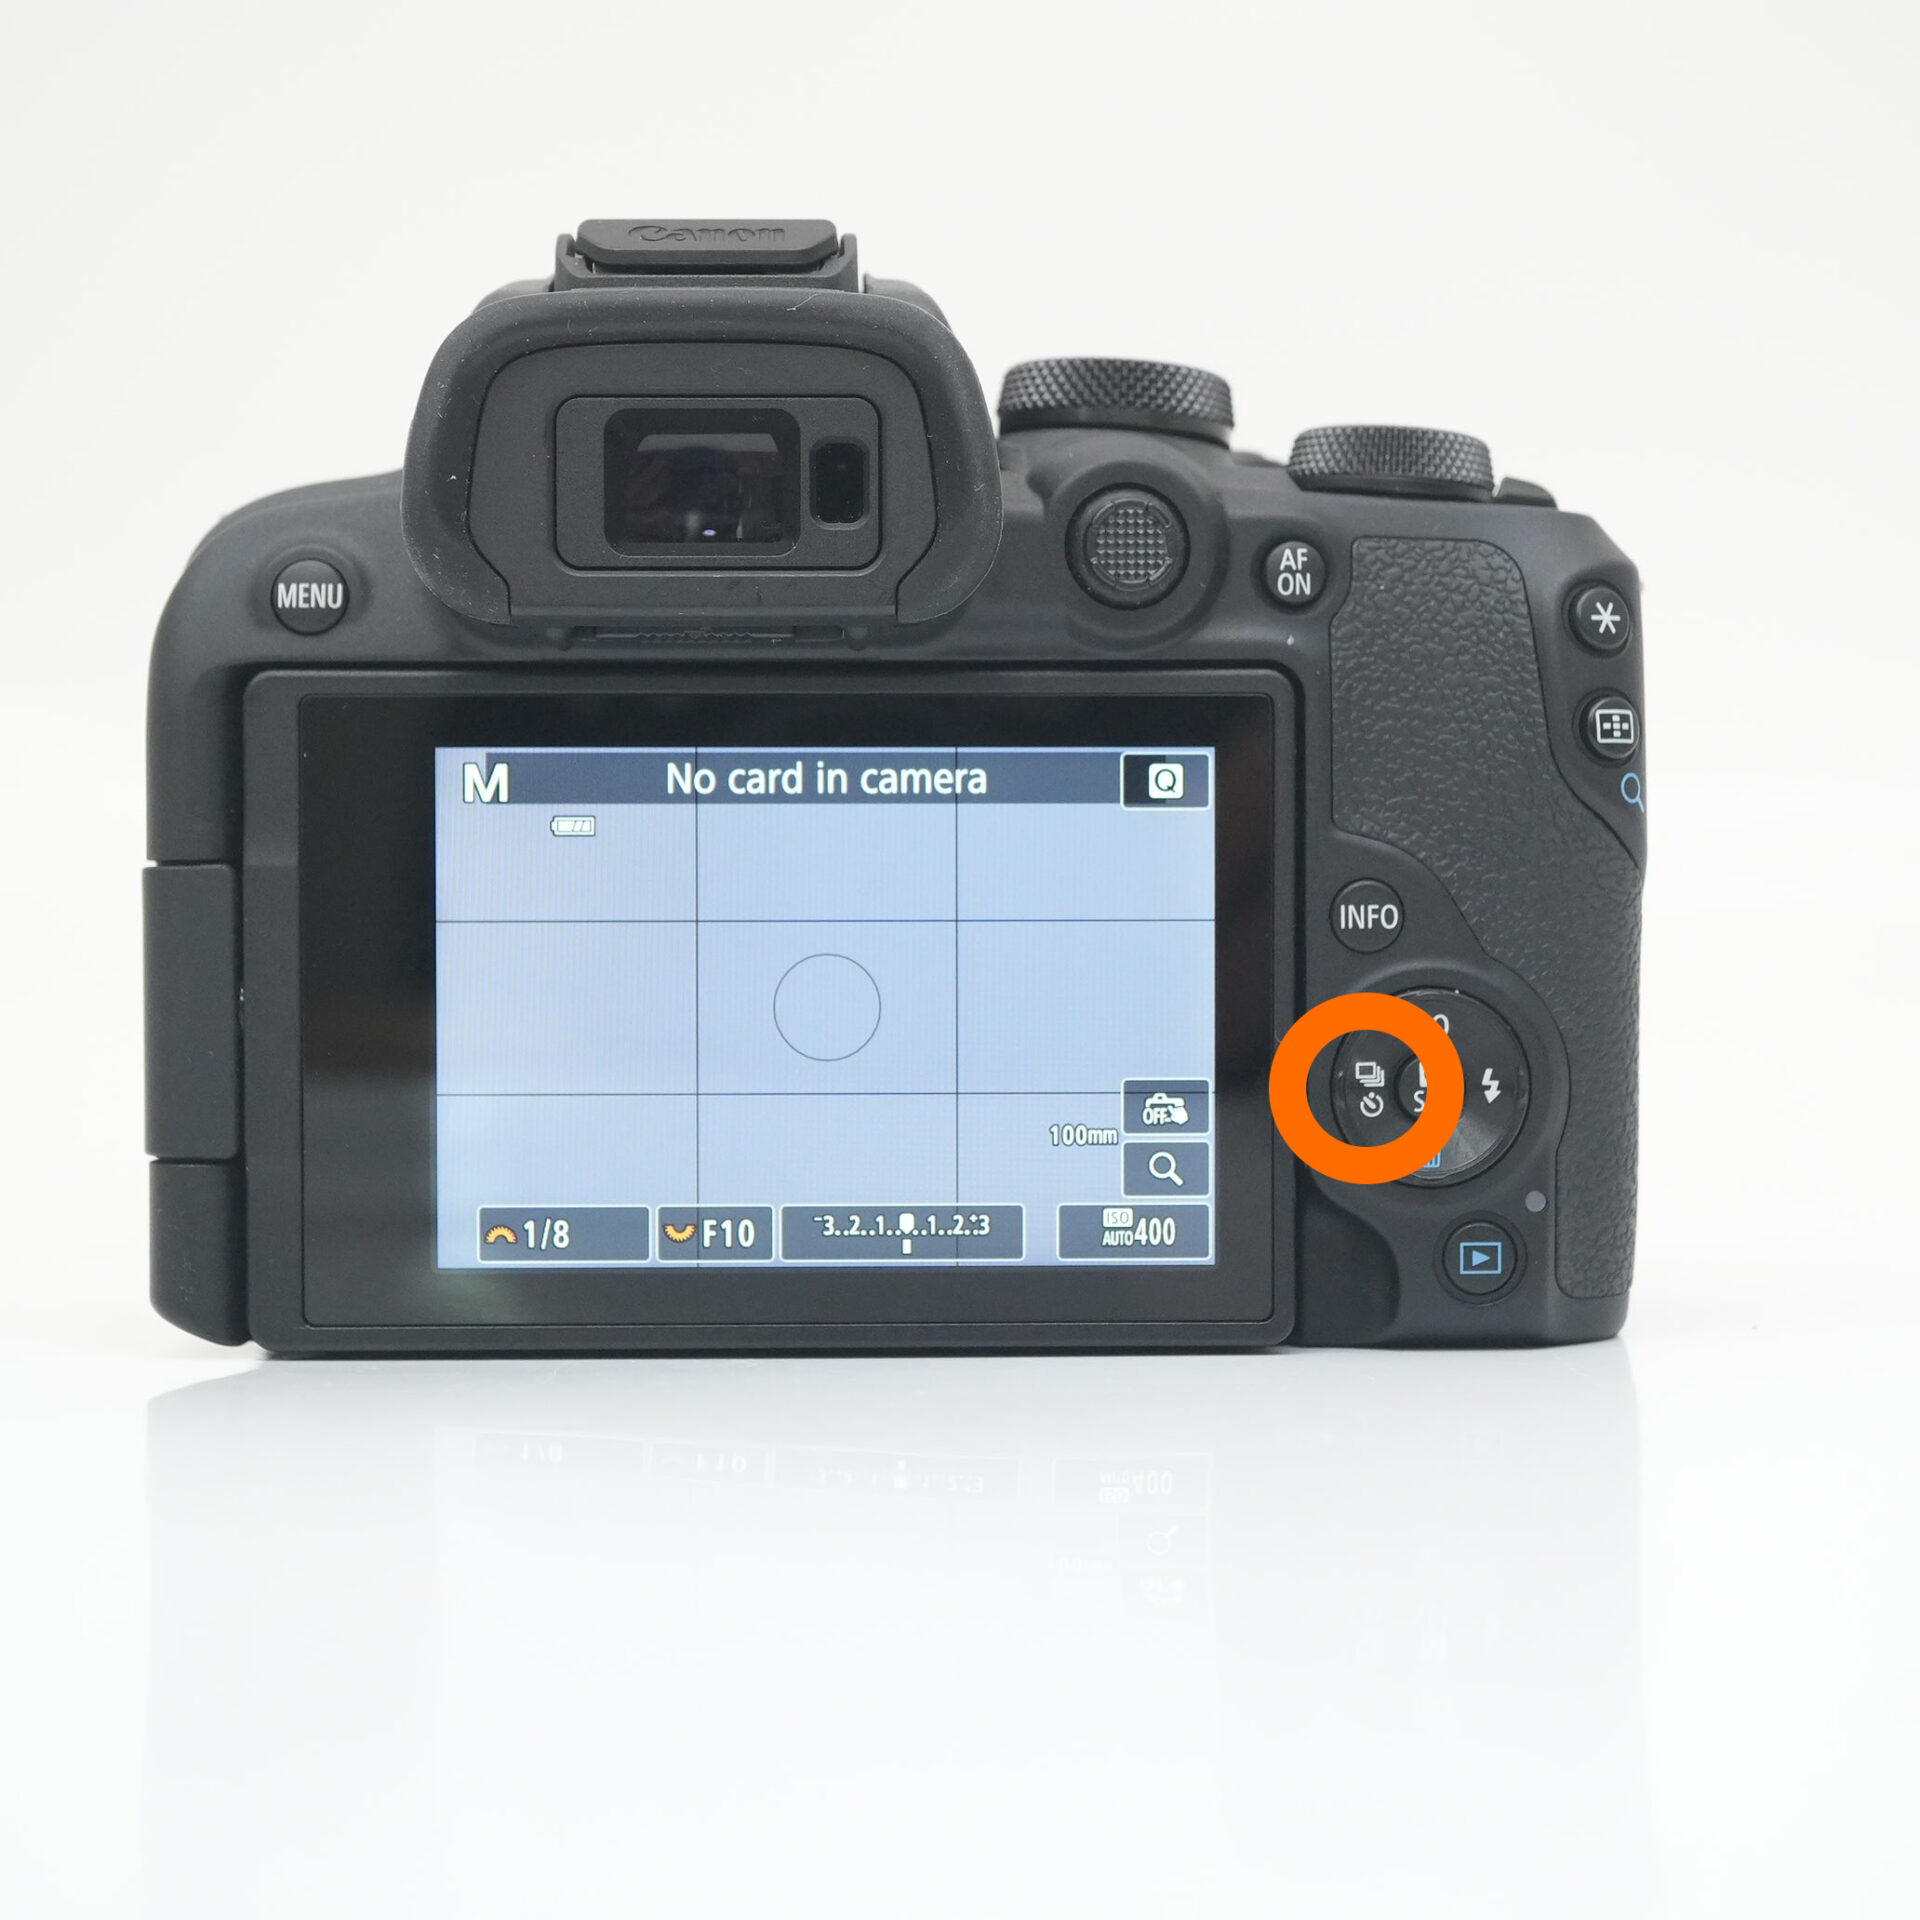 |
| Press left on the directional pad |
STEP.2
 |
| Select self-timer |
summary

Night scene photography is all about "settings + stability + careful operation."
By taking your time and making small adjustments, anyone can take a fantastic photo.
Please use the information in this article as a reference and try capturing your own beautiful night scene!