- Recommended for these people
- ・Those who want to take "soft and smooth" photos of waterfalls and flowing water
・Those who want to become more proficient with their cameras
・Those who want to try slow shutter photography for the first time
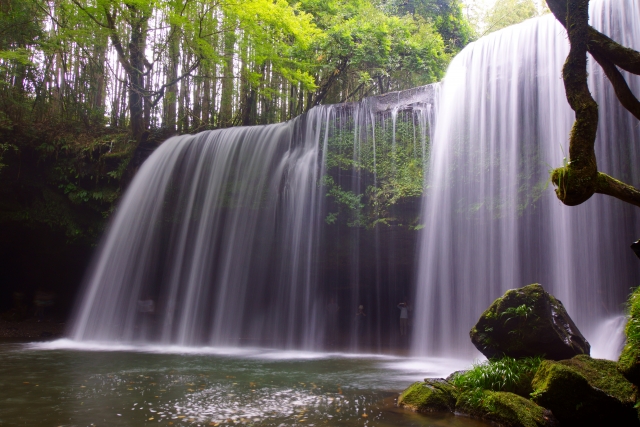
"I want to take pictures of waterfalls that look soft and fantastical."
I'm sure there are many people who feel the same way.
In this article, we'll explain in an easy-to-understand way, even for beginners, the photography technique of controlling the shutter speed to capture smooth images of waterfalls.
This page contains ads
Two recommended items
For long exposure photography to capture the smooth flow of a waterfall, we recommend using a tripod and a variable ND filter. With just these two items, you can take beautiful, clear photos even in the middle of the day.
Use a tripod to completely prevent camera shake during shutter release
With long exposures, even the slightest bit of camera shake can ruin your shot. Using a stable tripod will help prevent camera shake and give you a still, still image, even if you leave the shutter open for several seconds.
Variable ND filters are recommended.
In daylight, opening the shutter for more than one second will result in overexposure, so we recommend using an ND filter to control the amount of light.
A variable ND filter allows you to freely adjust the density, so you can easily control the exposure to suit the shooting conditions.
*You will need to purchase an ND filter that matches the filter diameter size of your lens.
Shutter speed is key
A photo that captures the smooth waterfall water.
That dreamy atmosphere is actually created by the shutter speed setting.
- Change the impression with shutter speed
- ・Fast shutter speed (e.g. 1/1000th of a second)
Creates a sharp and powerful image, as if freezing each individual drop of water
・A slow shutter speed (e.g. 1-2 seconds)
The soft, flowing water creates a dreamy and gentle atmosphere.
- The key to photographing waterfalls is a slow shutter speed!
- If you want to make the flow of water look soft, we recommend setting the shutter speed to about 1 to 2 seconds.
If the shutter speed is too long, it can cause overexposure, so adjust it while keeping an eye on the brightness.
Just by changing the shutter speed, the impression you get of the waterfall can change completely.
Try different shutter speeds to suit the weather and the atmosphere you want to capture!
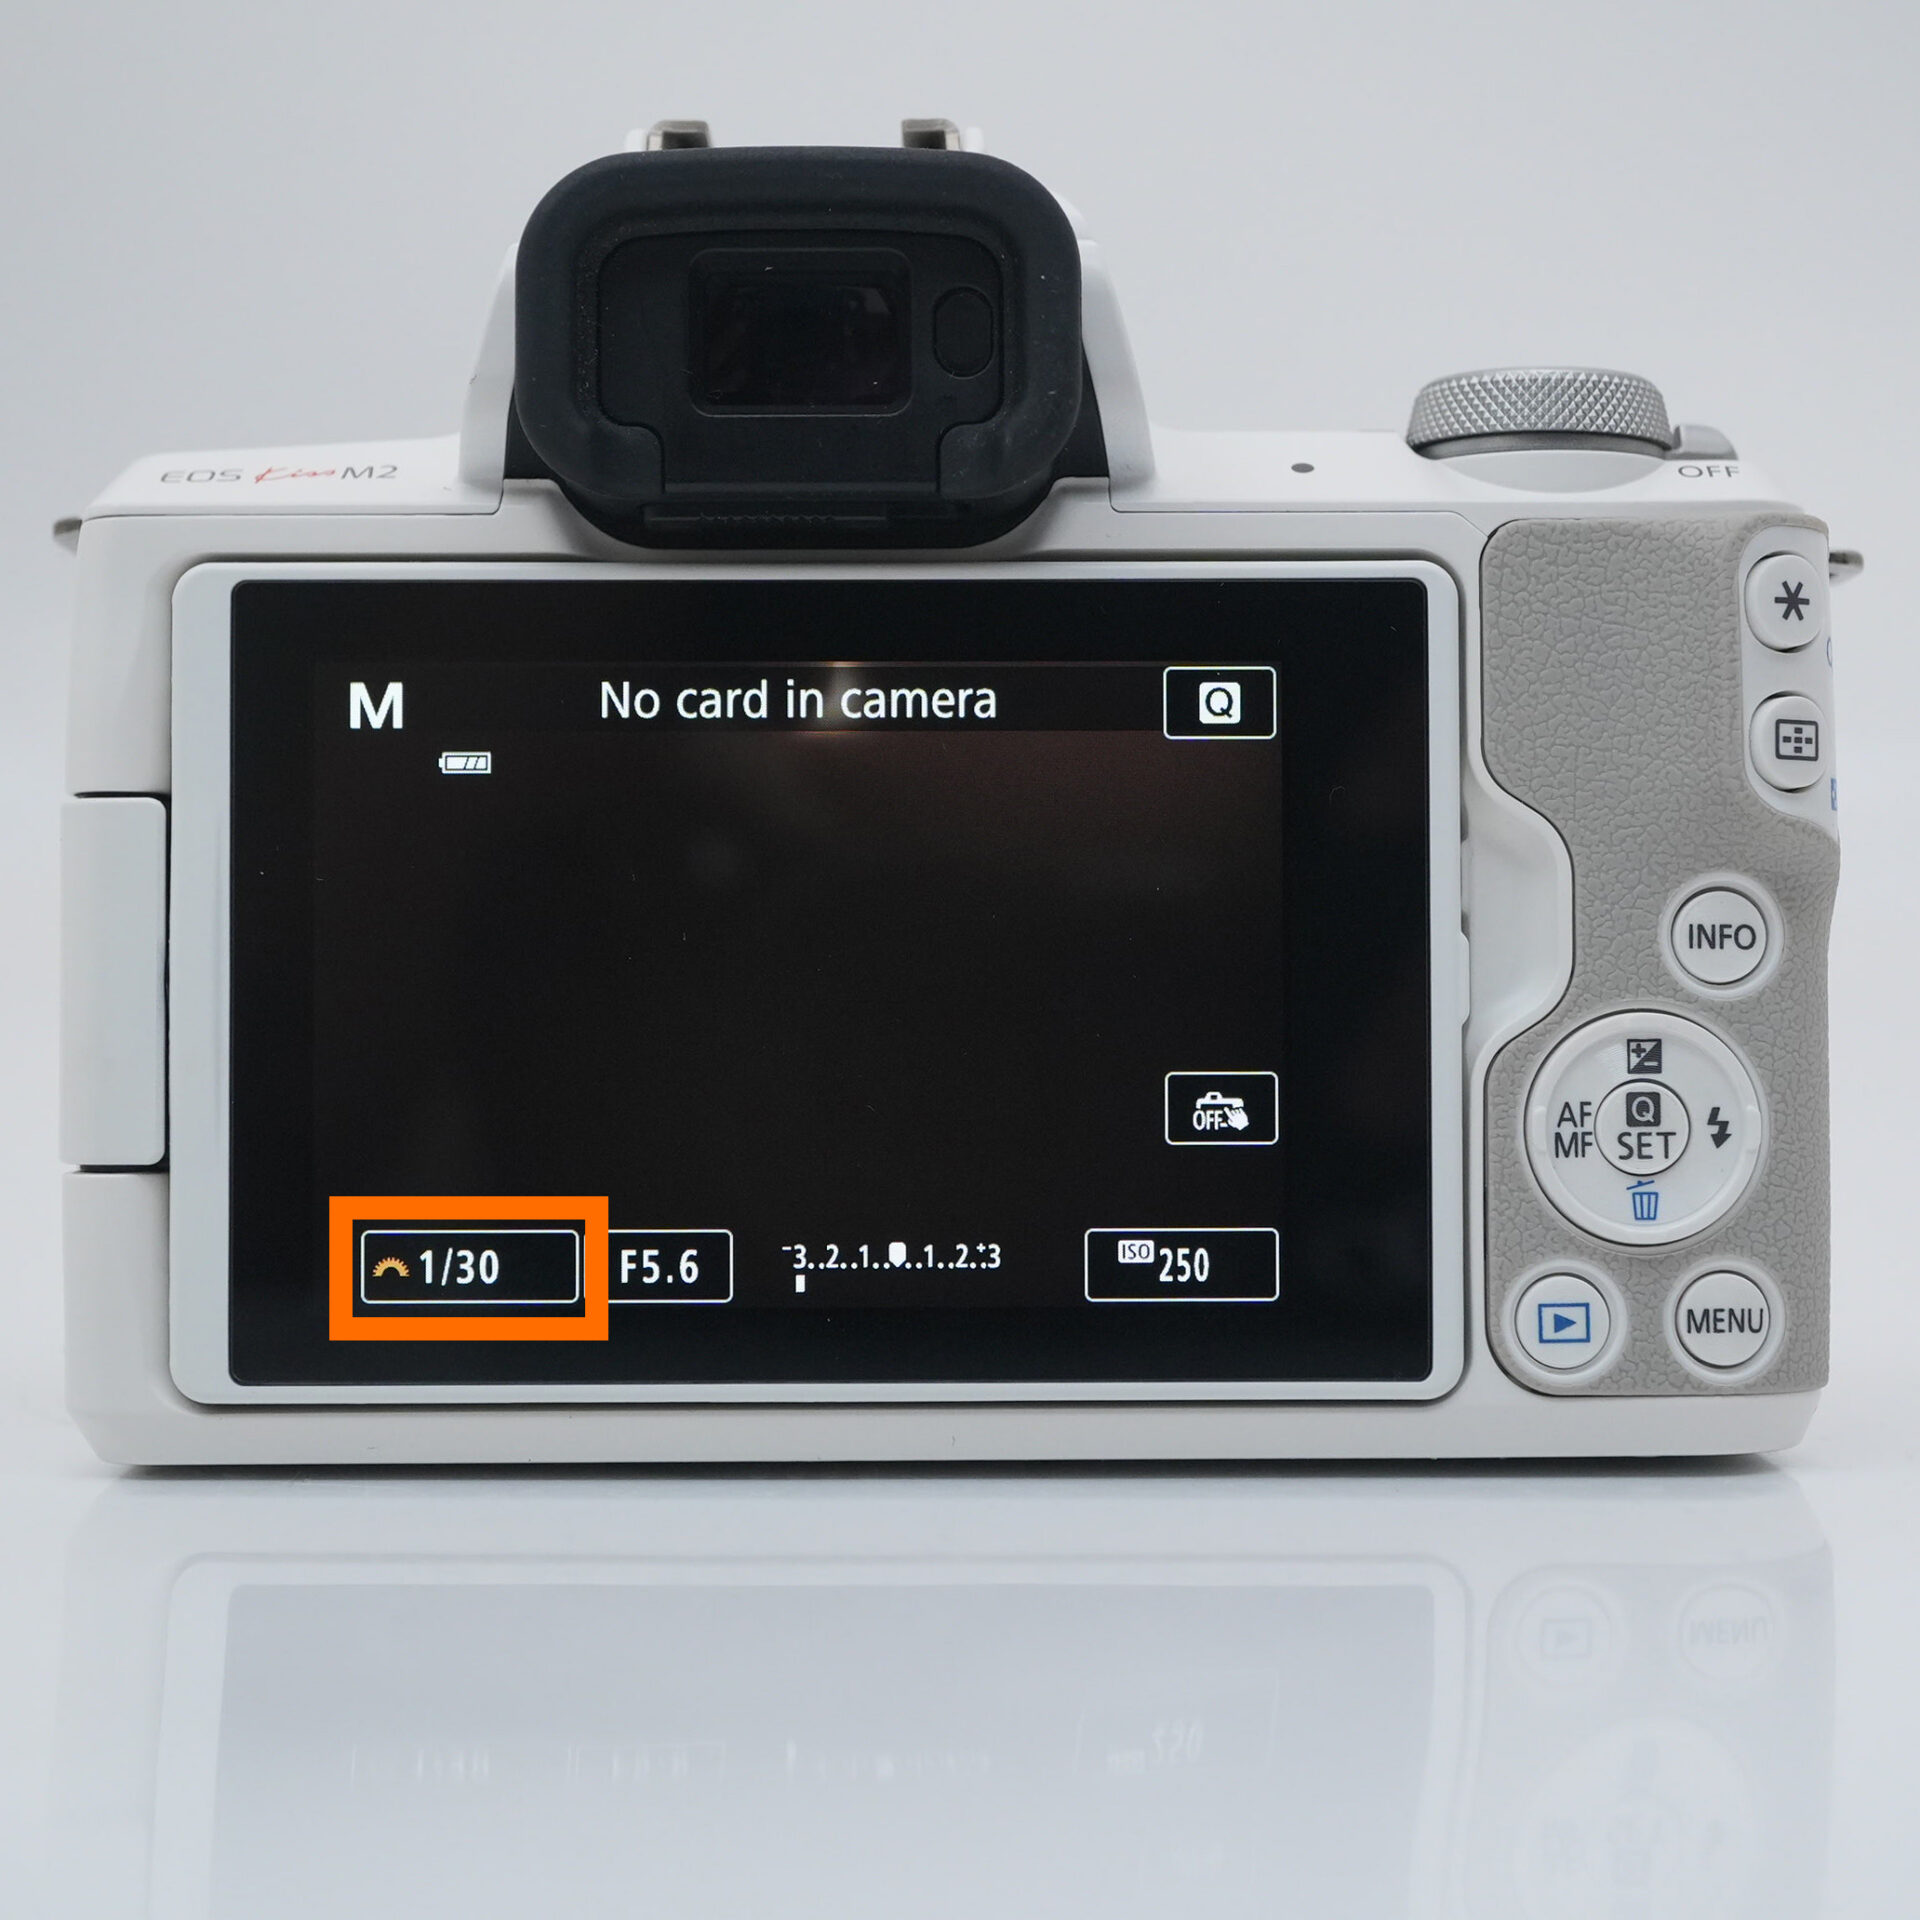
Set to M mode
If you want to capture the flow of a waterfall just the way you want it, we recommend M mode (manual mode), which lets you adjust all of the camera's settings yourself.
In M mode, you can set the shutter speed, F-stop, and ISO sensitivity to your liking, giving you precise control over the brightness of your photo and the expression of the flowing water.
STEP.1
 |
| Set the dial to M. |
First, set the shutter speed to 2 seconds.
The key to capturing a soft, smooth shot of waterfall water is to set the shutter speed to around two seconds. This will make the water flow look like silk, creating a dreamy atmosphere.
- If you use a variable ND filter, you can achieve the correct exposure even in 2 seconds.
- In bright daylight environments, setting the shutter to 2 seconds will let in too much light, but by using an ND filter you can use a slow shutter speed while adjusting the amount of light, allowing you to shoot at just the right brightness.
- Tips for changing shutter speed
- If it's too bright, make the ND filter darker (turn the dial)
You can maintain the shutter speed while preventing overexposure
Conversely, in dark places, you can dilute or remove the ND filter to let in only the amount of light you need and prevent it from becoming too dark.
If you want to change the way the water looks, try adjusting the SS and see the difference.
Find the optimal length to match the force and atmosphere of the waterfall.
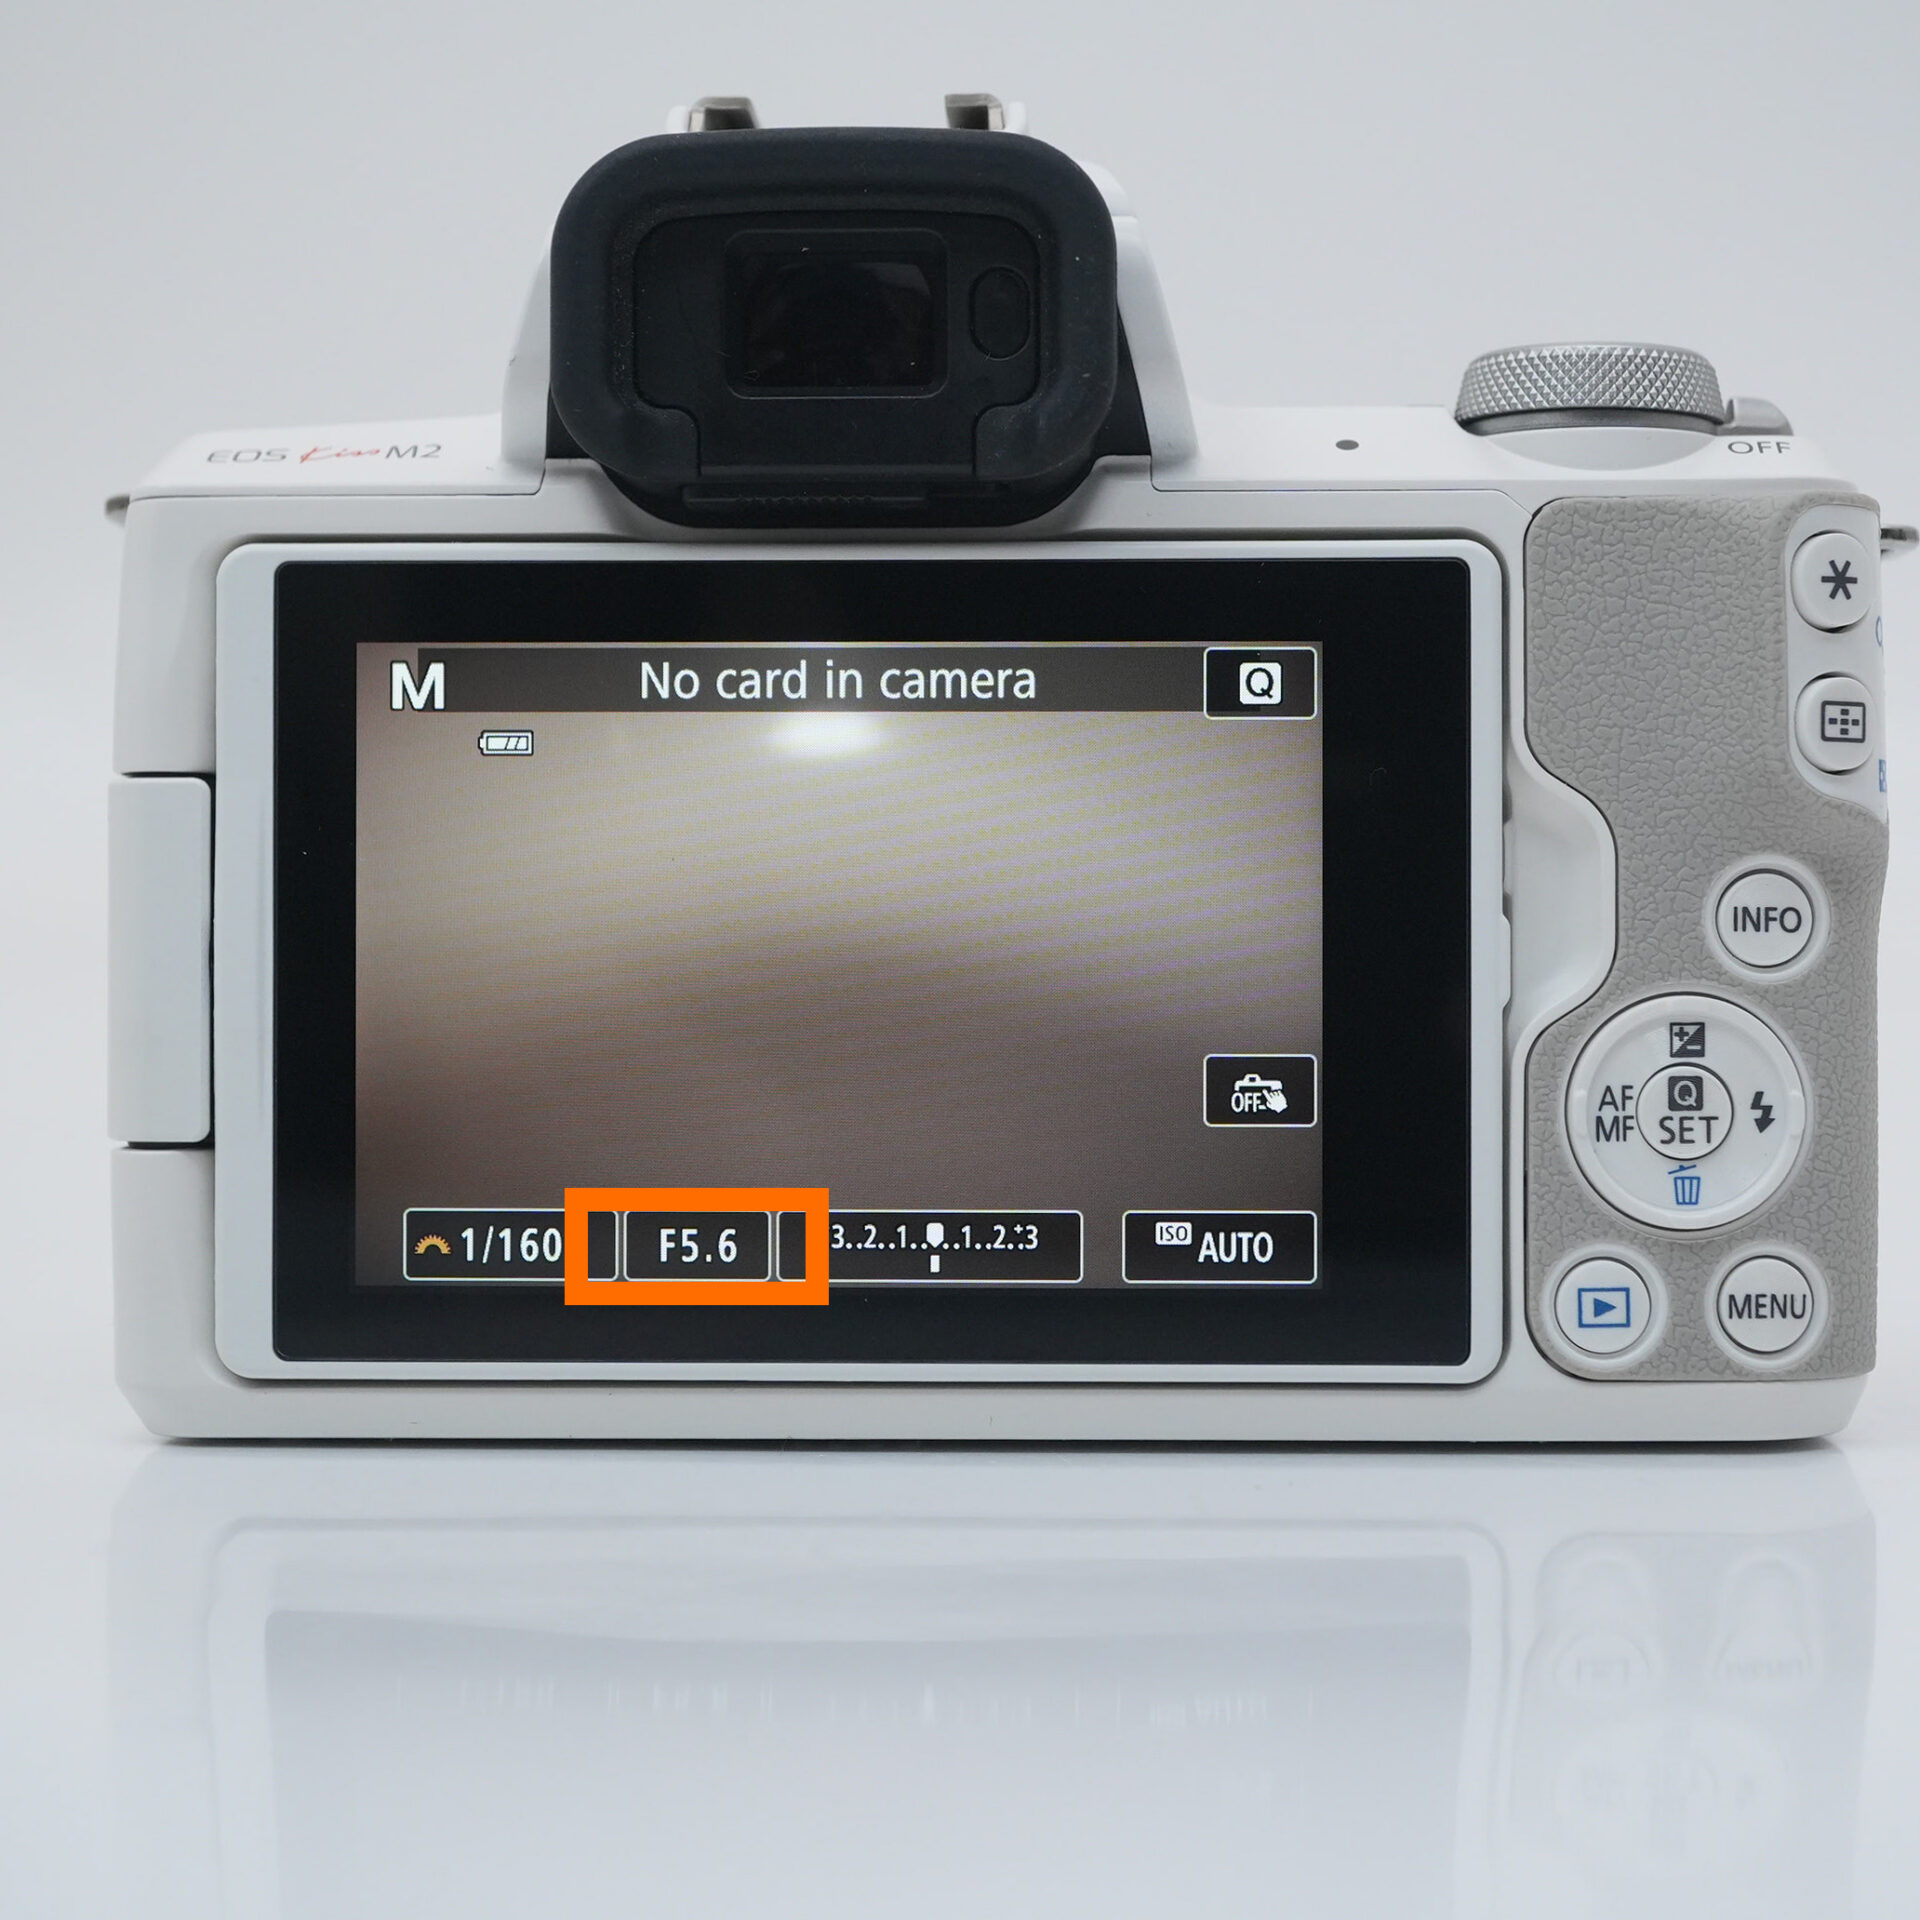
STEP.1
 |
| Tap SS |
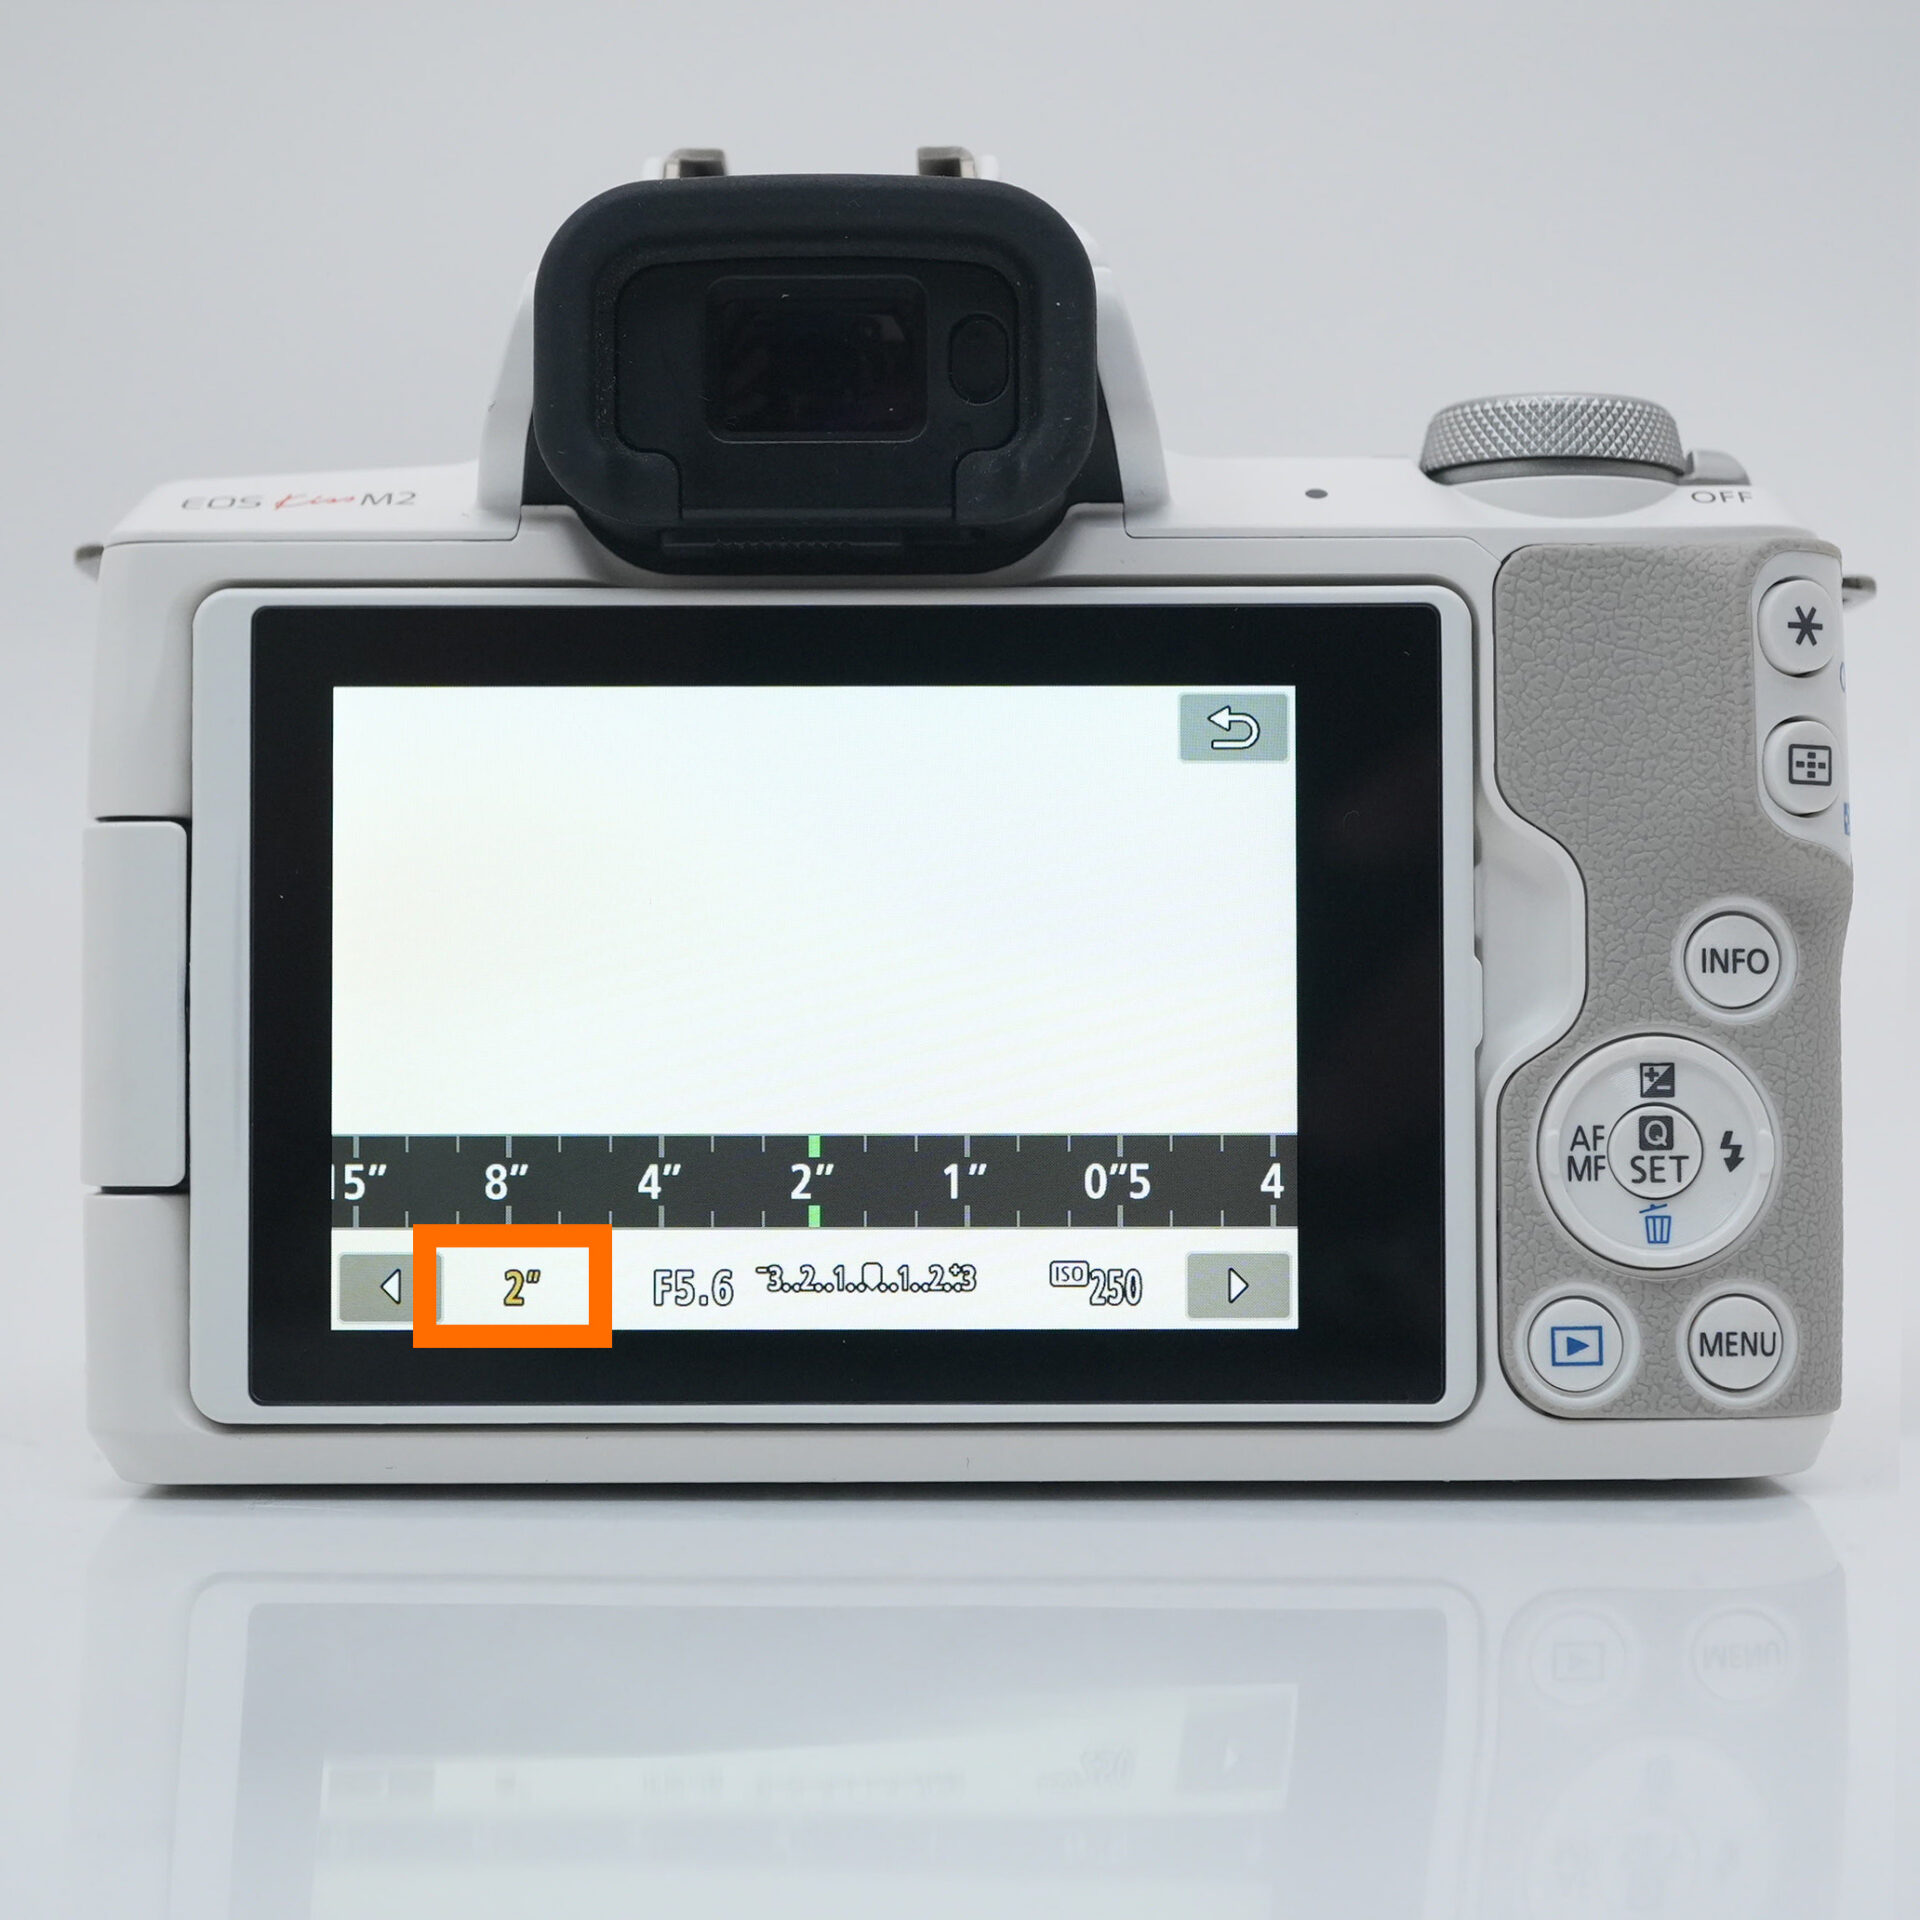 |
| Set the shutter speed to 2 seconds |
Set F value to 8
When photographing waterfalls, you often want to capture not only the flow of the water, but also the texture of the rocks and trees in the background.
In such cases, it's important to set the F-stop (aperture).
- Why is F8 recommended?
- F8 is the perfect F-number for making it easy to focus on the entire landscape and produce a sharp image without being too blurry.
The depth of field is deeper than at full aperture (such as F1.8),
so you can take photos with a well-balanced focus from the foreground to the background.
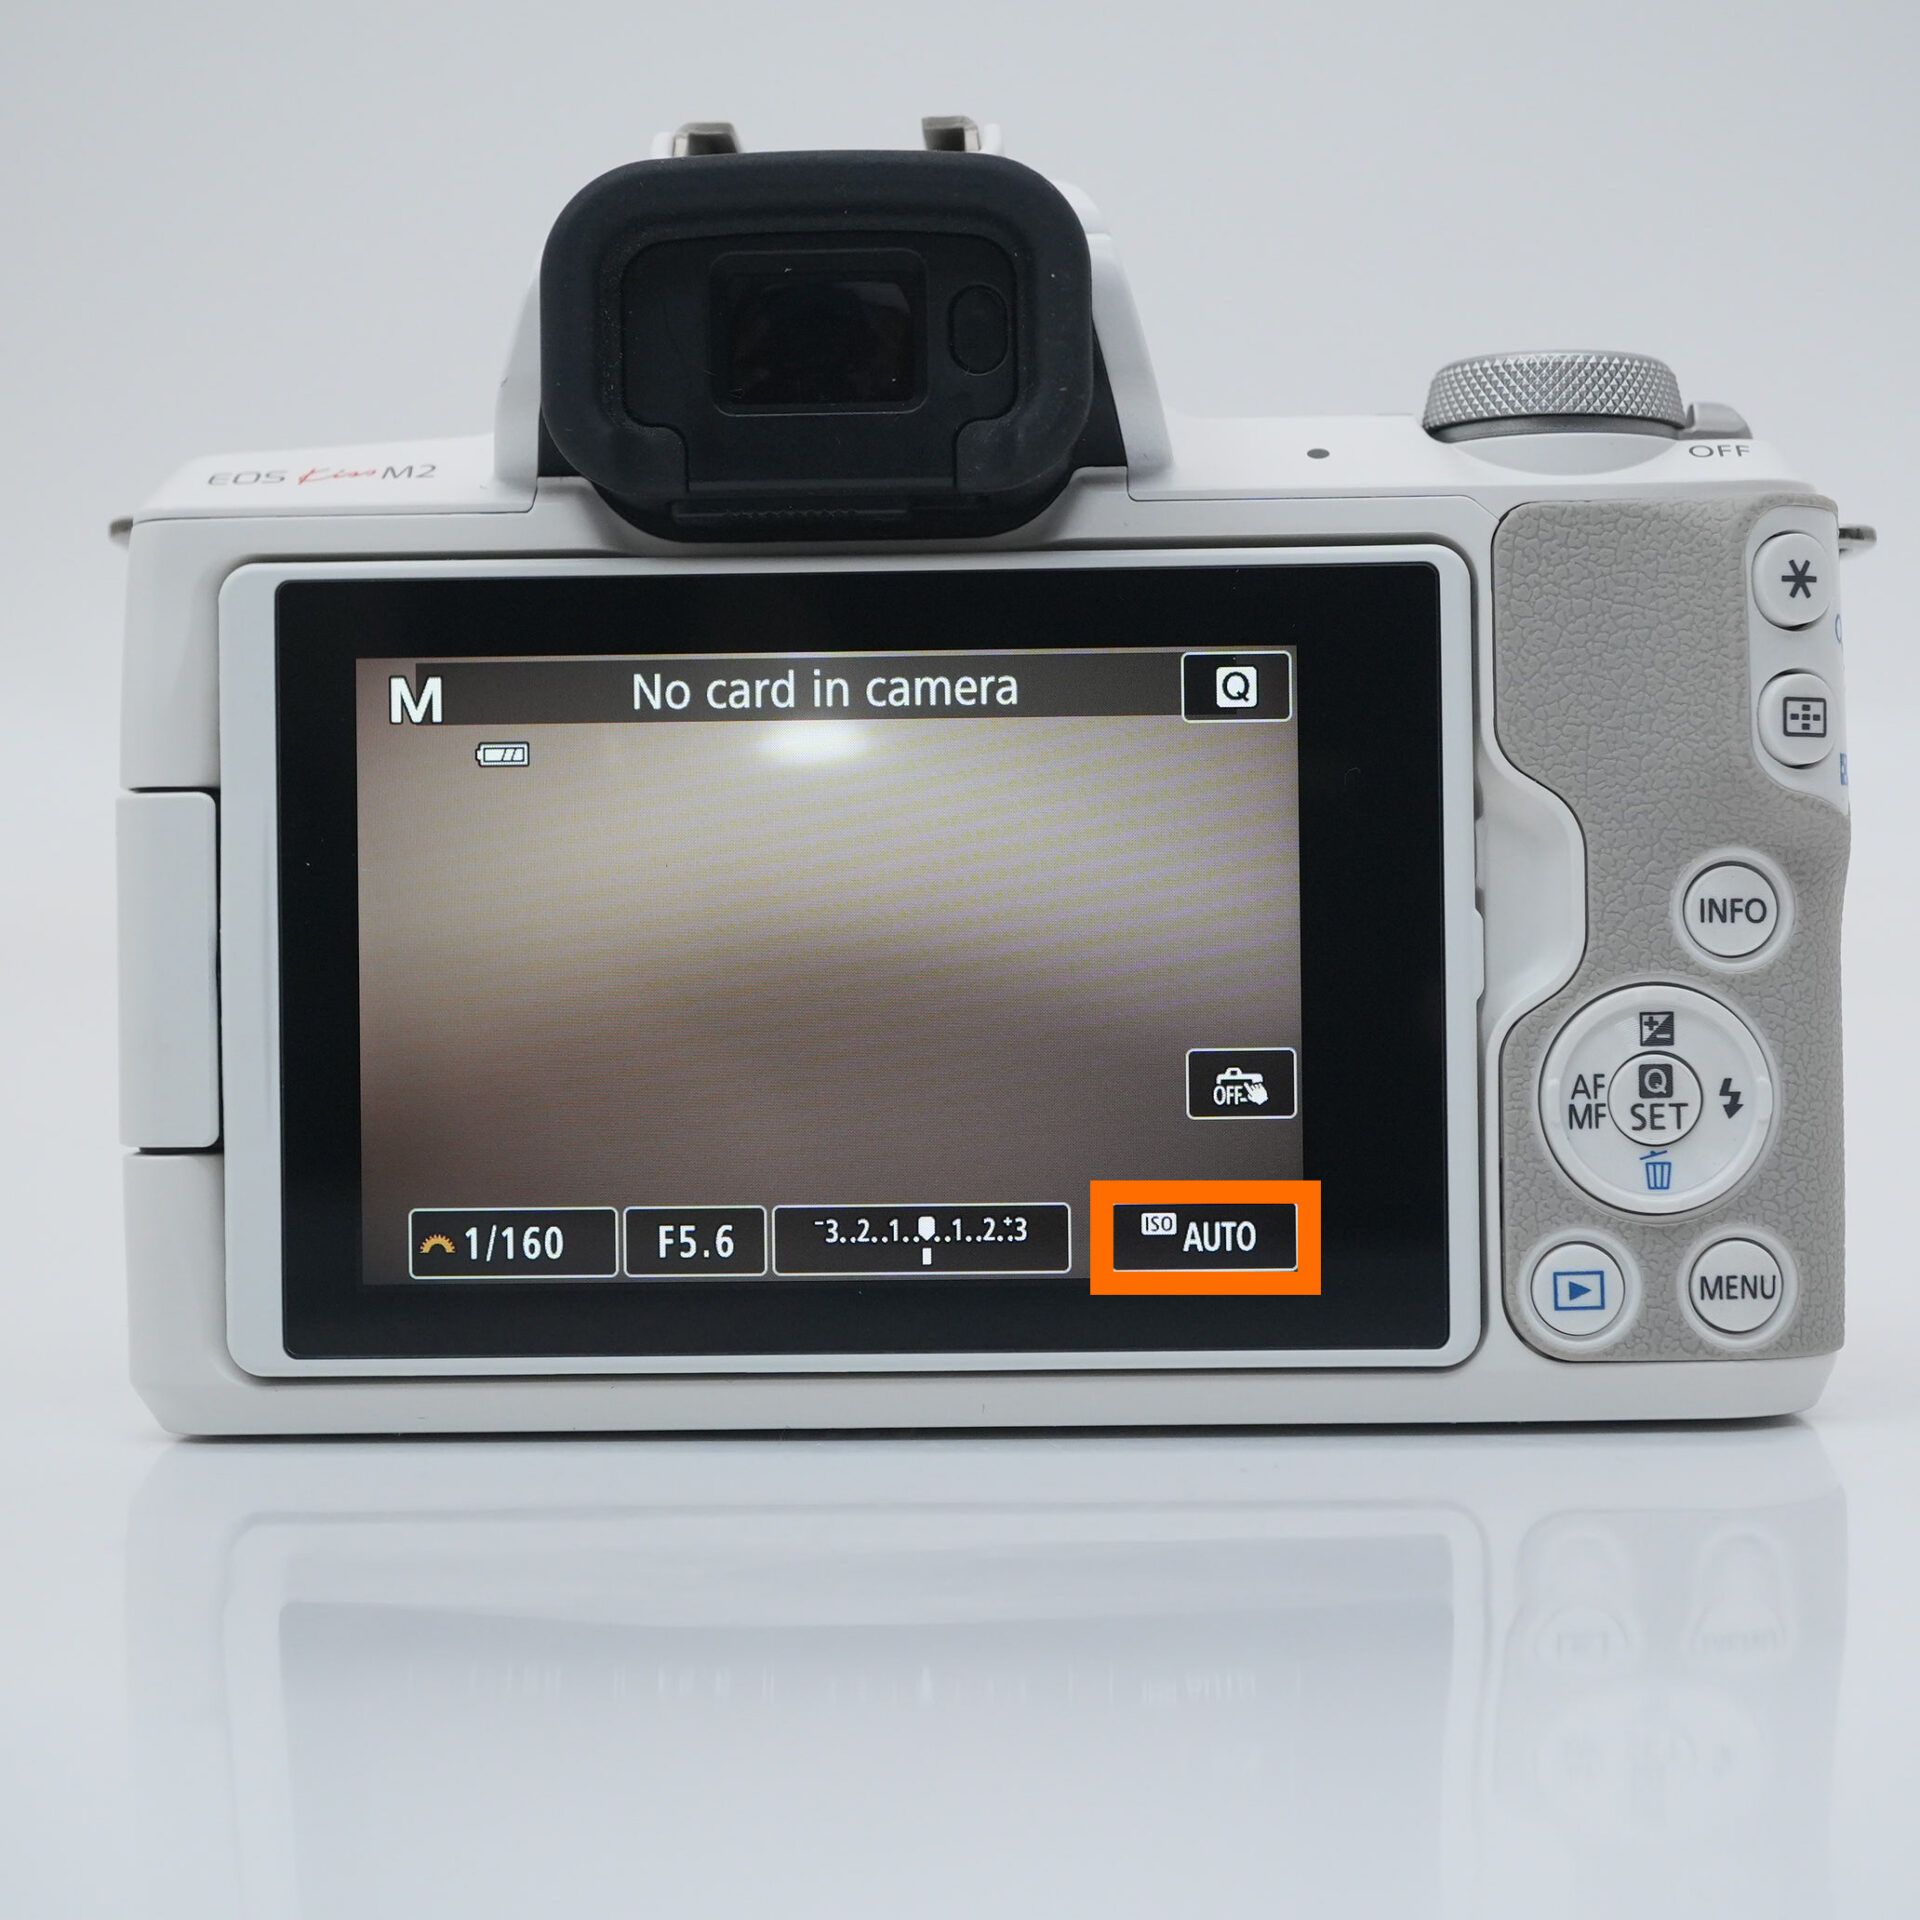
STEP.1
 |
| Tap F value |
STEP.2
 |
| Set to F8 |
Set iso to 100
When capturing scenes where you want to capture every detail, such as waterfalls and landscapes, it's important to take photos without compromising image quality as much as possible.
So you need to be mindful of the "ISO speed" setting.
- What is ISO sensitivity?
- ISO sensitivity is the "sensitivity" of a camera to light.
The higher the number, the more you can take pictures in dark places, but the more likely it is that noise (graininess) will increase.
- Why is ISO 100 recommended?
- ・ISO100 is the lowest sensitivity, has the least noise, and is the most stable image quality.
・It can capture the delicate details of waterfalls and nature clearly and beautifully.
・If there is not enough light, you can just dilute the ND filter or remove it.
STEP.1
 |
| Tap iso |
STEP.2
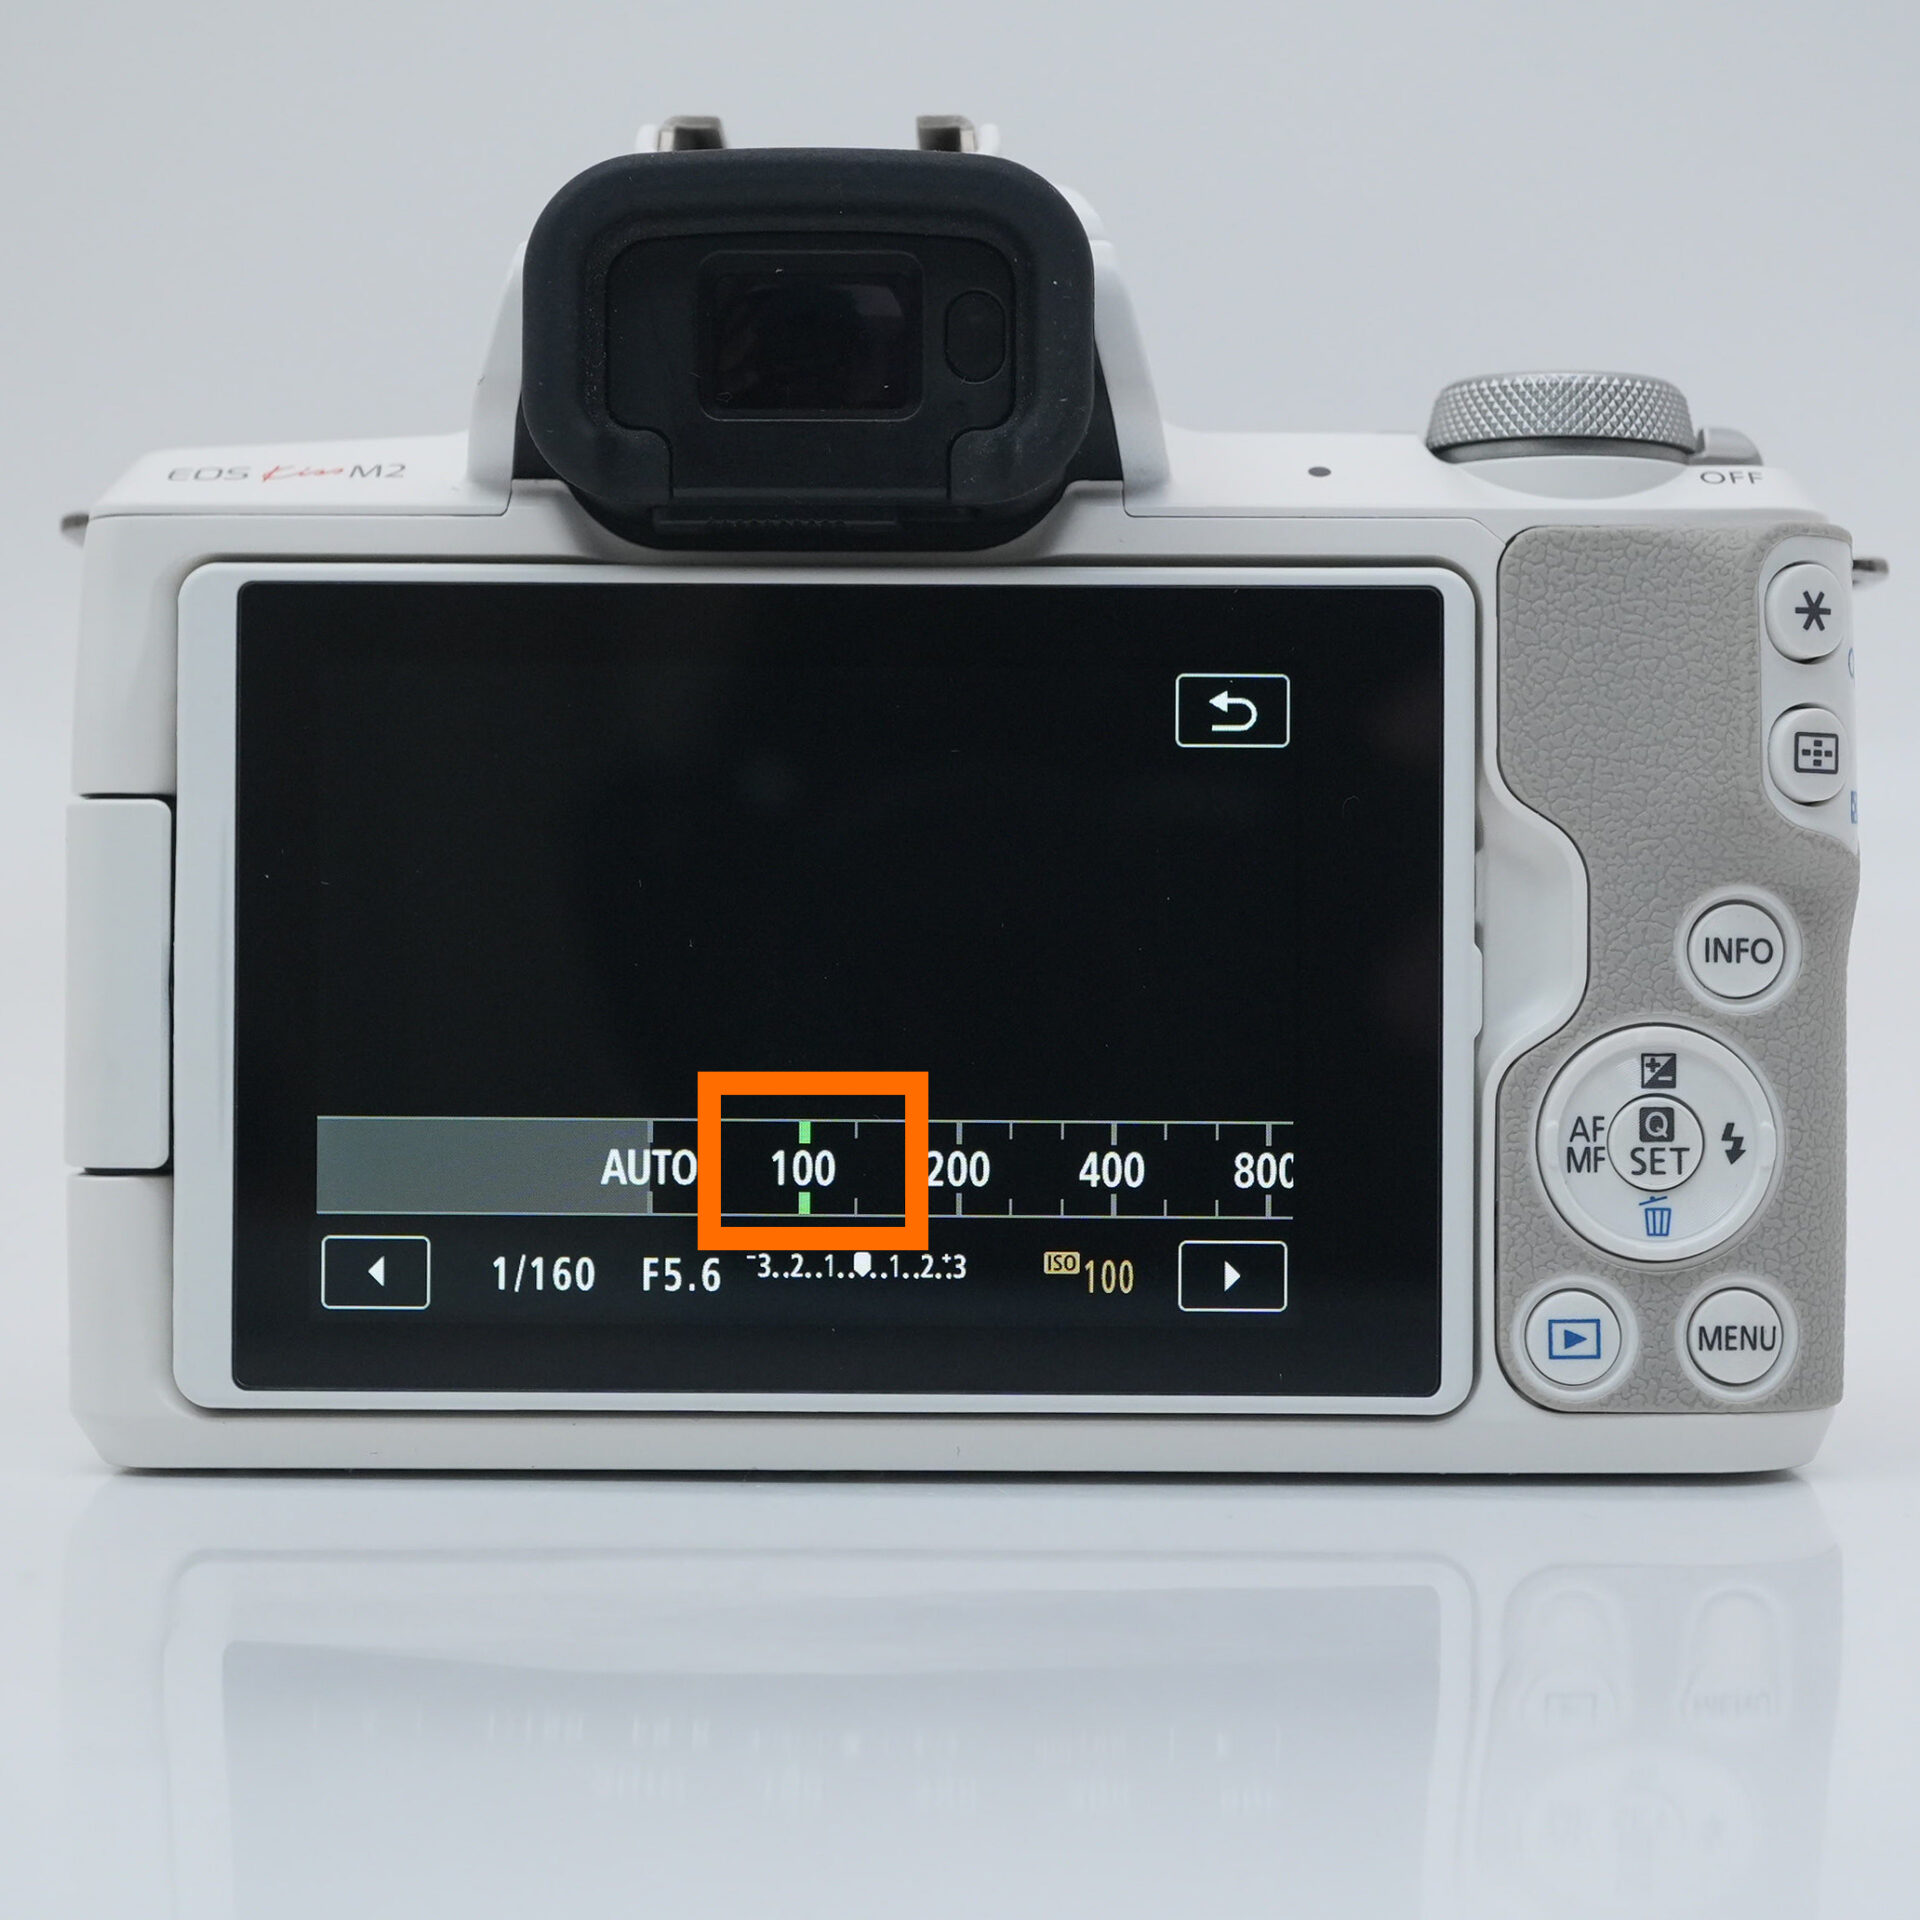 |
| Set iso to 100 |
How to adjust settings when a photo is too bright or too dark
With long exposure, even small changes in settings can have a big impact on the brightness of the photo, so it's a good idea to know some tips on how to make adjustments. Review the settings in the following order:
- When it's too bright
- 1. Lower the ISO sensitivity (e.g. ISO200 → ISO100)
↓
2. Increase the F-stop (e.g. F10 → F13)
↓
3. Adjust the variable filter to a darker setting
- When it's too dark
- 1. Adjust the variable filter to a brighter setting or remove it
↓
2. Decrease the F-stop (e.g. F11 → F8)
↓
3. Increase the ISO sensitivity (e.g. ISO100 → ISO200-400)
Connect to your smartphone
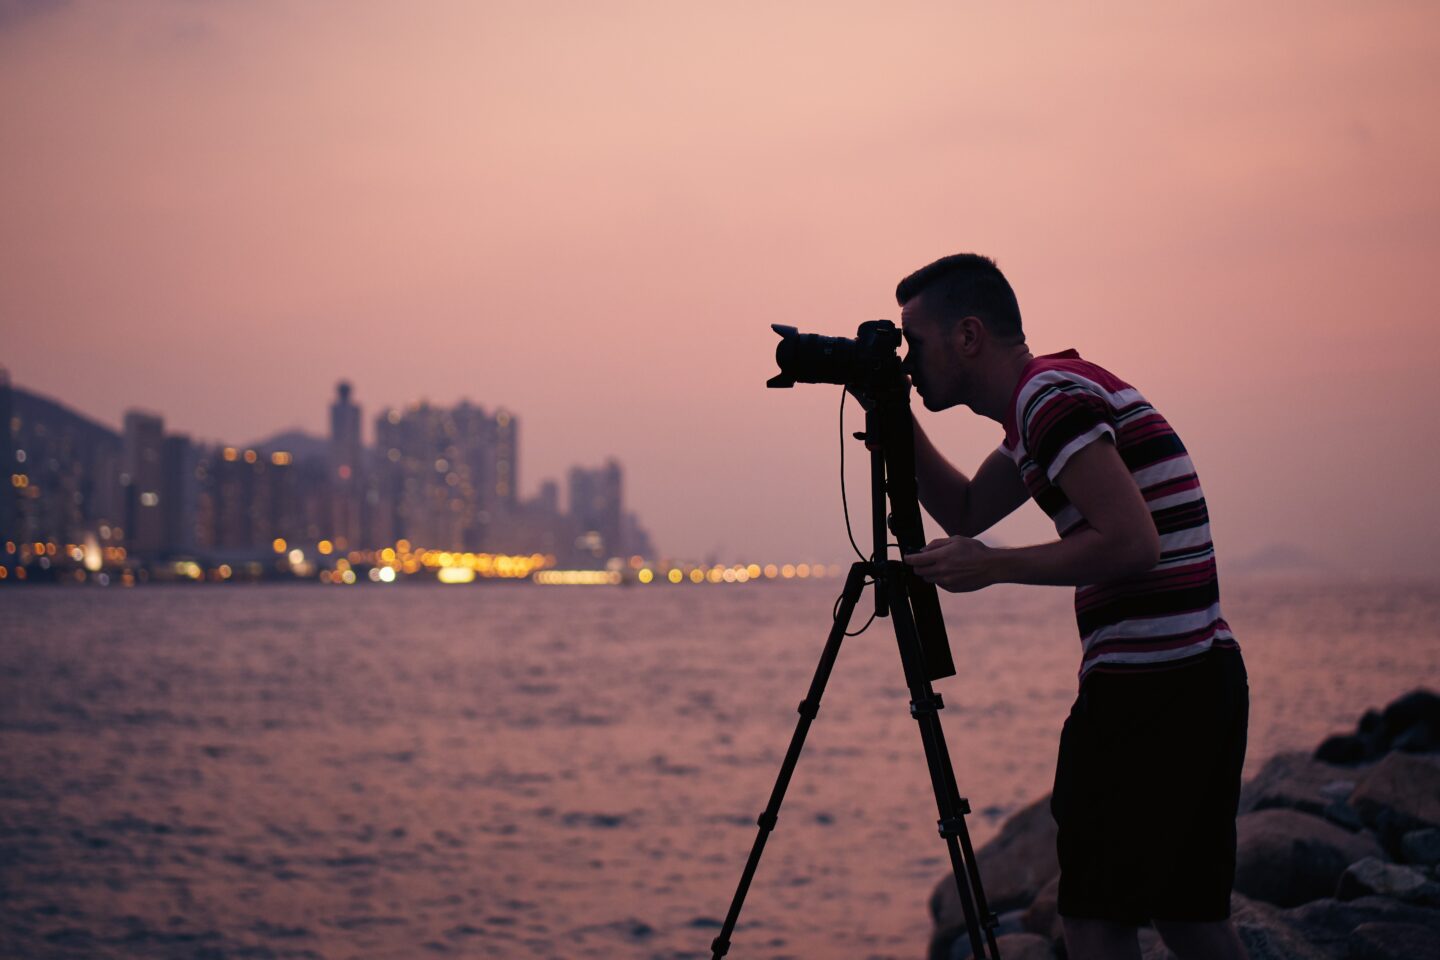
When photographing waterfalls, even the slightest shake when pressing the shutter can cause blurring.
In situations like this, remote control with your smartphone comes in handy.
Recent cameras are equipped with Wi-Fi and Bluetooth functions, making it easy to connect to a smartphone.
Each camera manufacturer has its own dedicated app, and you can control the camera remotely by following the steps below.
If you don't have a smartphone, use the self-timer to take the photo.
If you can't use a smartphone, use your camera's self-timer function.
This will prevent blurring by avoiding the vibration that occurs after pressing the shutter button.
We recommend setting the timer to 2 to 10 seconds.
STEP.1
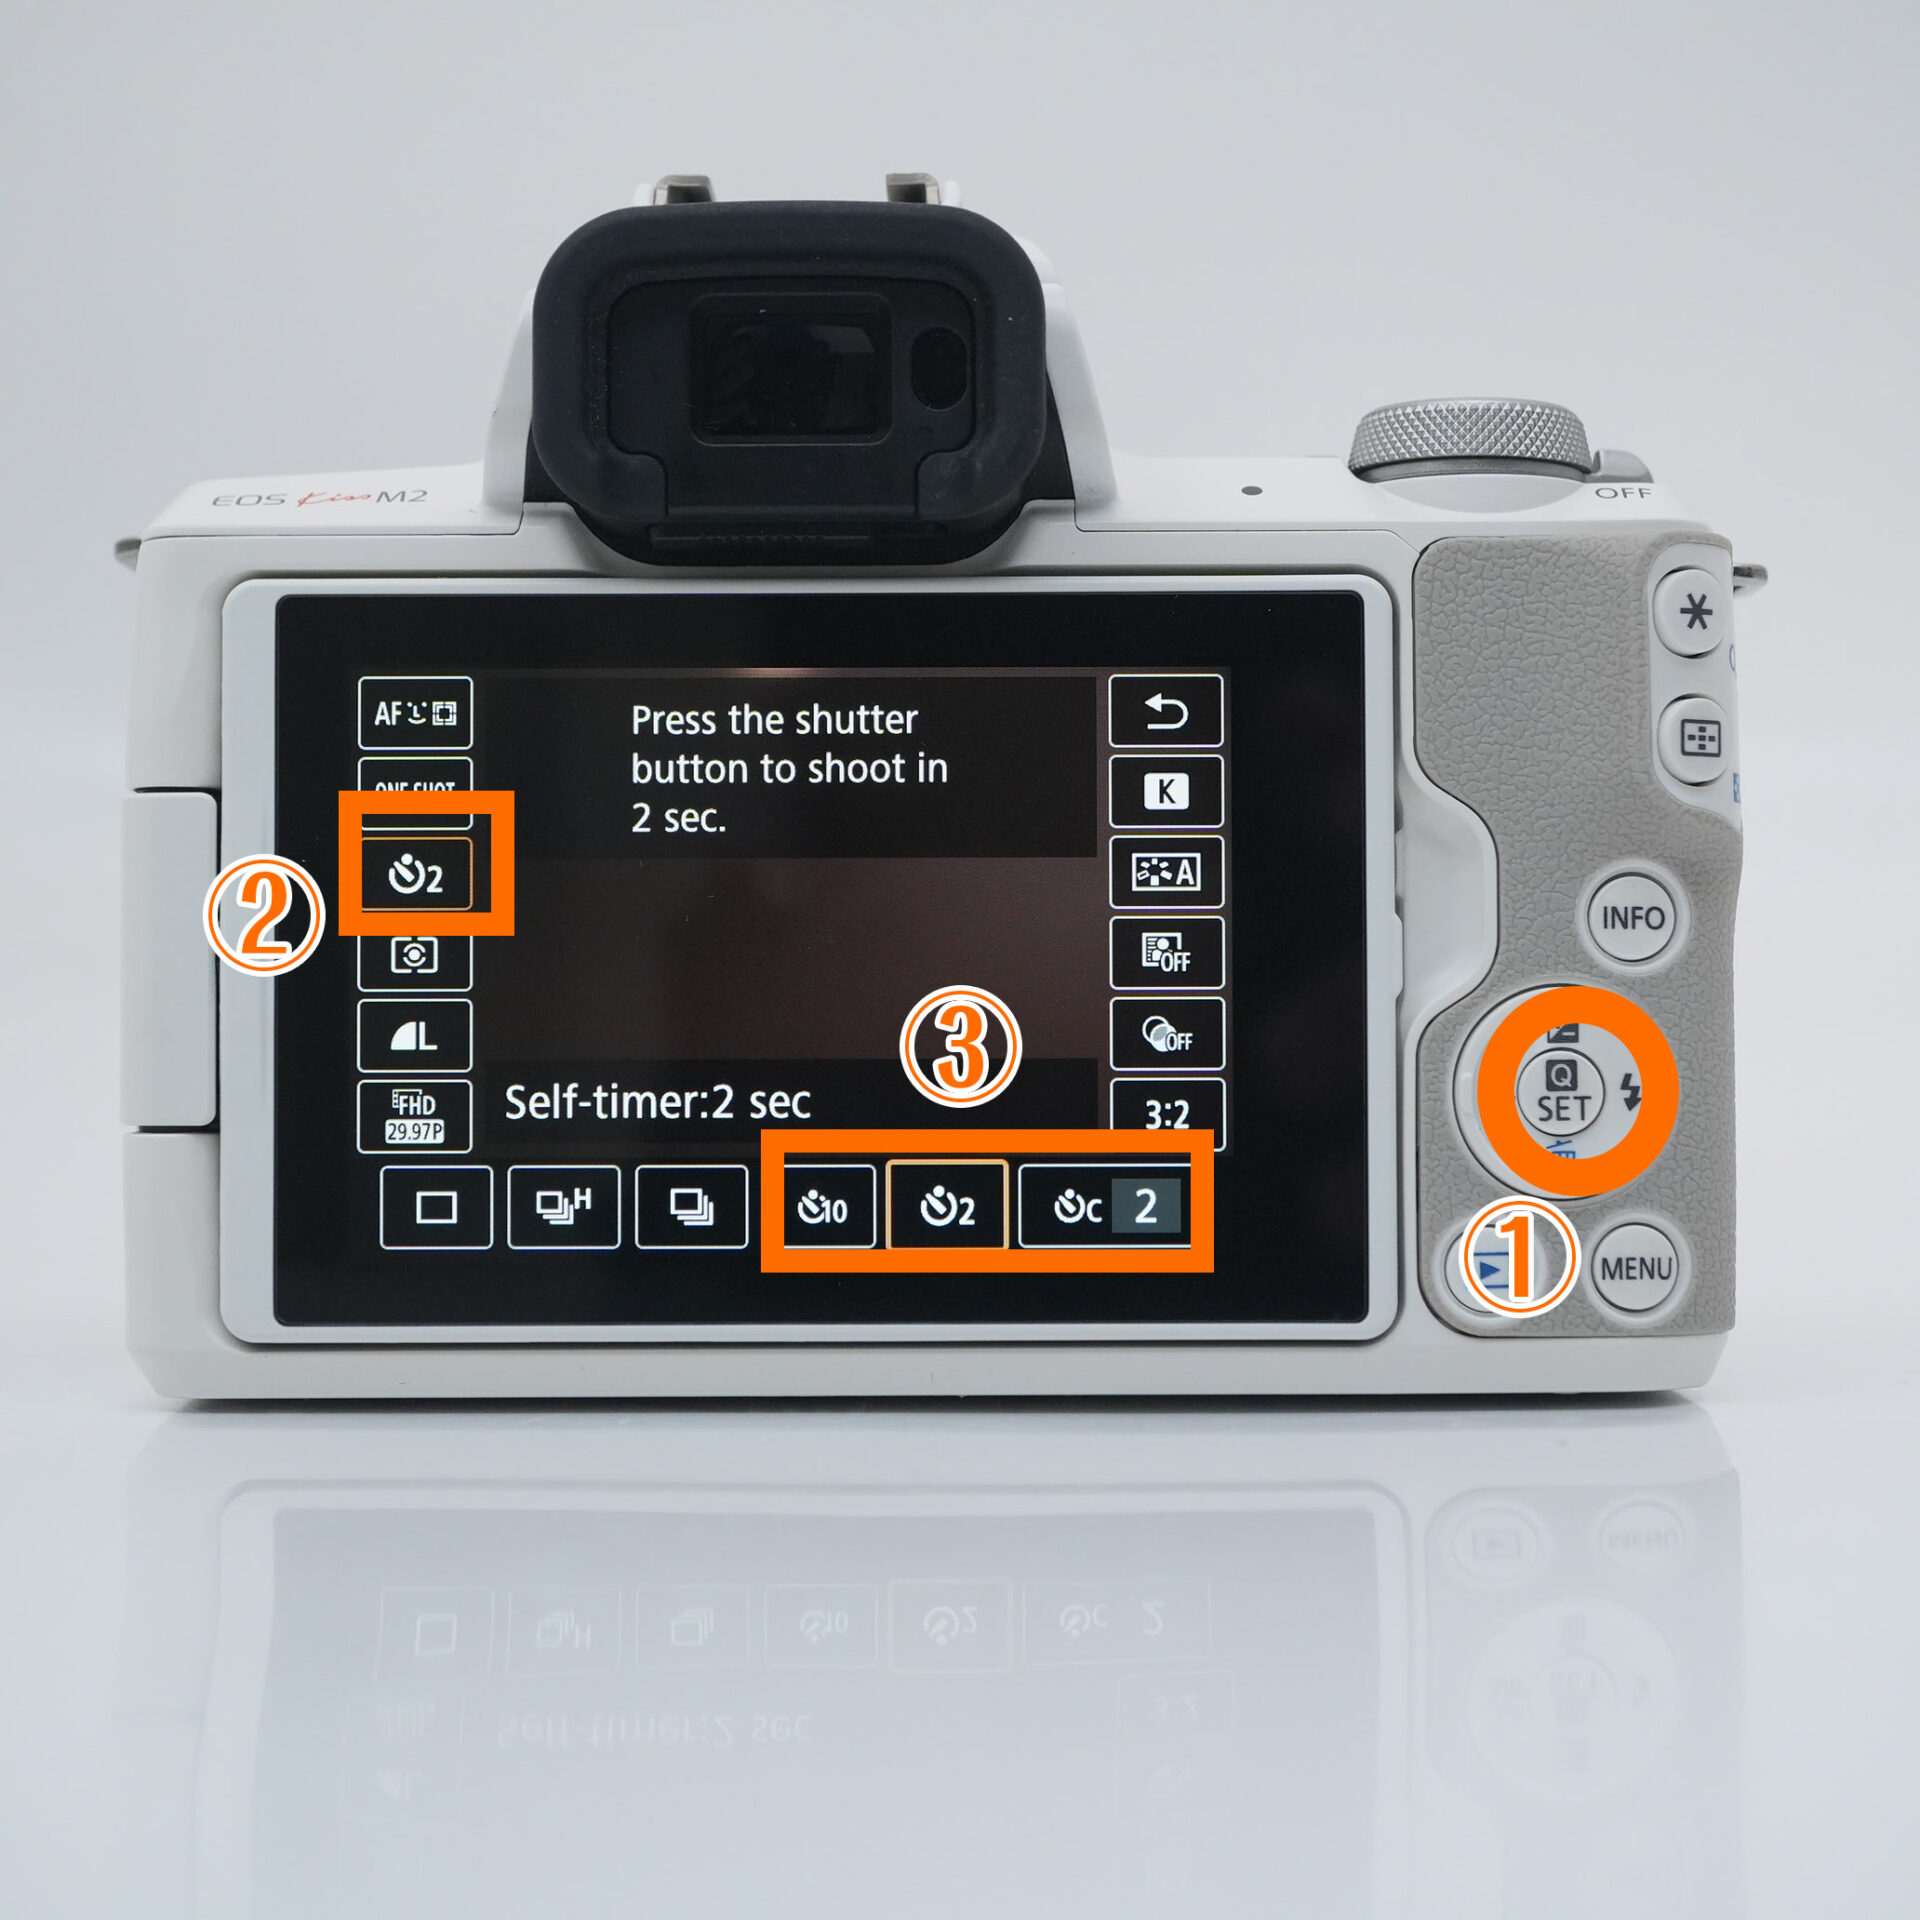 |
| Q→Drive mode→Select self-timer |
summary

We've shown you how to take great photos of waterfalls.
Take the information we have just explained into consideration and adjust the values to find the best results.