- Recommended for those who:
- ・Beginners who want to try photographing the starry sky for the first time
・Those who are not confident in the settings
・Those who want to learn the basics of how to take blur-free photos
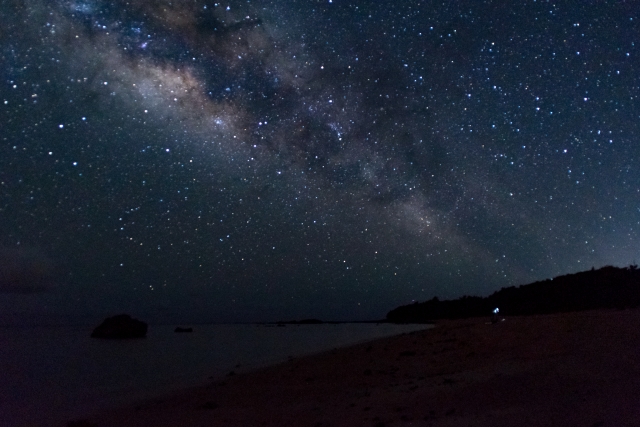
Have you ever wanted to capture a beautiful, blur-free photo of a starry sky?
In this article, we will carefully explain the points to help anyone take photos of the starry sky with ease.
If you want to try your hand at starry sky photography or want to learn some photography techniques, be sure to read until the end!
This page contains advertisements
Use a tripod to prevent blurring when photographing the starry sky
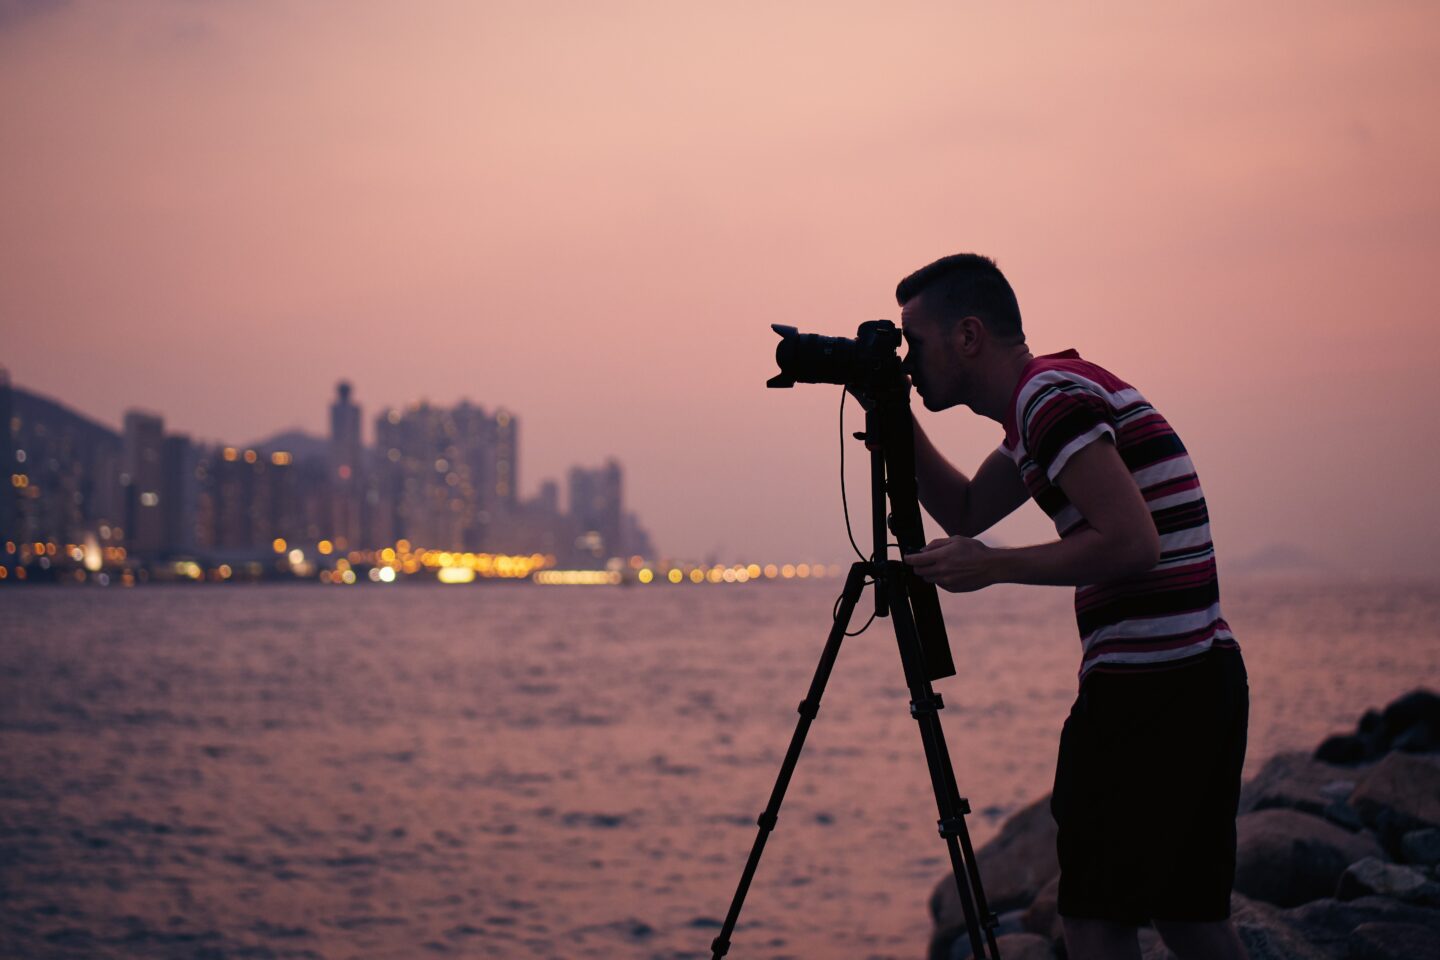
To take beautiful photos of the starry sky, you need to use a method called "long exposure," which involves opening the shutter for several seconds or more. If the camera moves even a little during that time, the stars will blur and appear as lines, ruining the photo.
That's when a tripod comes in handy.
It holds the camera firmly in place, allowing you to take clear, blur-free photos of the starry sky.
Tripods are also easy to purchase on sites like for just a few thousand yen. They're easy even for beginners to pick up, and many models are lightweight and compact, making them easy to carry around.
Tripods are also useful not only for taking photos of the starry sky,
・Nightscape photography
・Selfie photography in group photos
・Time-lapse video
・Landscape photography where you want to reduce blur
It can be used in a variety of situations.
Just having one of these handy items will greatly expand the scope of your photography.
Start with an affordable tripod and experience the charm of starry sky photography.

Why use a wide-angle lens and what are its benefits?
Why use a wide-angle lens and what are its advantages?
If you want to capture a dynamic starry sky, we recommend using a wide-angle lens.
A wide-angle lens is a lens with a wide angle of view, allowing you to capture a wide range of scenery in one photo. By capturing the entire night sky and the scenery on the ground together, you can take starry sky photos with a sense of scale.
・Landscape photos
・Interiors of buildings
・Snapshots while traveling
A versatile lens that can be used in a variety of everyday scenes.
Be careful of street lights getting in the way!
Be careful of street lights getting in the way! Tips for taking beautiful photos of the starry sky
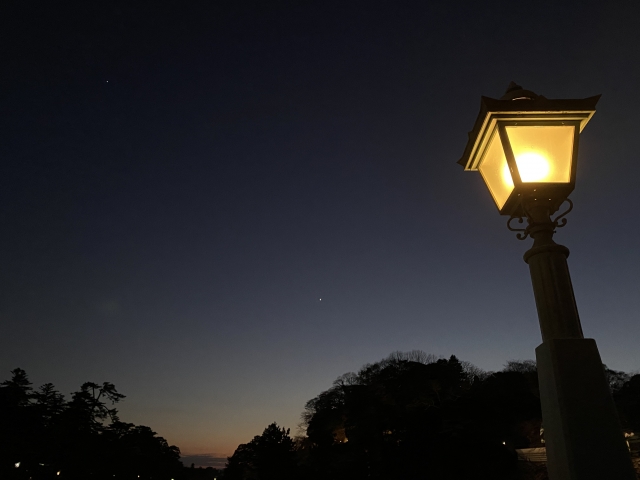
In order to take a clear picture of the stars, try to avoid street lights from entering the camera's field of view.
・Keep your distance from street lights
・Point the camera away from the city
・Use mountains or trees in the background to block the light
There are several methods such as:
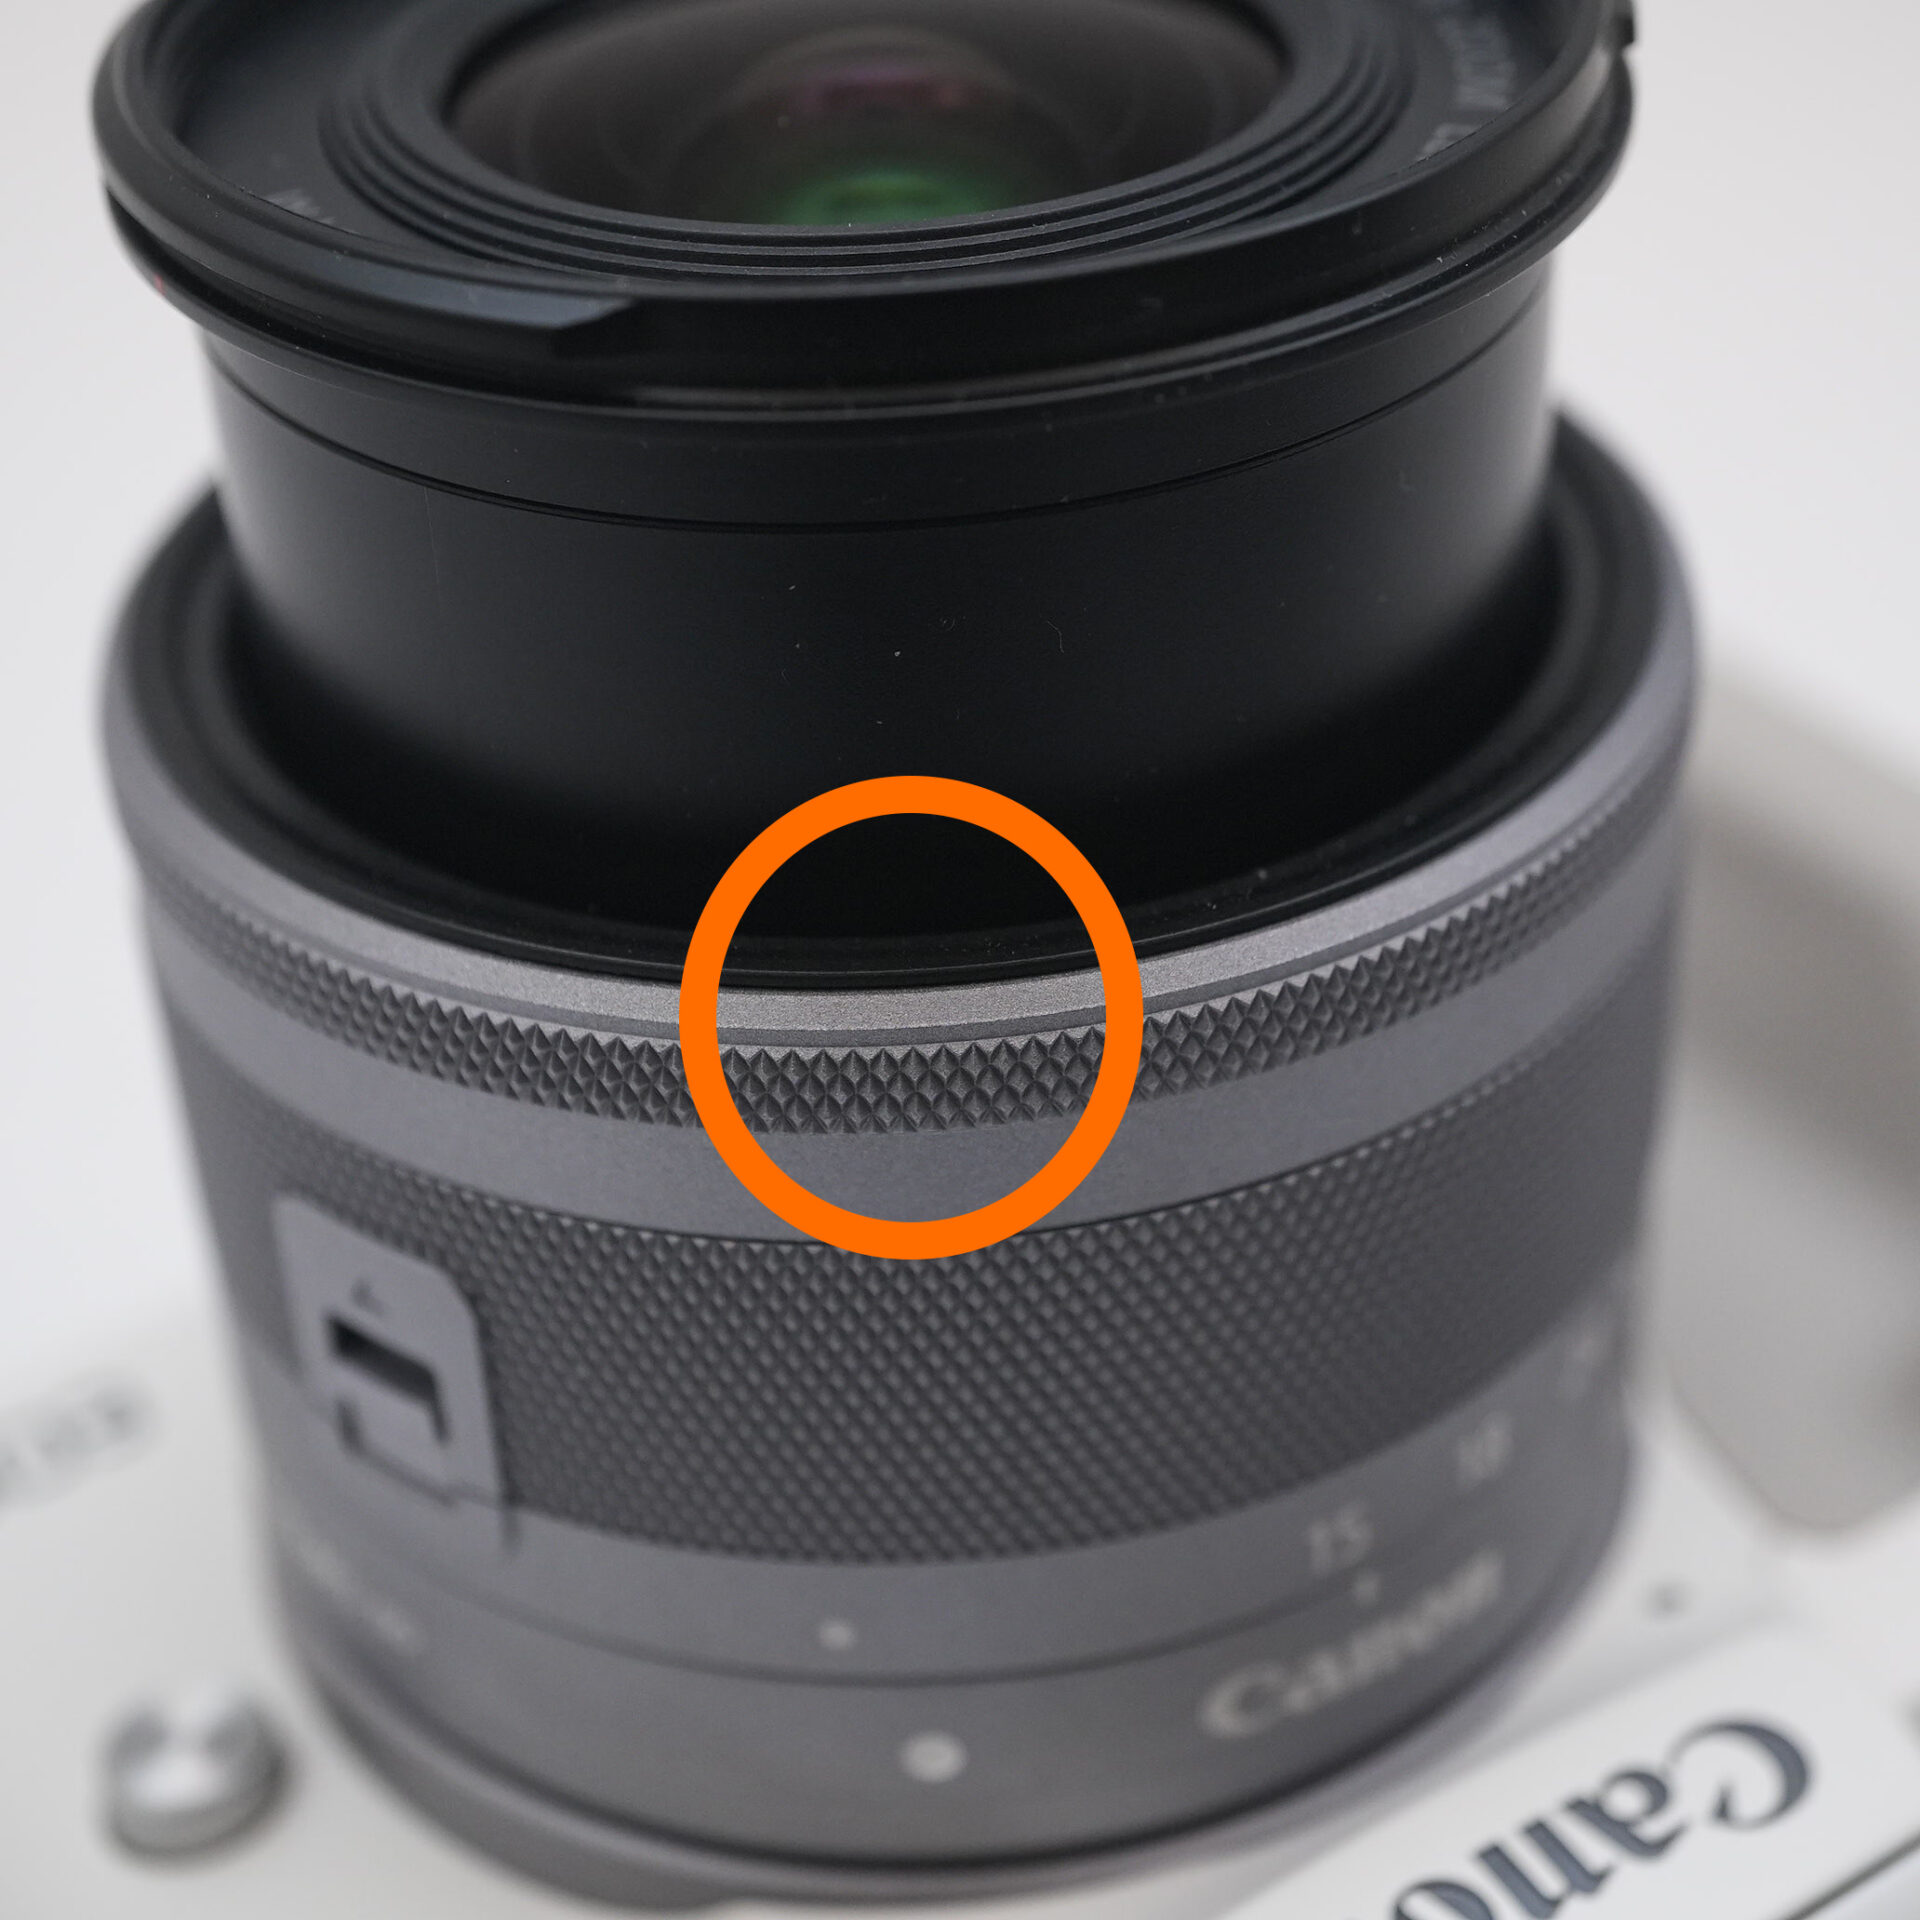
If there are street lights nearby, you can use a lens hood to prevent unnecessary light from being captured in the image.
The key is to choose a location a little away from bright areas.
Avoid full moon days!
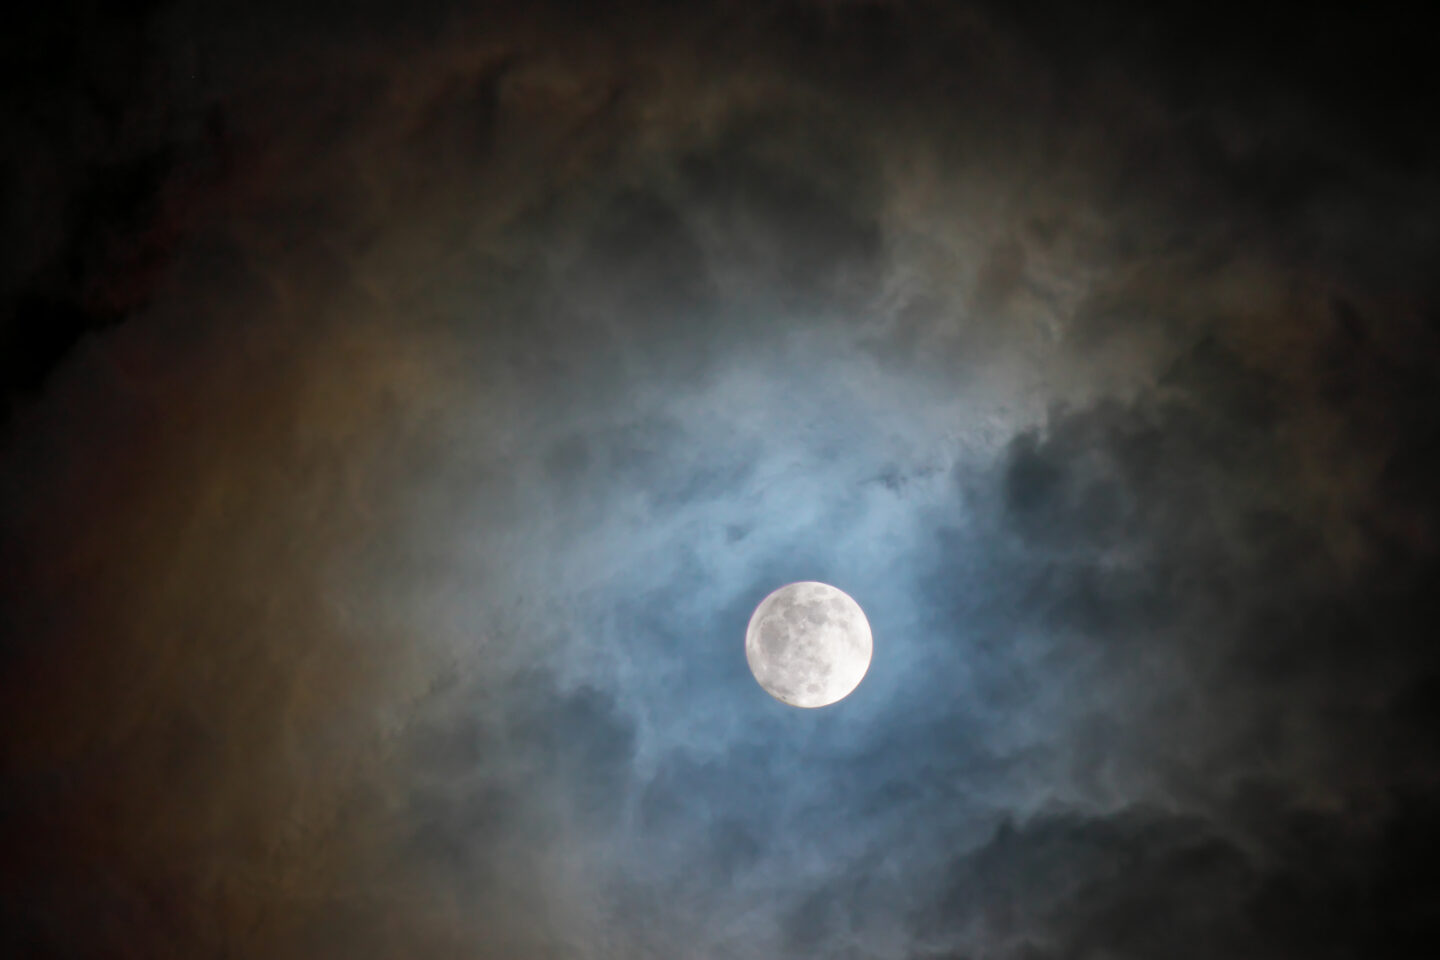
On nights with a bright moon, the sky can appear whitish and the light of the stars can become dim. A full moon is particularly unsuitable for photographing the starry sky.
If you want to capture clear images of the stars, try to shoot just before or after a new moon, or after the moon has set. If the moon is in the frame, ghosting and flare can occur, so you also need to be careful with your composition.
When photographing the stars, it's important to think of moonlight as a form of "light pollution," so check the position and time of the moon in advance.
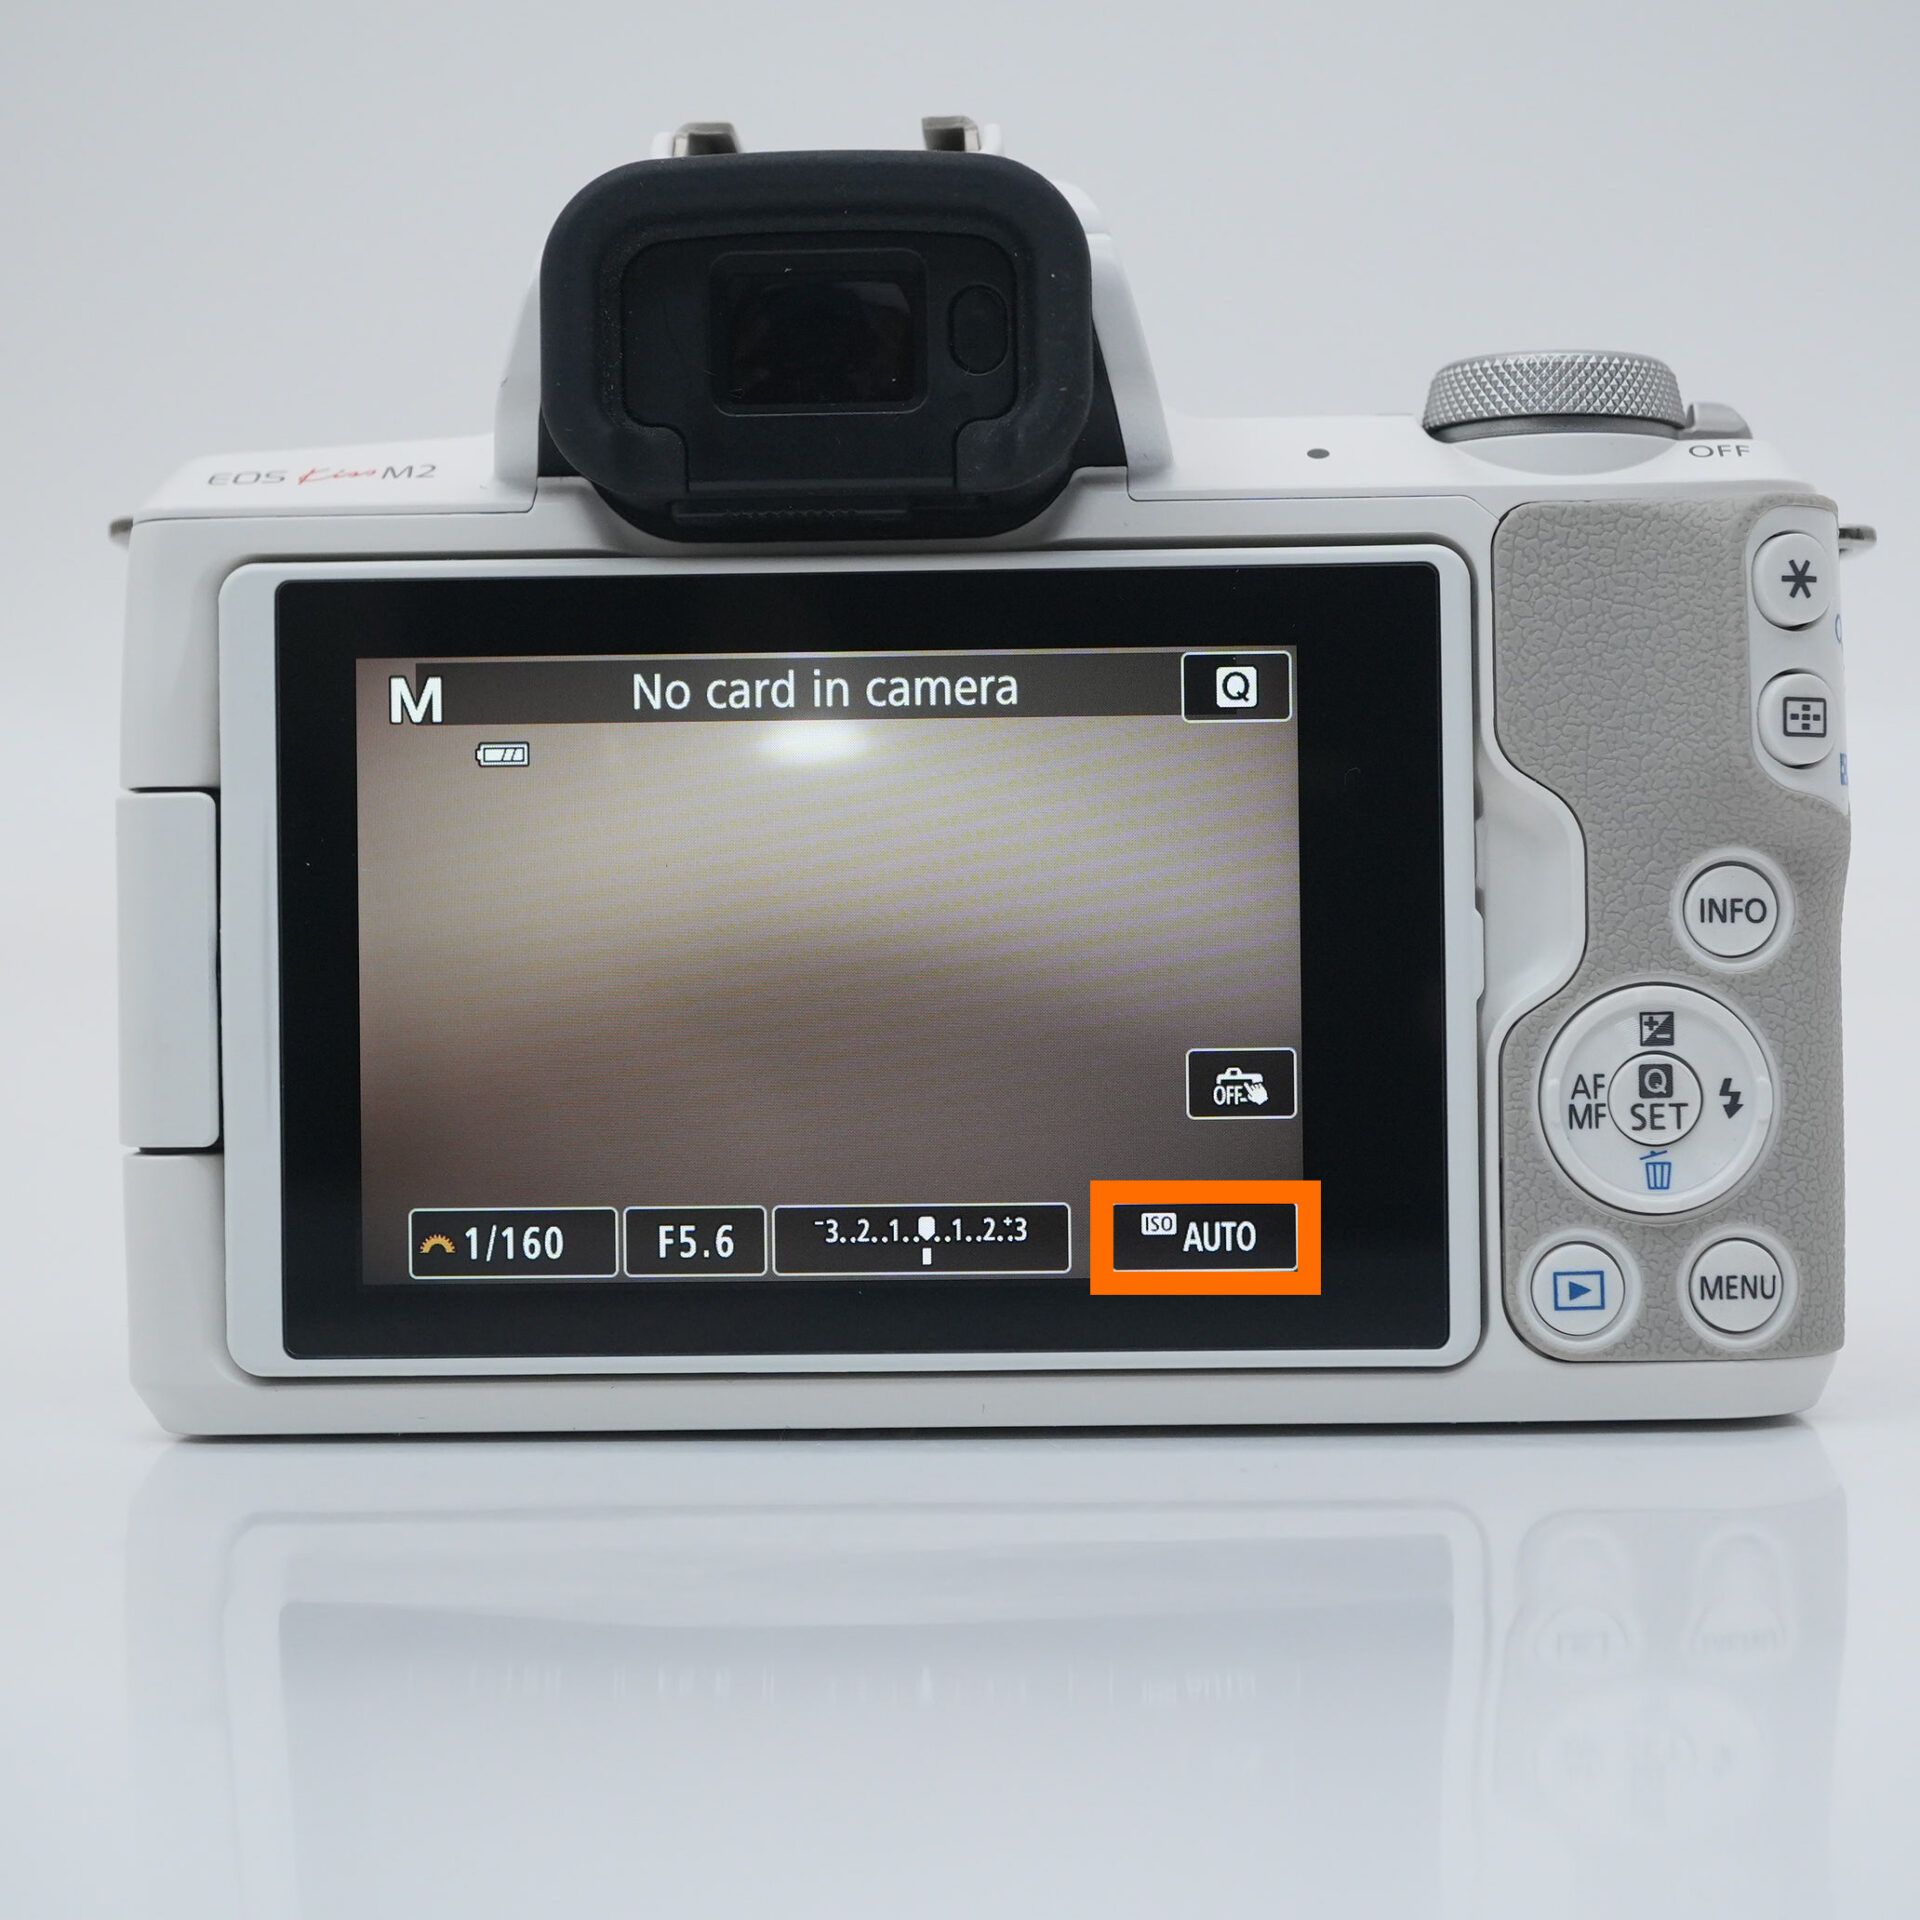
Shooting starry skies in M mode
M mode is a function that allows you to manually set the shutter speed and F-stop.
STEP.1
 |
| Set the dial to M. |
Use the widest F-number when photographing starry skies! Basic settings for taking bright photos
When photographing the starry sky, the basic rule is to set the F-number (aperture value) as small as possible, i.e. to open the F-number. The smaller the F-number, the more light the lens can capture, so you can capture the stars clearly even in a dark night sky.
For example, if your lens is labeled "F2.8," that number is the minimum F-number (opening). Make sure to select the smallest number, such as "F2.8," in your camera settings.
Opening the F-number also has the advantage of not having to forcefully increase the ISO sensitivity or shutter speed. This allows you to take clear starry sky photos with reduced noise.
STEP.1
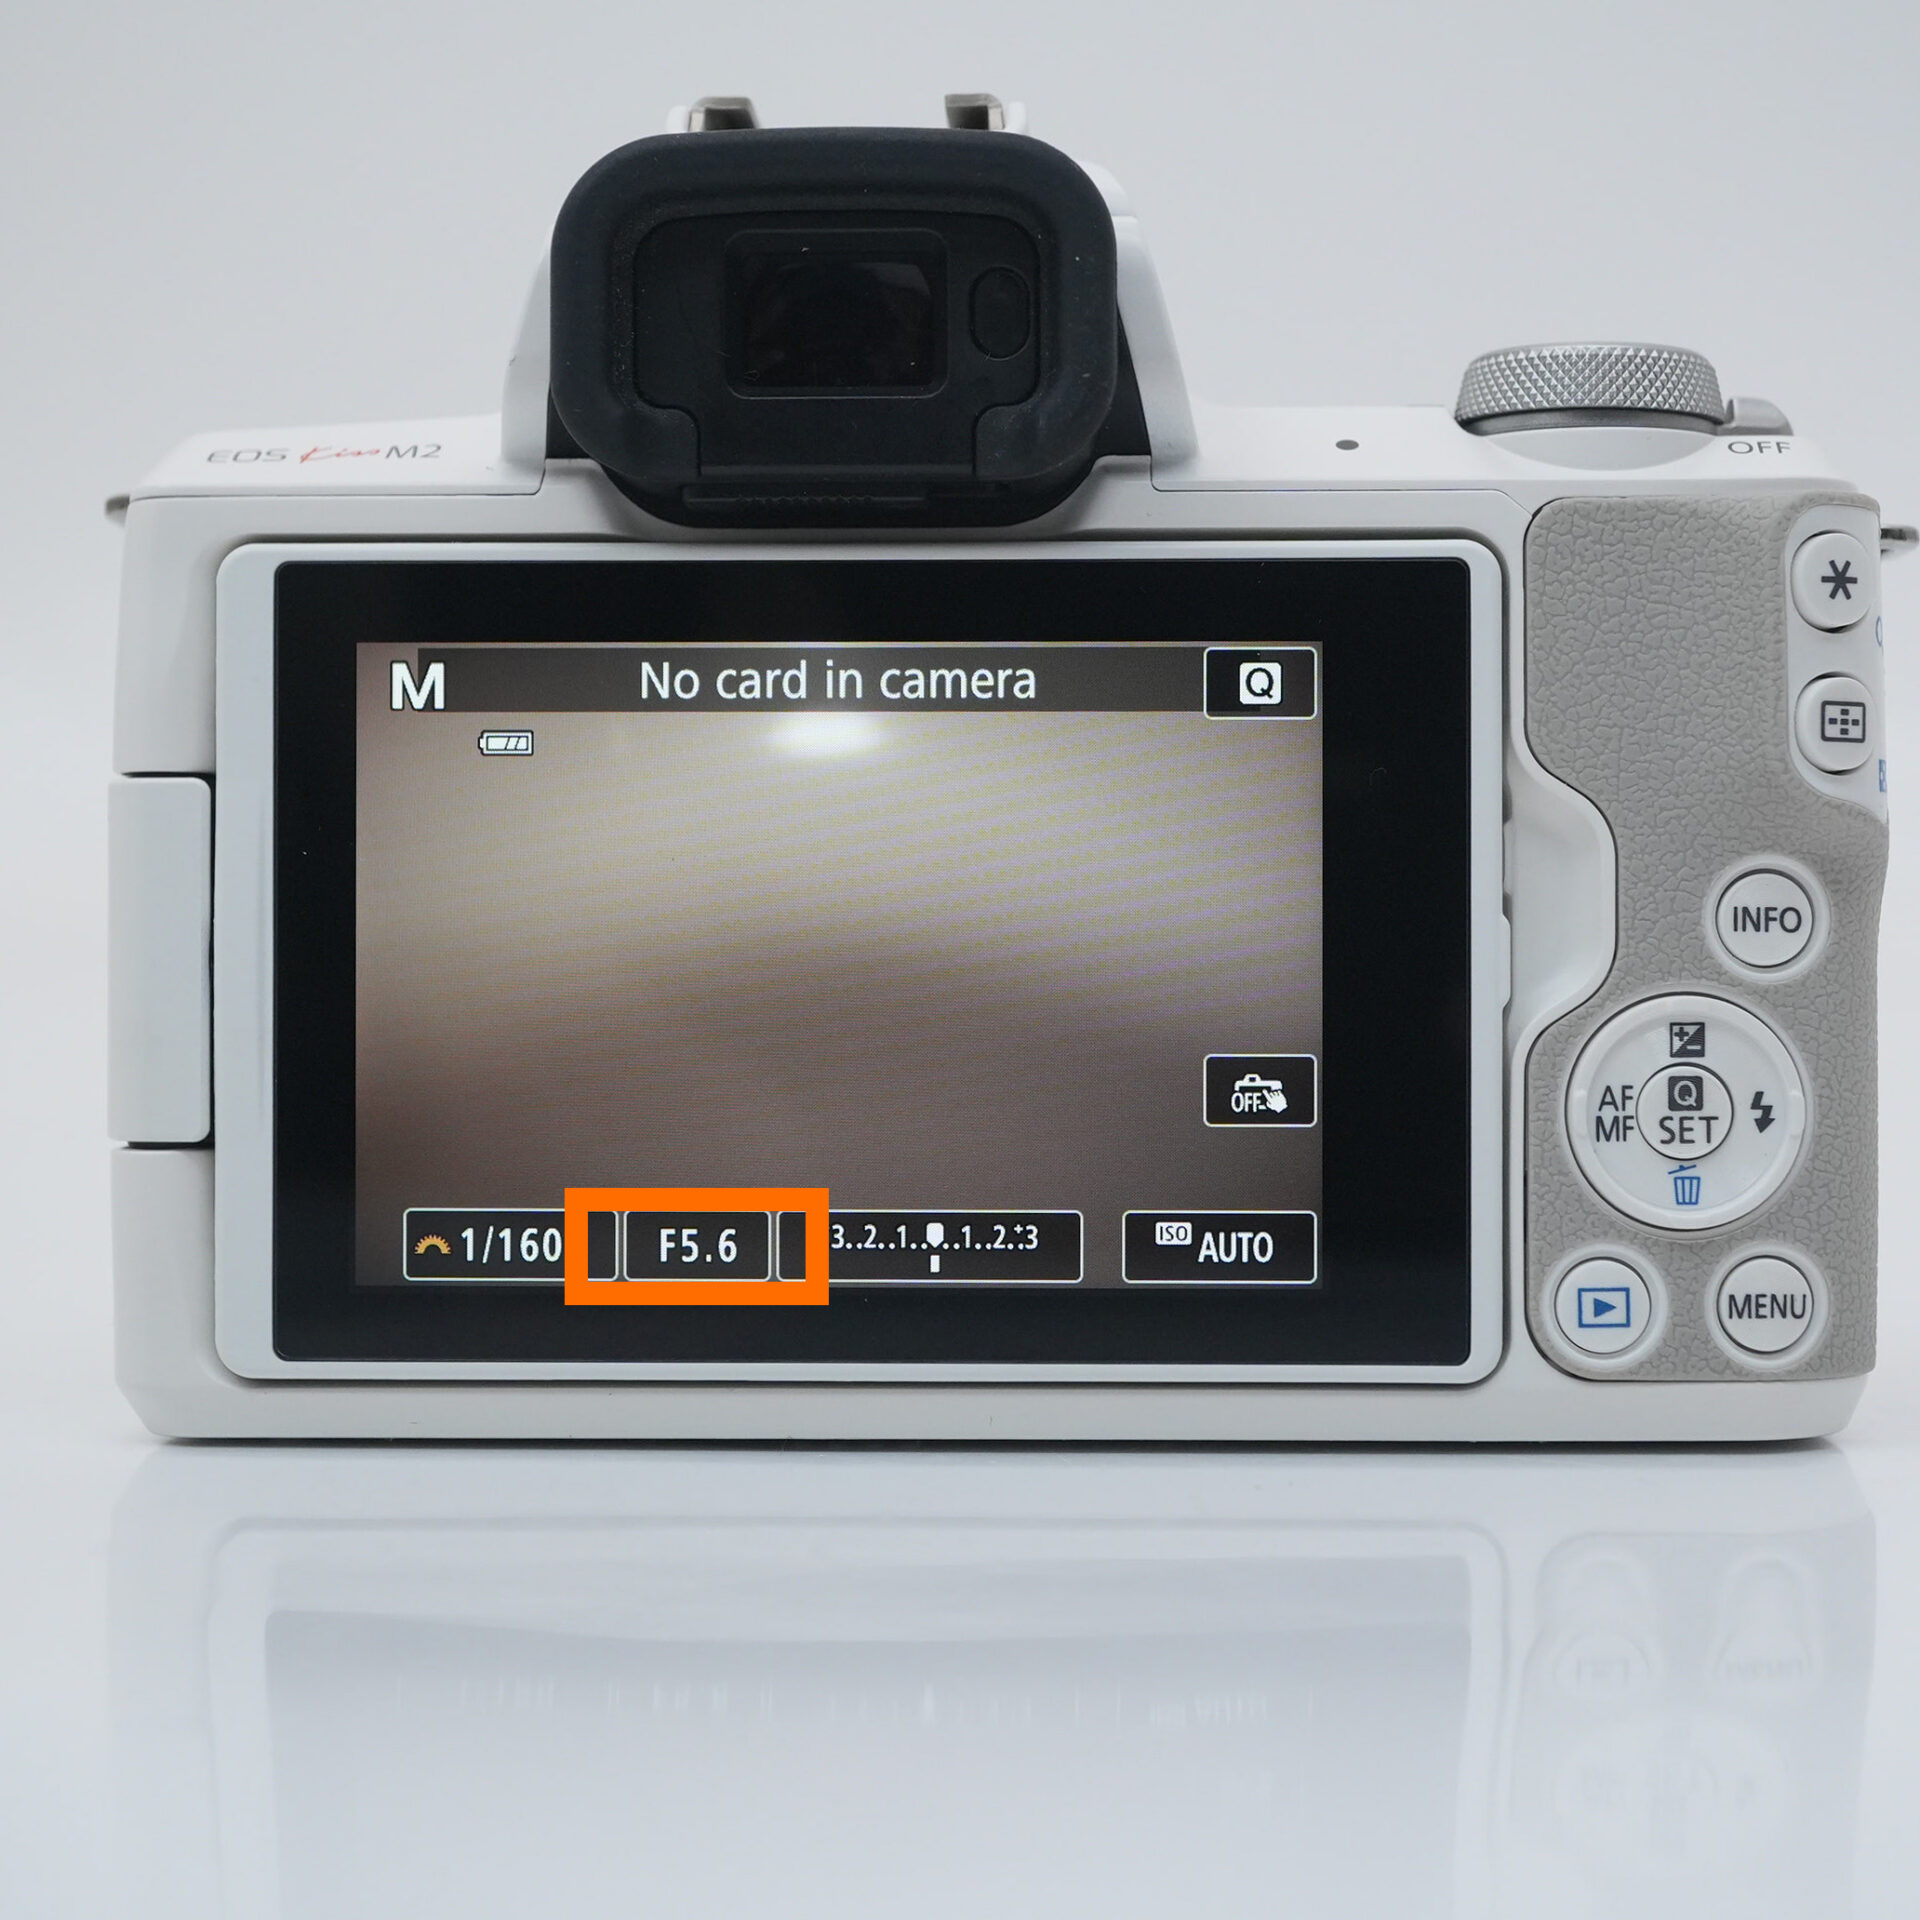 |
| Tap F value |
STEP.2
 |
| Set the F-number to the smallest |
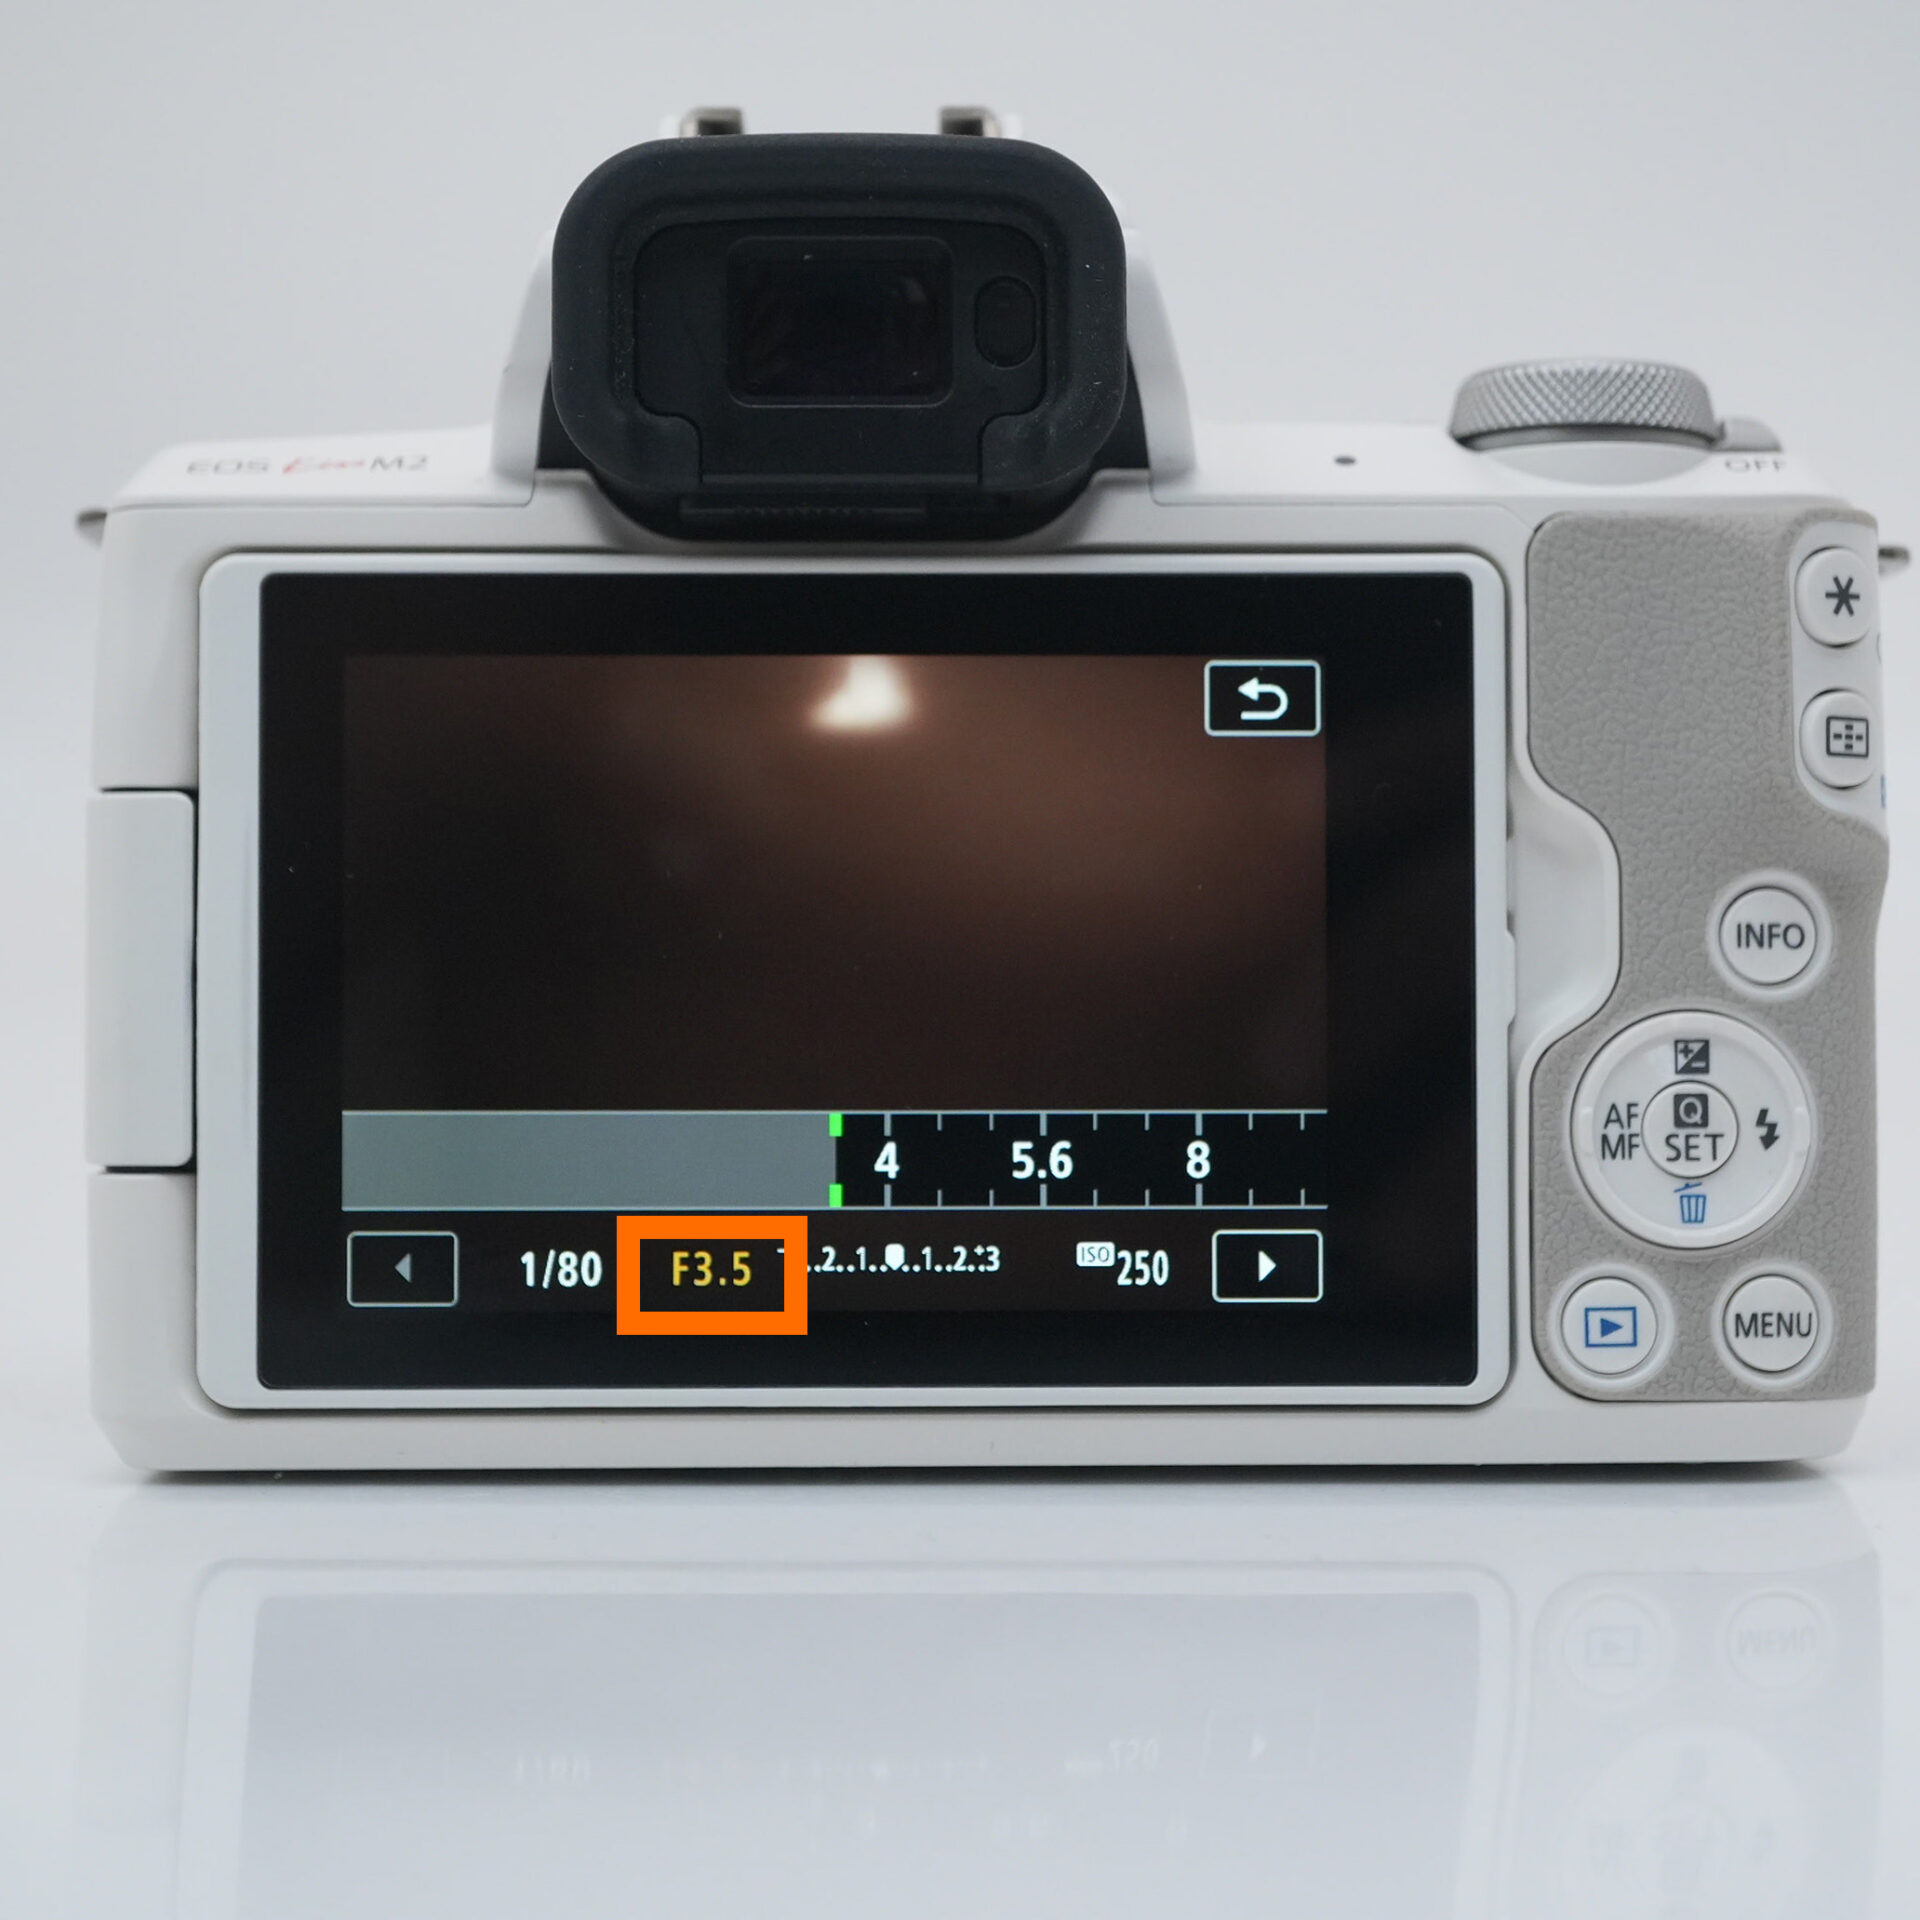
To capture the stars without blur, we recommend a shutter speed of 8 seconds.
Setting the shutter speed is very important for taking beautiful photos of the starry sky. At first glance, the stars appear to be still, but because the Earth rotates, if you leave the shutter open for too long, they may blur like a line.
The recommended setting for beginners is a shutter speed of "8 seconds."
Eight seconds is a good balance between capturing the stars as dots while still capturing enough light. Using a wide-angle lens will help you capture a beautiful starry sky with even less blur.
STEP.1
 |
| Tap SS |
STEP.2
 |
| Set the shutter speed to 8 seconds |
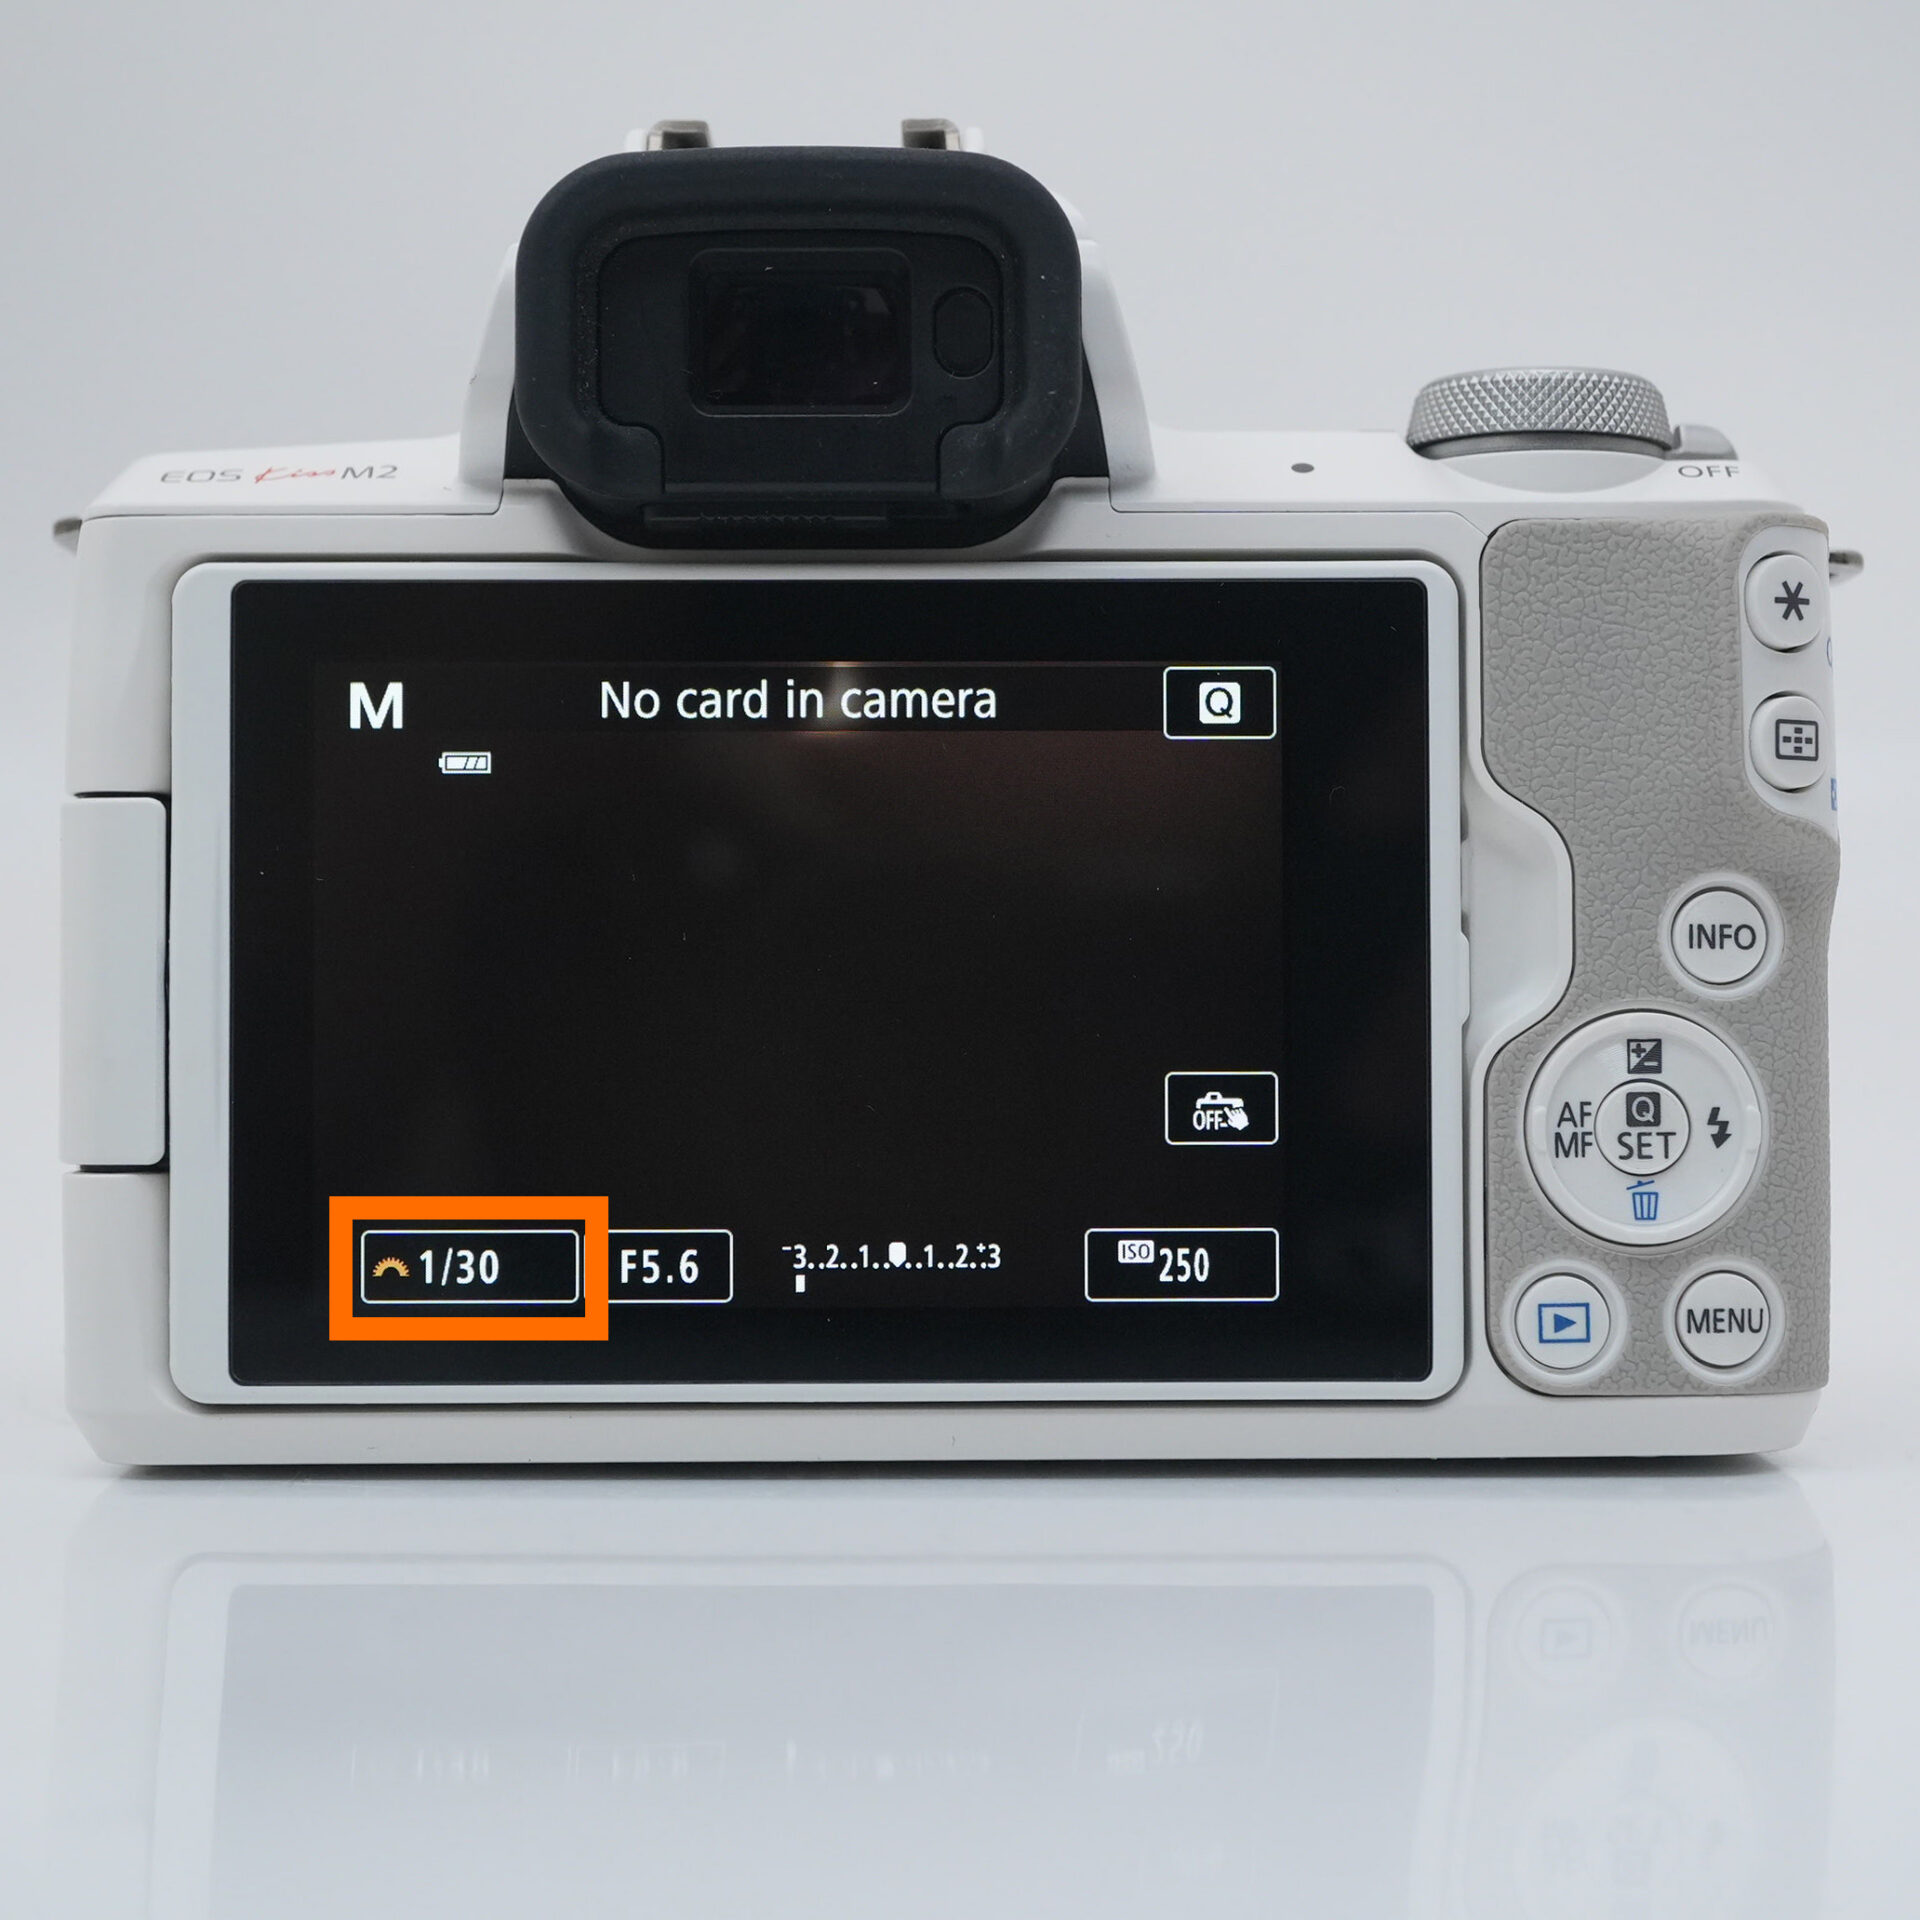
ISO sensitivity should be set at 400. Adjust it according to the brightness.
- What is ISO sensitivity?
- ISO sensitivity is a setting that indicates the "sensitivity to brightness" of the camera to capture light. The higher the number, the brighter the image you can take in dark places, but the more likely it is that noise (graininess) will occur.
How to adjust the ISO sensitivity
Using ISO 400 as the reference, adjust as follows.
| Situation | Suggested Adjustment |
|---|---|
| The image looks darker than expected | Gradually increase ISO to 800–1600 |
| Image is blurry, but you want to keep a fast shutter speed | Raise ISO to 2000 or higher to maintain brightness |
| The image is too bright or there's too much noise | Try lowering ISO to 80–200 |
- Point
- When shooting stars, it is best to set the ISO sensitivity to 400 and adjust it according to the amount of light. By balancing brightness and noise, you can capture sharper and more beautiful night scenes.
STEP.1
 |
| Tap iso |
STEP.2
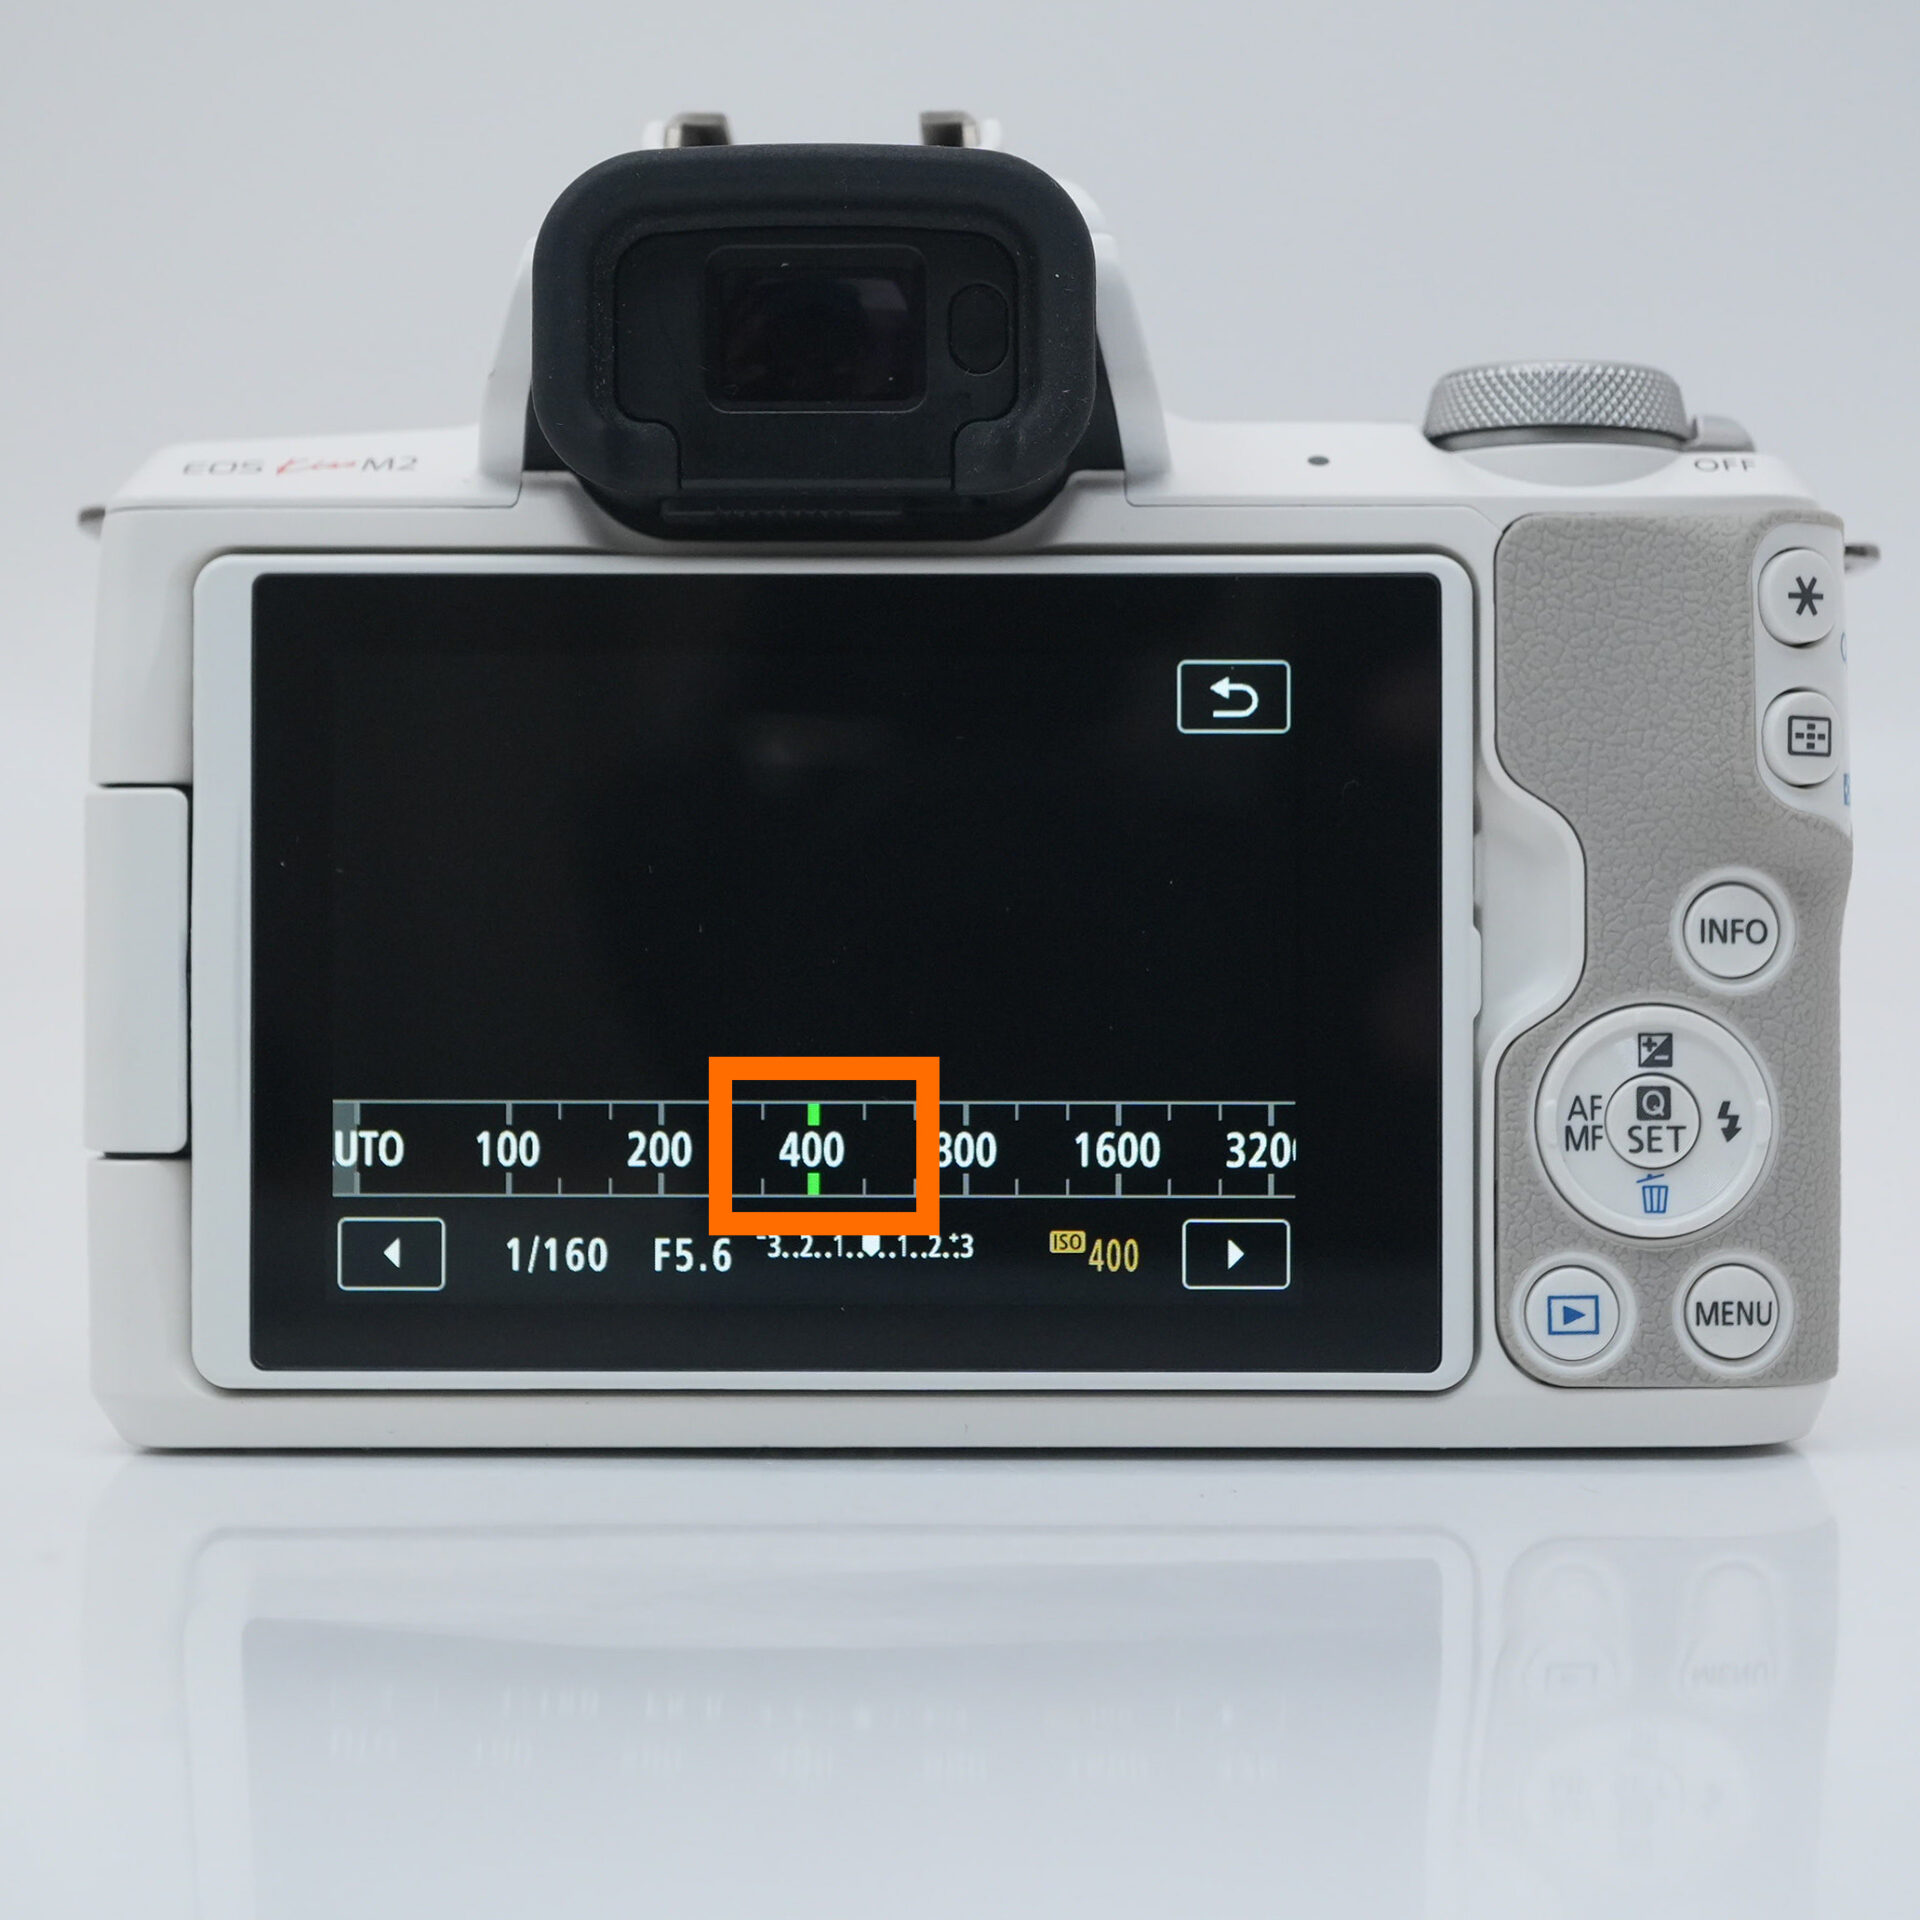 |
| Make it ISO400 |
How to use manual focus and tips for photographing stars
- What is manual focus?
- Manual focus (MF) is a focusing method in which you adjust the focus by hand. Its major advantage is that you can focus on the desired location even in dark places or with detailed composition where autofocus is difficult.
- Why MF is effective for photographing stars
- ・AF is prone to confusion in dark places → MF allows you to focus reliably
・You can accurately focus on small points of light such as stars and street lights
STEP.1
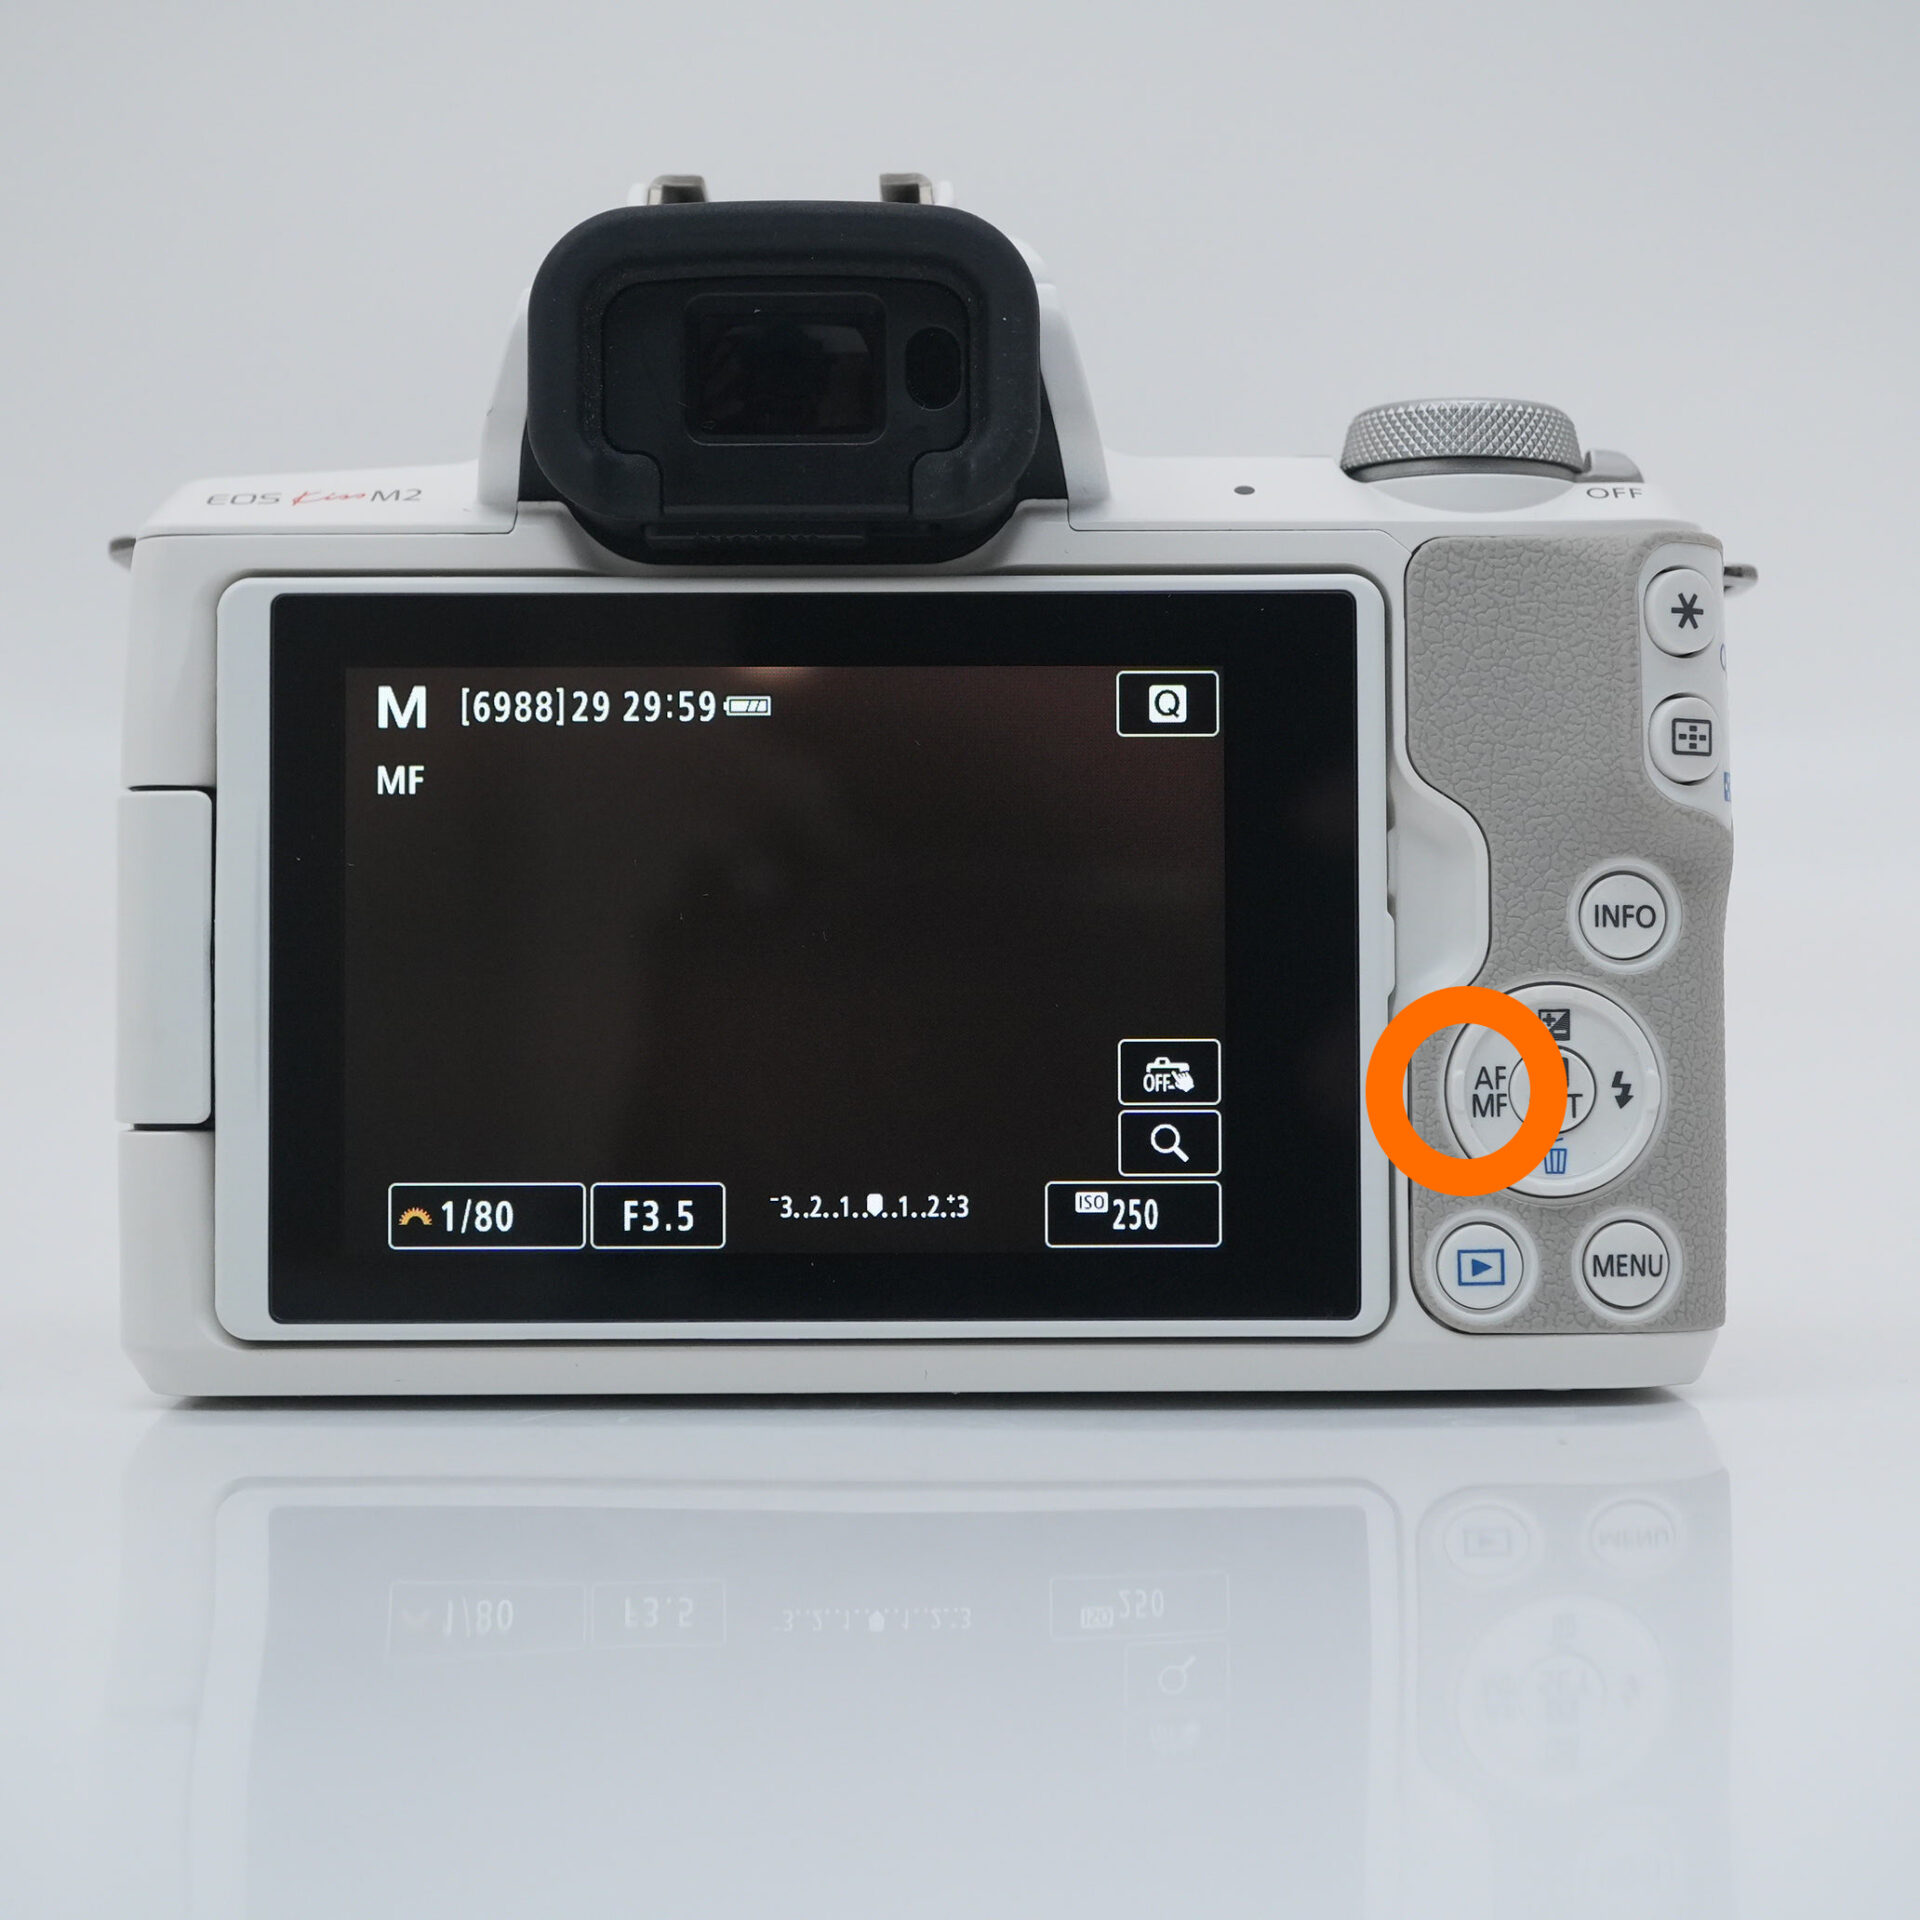 |
| Press left on the directional pad |
STEP.2
 |
| Turn the dial on the front to adjust the focus |
How to check focus with magnified view

When you try to focus manually, the screen is small and it can be hard to tell if the focus is correct.
In such cases, "Magnified Display" is useful.
You can focus more accurately on small points of light or distant subjects.
STEP.1
 |
| Select the playback button → Press the AF frame button → Use the cross keys to move to the desired location |
Connect to your smartphone and control the camera remotely
When photographing stars, even the slightest shake when pressing the shutter can cause the image to blur. In such cases, remote control using a smartphone is convenient.
Most modern cameras are equipped with Wi-Fi and Bluetooth functions, making it easy to connect to a smartphone.
If you don't have a smartphone, use the self-timer to take the photo.

If you can't use a smartphone, use your camera's self-timer function.
This will prevent blurring by avoiding the vibration that occurs after pressing the shutter button.
We recommend setting the timer to 2 to 10 seconds.
STEP.1
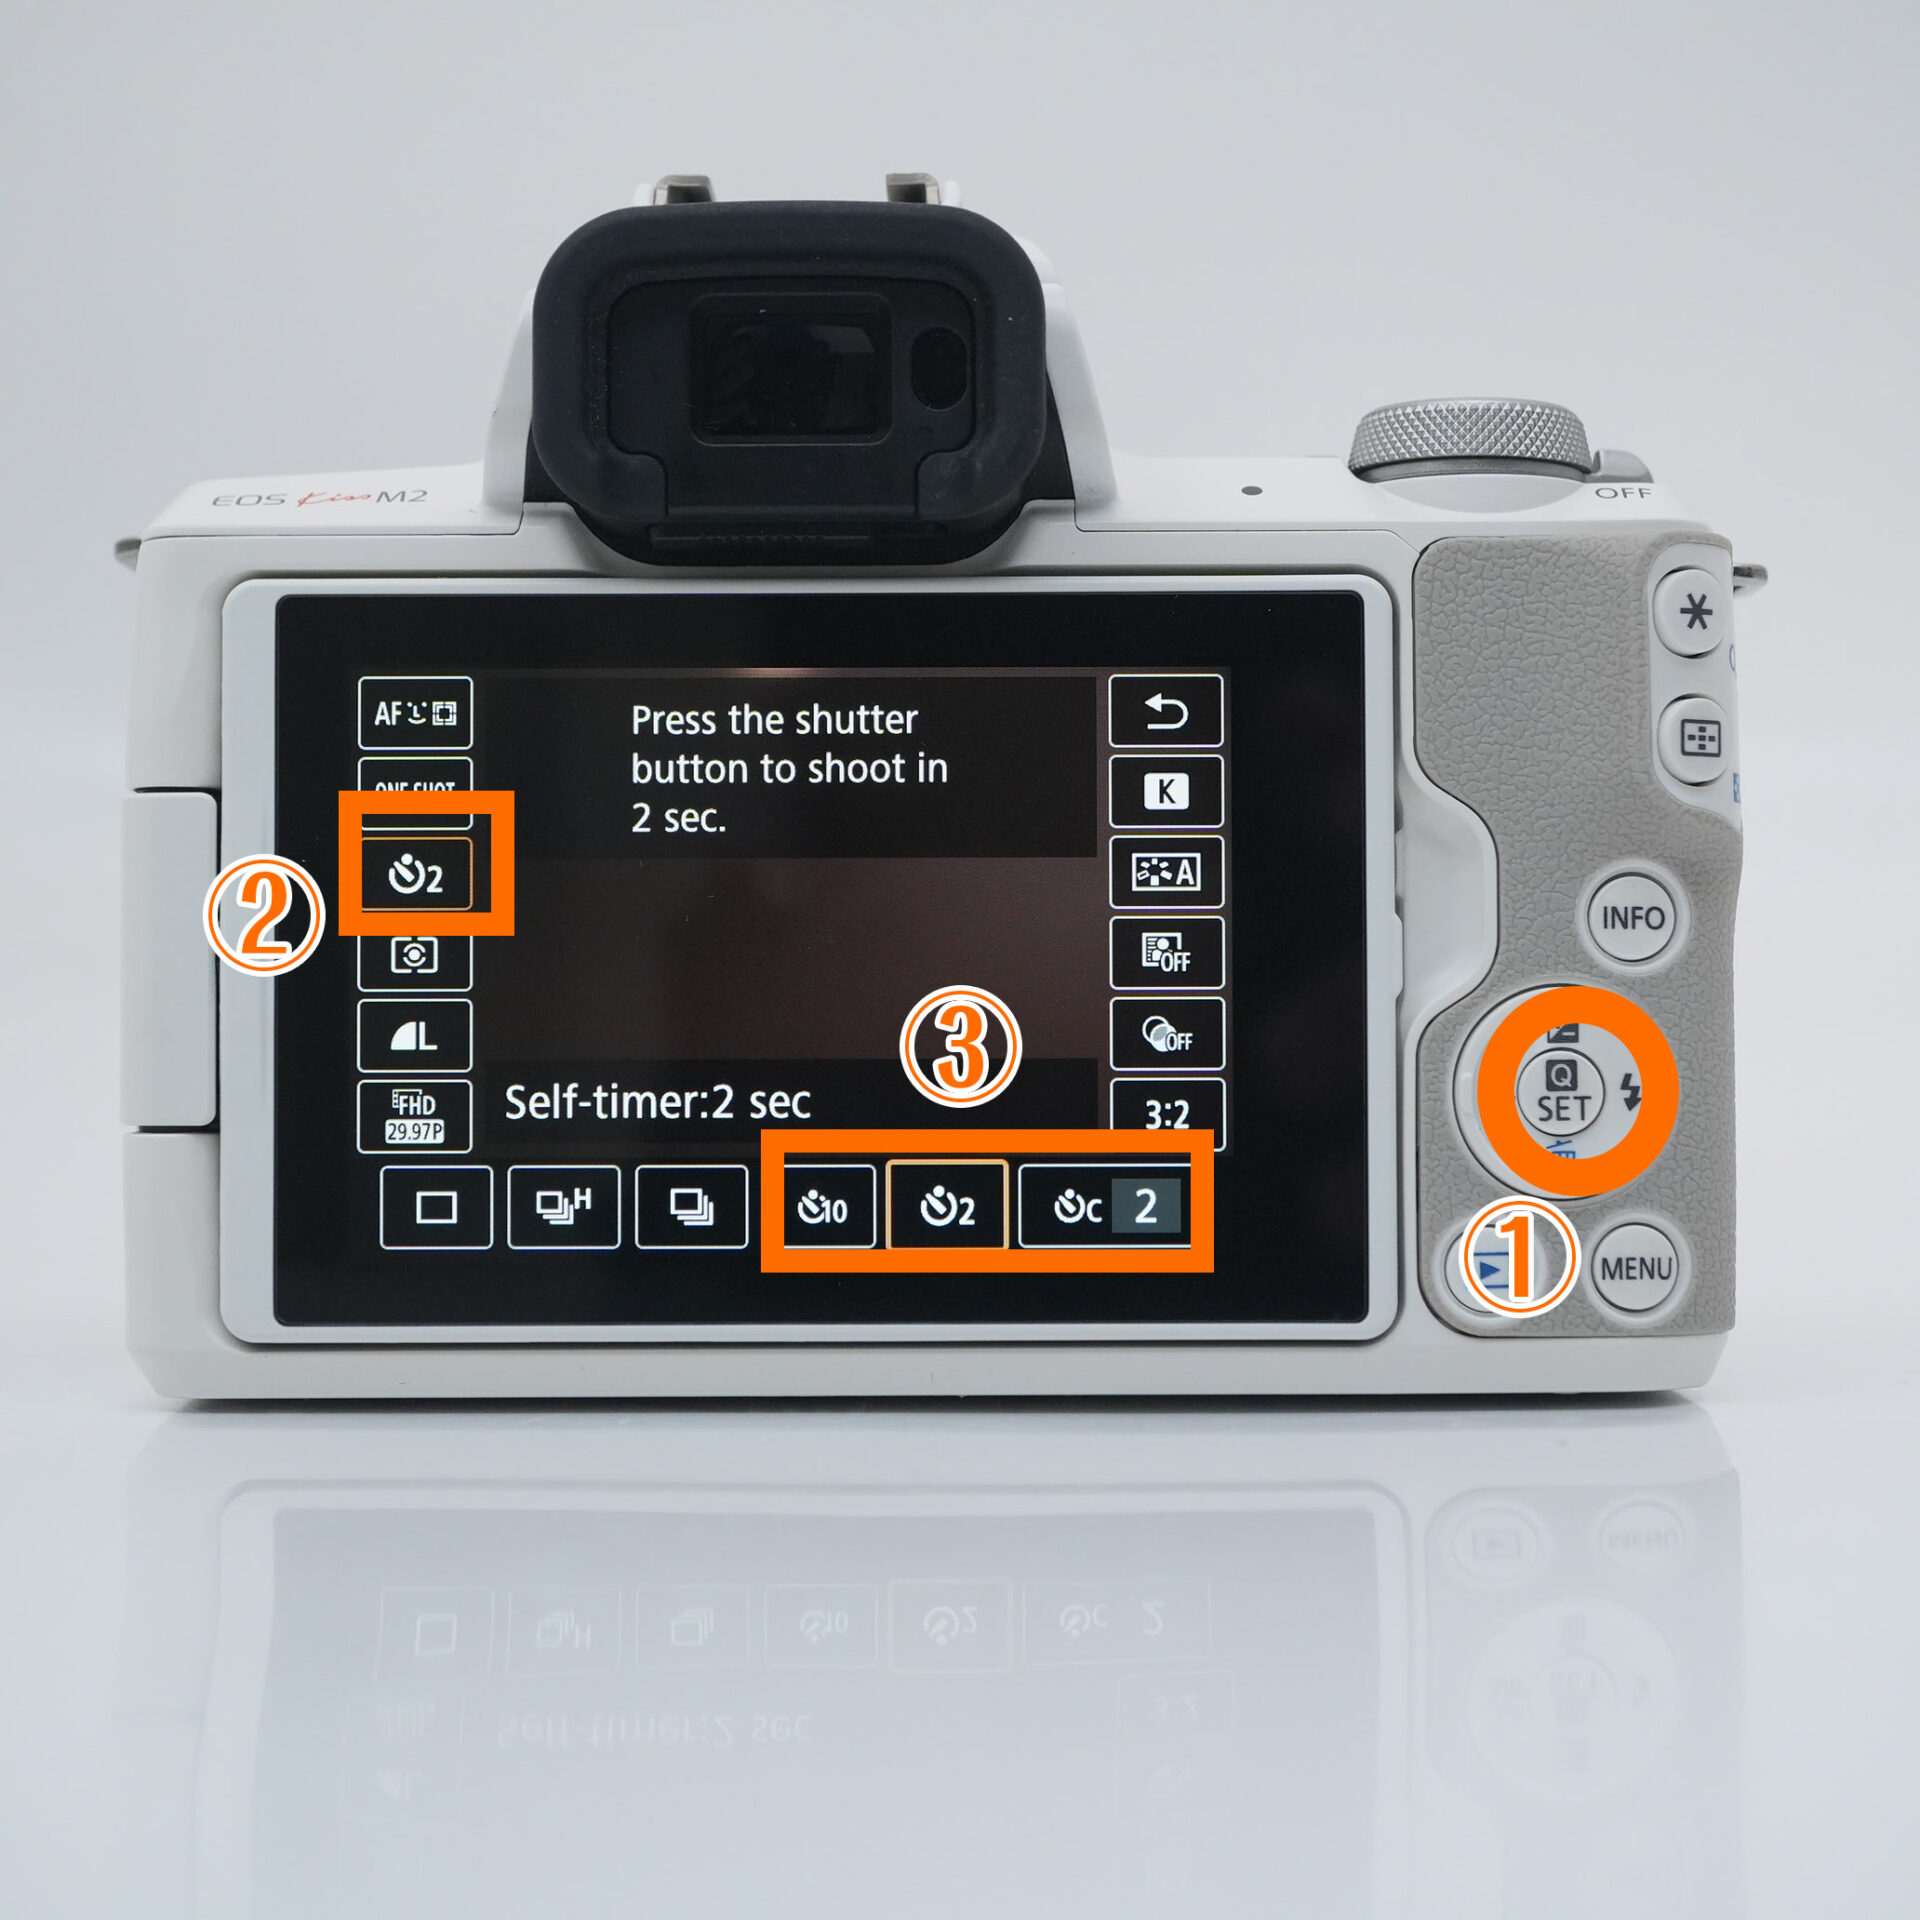 |
| Q→Drive mode→Select self-timer |
summary

To take beautiful photos of the starry sky, it's important to set up your camera and prepare the right shooting environment.
If you keep in mind the points introduced in this article, even beginners can enjoy starry sky photography. Be sure to give it a try under the night sky!