Have you ever tried to change a setting on your camera and found yourself digging through endless menus?
And by the time you finally realize it…you've probably already missed the perfect shot.
To help you avoid such frustration, here are some handy settings for commonly used items.
Grid
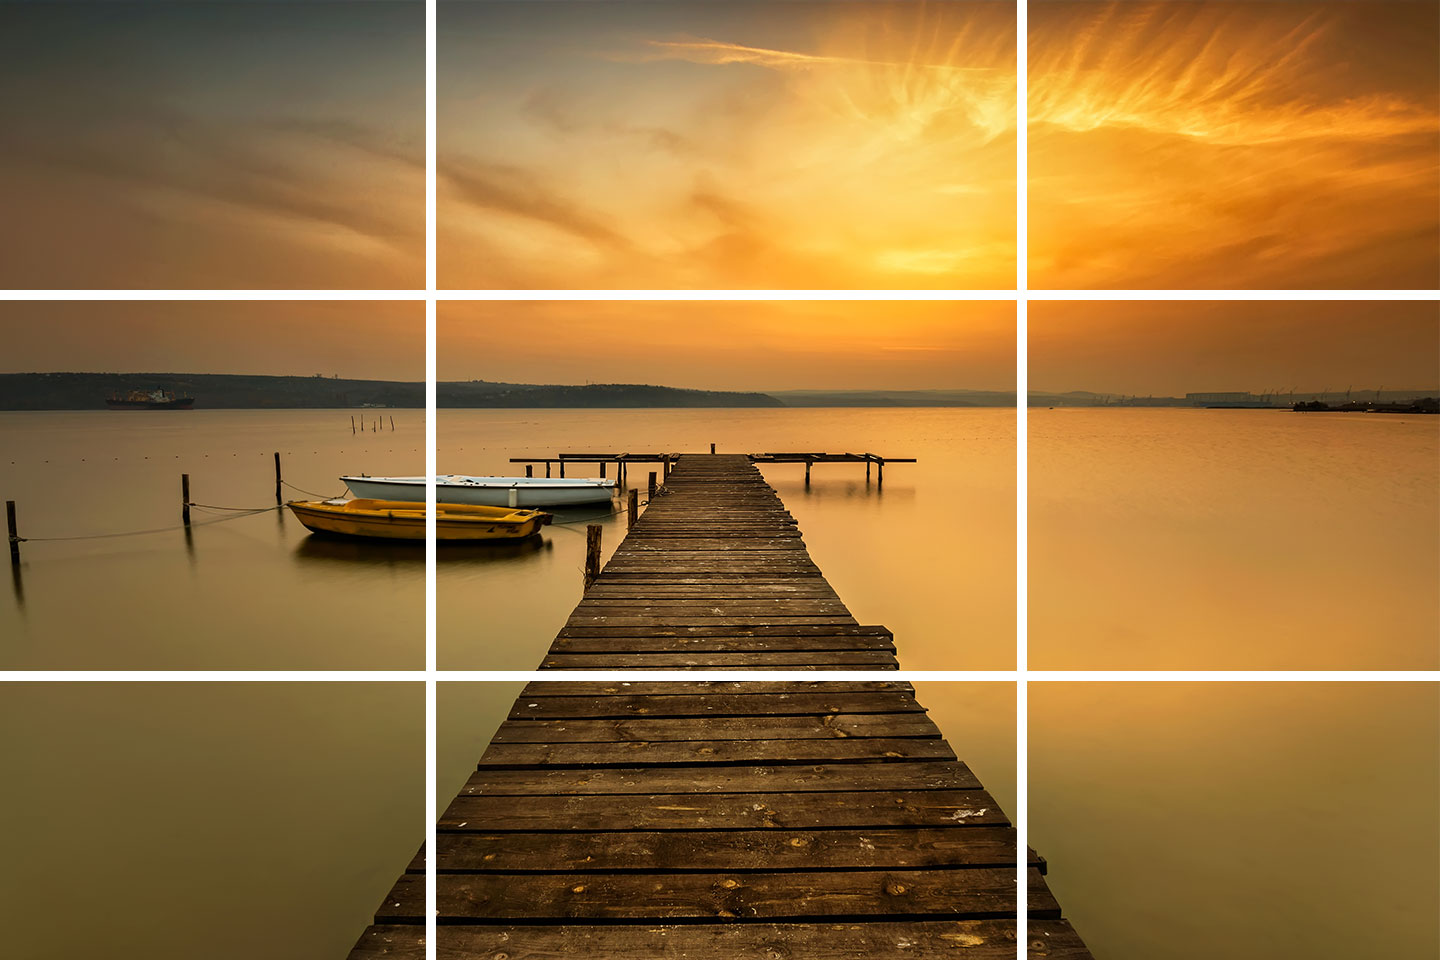
Grid lines are a handy feature that display vertical and horizontal lines on your screen.
They help you keep your composition balanced and your horizons straight—especially useful when framing your shots.
- Recommended scenes
- ・Shooting while keeping the camera level.
・Portrait photography.
・Snap shots, etc.
STEP.1
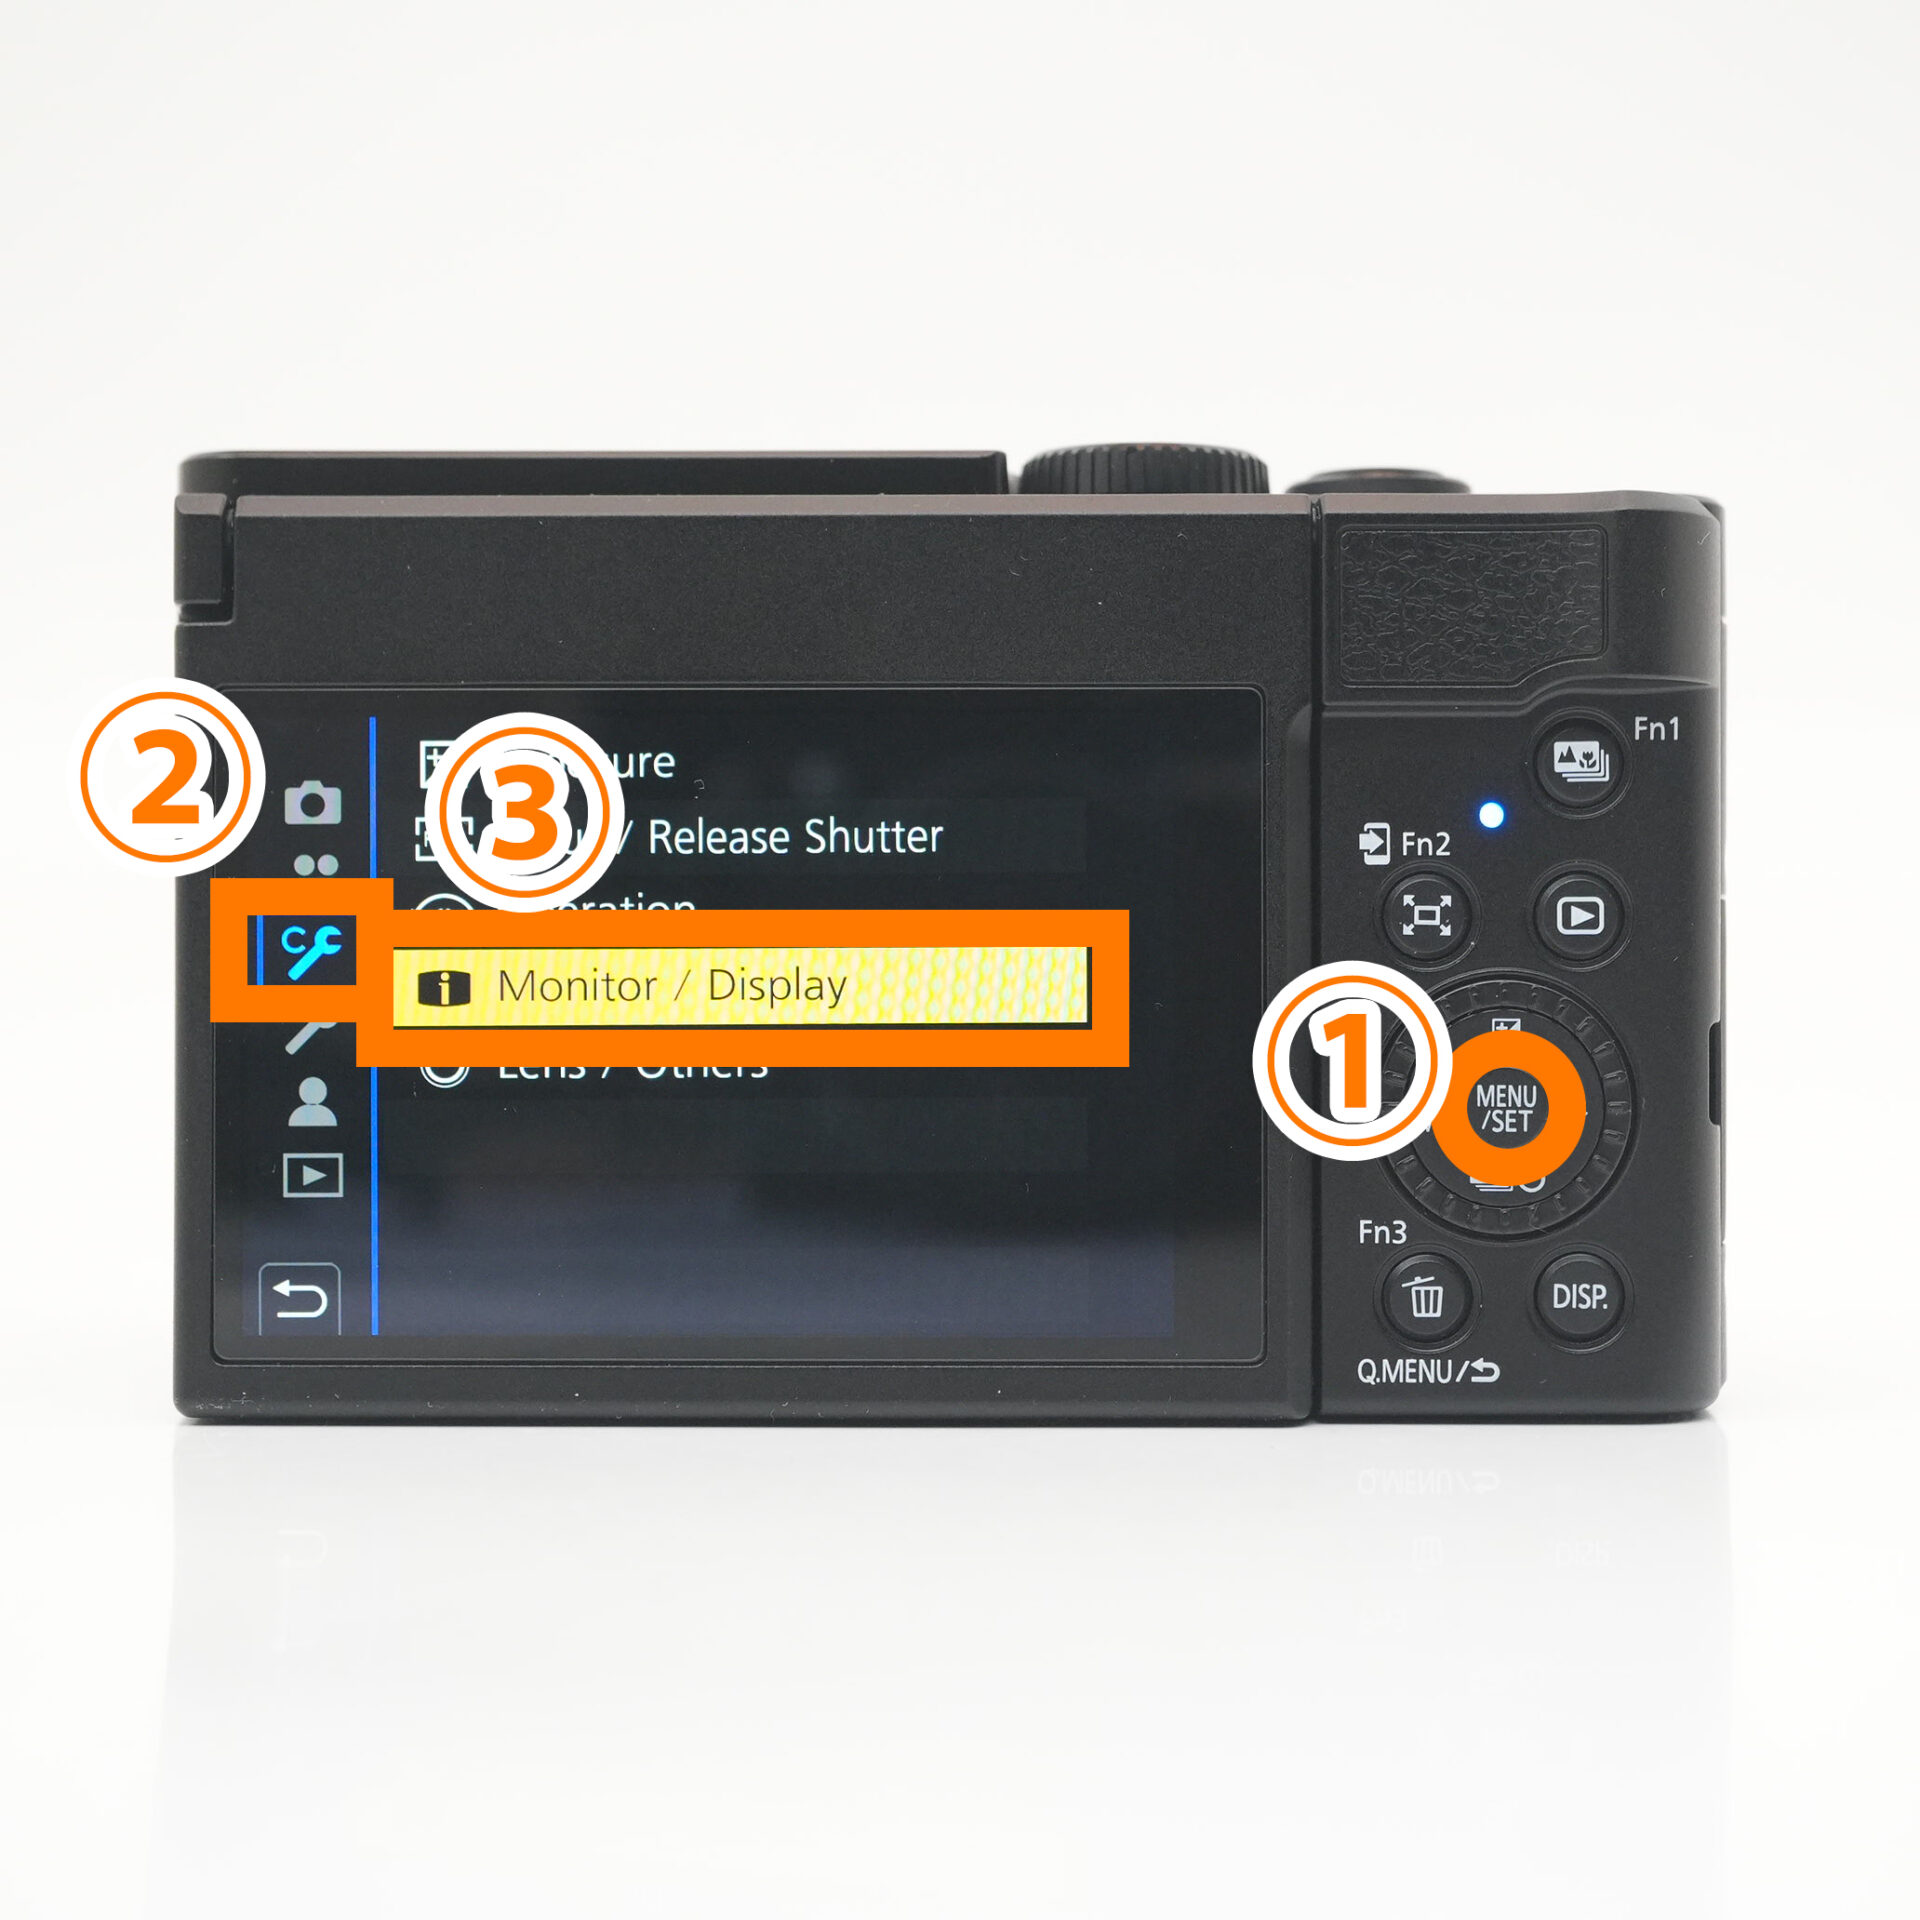 |
| MENU→spanner icon→Monitor/Display |
STEP.2
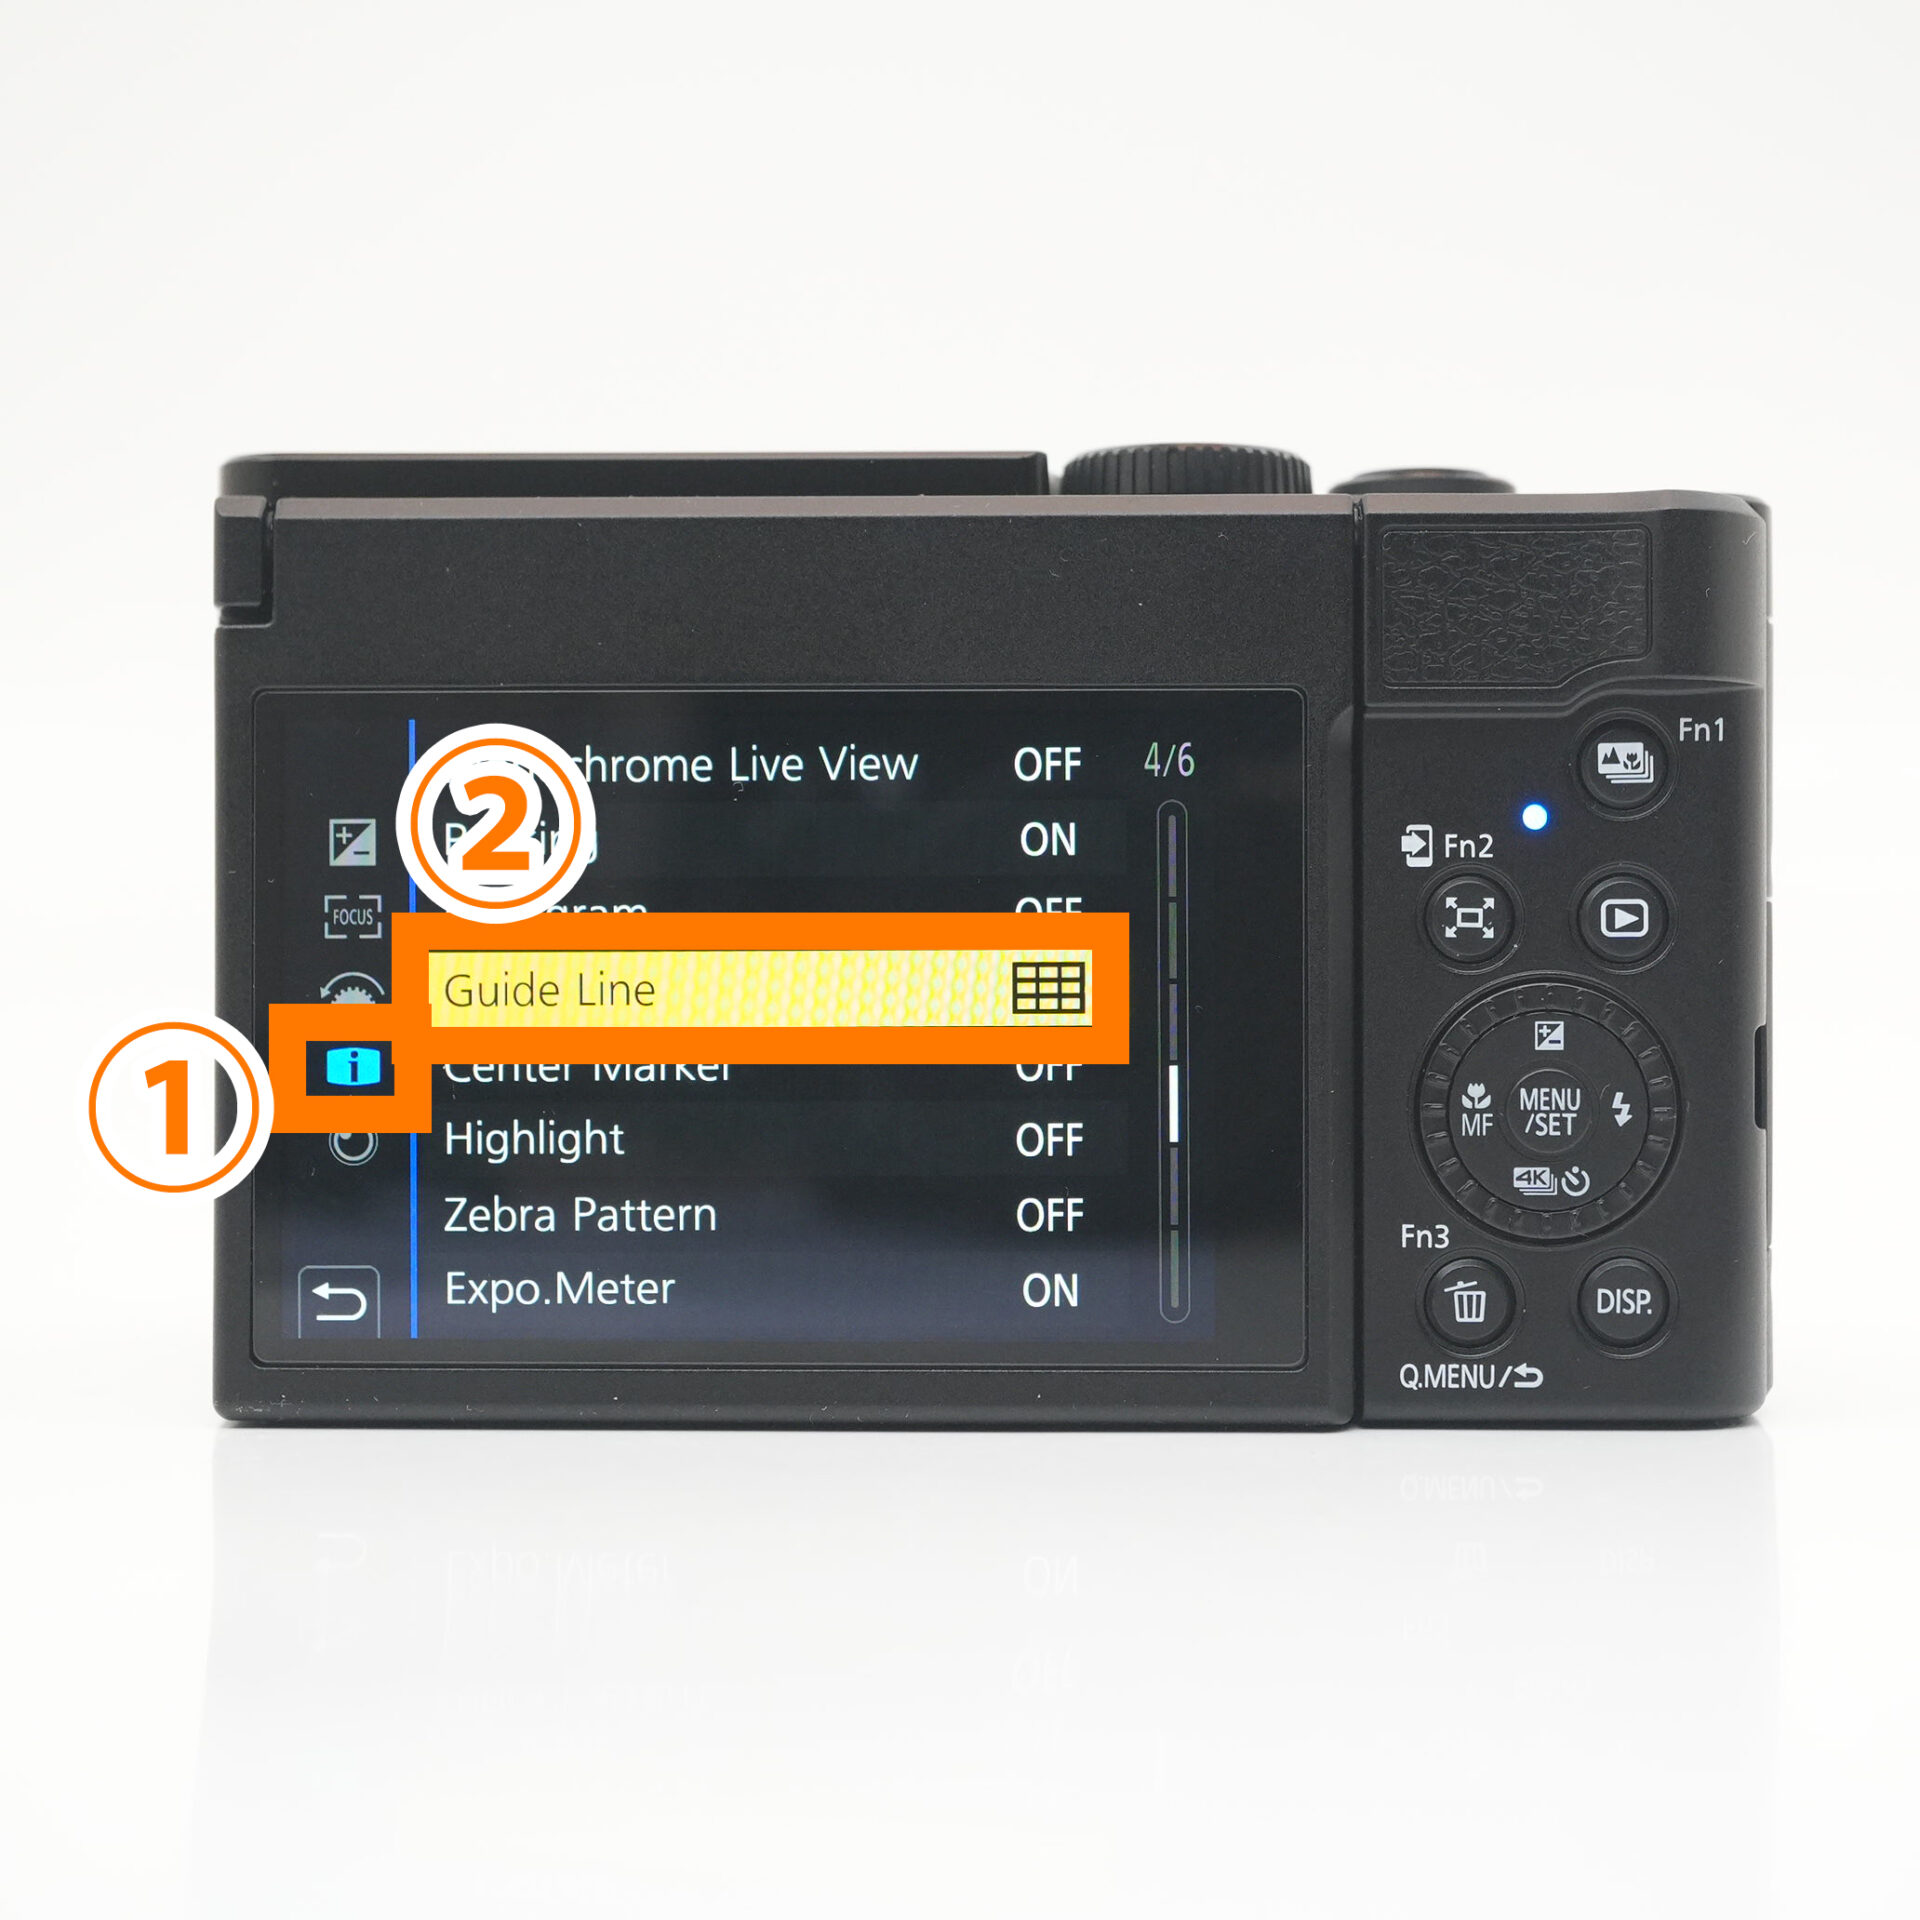 |
| i→Guide Line |
STEP.3
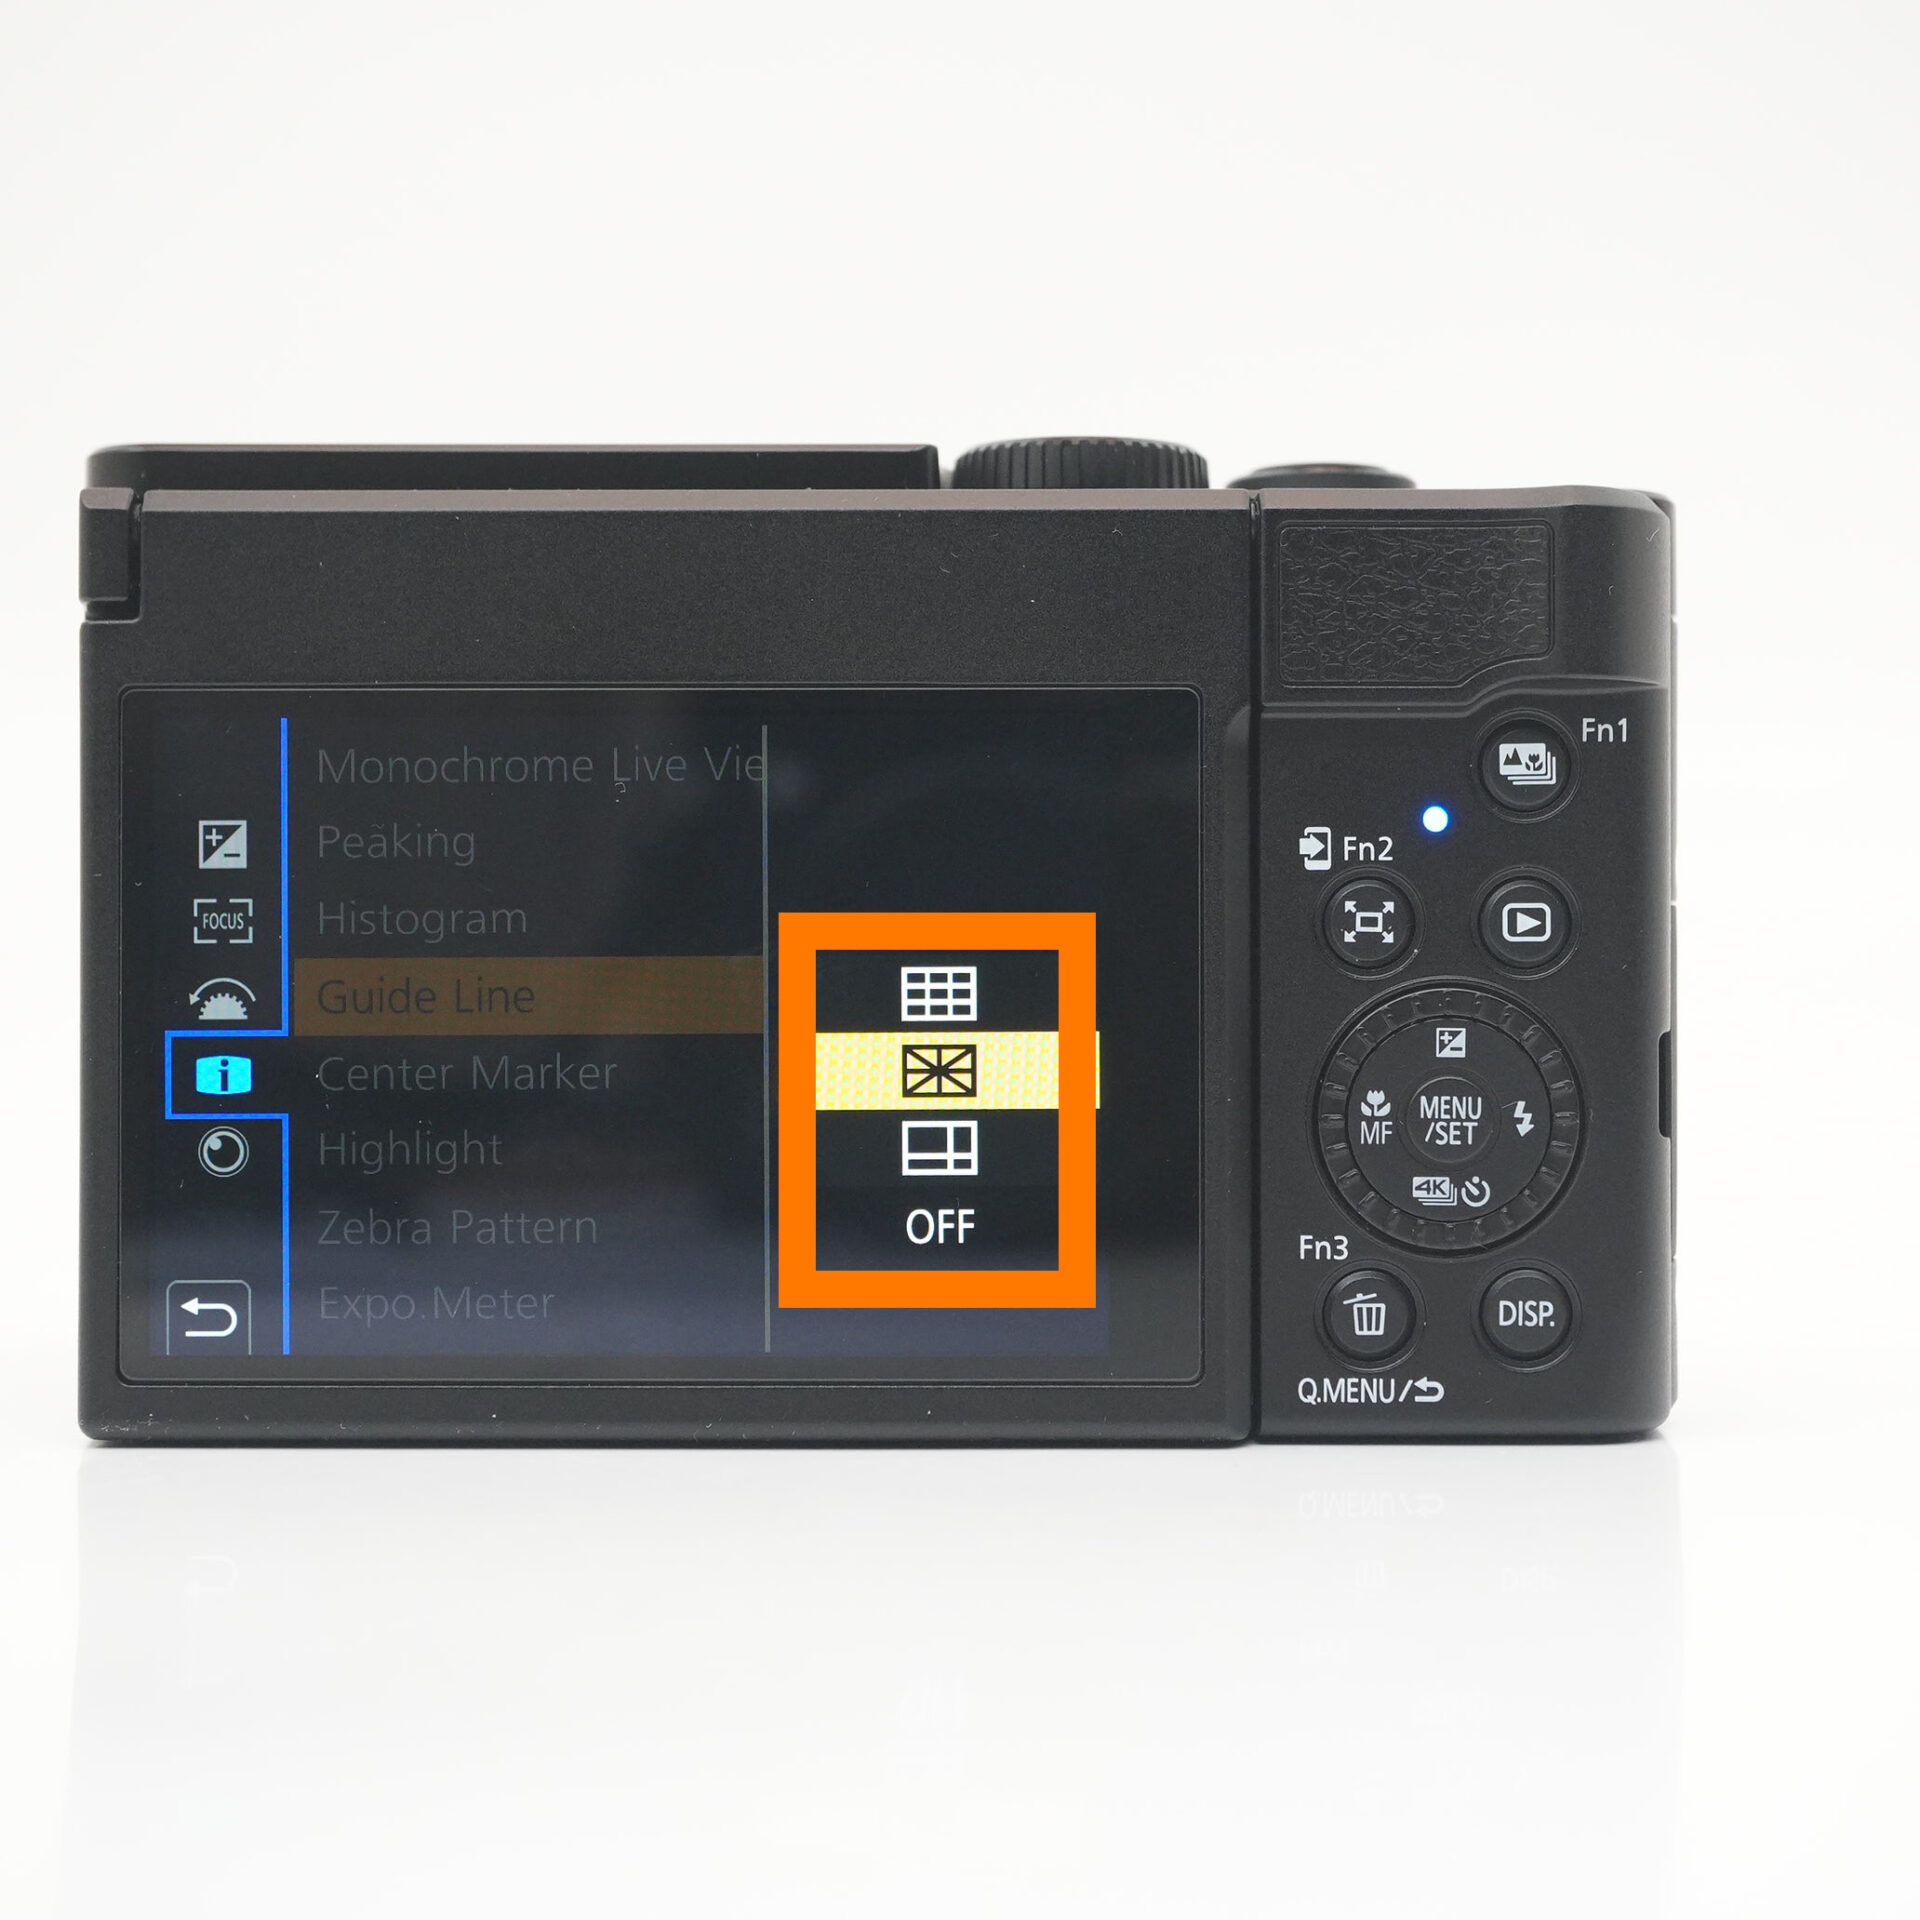 |
| Select the grid you like |
Enlarged display

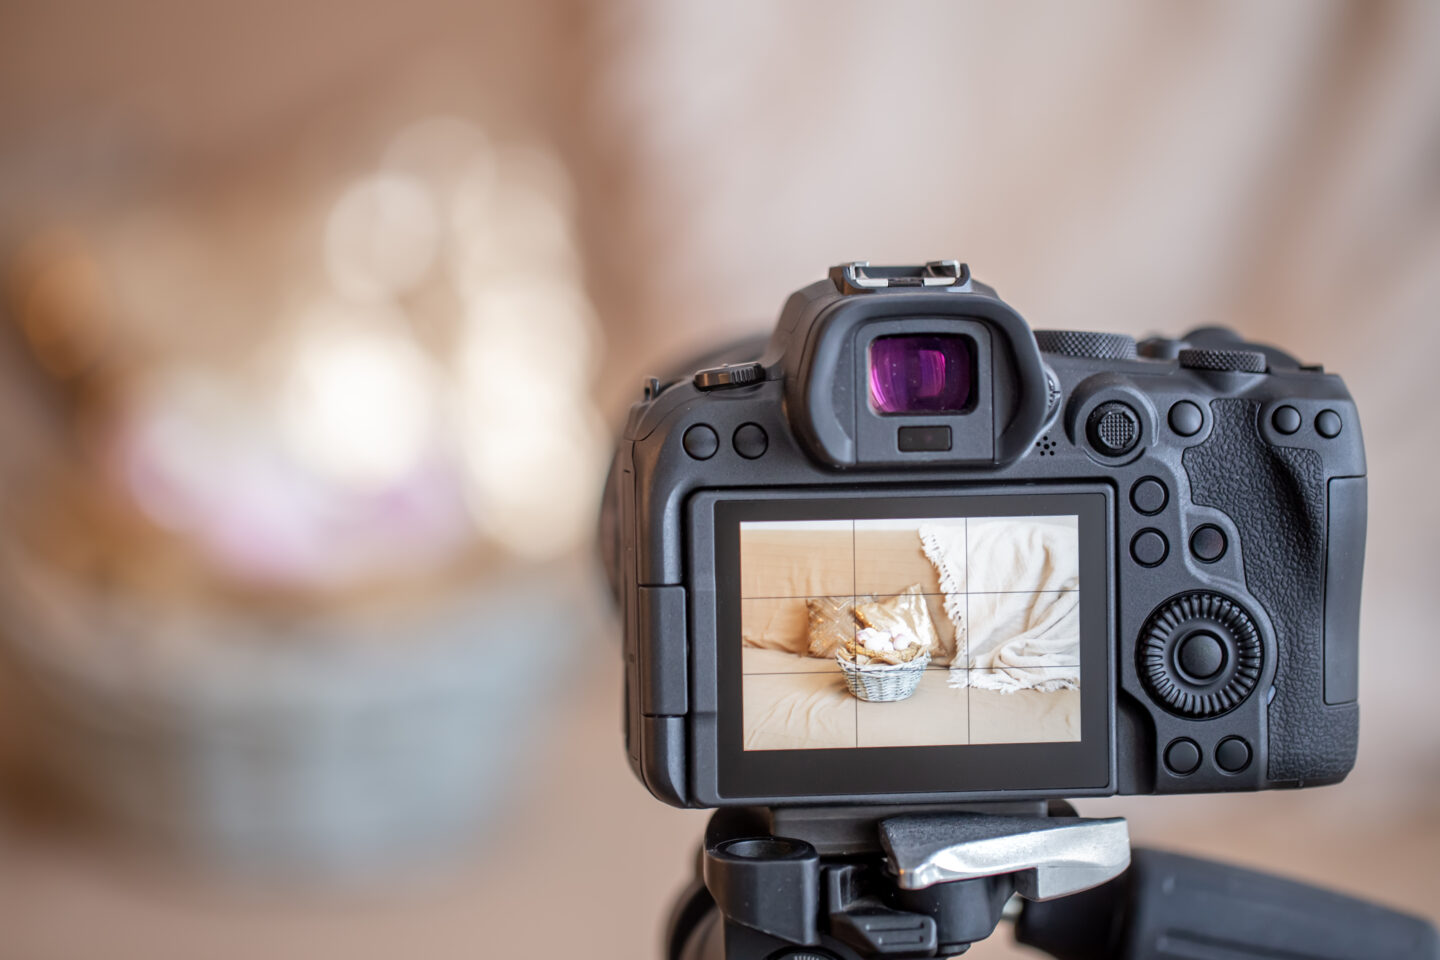
The Magnify feature allows you to zoom in on a specific area of the frame to see exactly where your most important focal points are.
- Recommended scenes
- ・I want to zoom in and check the focus.
・I want to check their expressions when taking commemorative photos.
STEP.1
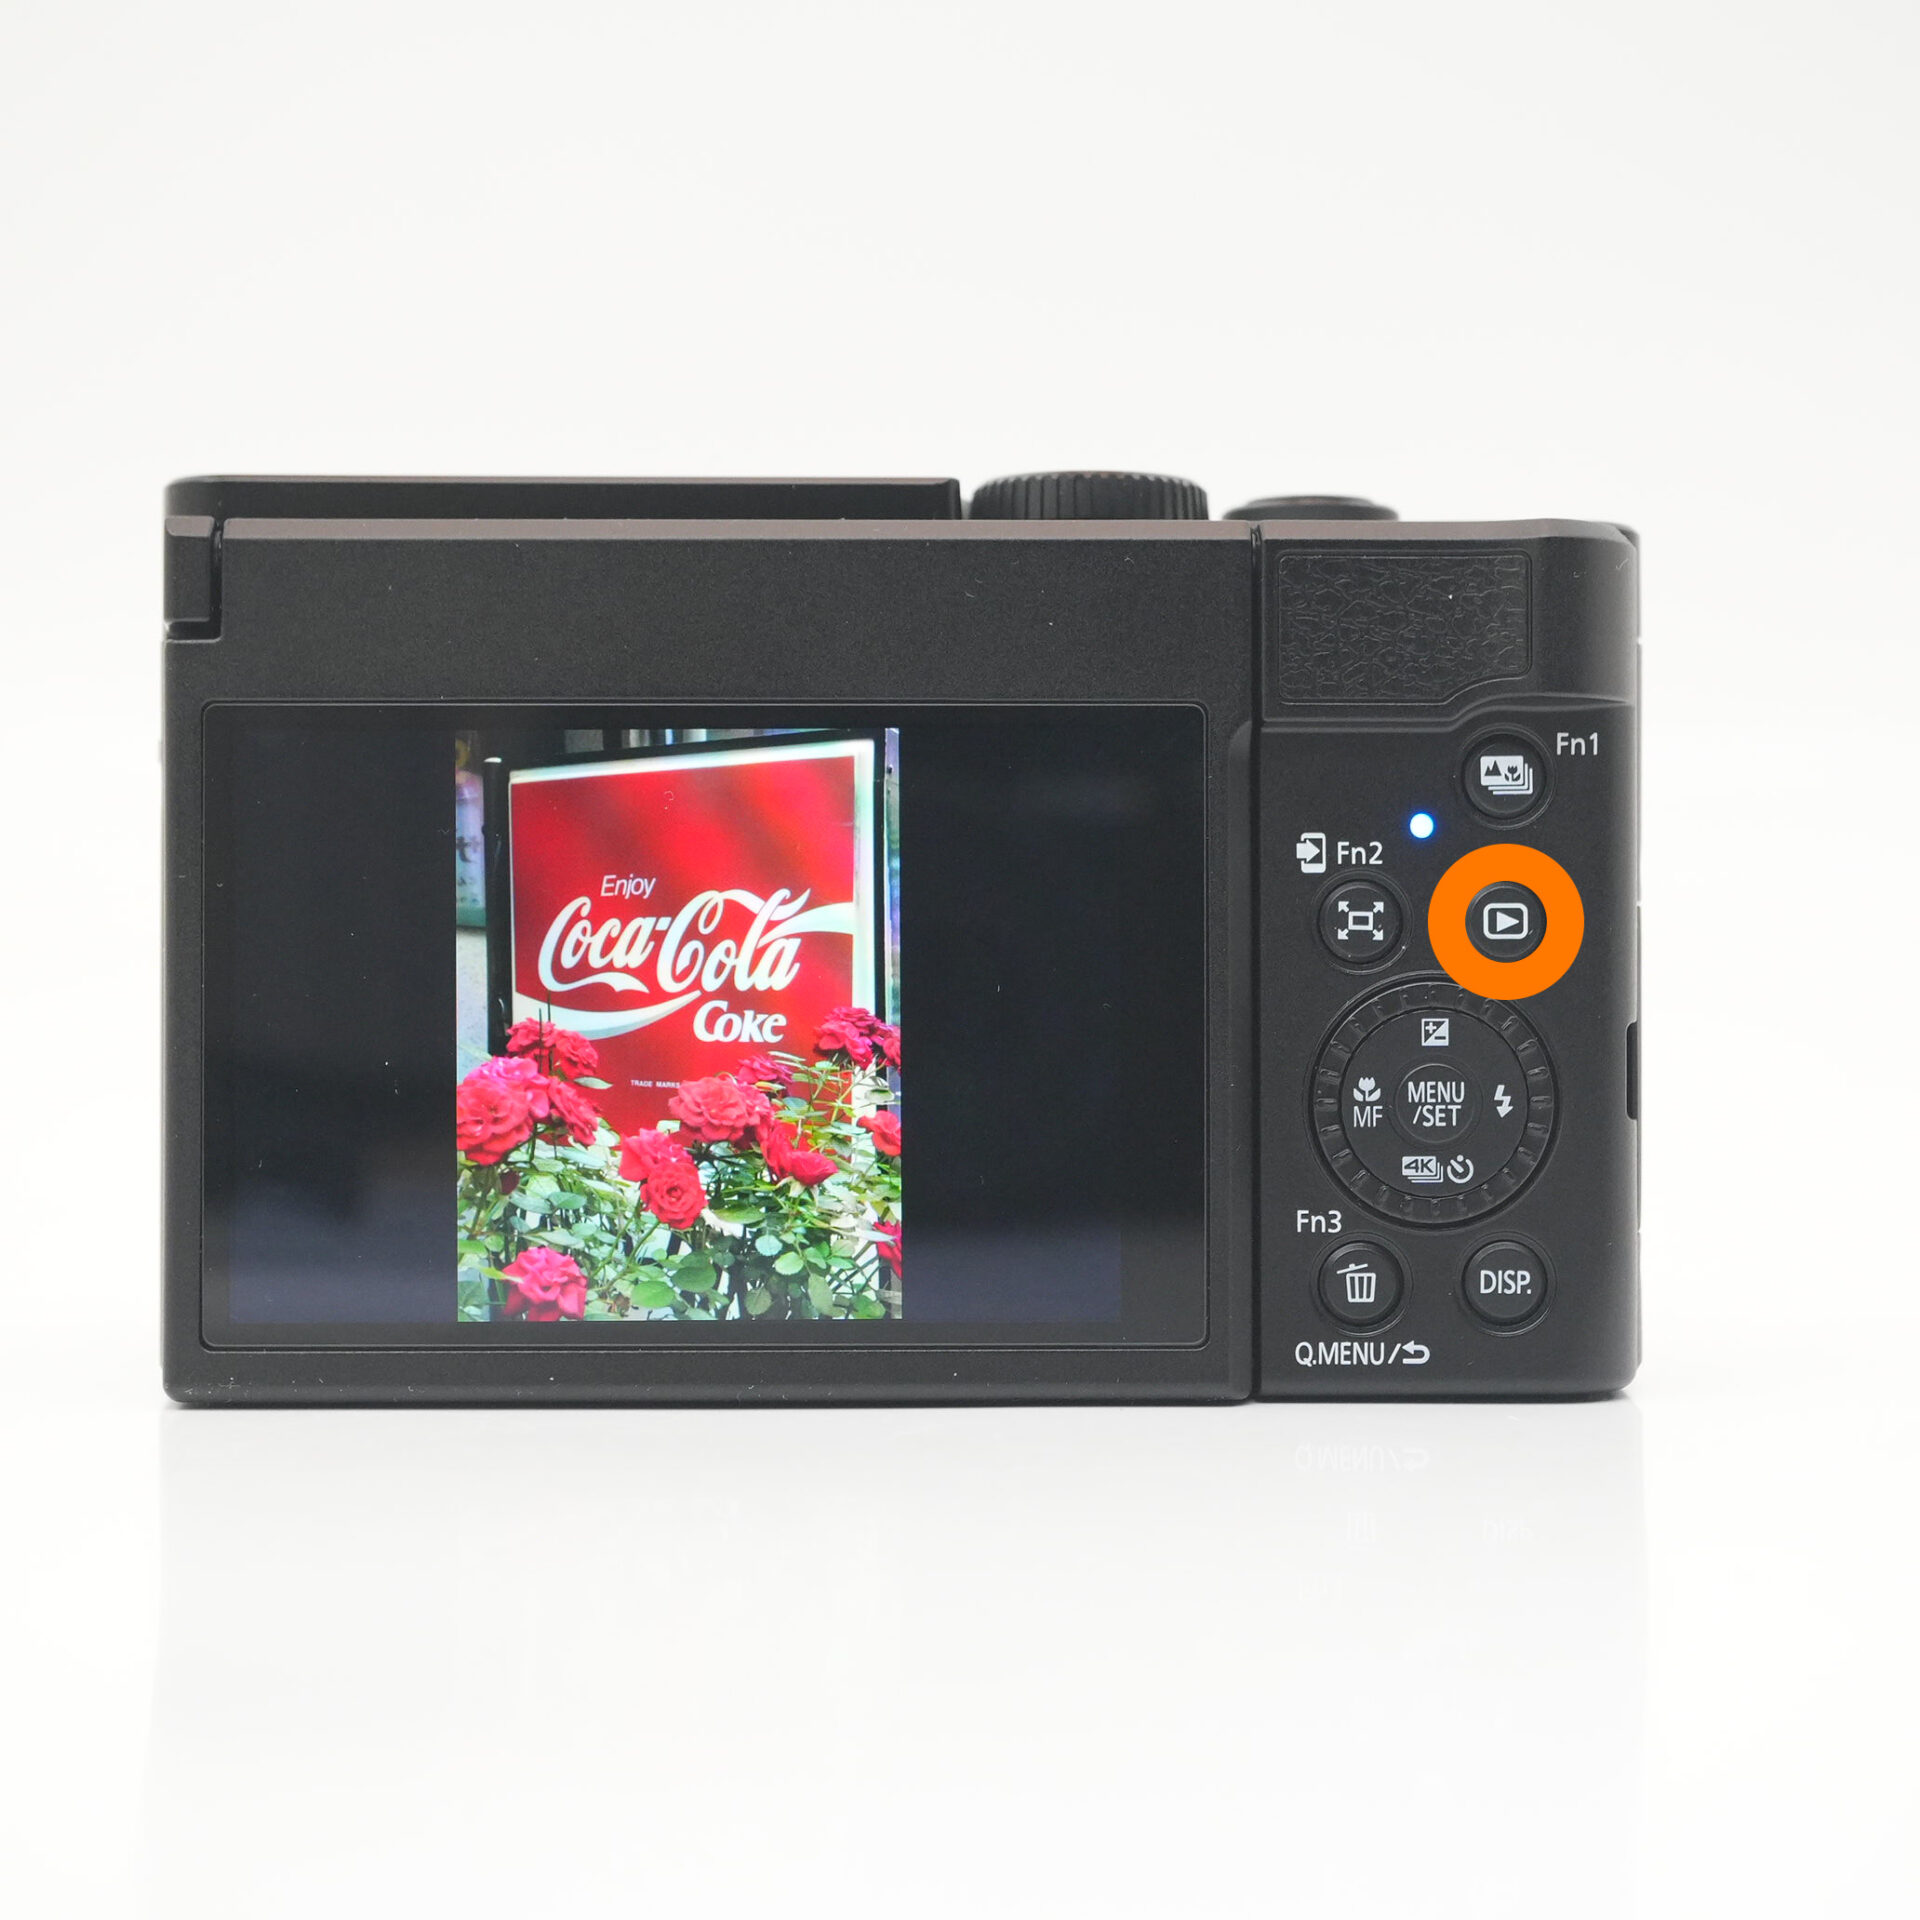 |
| press play button |
STEP.2
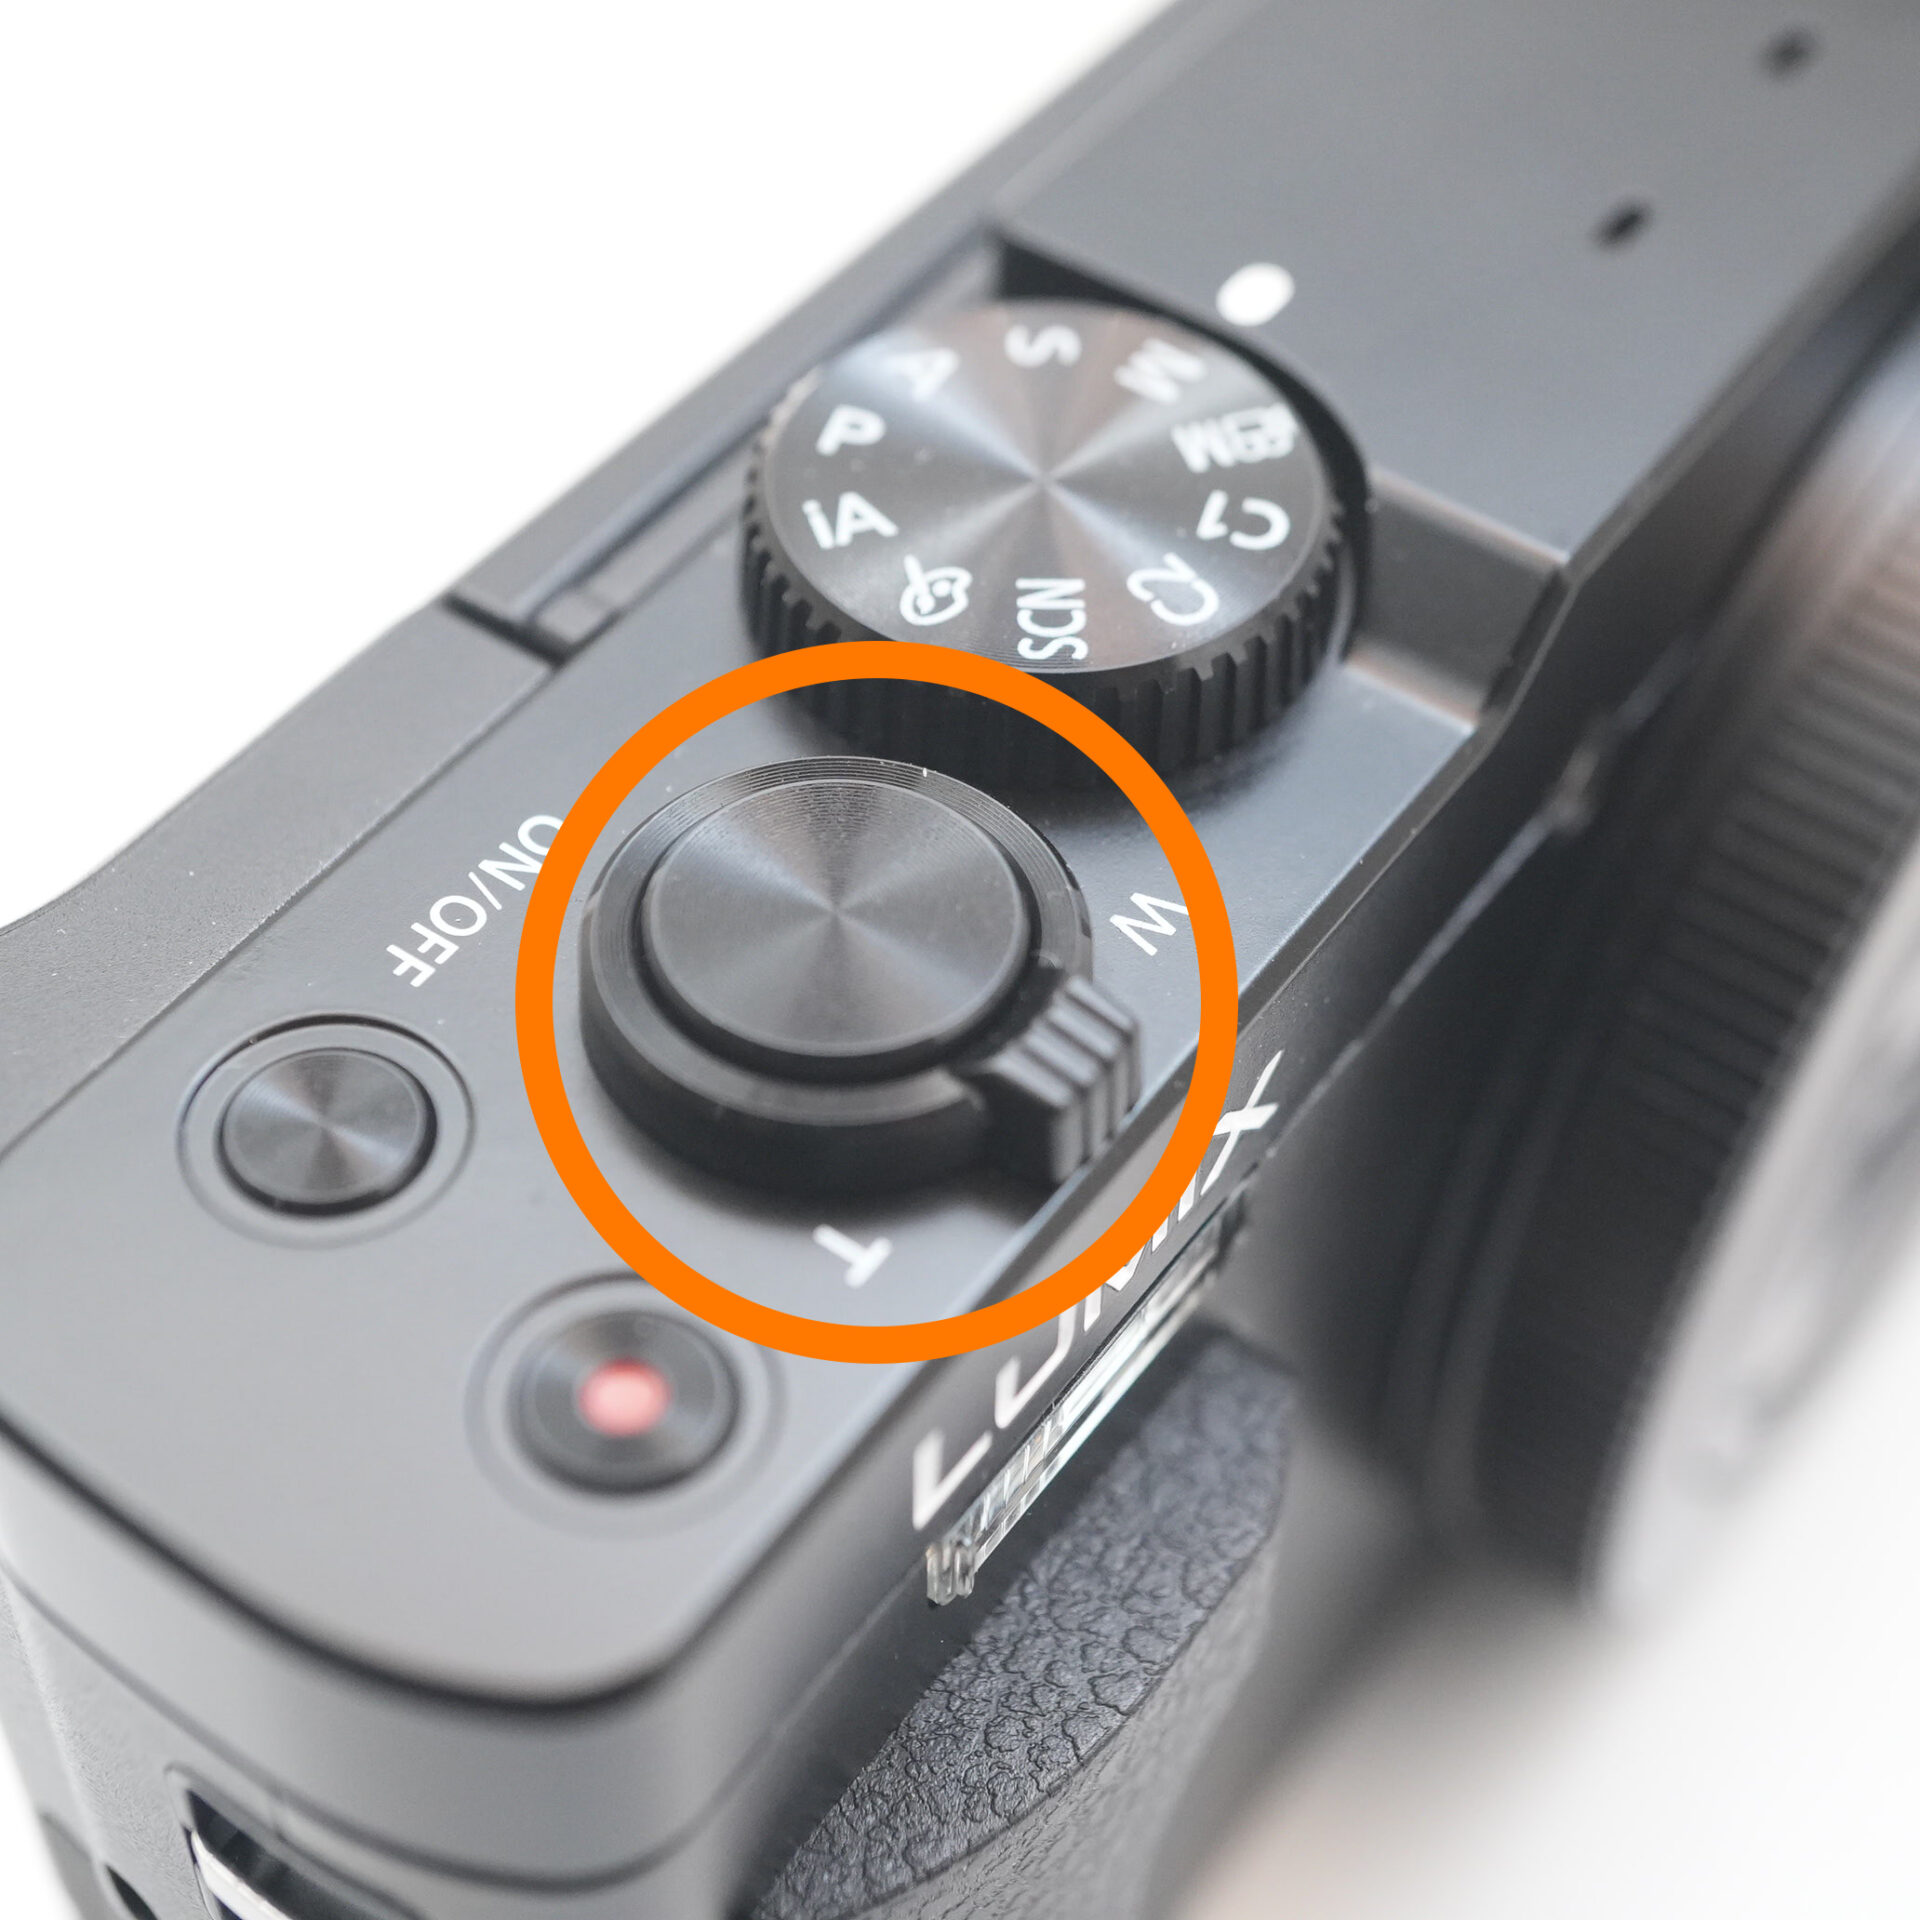 |
| Zoom in with the lever |
STEP.3
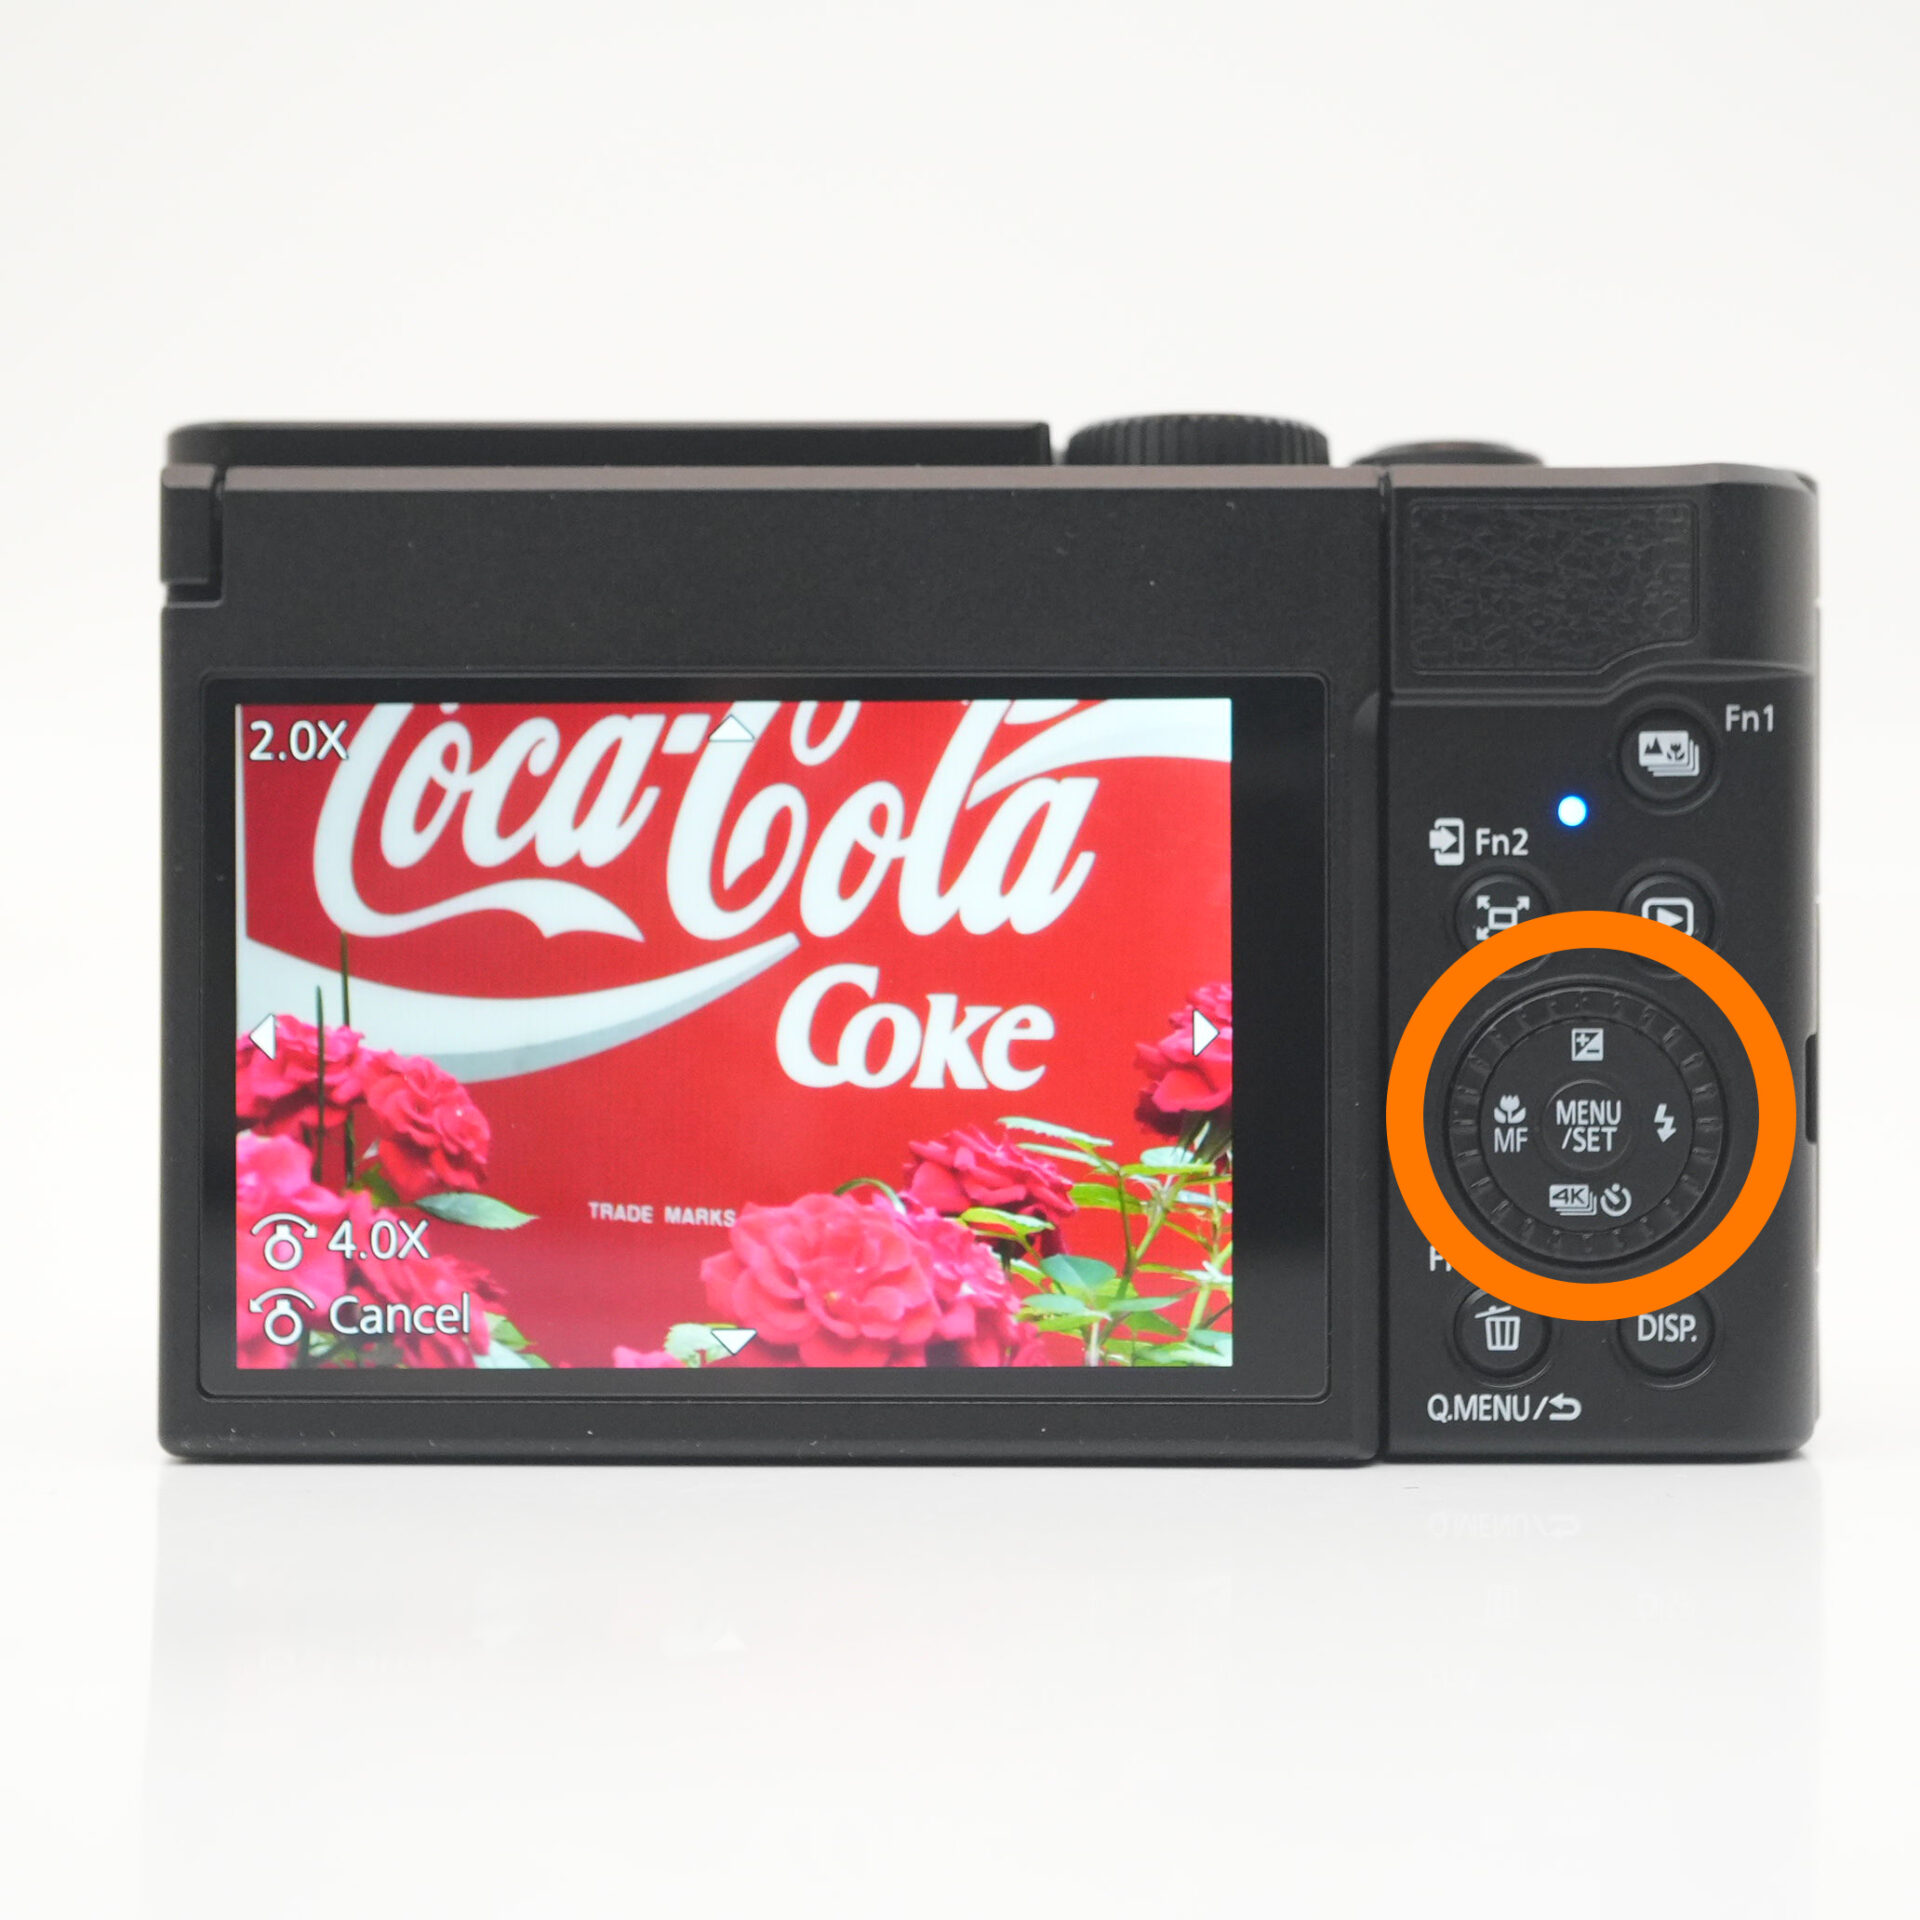 |
| Turn the dial to move the enlarged area |
silent shooting

Silent shooting: Shoot without making a shutter sound
Sometimes you want to shoot without drawing attention—
that’s where silent shooting comes in handy.
Since the camera shoots without making a shutter sound, you can take pictures without disturbing those around you.
- Recommended scenes
- ・Shooting at the venue
・Photographing a sleeping baby.
STEP.1
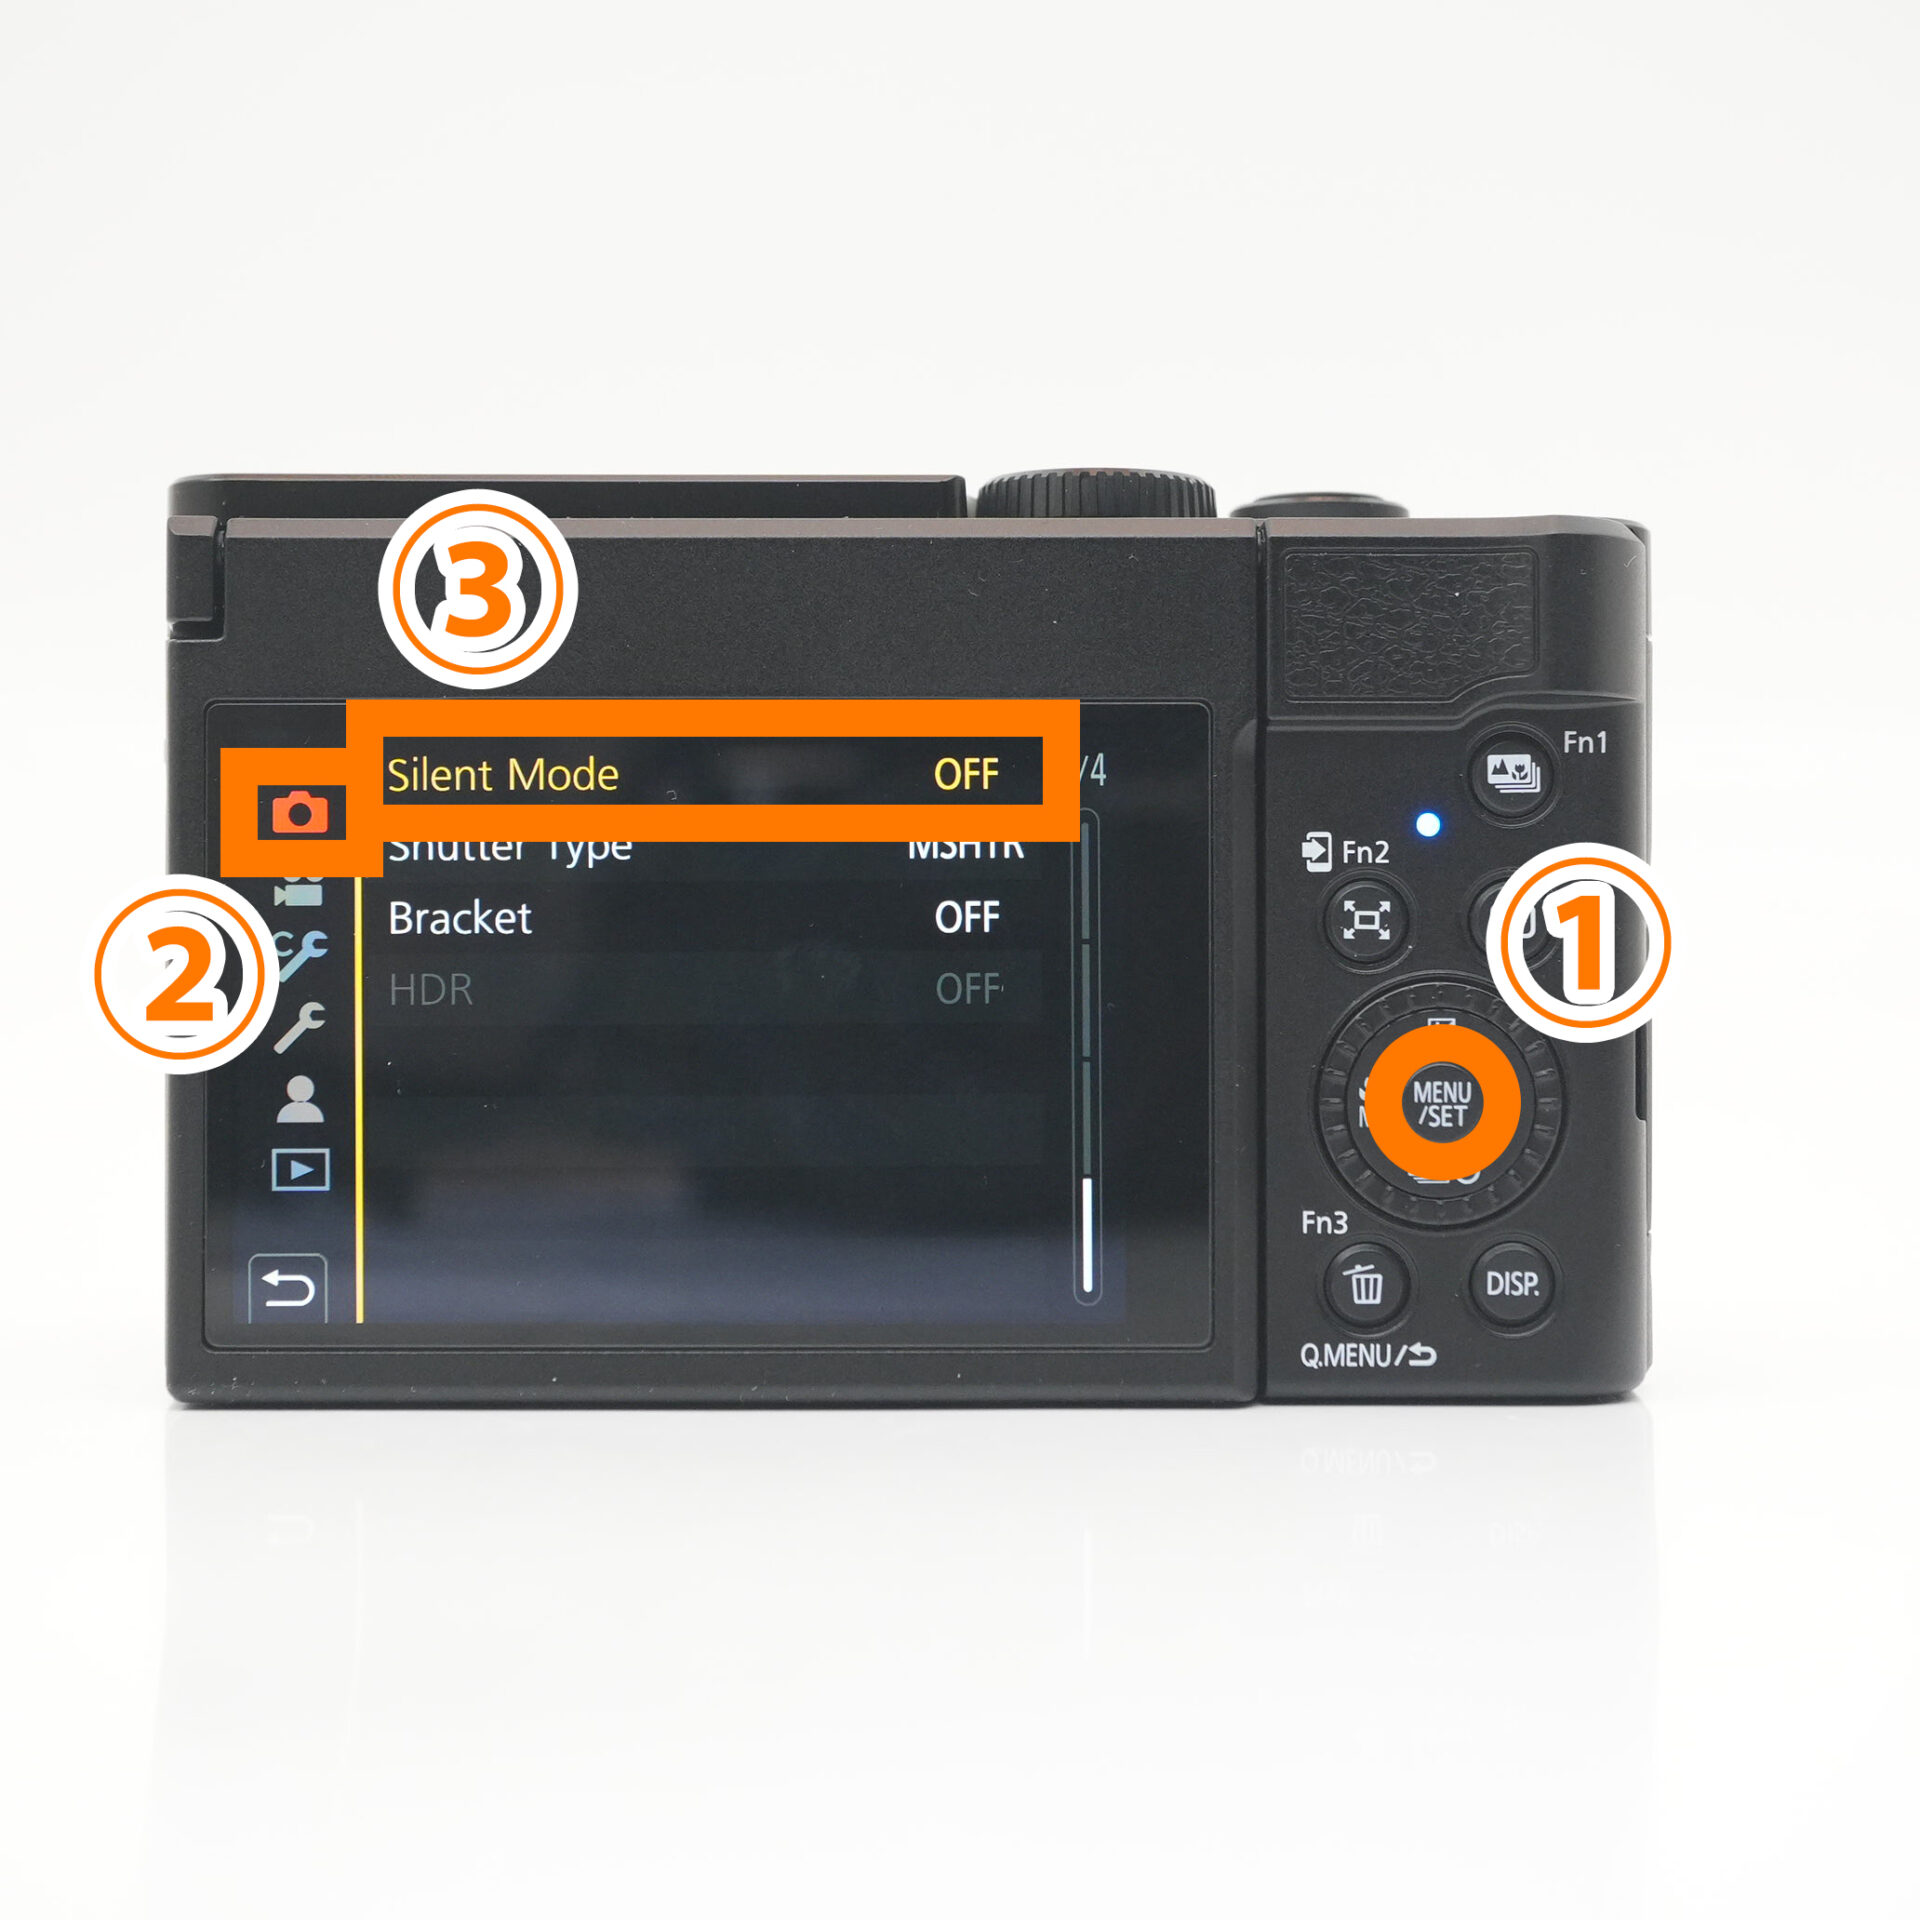 |
| MENU→camera icon→Silent Mode |
STEP.2
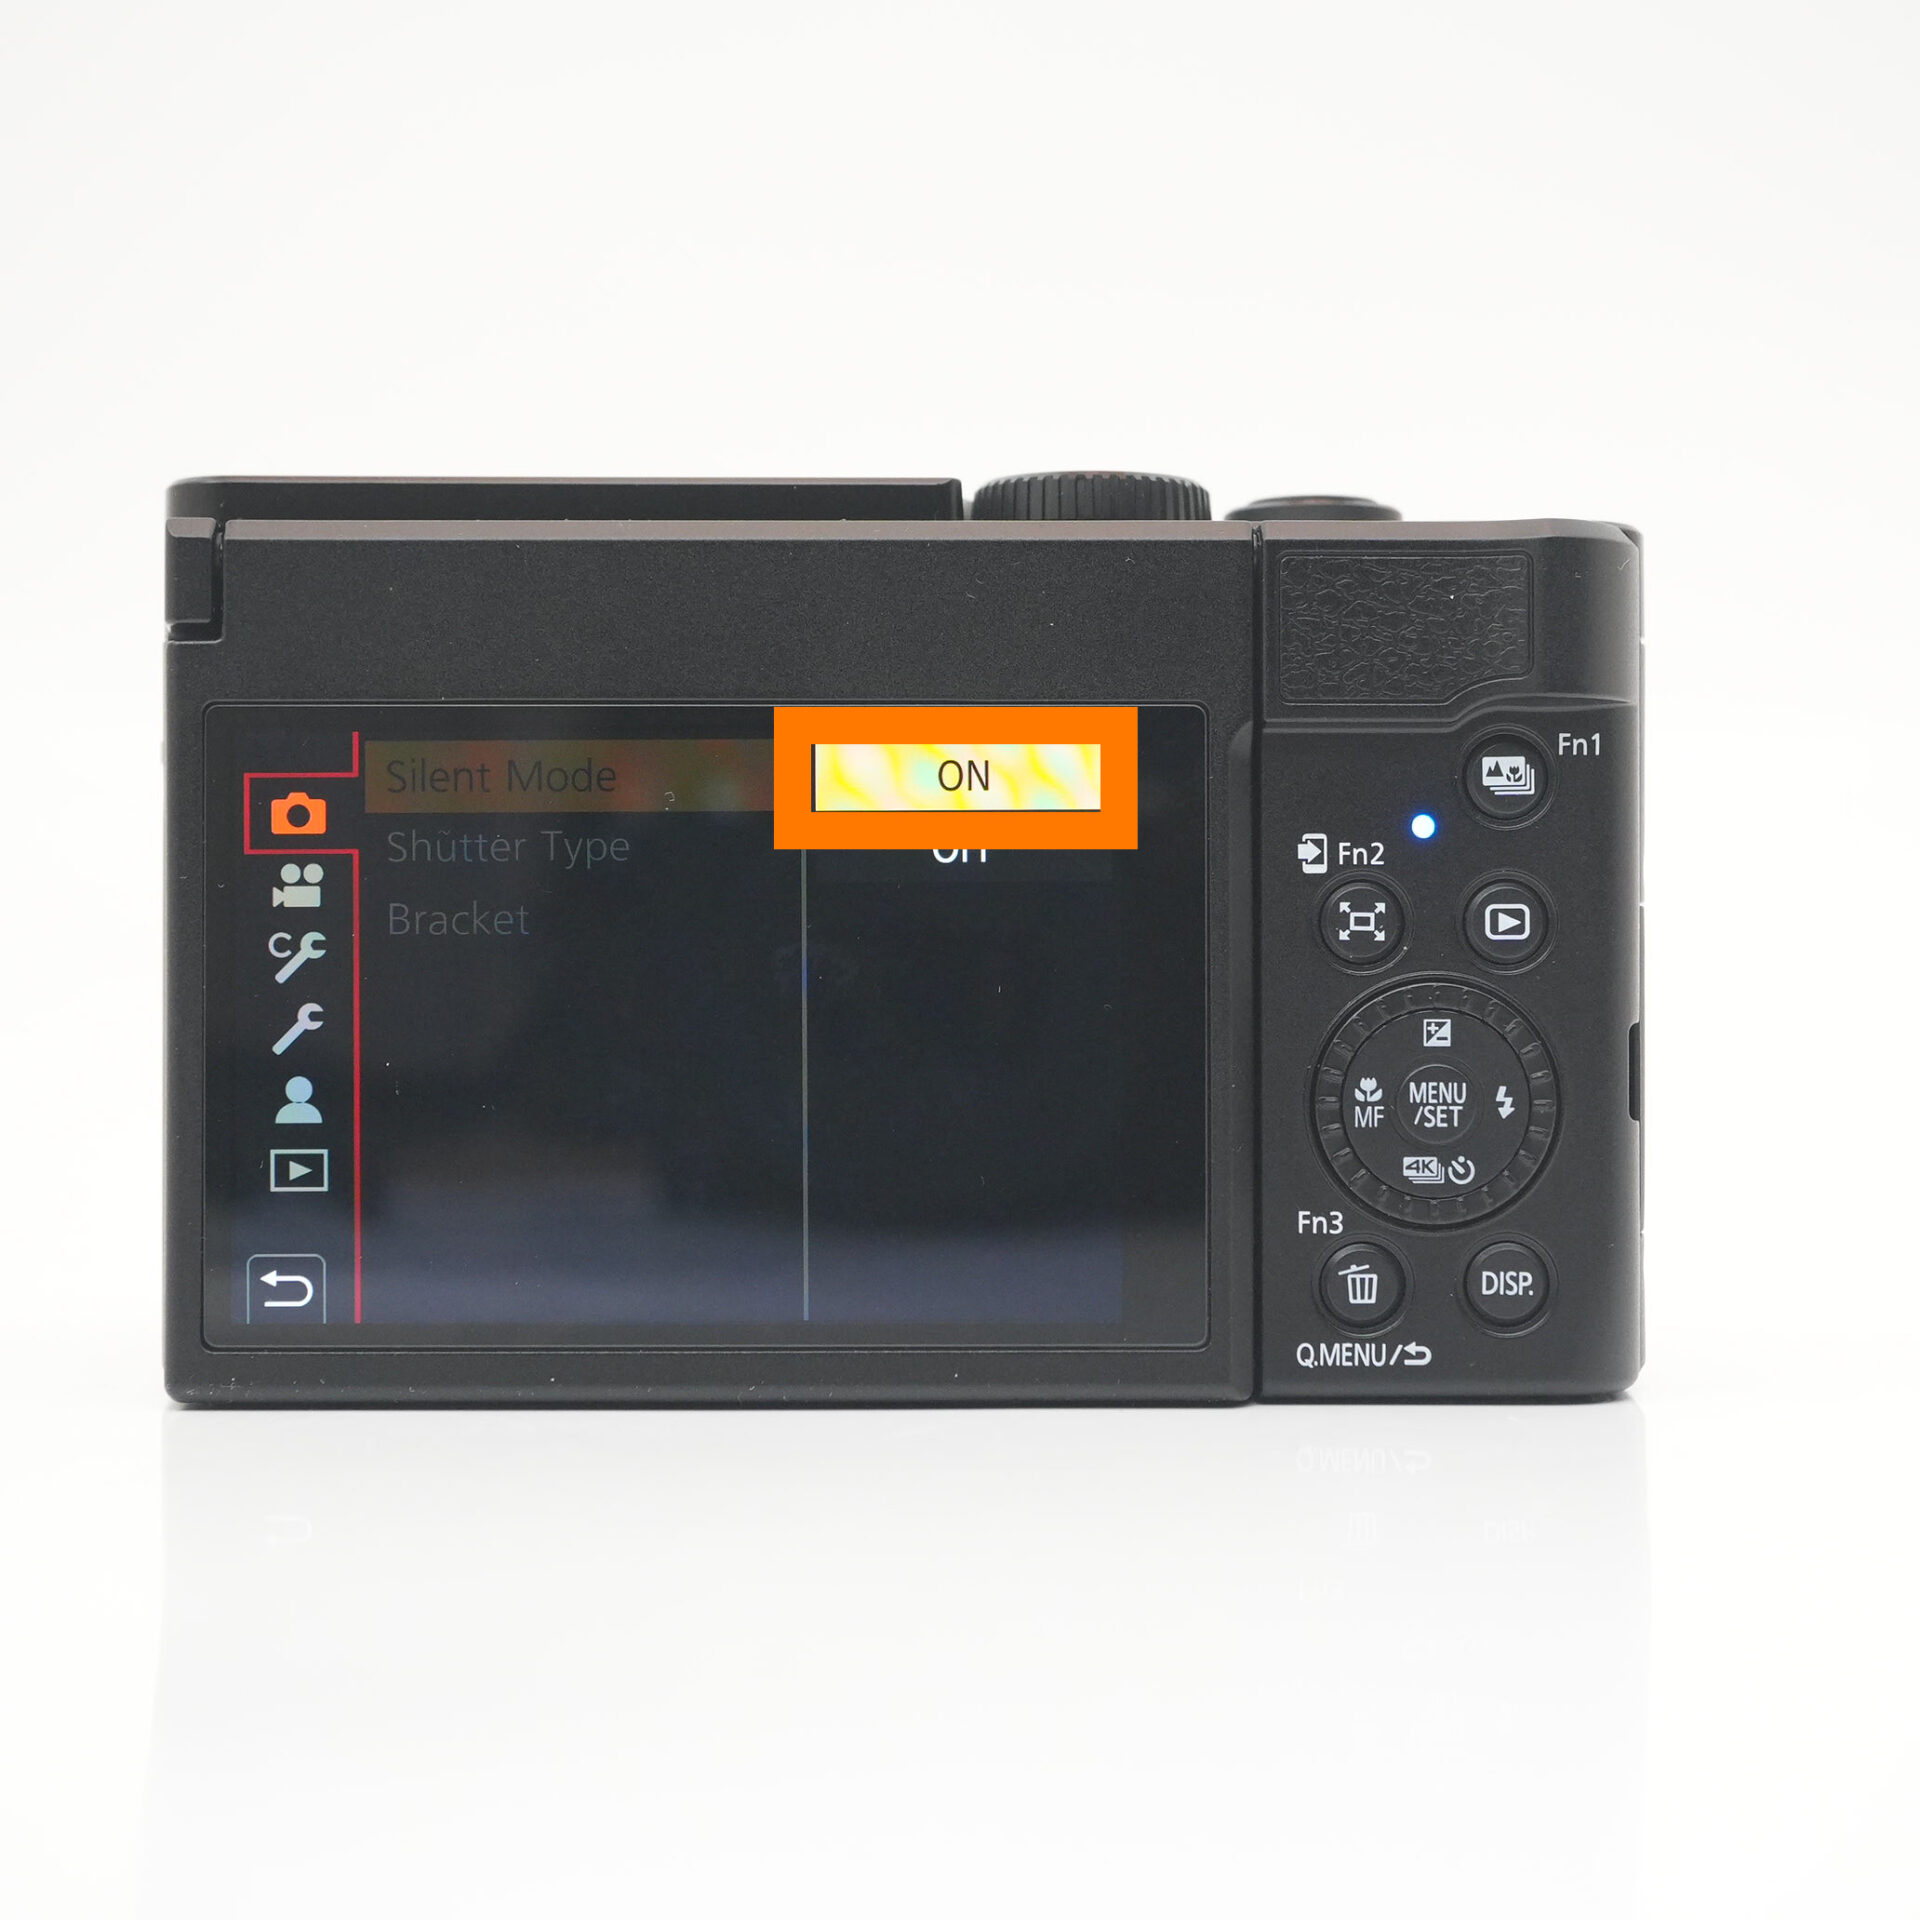 |
| Set to ON |
Continuous shooting
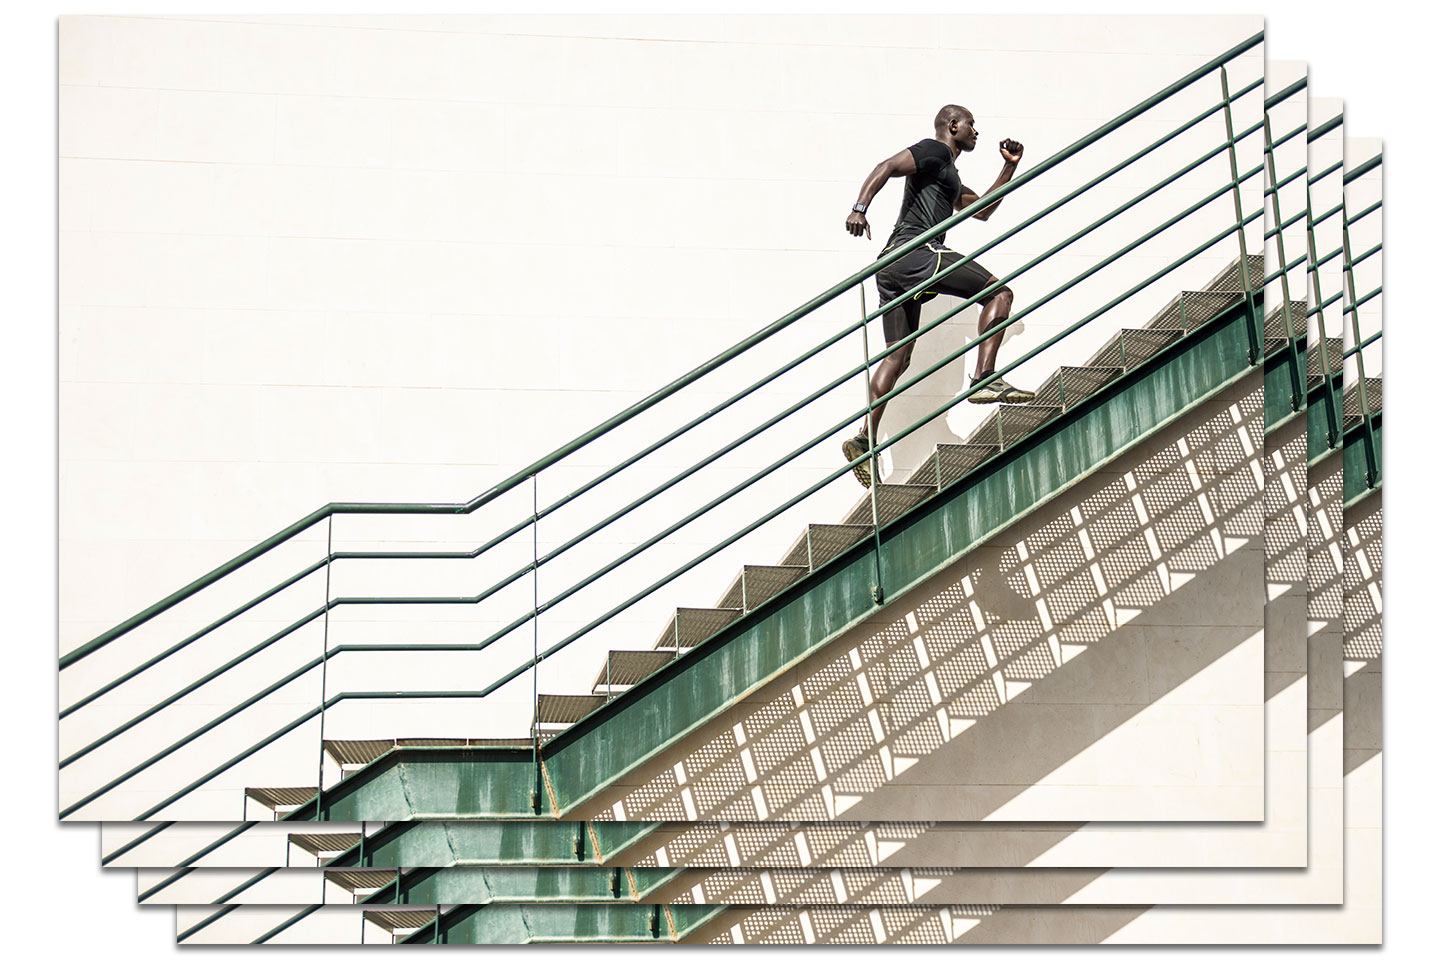
Continuous Shooting: Continuous shooting is possible while the shutter button is pressed.
When you're shooting in single shot mode,it can be hard to capture the perfect moment.
By switching to continuous shooting,you can take multiple shots in a row—
then simply choose the best one from the series.
- Recommended scenes
- ・Sports photography.
・Photographing the sports day.
・Wild bird photography.
・Photographing races, etc.
STEP.1
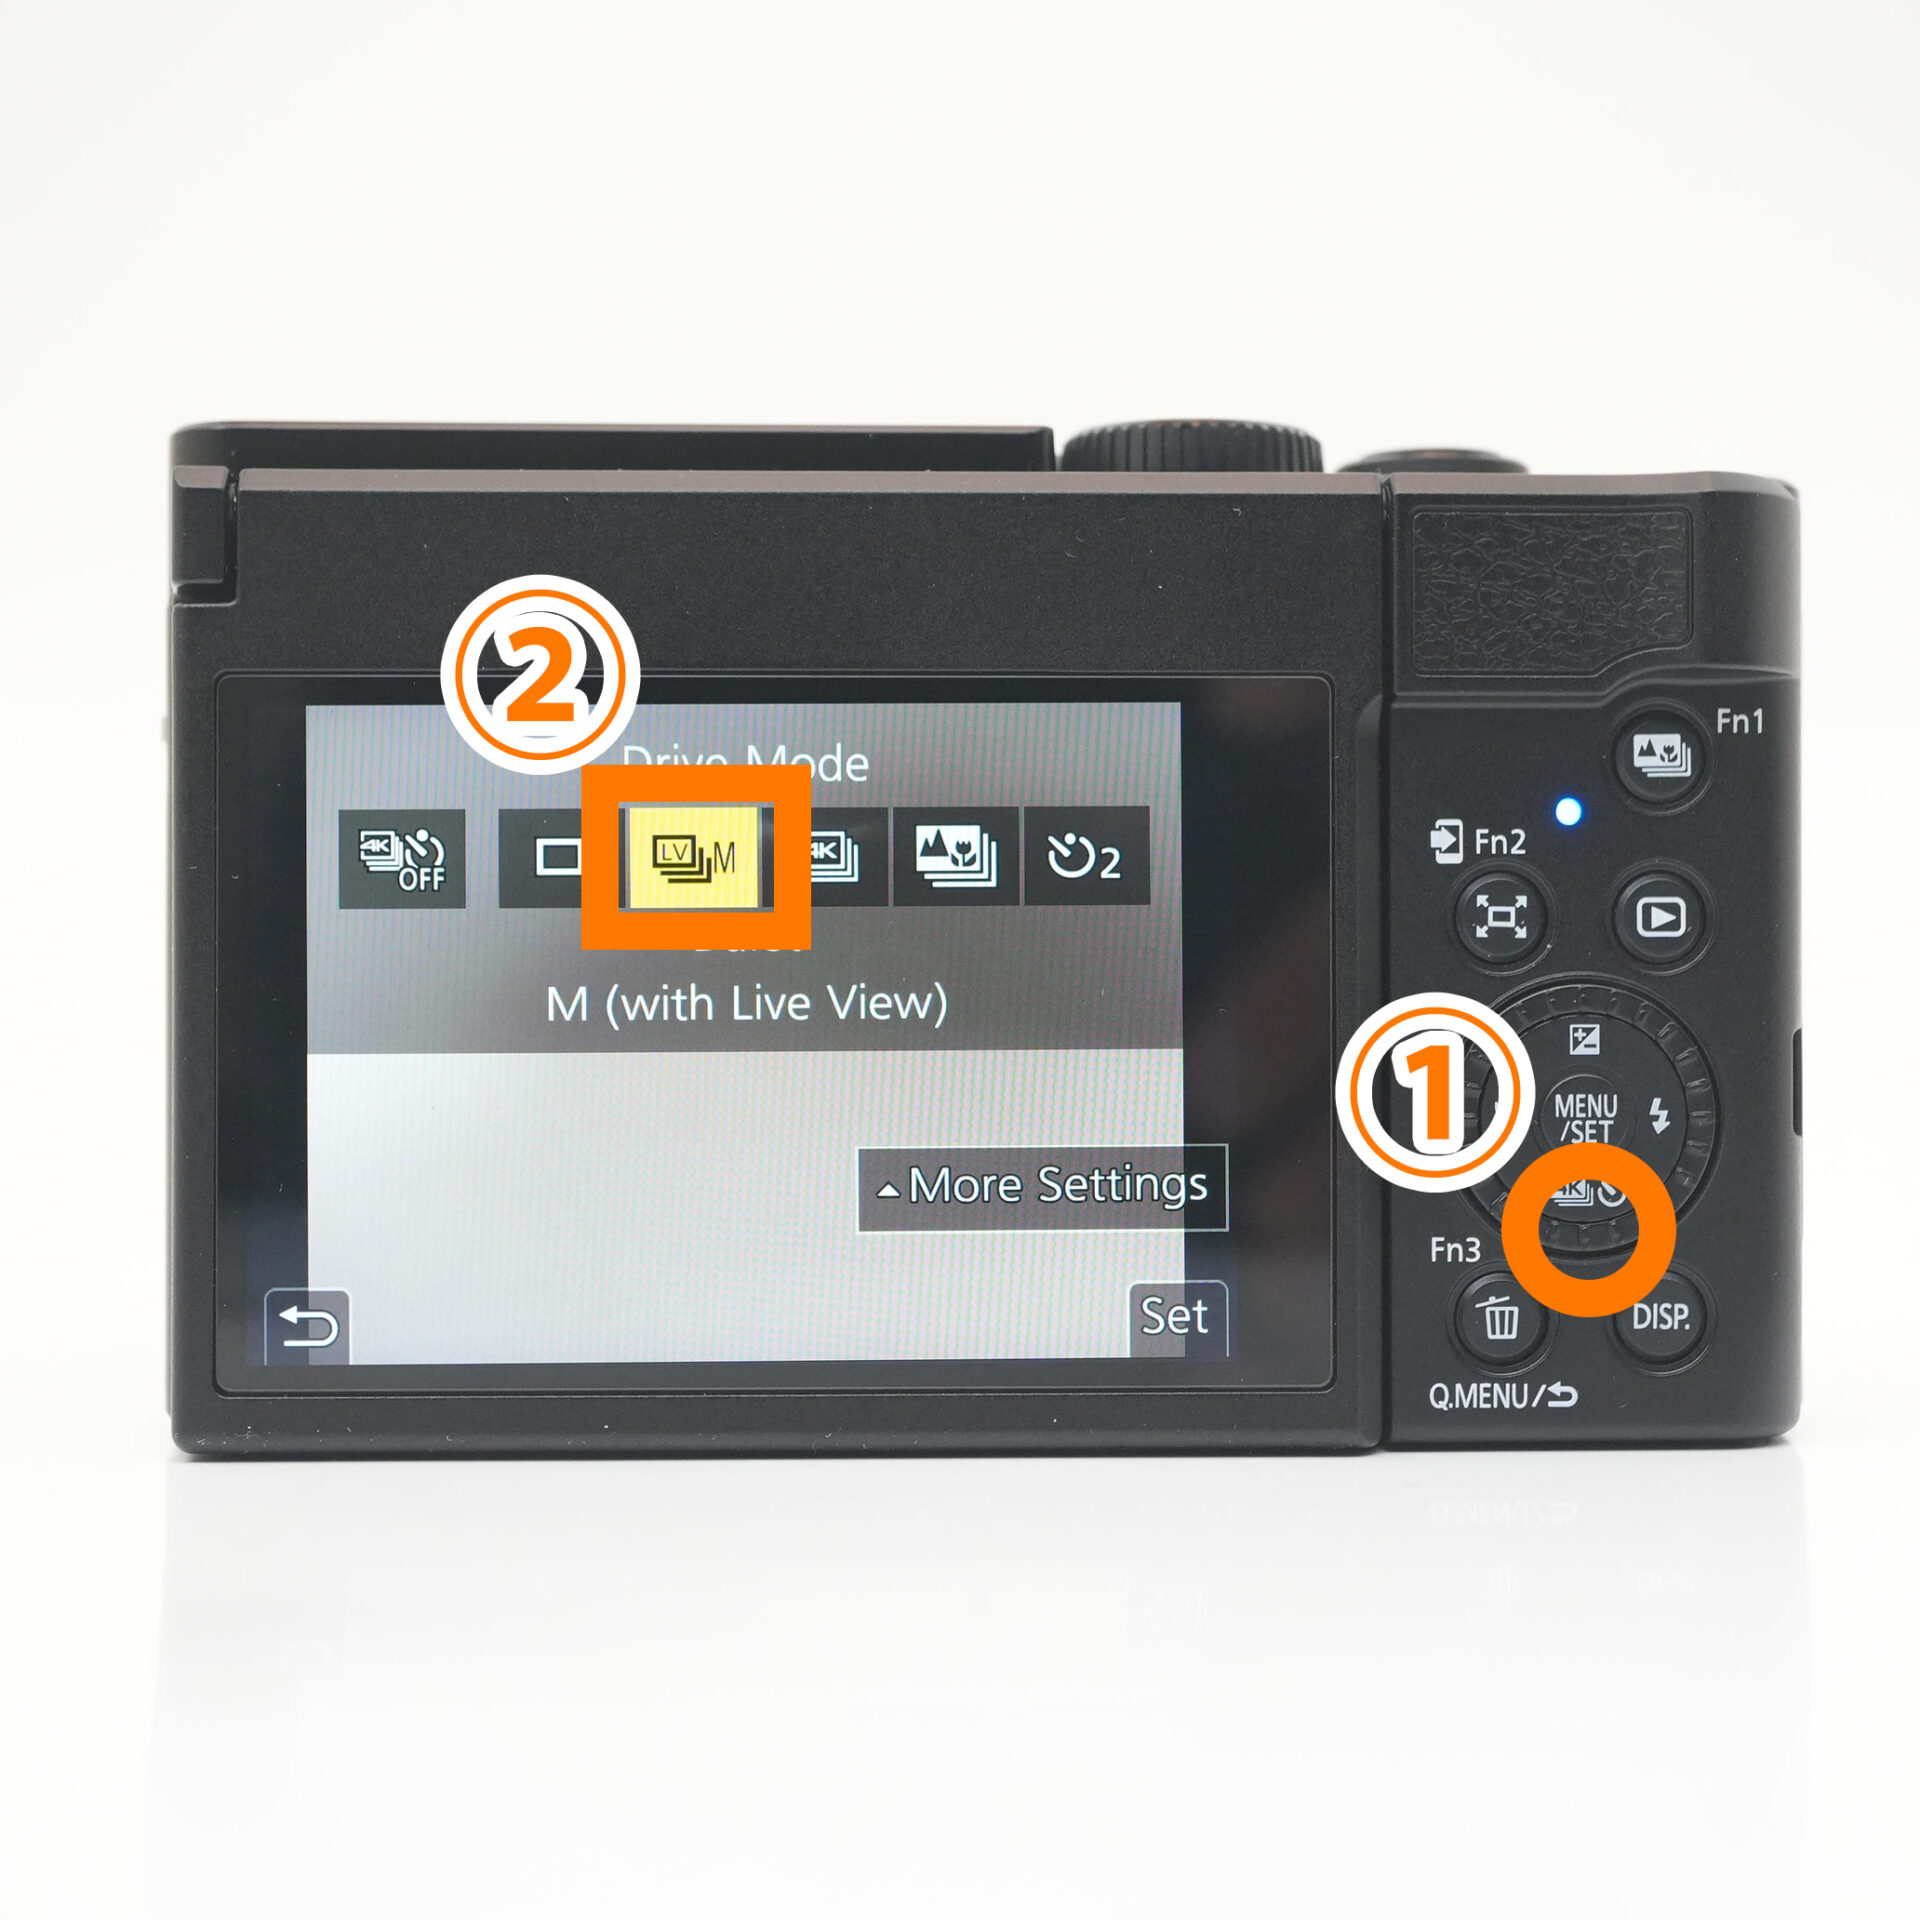 |
| Press the bottom of the dial to select continuous shooting |
STEP.2
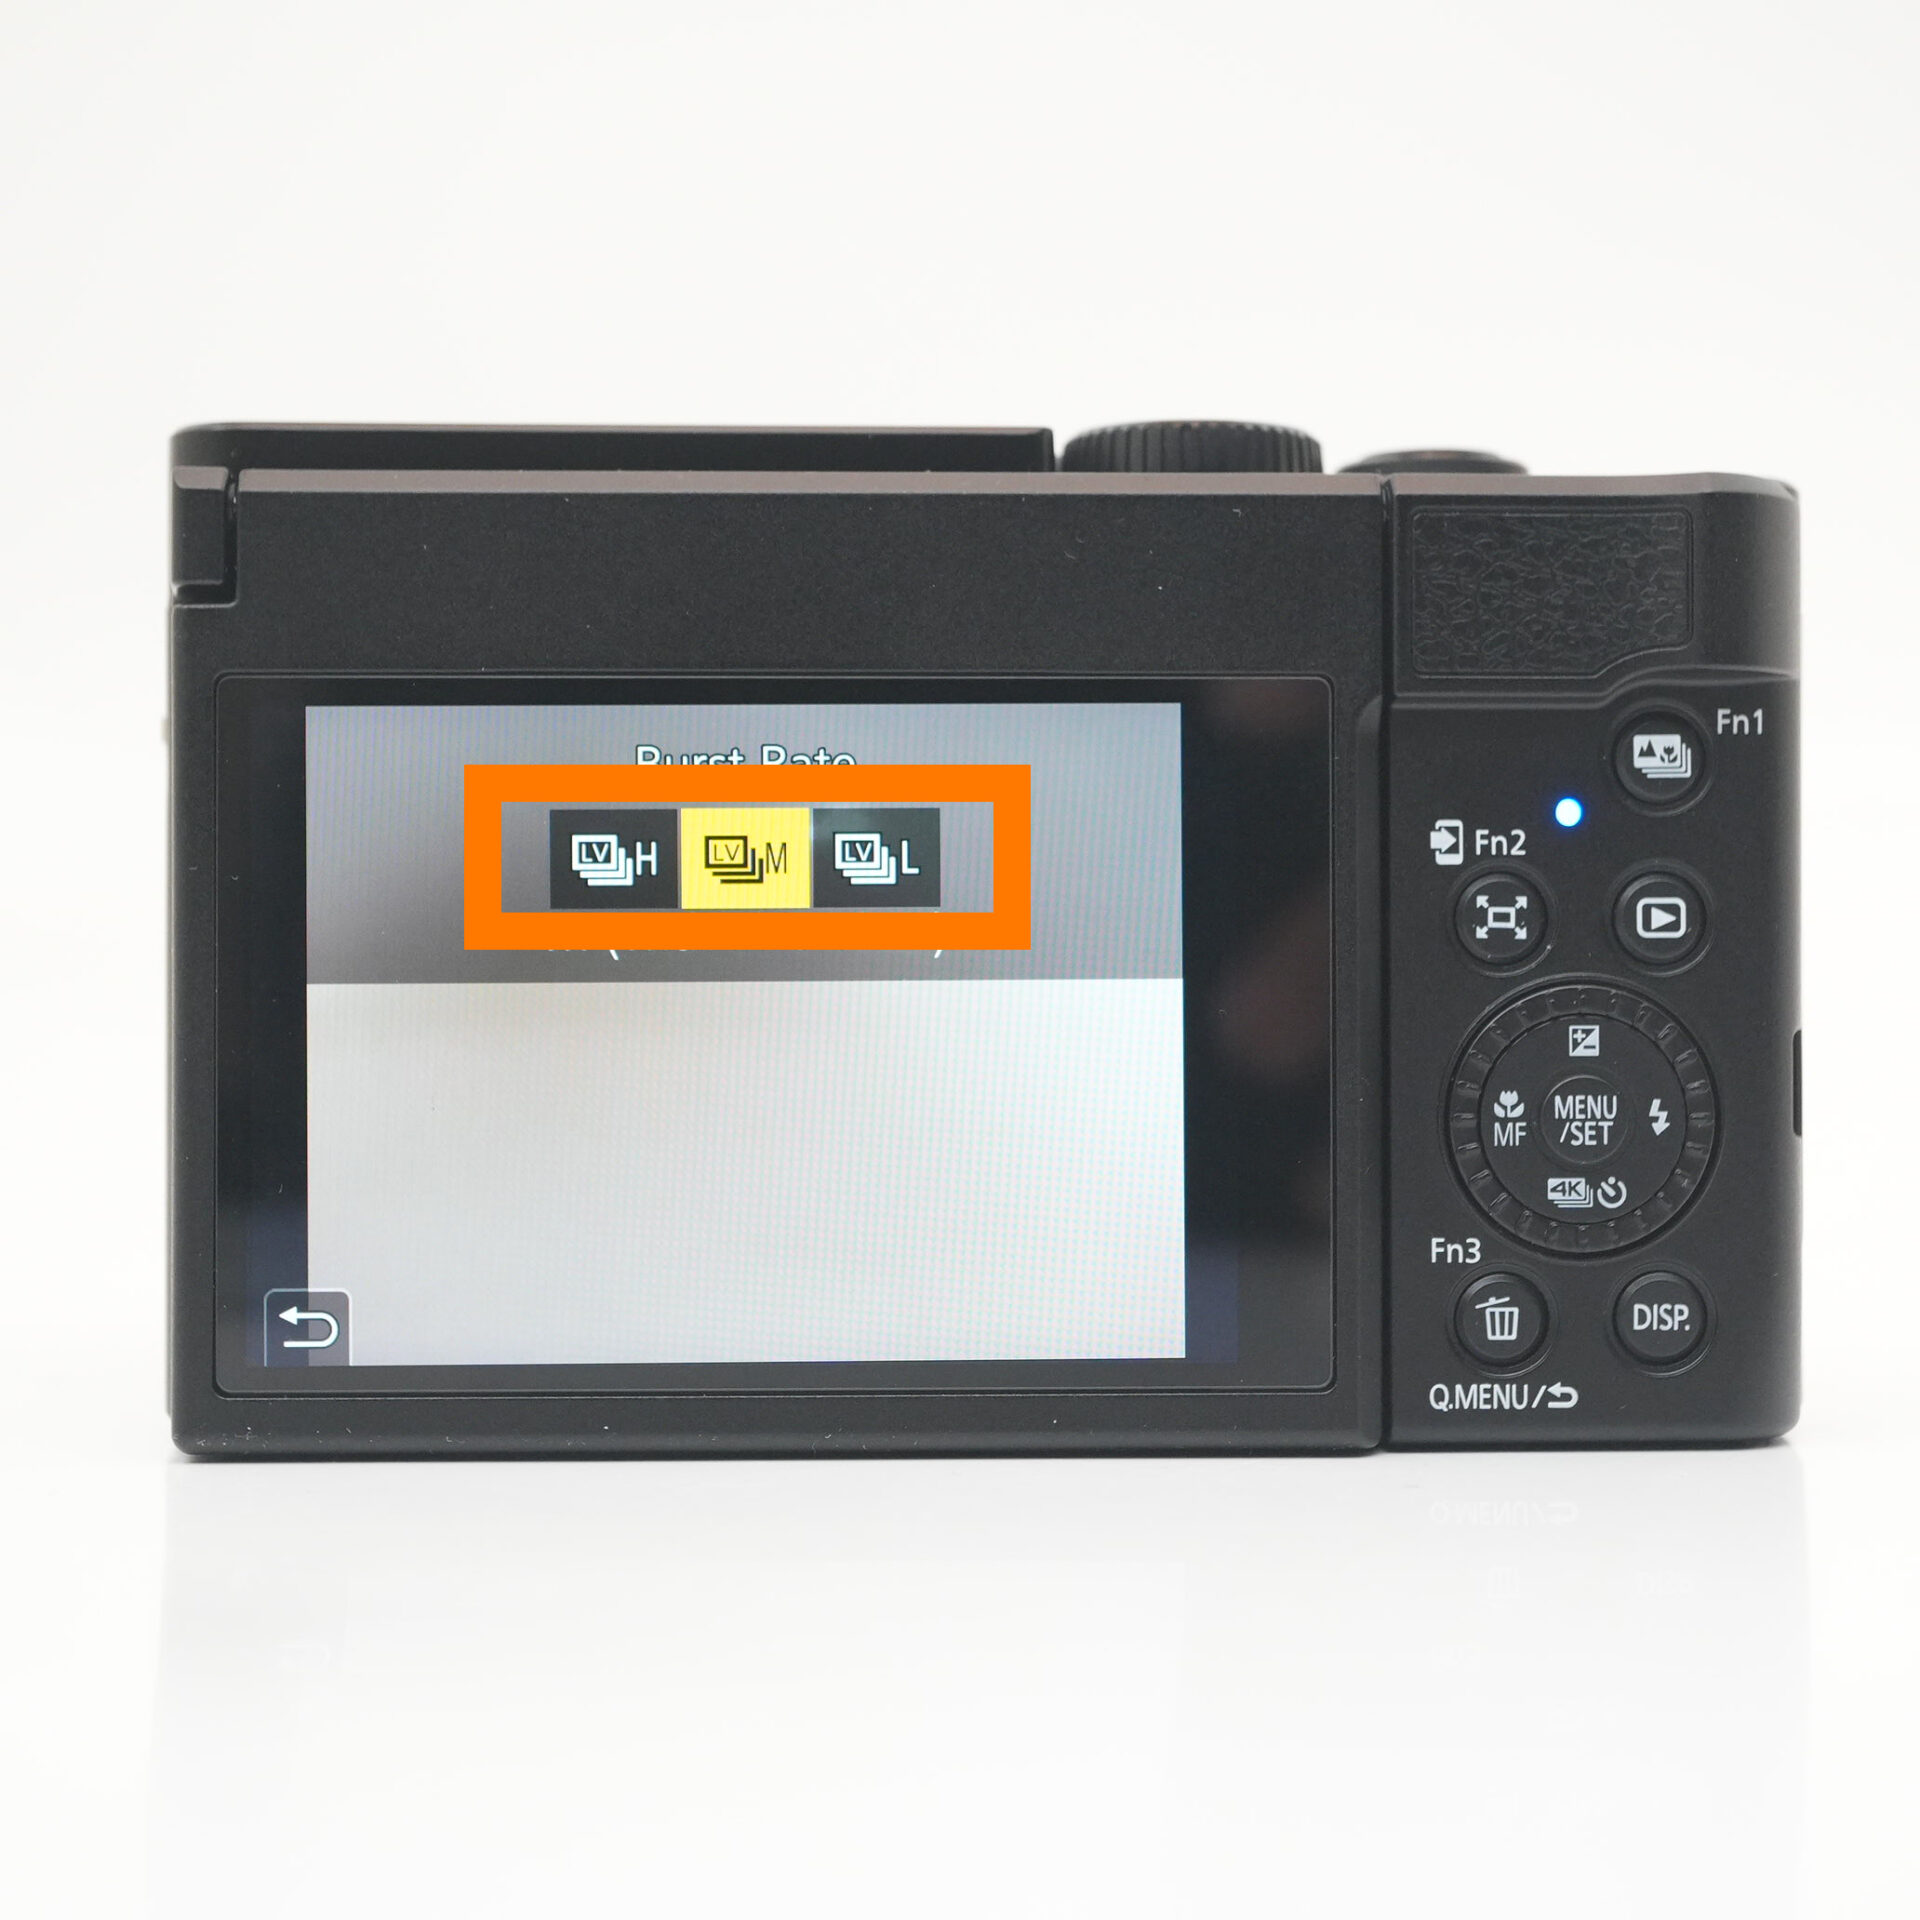 |
| Choose your preferred speed |
self timer

Self-timer: The shutter will be released a certain number of seconds after the shutter button is pressed.
- Recommended scenes
- ・Commemorative photo.
・Shooting with a longer exposure time.
STEP.1
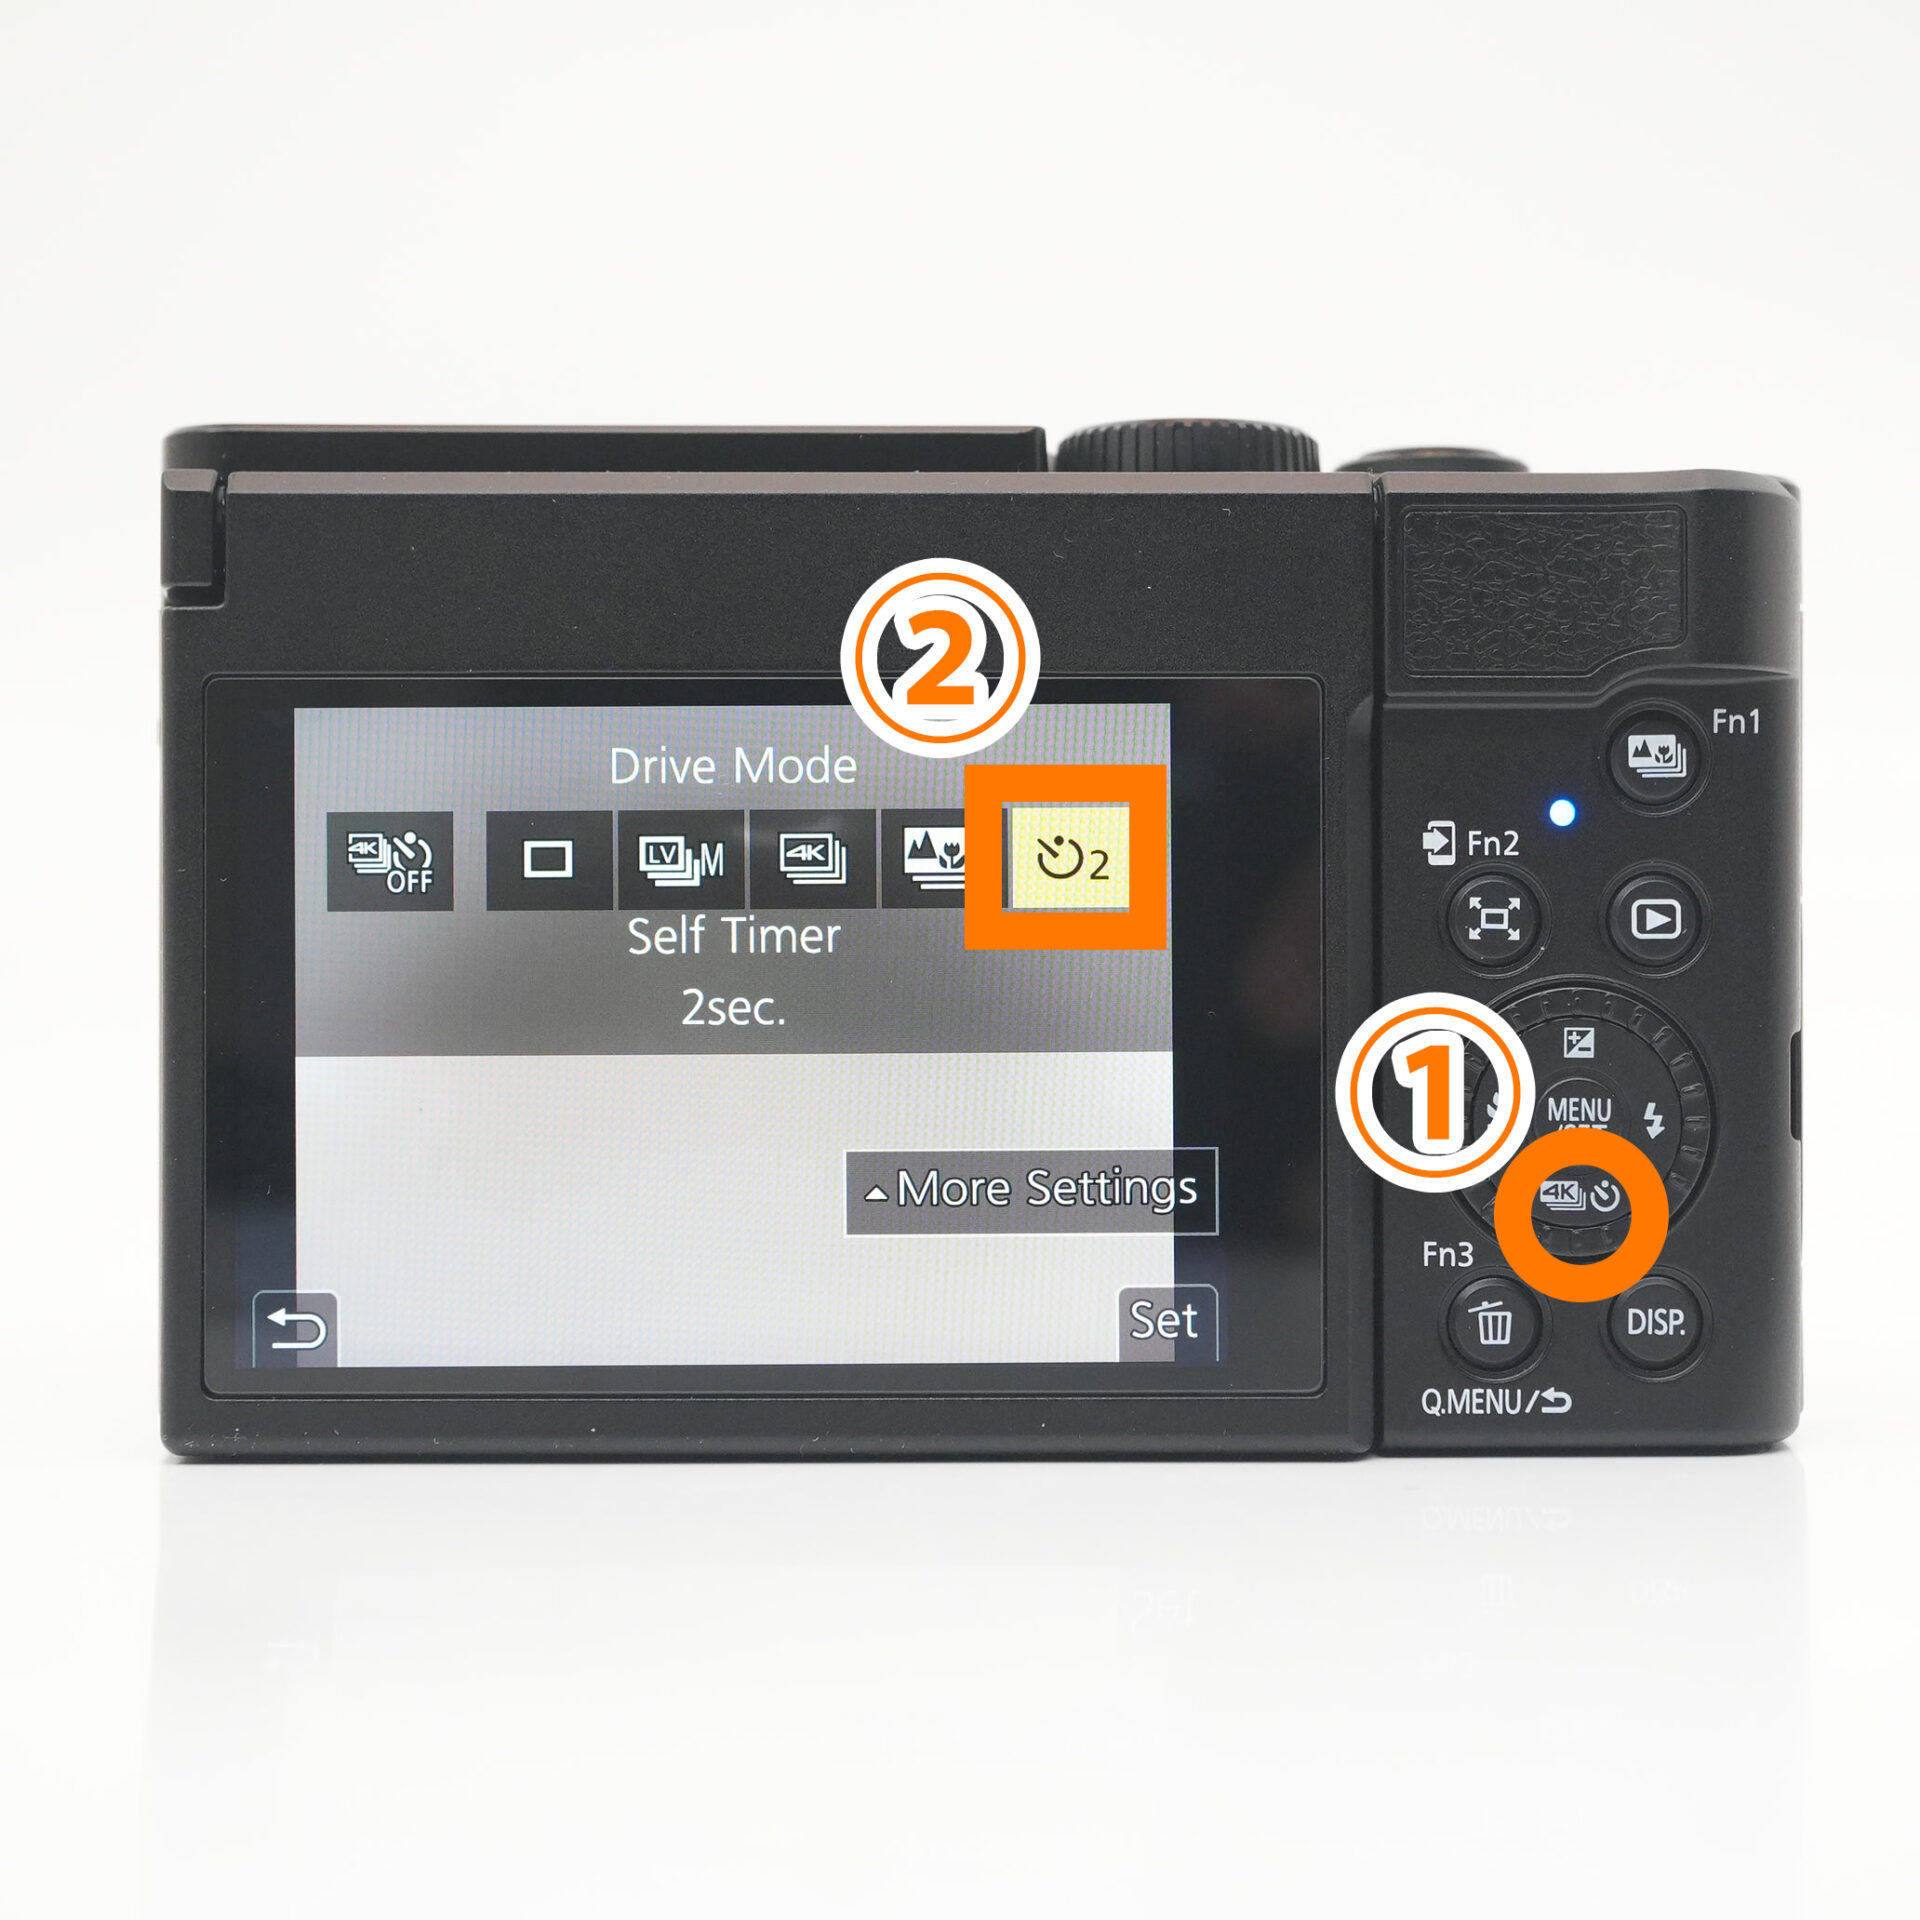 |
| Press the down button on the directional pad to select self-timer |
STEP.2
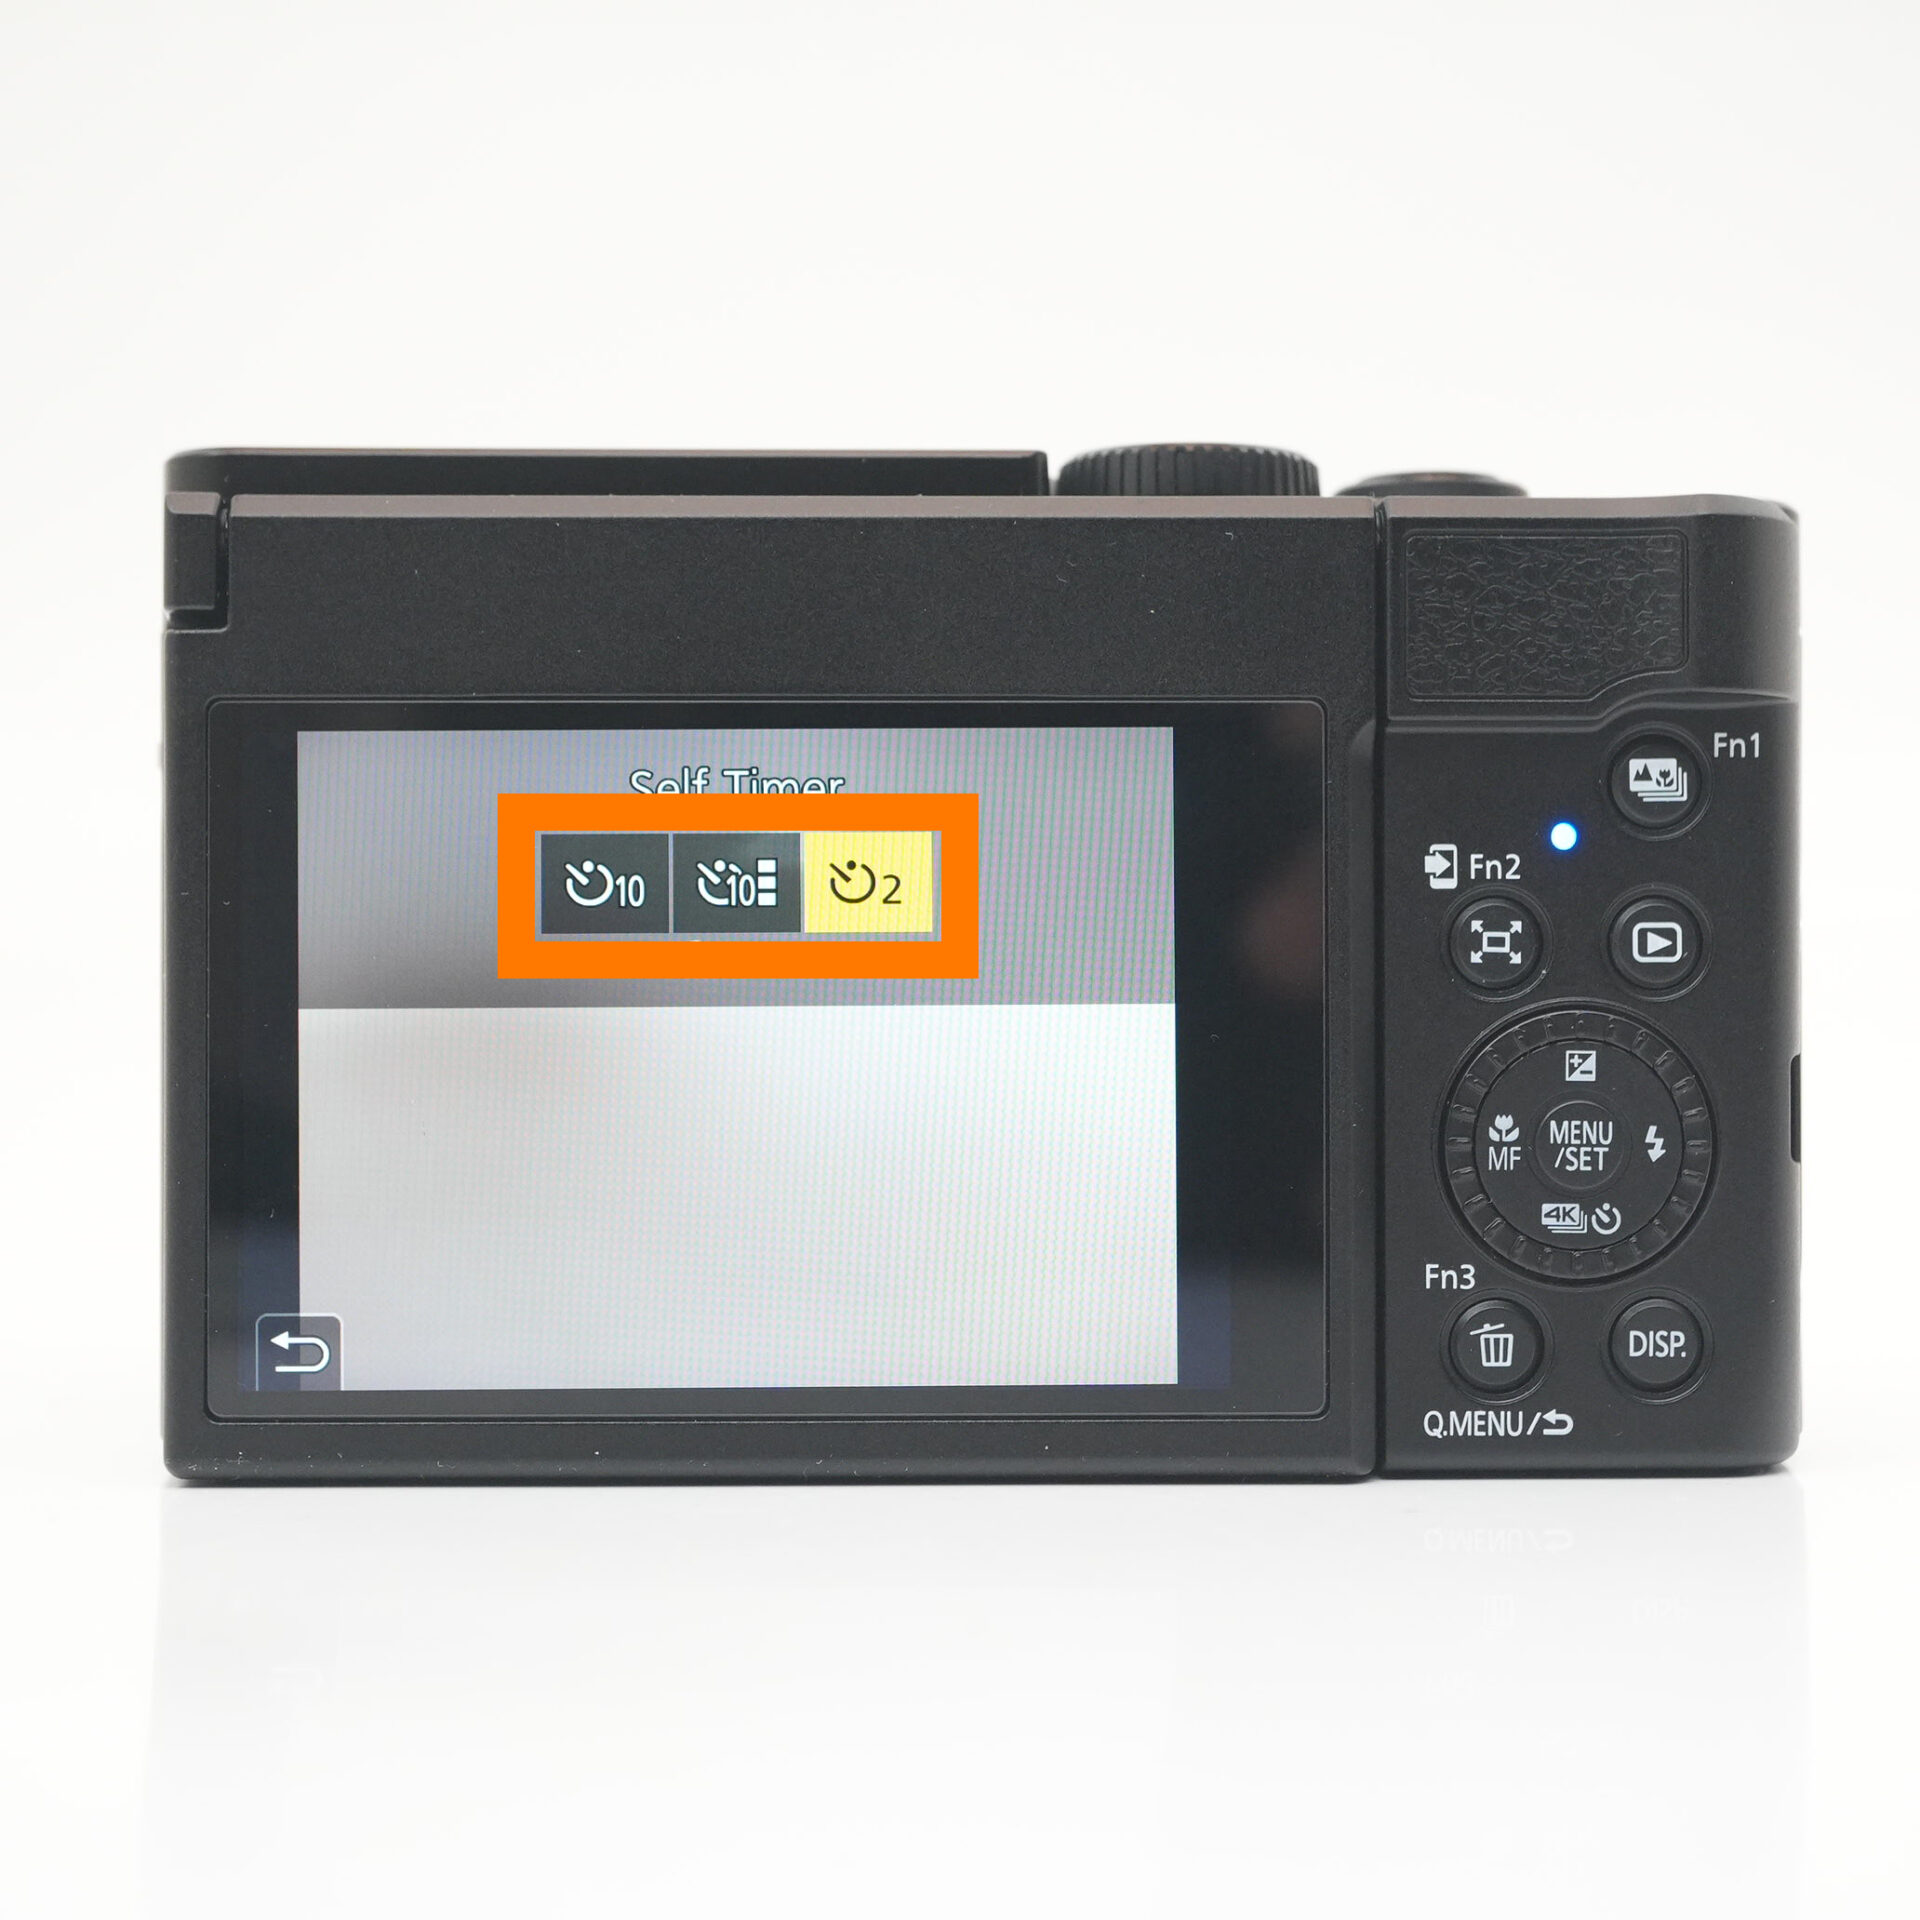 |
| Set it to the number of seconds you want |
manual focus
Manual focus: You can adjust the focus manually.
Autofocus is a powerful and convenient feature,but it doesn’t always get it right—especially in low light or when it focuses on the wrong area.
In those situations, switching to manual focus gives you full control to set the focus exactly where you want it.
- Recommended scenes
- ・Shooting fireworks.
・Night view photography.
・Photographing the starry sky, etc.
STEP.1
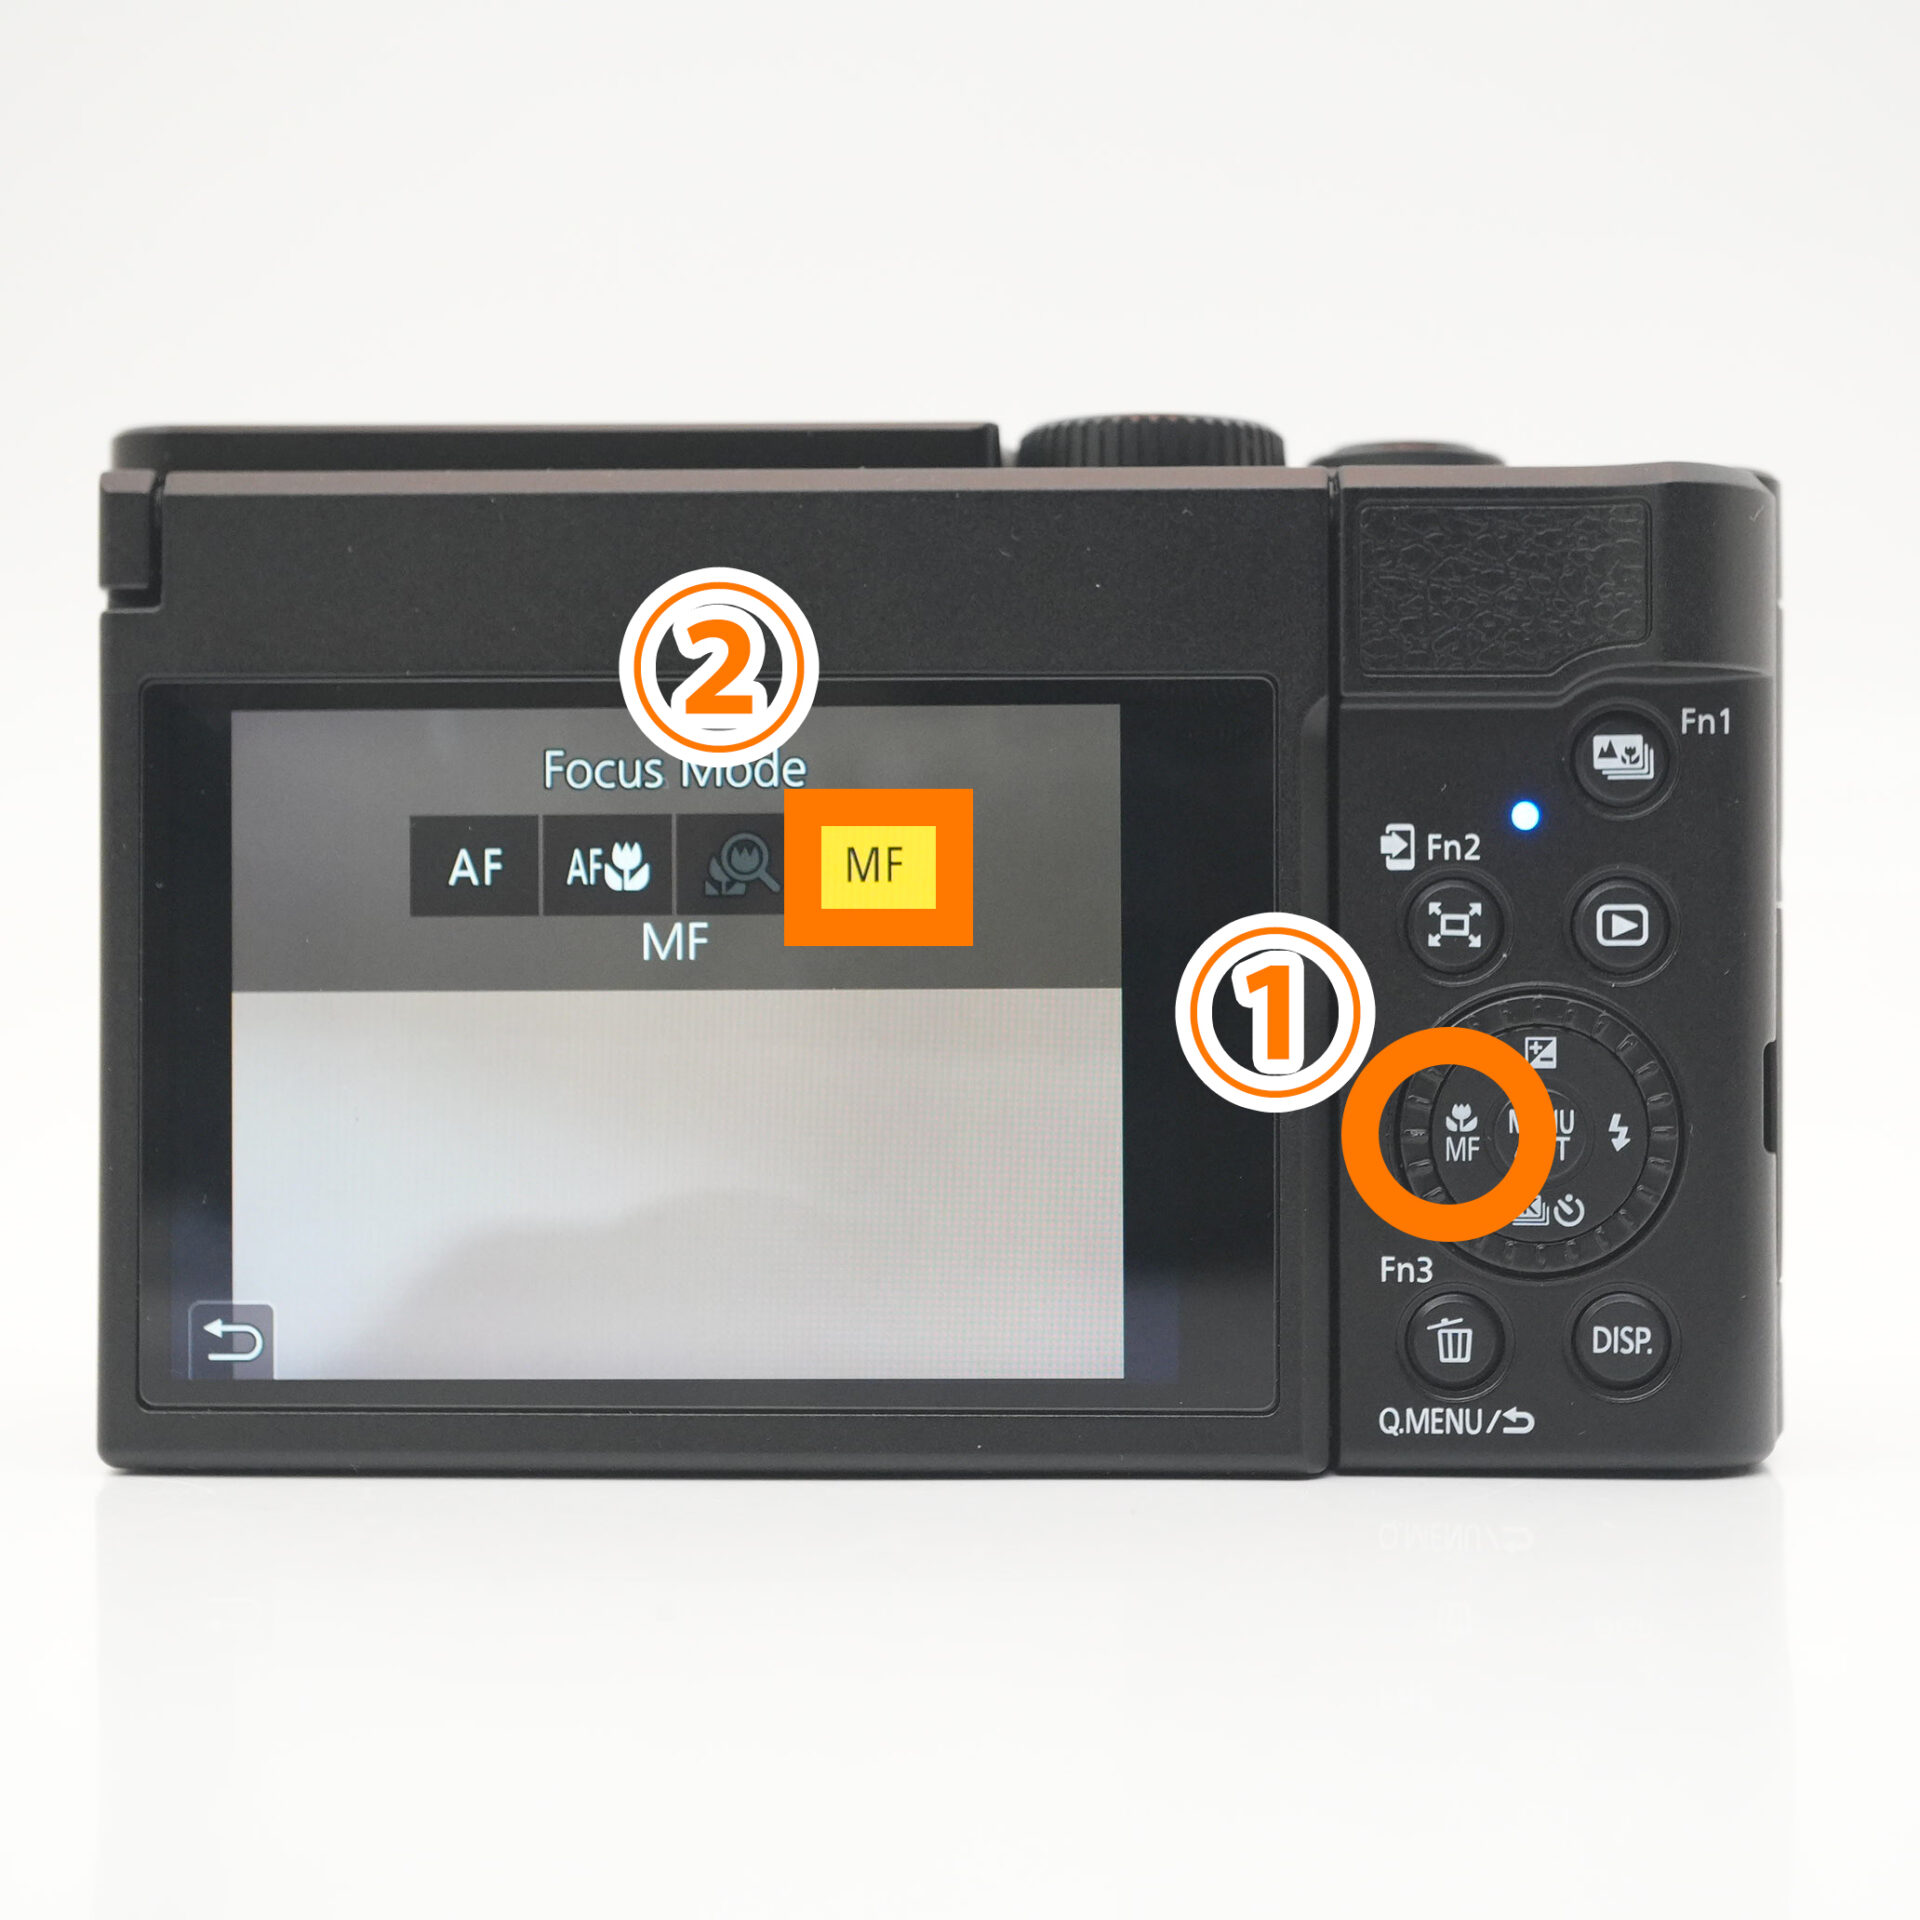 |
| Press the dial left to select MF |
STEP.2
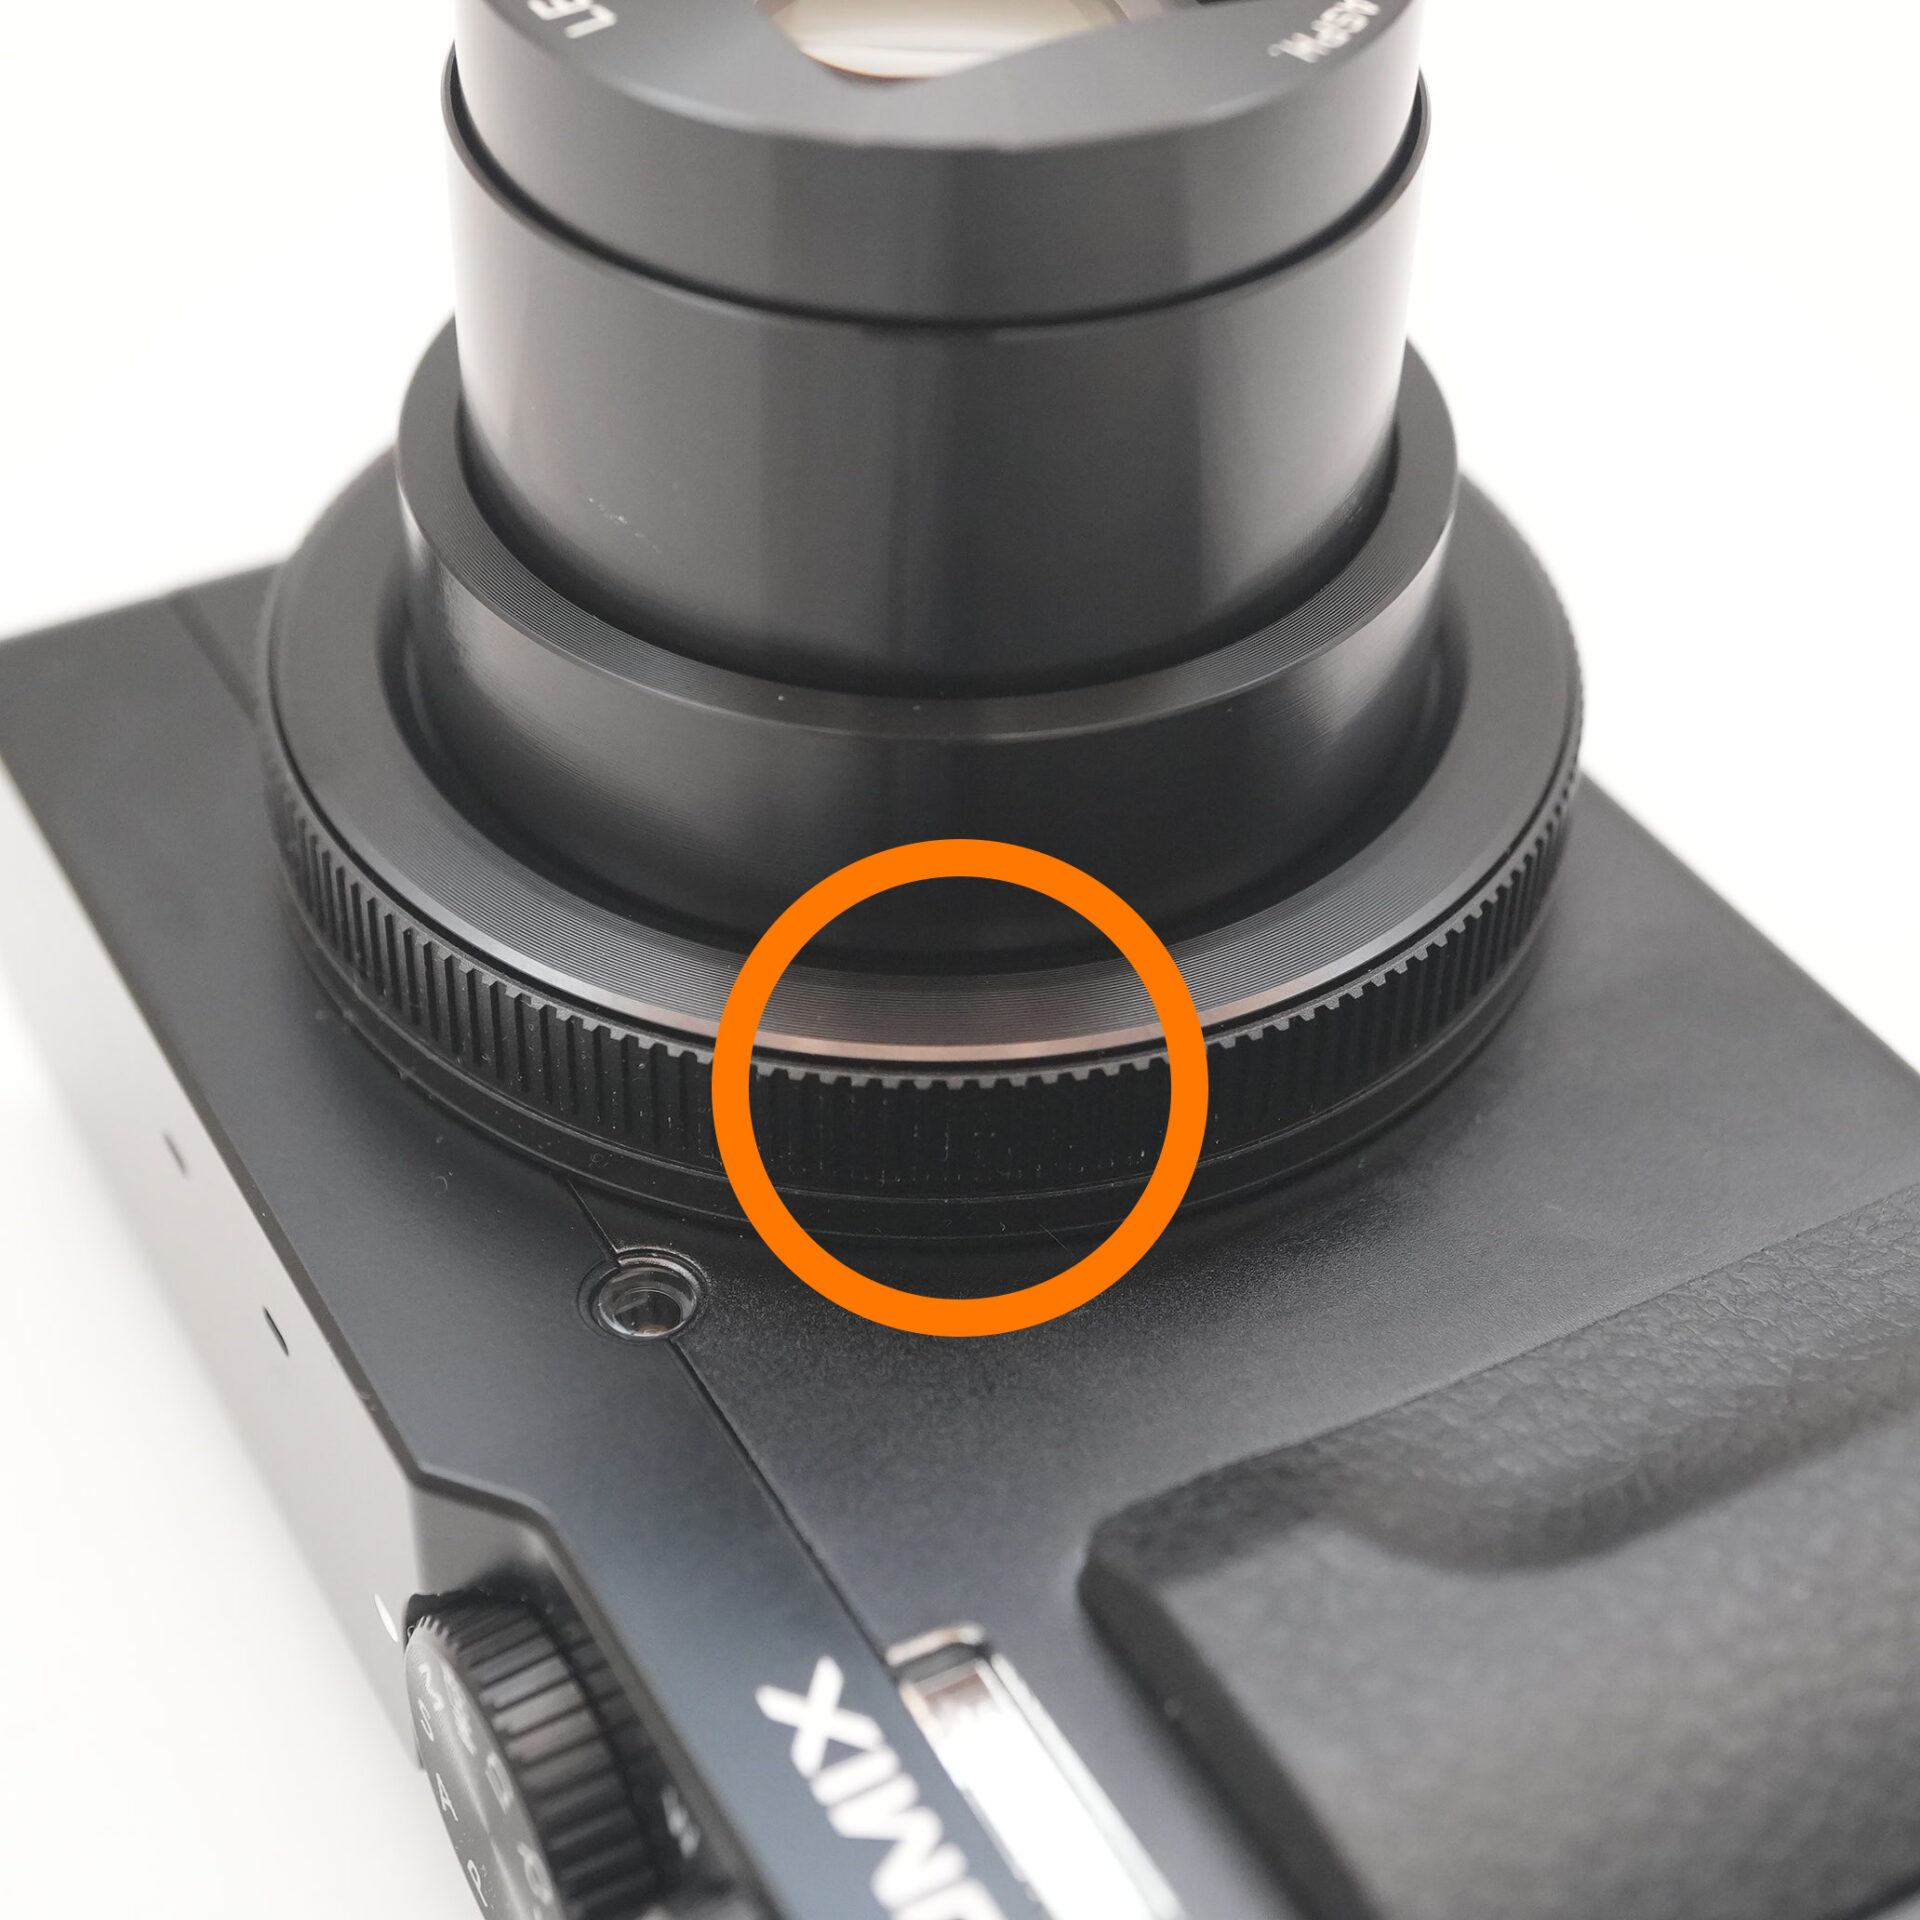 |
| Turn the dial on the front to adjust the focus |
Screen display switching
Screen display switching: You can change the information displayed on the screen.
Sometimes it’s helpful to have various information displayed on the screen—
like grid lines, exposure settings, and focus points.
But in other situations, all that data can make the screen feel cluttered and hard to see.
Fortunately, most cameras let you easily cycle through different display modes,so you can choose the screen view that fits your shooting style best.
- Recommended scenes
- ・The display is distracting and makes it difficult to see the screen
・I want to check the display properly
STEP.1
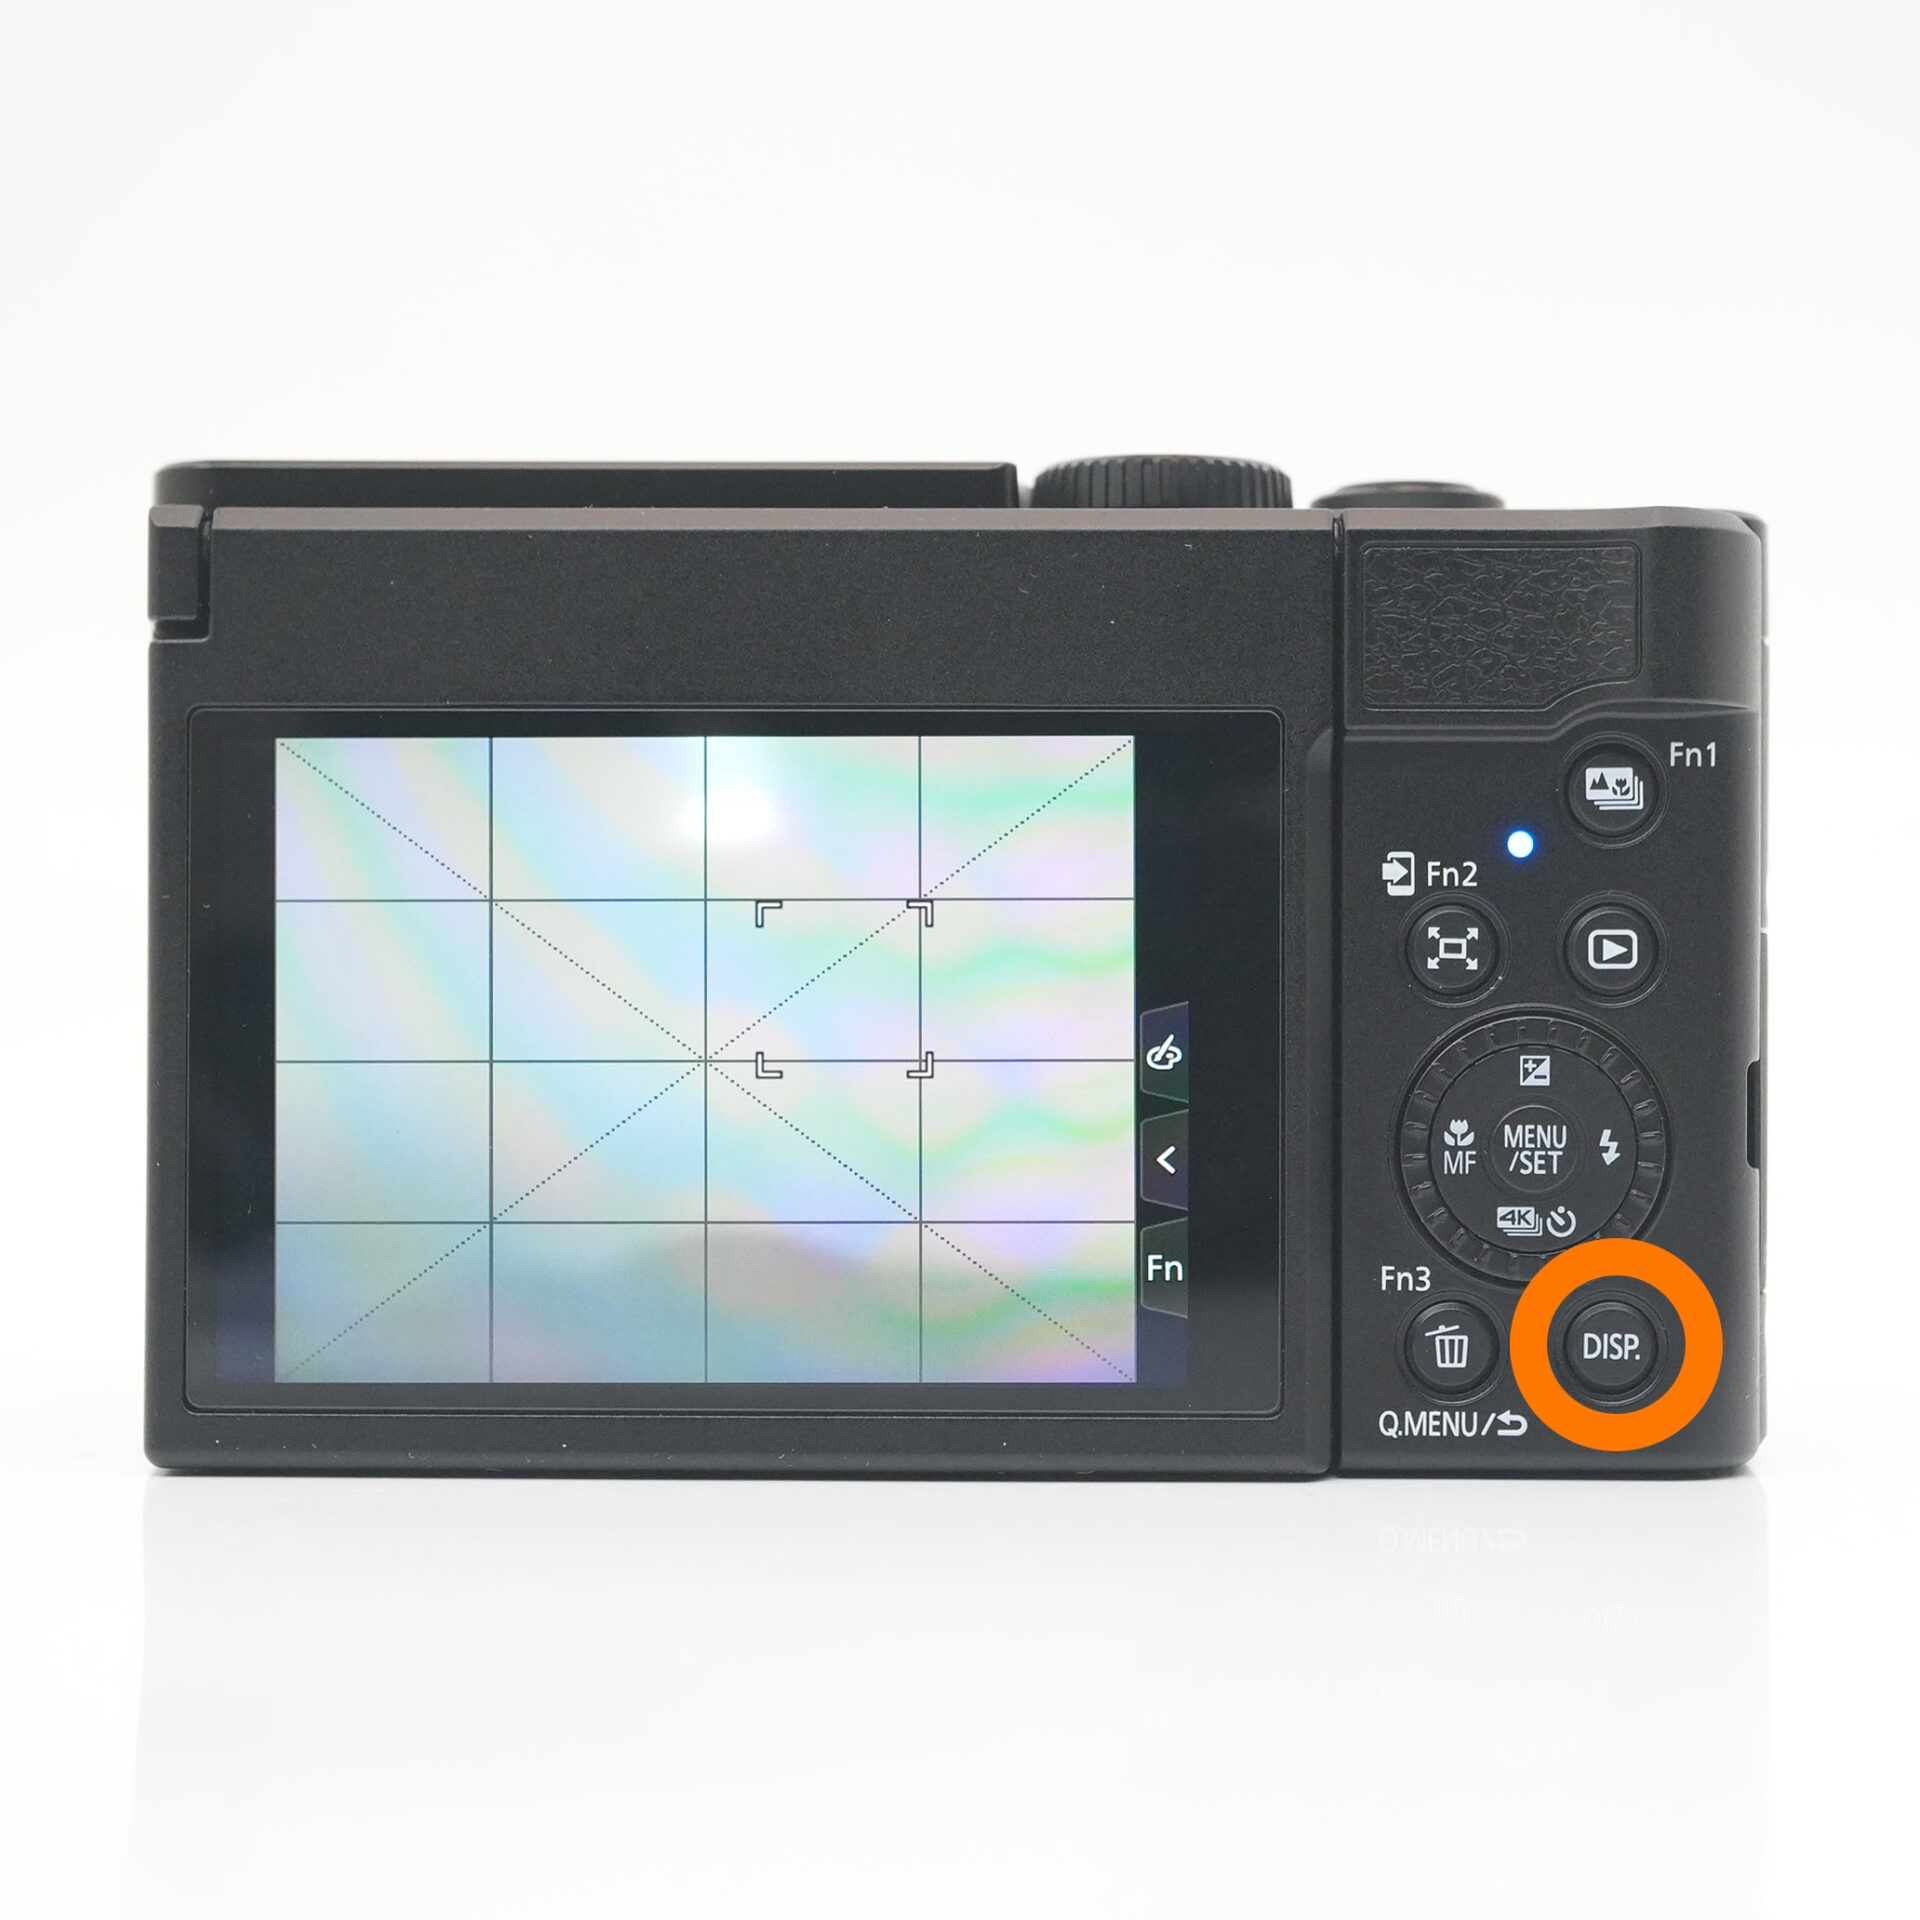 |
| Press DISP several times |
White balance
Have you ever looked at a photo and thought,“Why do the colors look a bit off?”
That’s where white balance comes in!
By adjusting it to match the lighting conditions,you can capture images with more natural and accurate colors.
Auto white balance is convenient, but in certain situations,it can make your photos look unnatural.That’s why it’s a good idea to switch white balance settings based on the scene.
- Recommended scenes
- ・The color is different
・I want to unify the colors in the same scene.
・I want to change the color to create a more atmospheric photo.
| Setting | Recommended Scenes |
|---|---|
| Auto (AWB) | Works for almost any scene. Great when you're unsure. |
| Daylight | Sunny outdoor scenes, blue skies, beaches, parks, etc. |
| Cloudy | Overcast days, shade outdoors, soft evening light. |
| Incandescent | Warm indoor lighting (orange-hued bulbs), cafés, living rooms. |
| Fluorescent | Indoor scenes with cool white lighting like offices, schools, supermarkets. |
| Custom | Ideal for special lighting conditions (stage lights, LED setups), or product photography. |
STEP.1
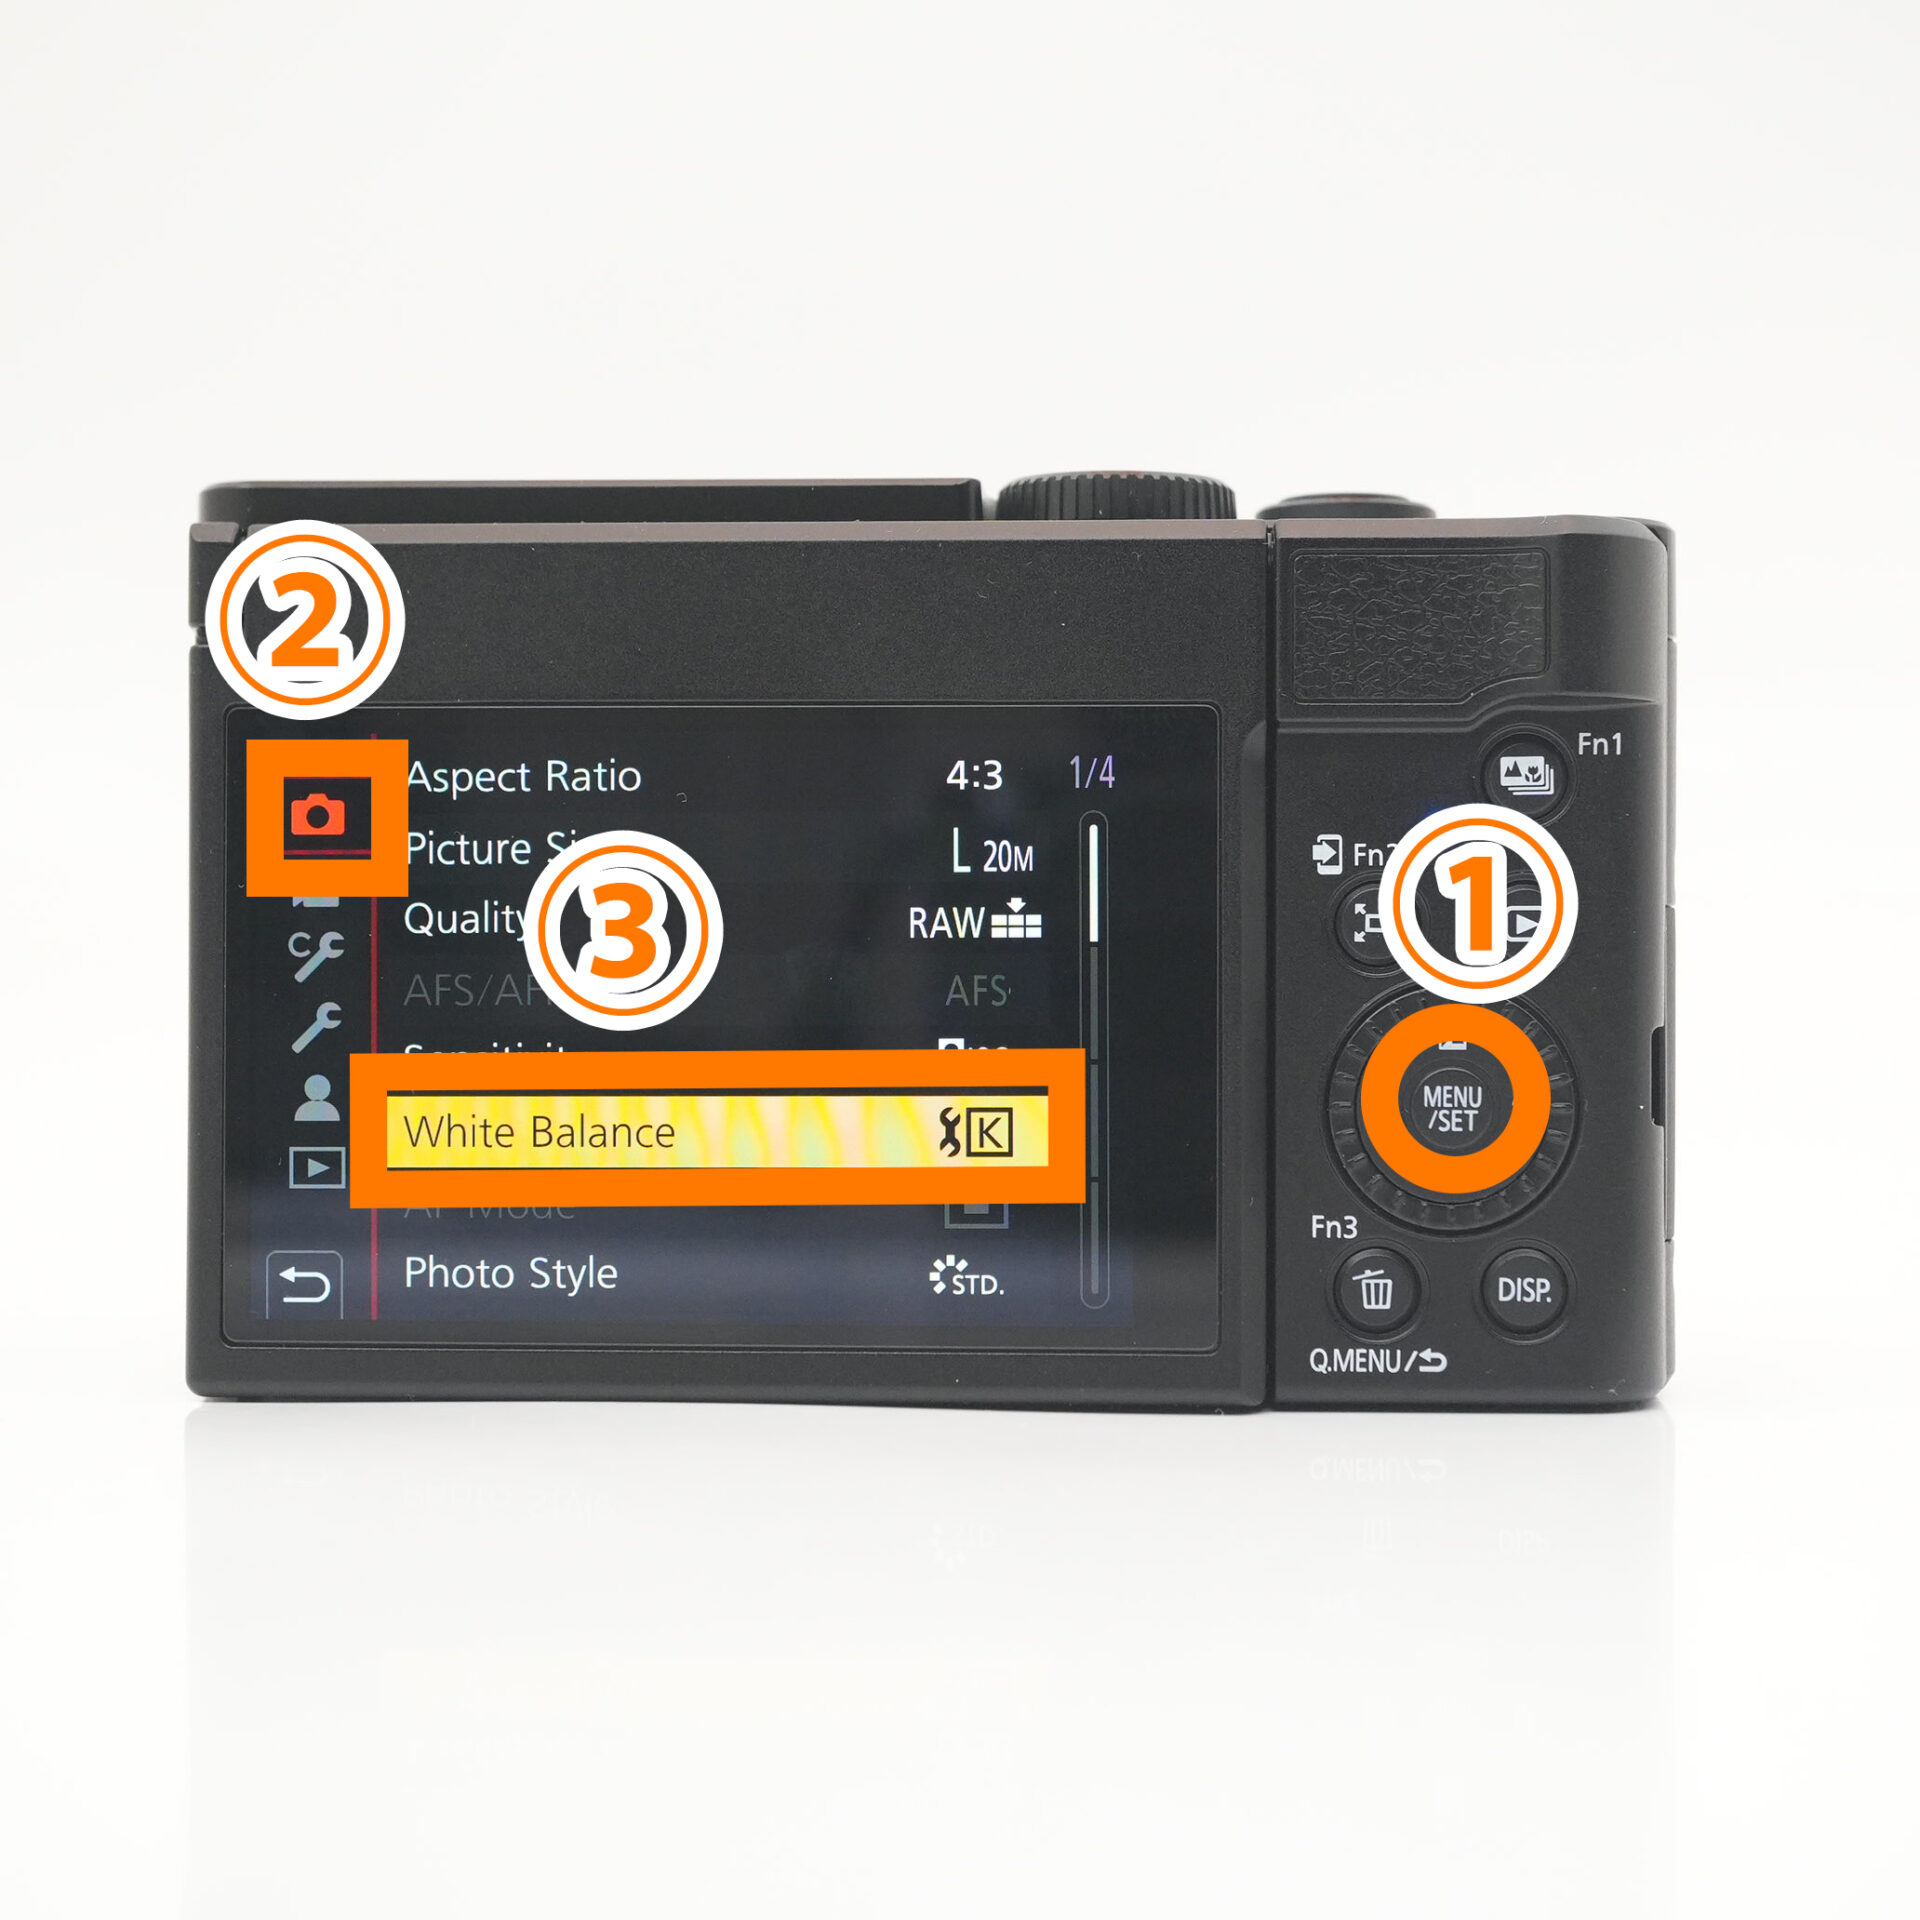 |
| MENU→camera icon→White Balance |
Summary

In this post, we focused on the minimum settings you should know to get started.
By understanding and using these features, you'll open up more creative options and improve your shooting experience.
They’re simple, but powerful—and definitely worth remembering.