- Recommended for these people
- ・Those who have tried taking photos of sunrises and sunsets but were unable to capture the light well
・Those who want to try landscape photography
・Those who want to leave a "sky gradient photo" that will look great on Instagram or blogs
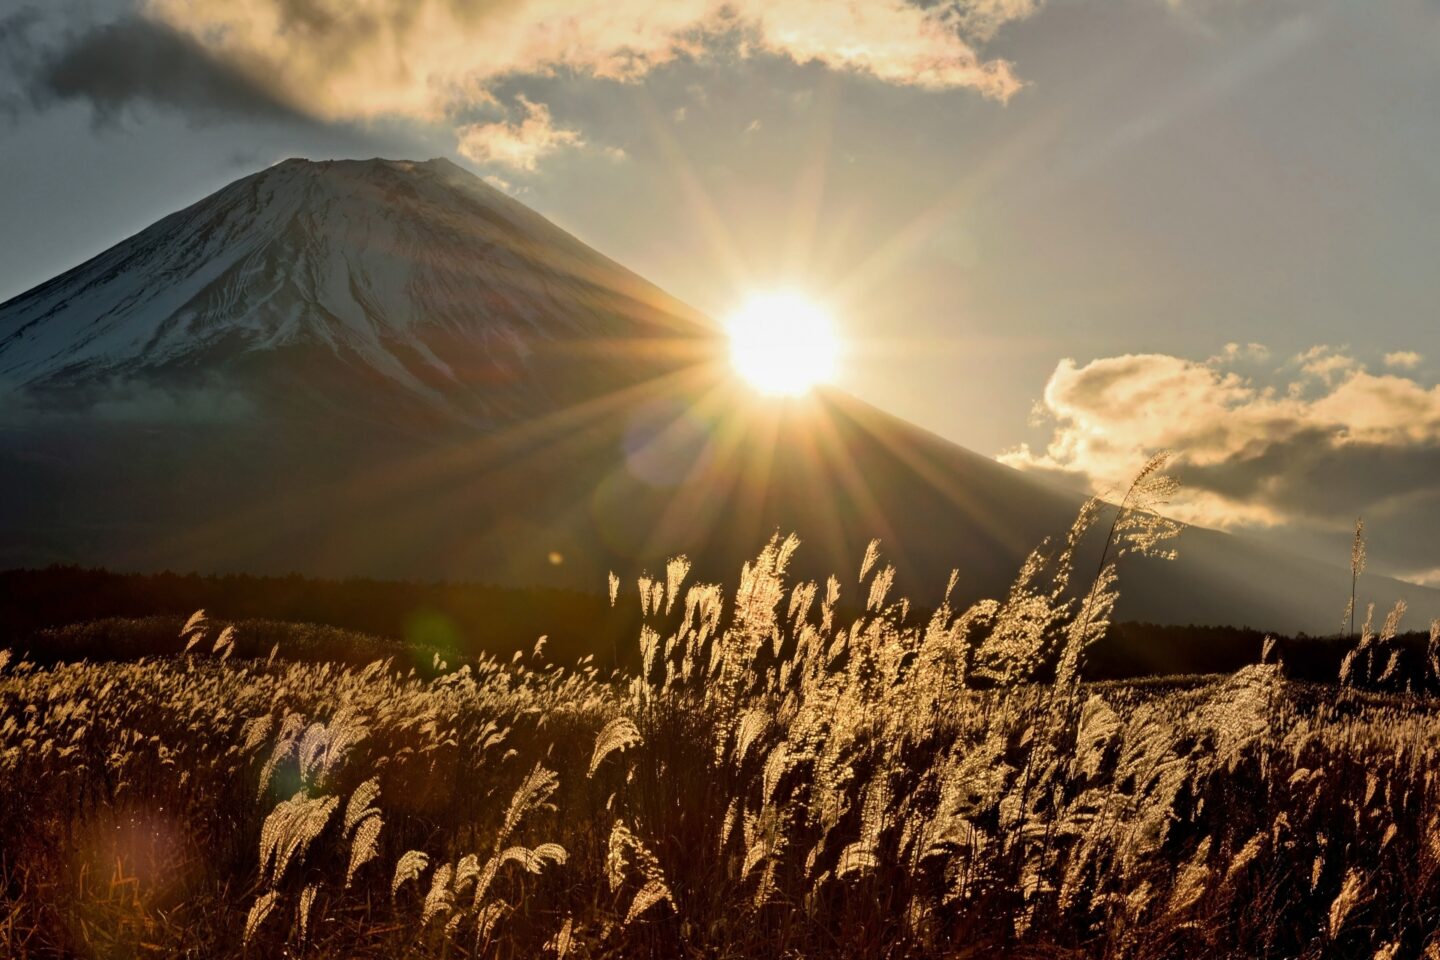
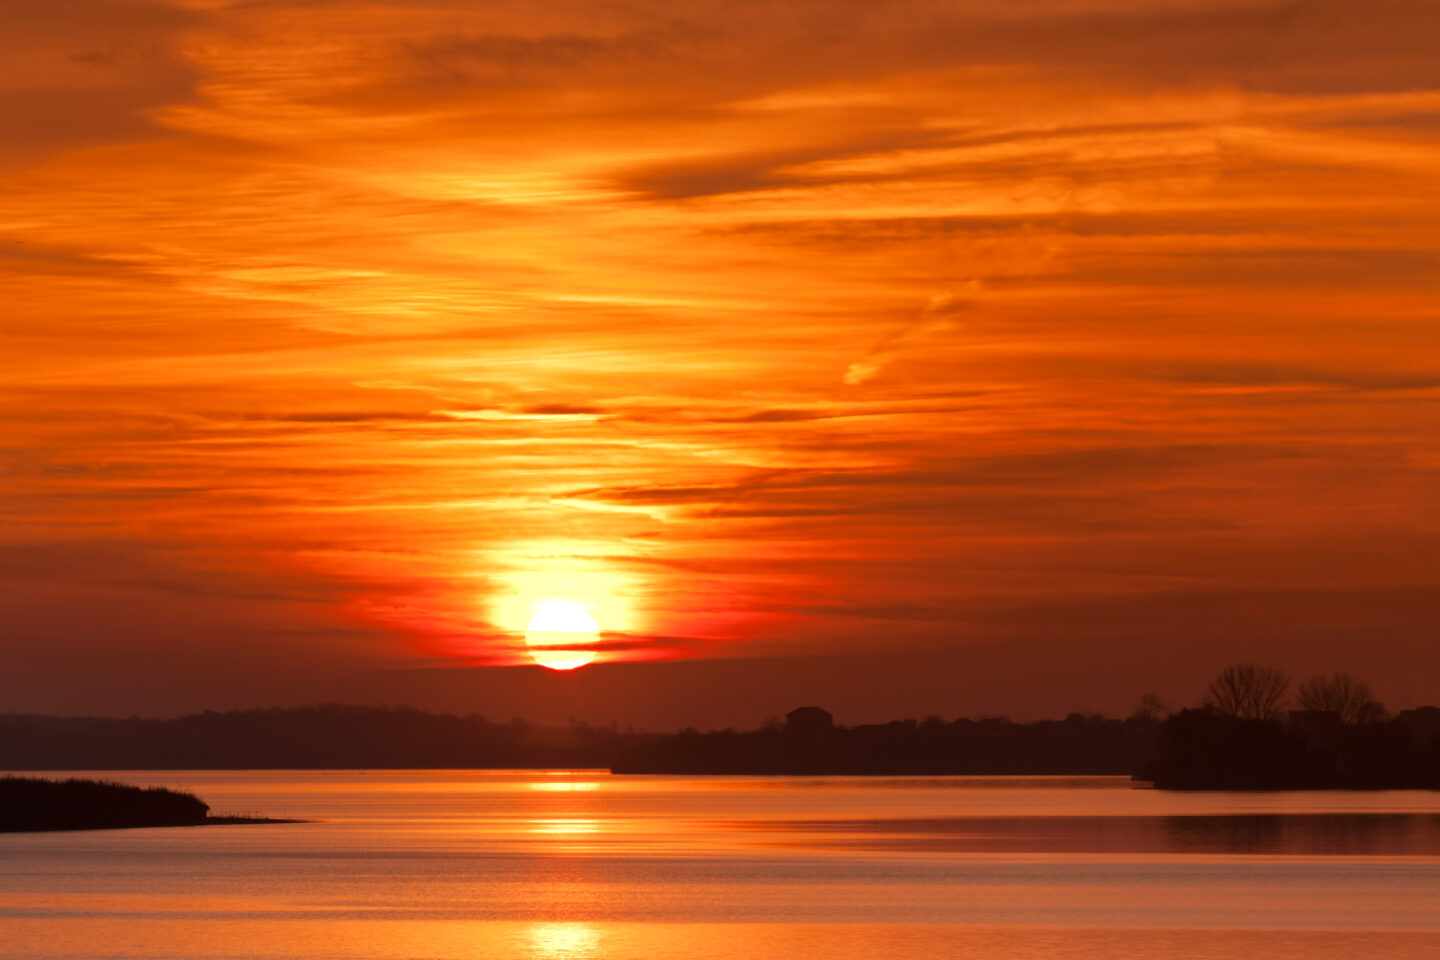
Sunrises and sunsets are a battle of the split second when time and light are limited.
For those who have ever felt frustrated and thought, "I could have taken a better photo…"
In this article,
we will clearly introduce the basic settings and composition tips for photographing sunrises and sunsets that anyone can do.
This page contains advertisements
A tripod will allow for stable shooting
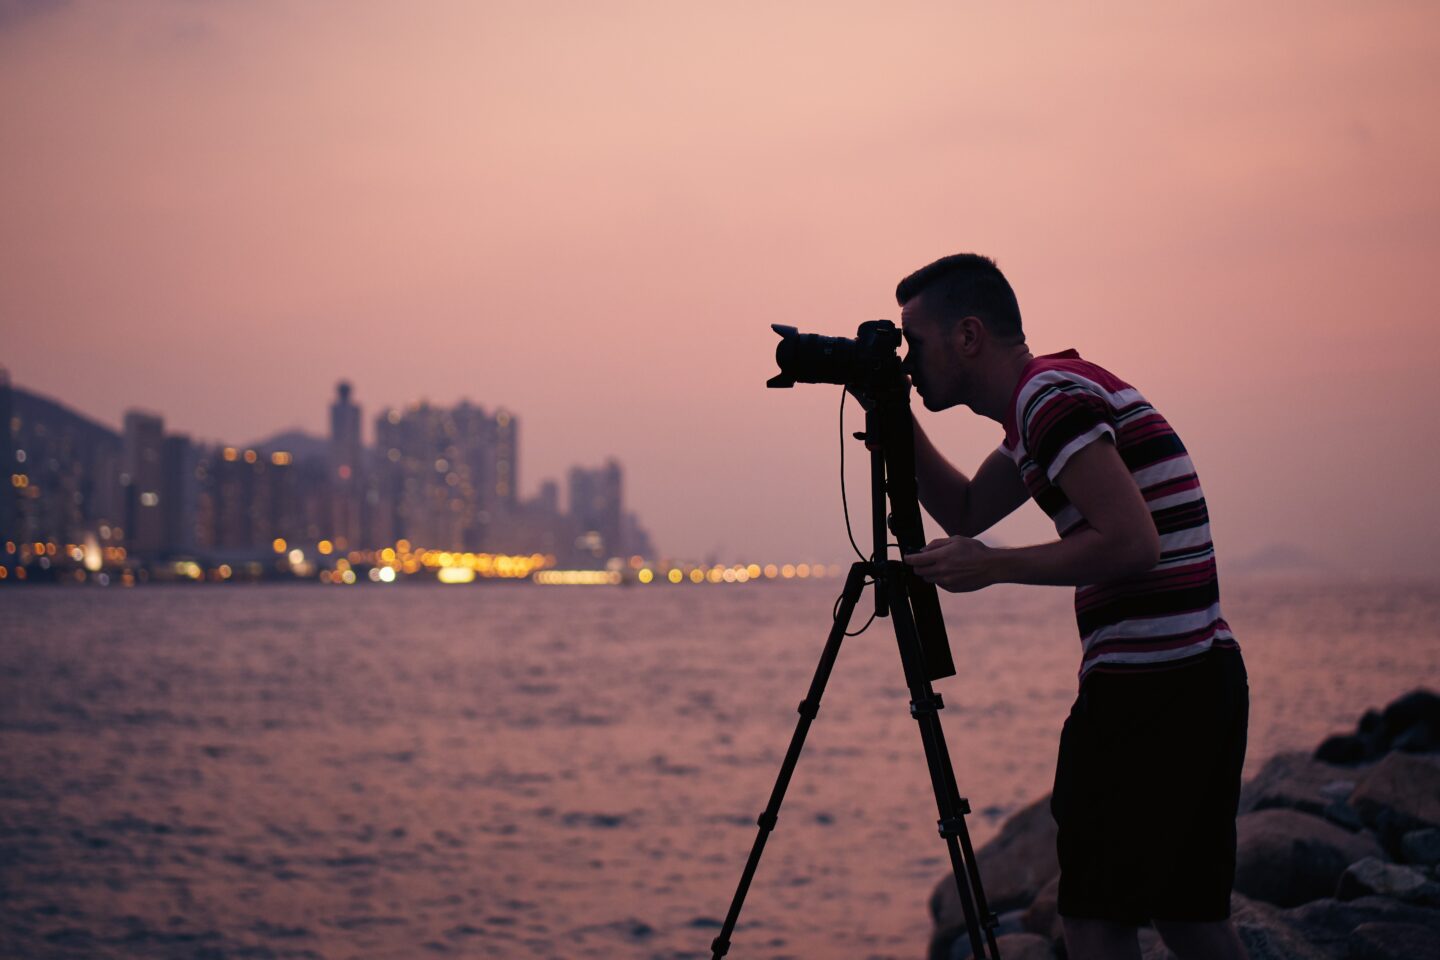
Photographing sunrises and sunsets is perfectly possible using a handheld camera, but using a tripod greatly expands the possibilities.
Especially during times of low light, such as sunrise, you'll need to use a slow shutter speed and fine-tune your composition, so a tripod will give you peace of mind and let you concentrate on shooting.
Set to A mode
- What you can do in A mode
- You can adjust the background to be blurred or sharp.
→ A small F-number (e.g. F1.8-F2.8) makes the background easier to blur.
→ A large F-number (e.g. F8-F11) makes the background clear all the way to the back.
The brightness is kept natural
→ The camera automatically adjusts the shutter speed, so there are fewer mistakes
Useful in situations like these!
| Scene | Recommended Aperture (F-stop) | Effect |
|---|---|---|
| Shooting a person with a sunset | F2.8–F4 | Softly blurs the background to highlight the subject |
| Capturing an entire sunrise landscape | F8–F11 | Keeps everything sharp from foreground to background |
| Including flowers or grass in the foreground | F4–F5.6 | Creates depth with moderate background blur |
A mode is the easiest shooting mode to use when you want to create the atmosphere you want.
Just adjusting the aperture (F-stop) can dramatically change the impression of the photo, so be sure to try out different F-stops.
STEP.1
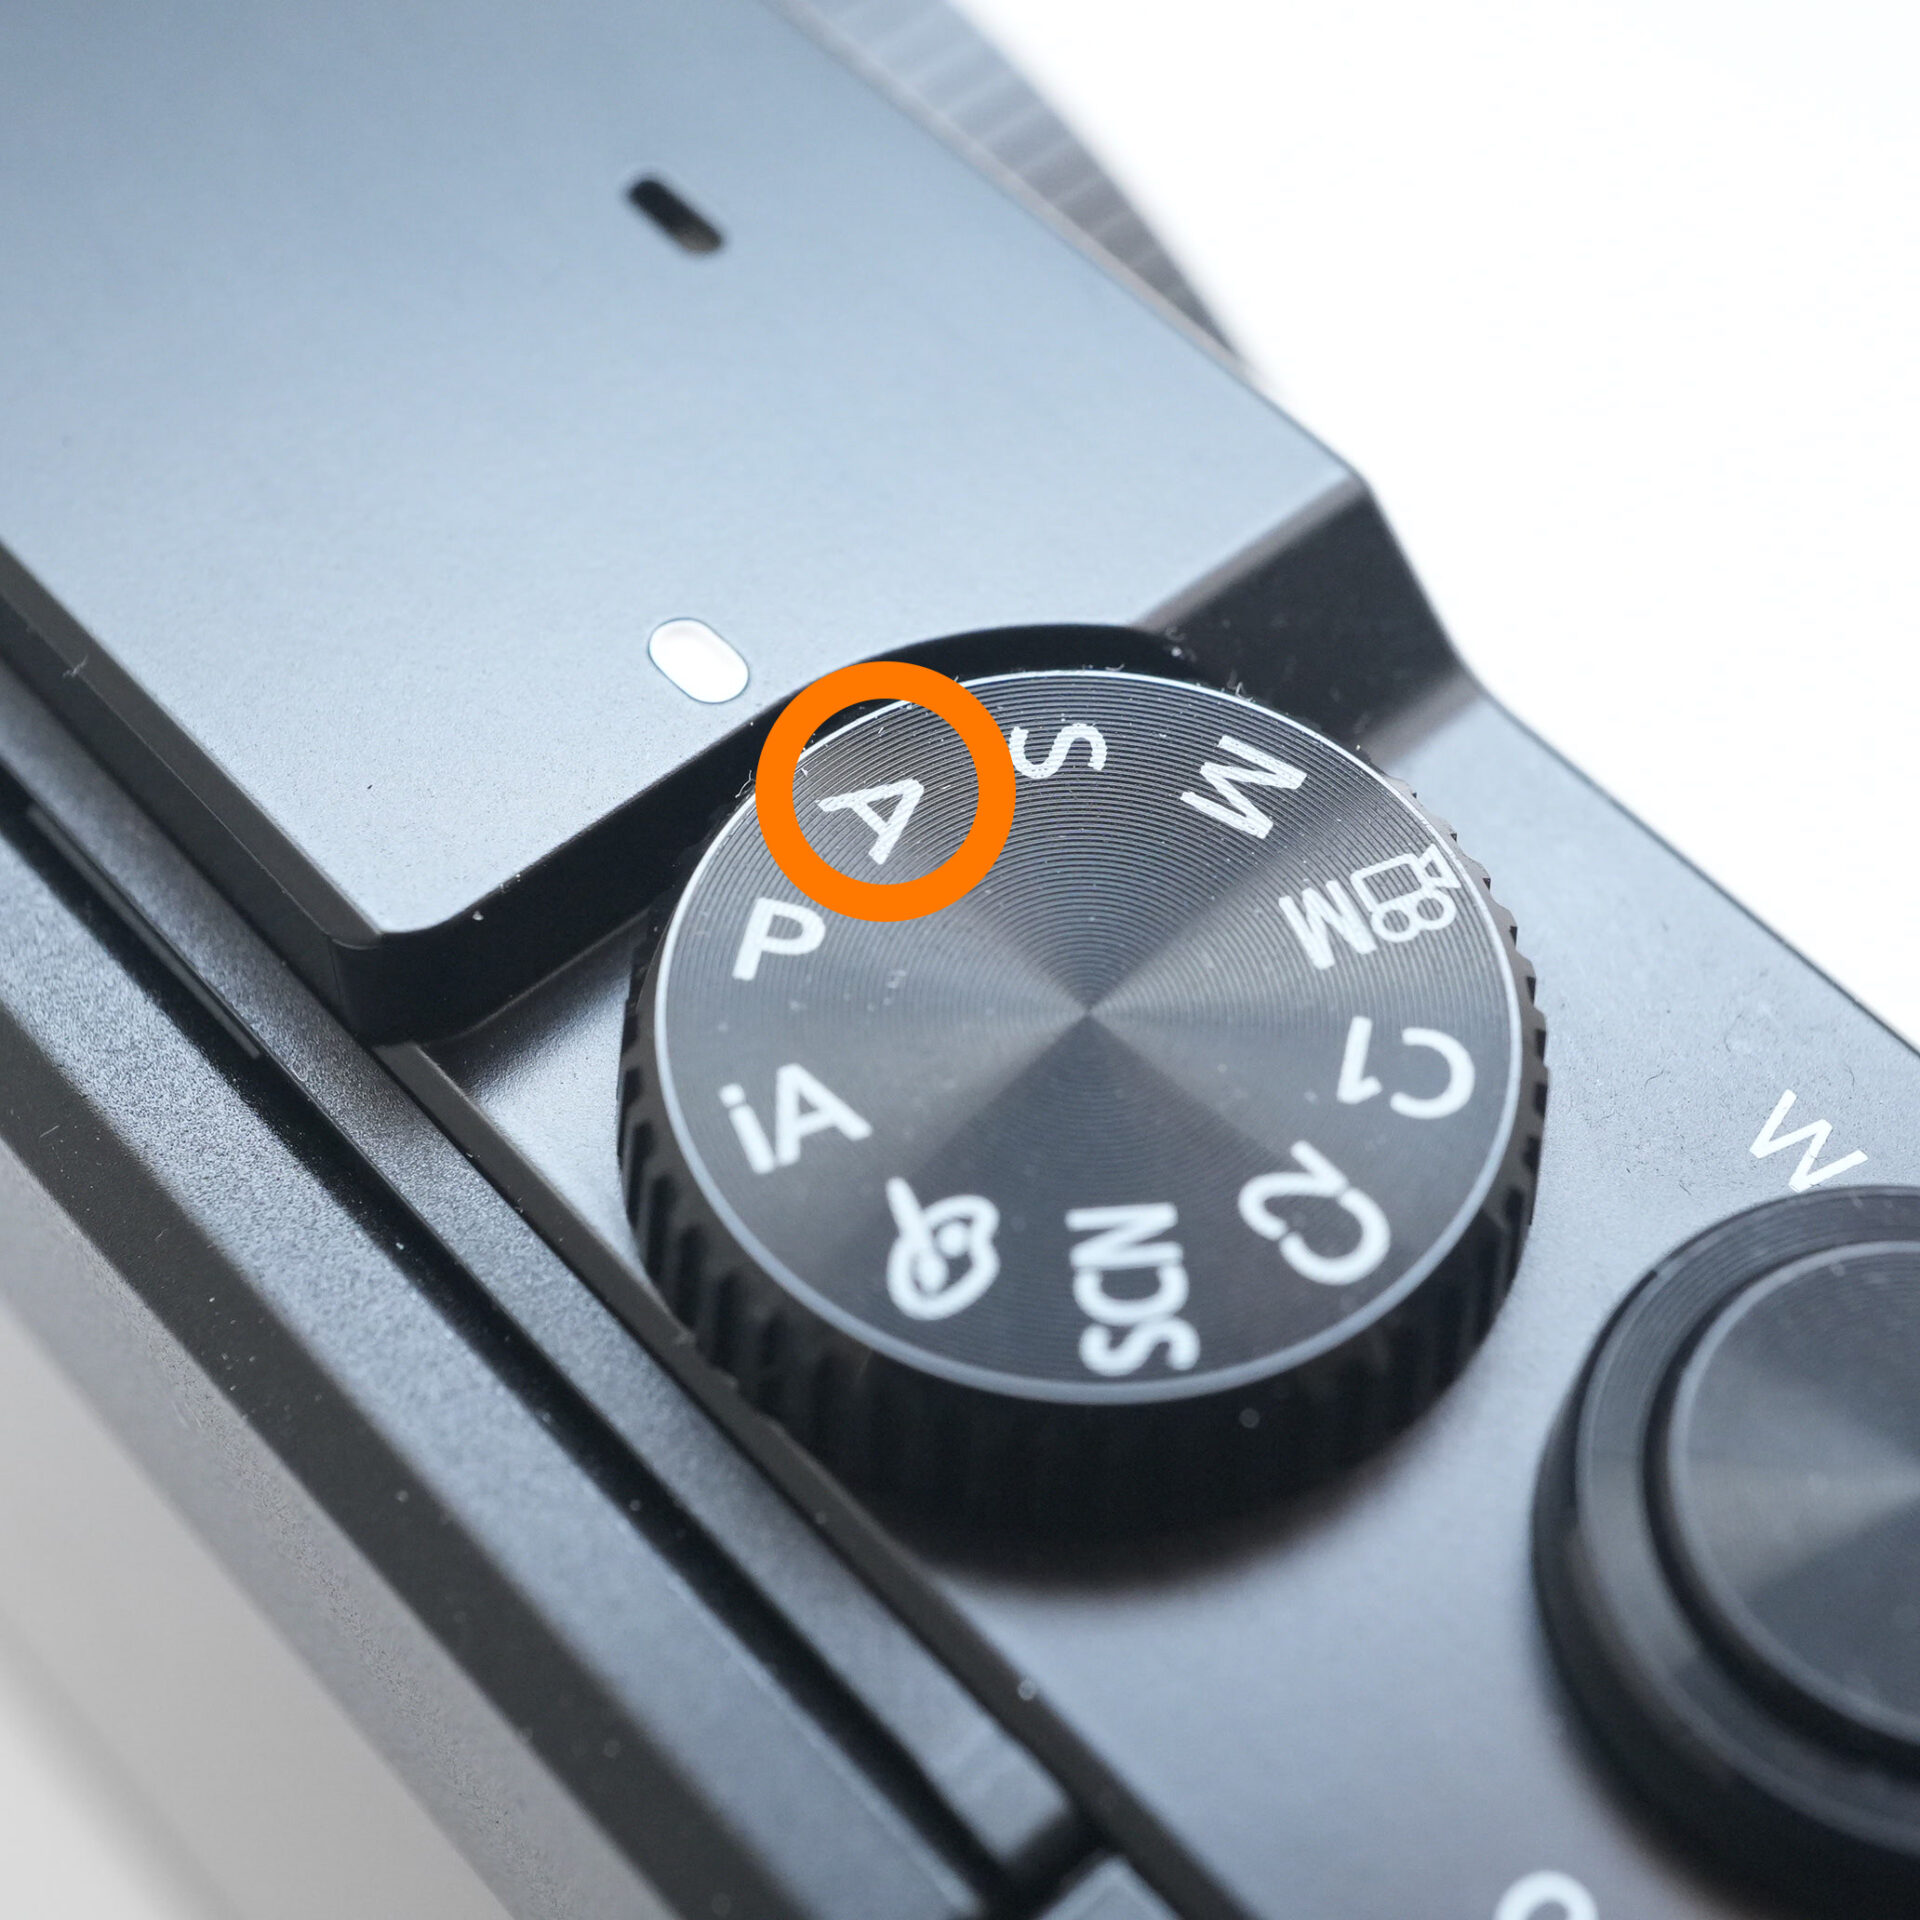 |
| Set to A mode |
We recommend an F-stop between 8 and 11.
When you want to clearly capture expansive landscapes, such as sunrises and sunsets, we recommend setting the f-stop to f/8 to f/11.
This range is just the right aperture value for capturing a sharp image with the background in focus.
- Why is an between F8 and F11 appropriate?
- ・The depth of field (range in focus) becomes deeper.
→ Everything from the foreground to the background is in focus, and the sky, horizon, foreground, and everything else can be recorded clearly.
・Range in which lens performance is stable
→ Most lenses achieve their highest resolution between F5.6 and F11.
・Contrast is less likely to be lost even in backlit conditions or during periods of high contrast
→ By narrowing the aperture, light bleeding and halation are reduced, resulting in a more natural depiction.
If you want to capture the colors of the sun and sky, and the three-dimensional feel of the landscape in your photos, setting the F-stop between F8 and F11 is the best option. Try using it to take a sharp photo with depth.
STEP.1
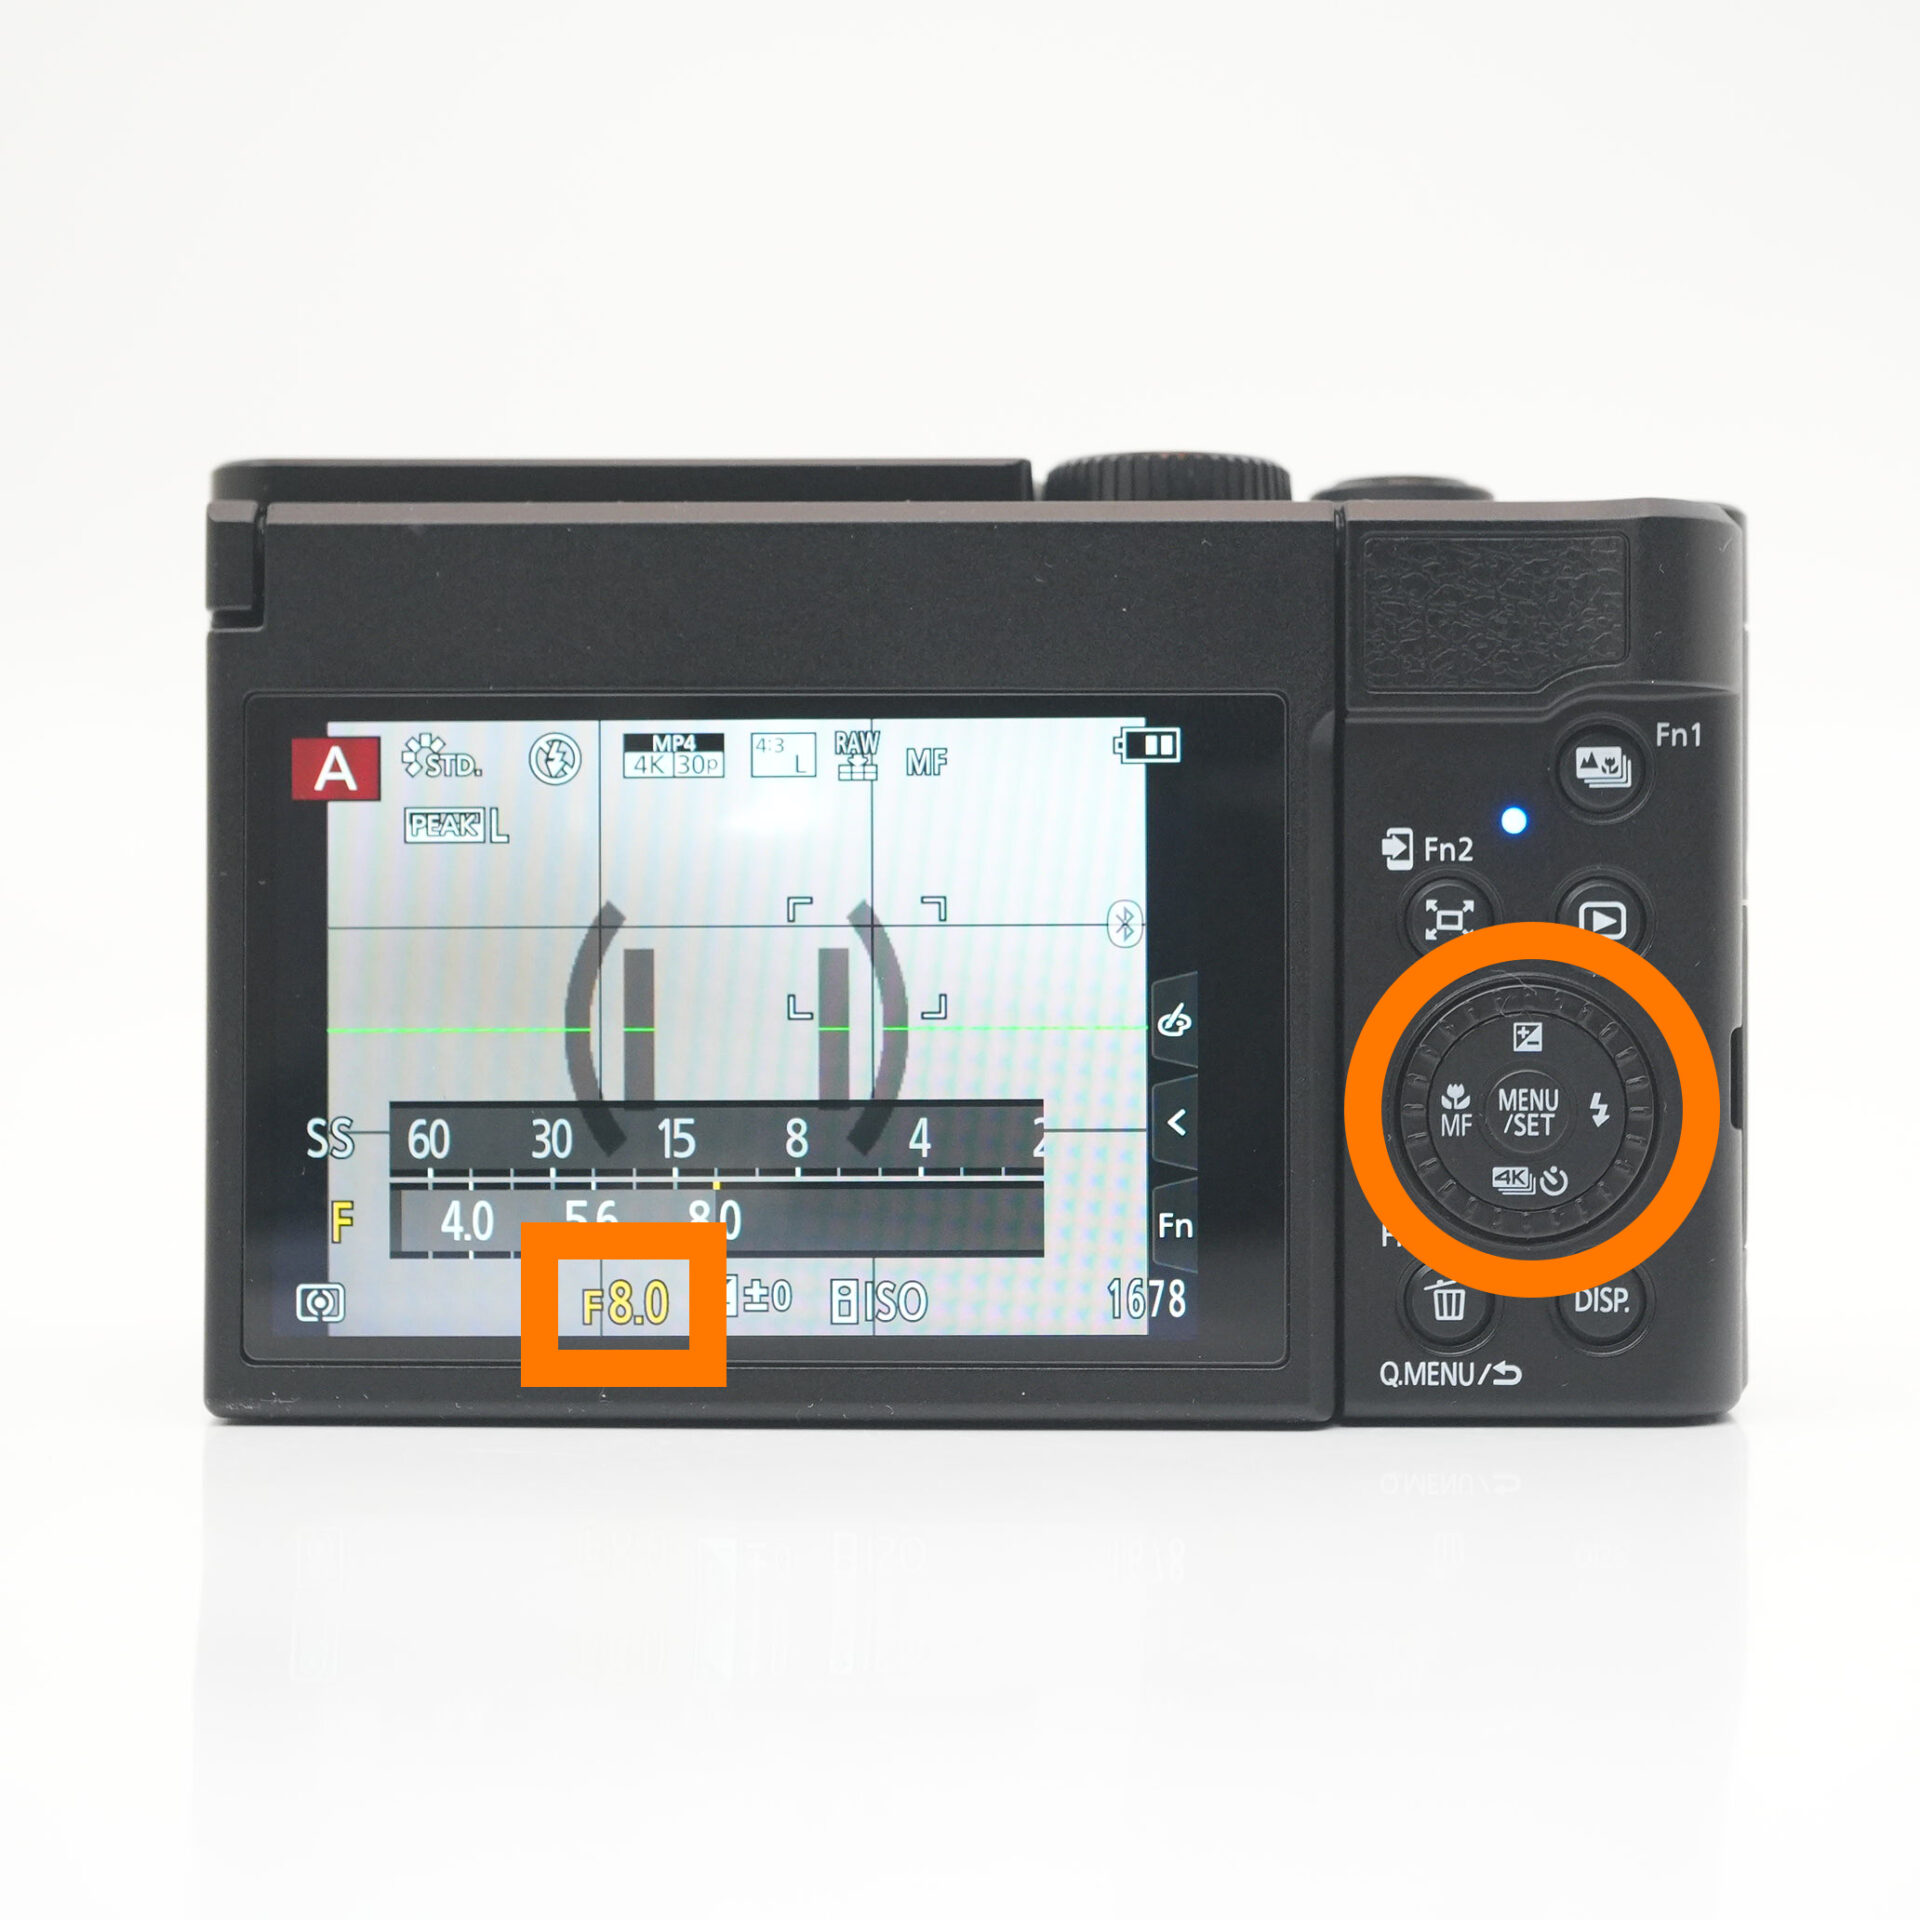 |
| Turn the dial to set F to 8. |
ISO Auto is safe in scenes where the brightness changes
When photographing a sunrise or sunset, the light intensity is constantly changing.
In such cases, it is convenient to set the ISO sensitivity to Auto (automatic control).
- Advantages of ISO Auto
- ・Automatically adapts to changes in brightness
→ Even if the light gets stronger as the sun rises, the ISO will automatically lower to maintain appropriate exposure.
・No need to reset the ISO while shooting
→ You can concentrate on the shutter speed and F-stop, so you're less likely to miss an opportunity.
・Easy to maintain brightness without blurring
→ ISO Auto is especially useful when shooting handheld, as it automatically adjusts to an appropriate sensitivity.
- Important points to note when using Auto ISO
- ・If the ISO is too high, noise will increase.
→ Set the "ISO upper limit (e.g. ISO1600)" in the settings menu to be on the safe side.
・Switch to manual if the exposure is unstable.
→ Fixing the ISO is one way to go if you're using a tripod or want to prioritize image quality.
Auto ISO is a very reliable setting for sunrise and sunset scenes where the brightness changes frequently during shooting.
By leaving the exposure balance to the camera, you can enjoy shooting while concentrating on composition and timing.
This is a convenient setting that is also recommended for beginners.
STEP.1
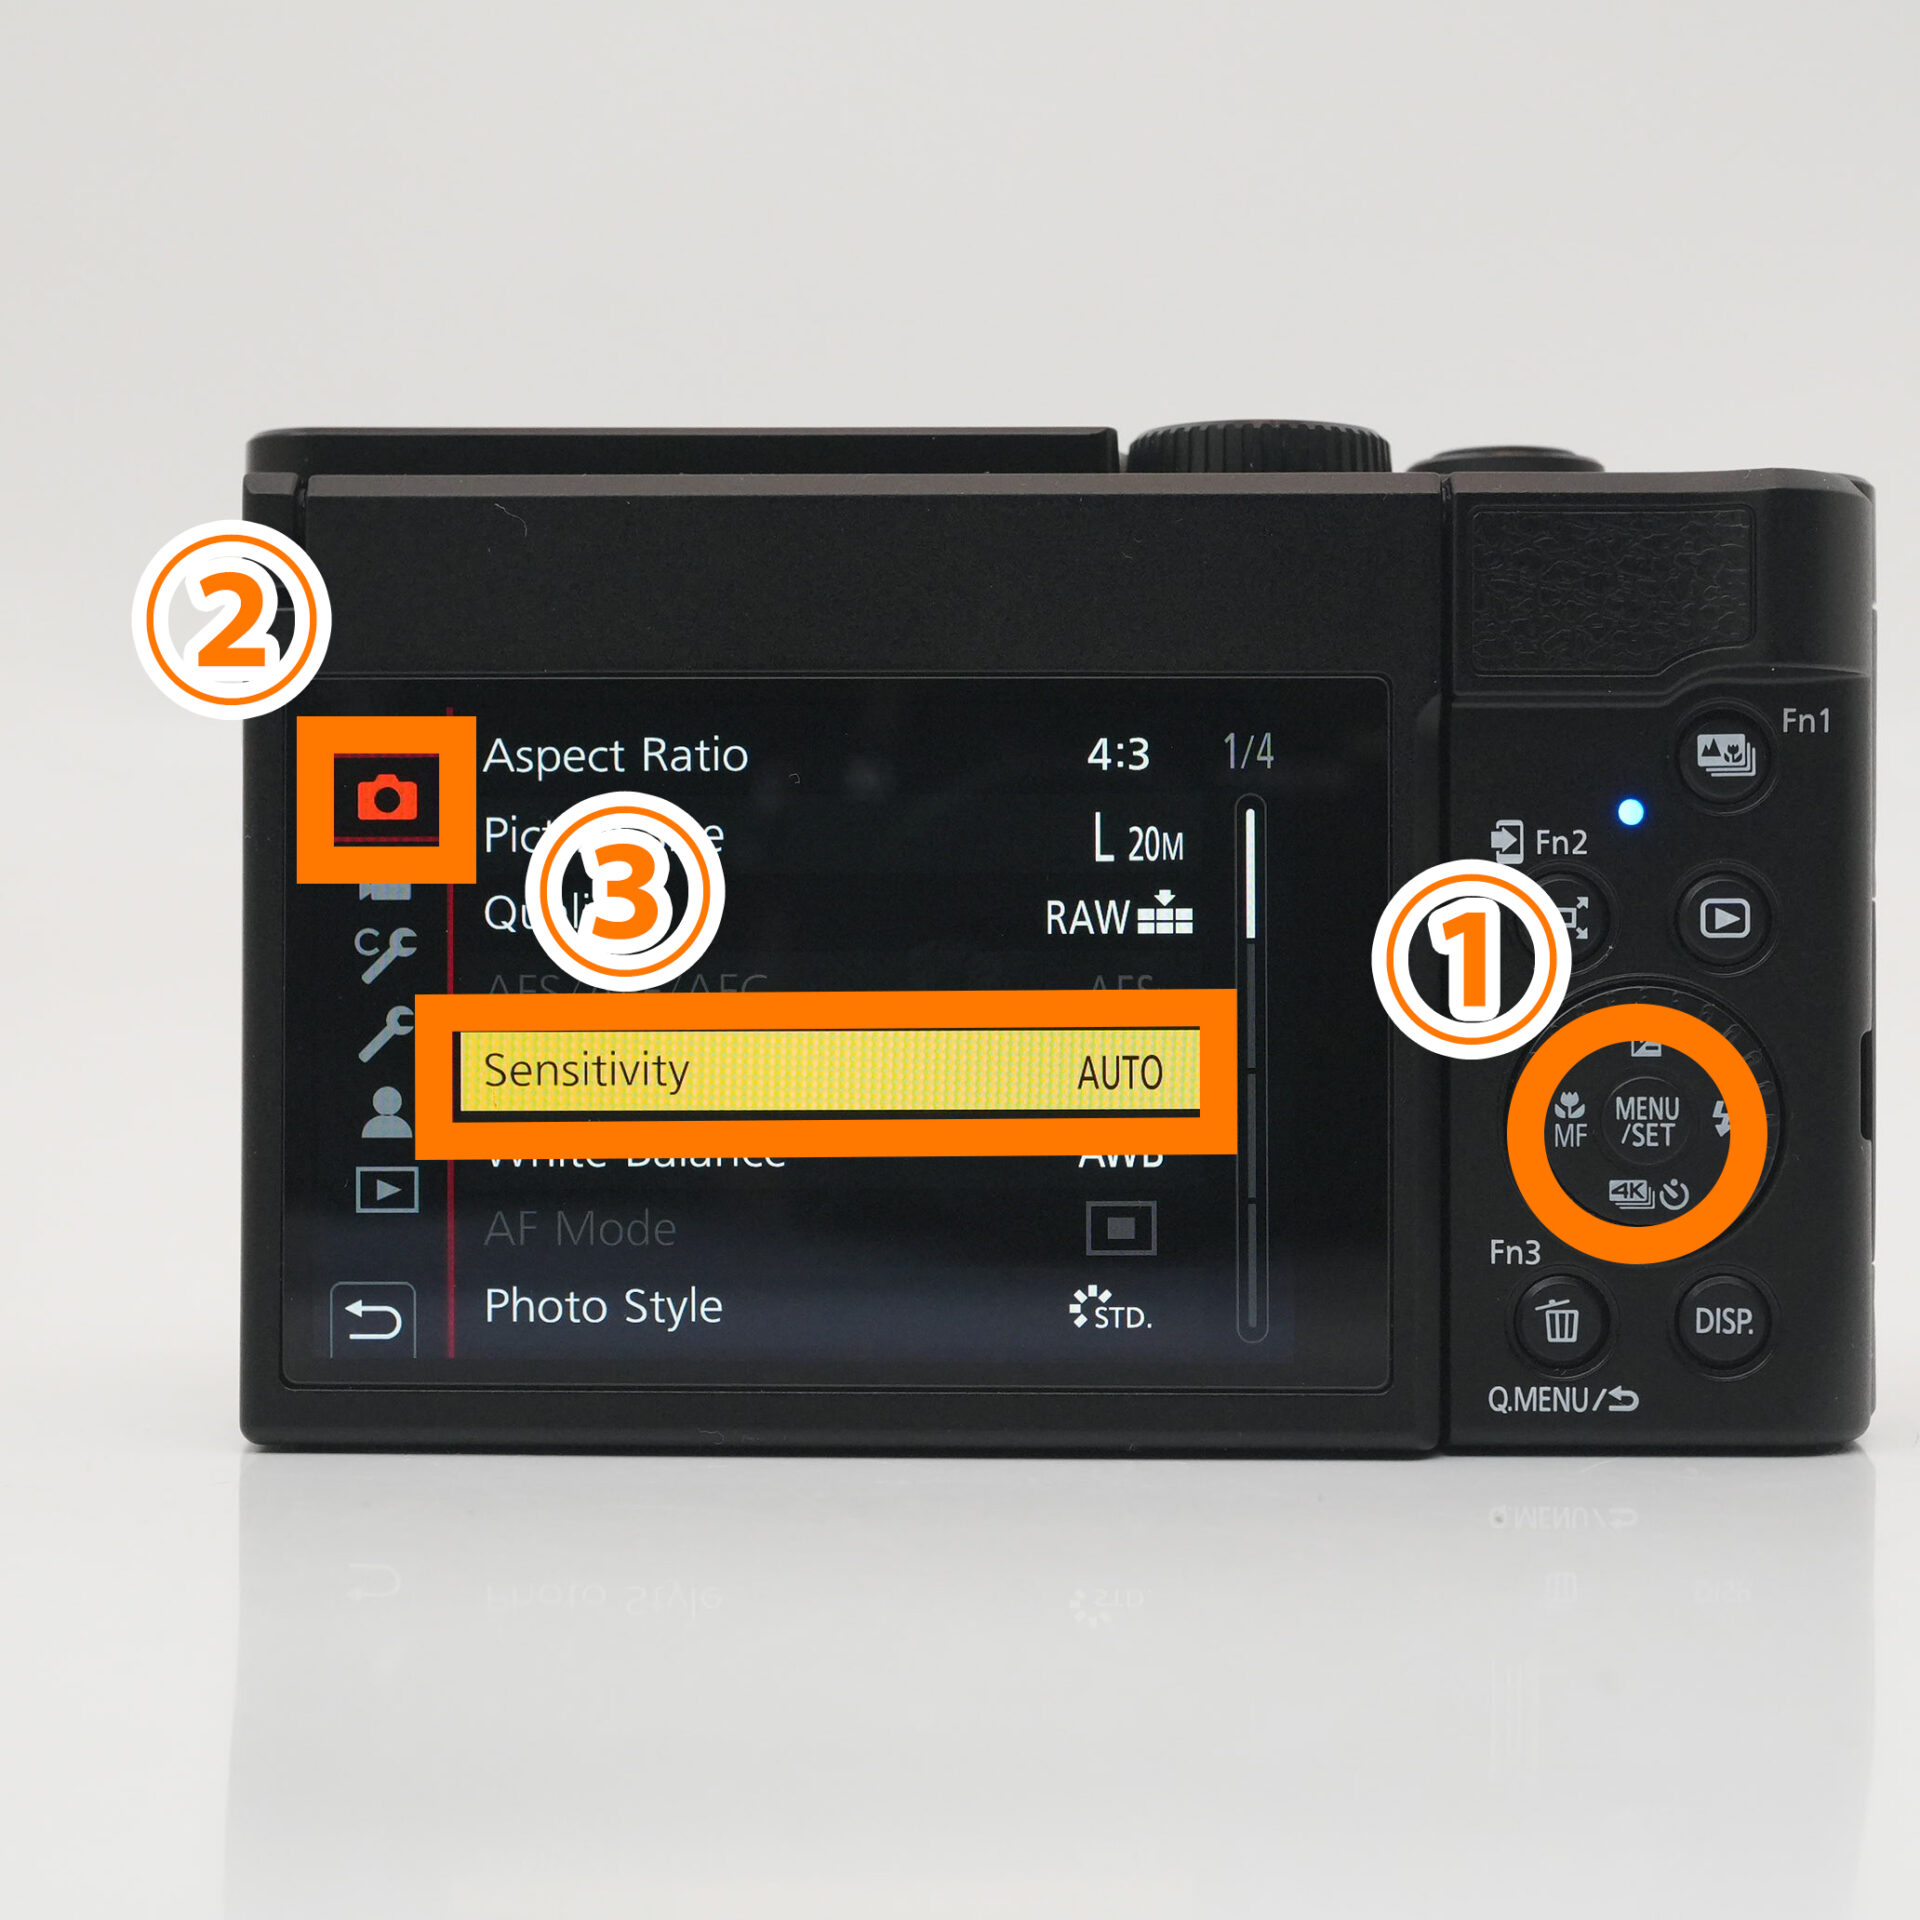 |
| MENU→camera icon→Sensitivity |
STEP.2
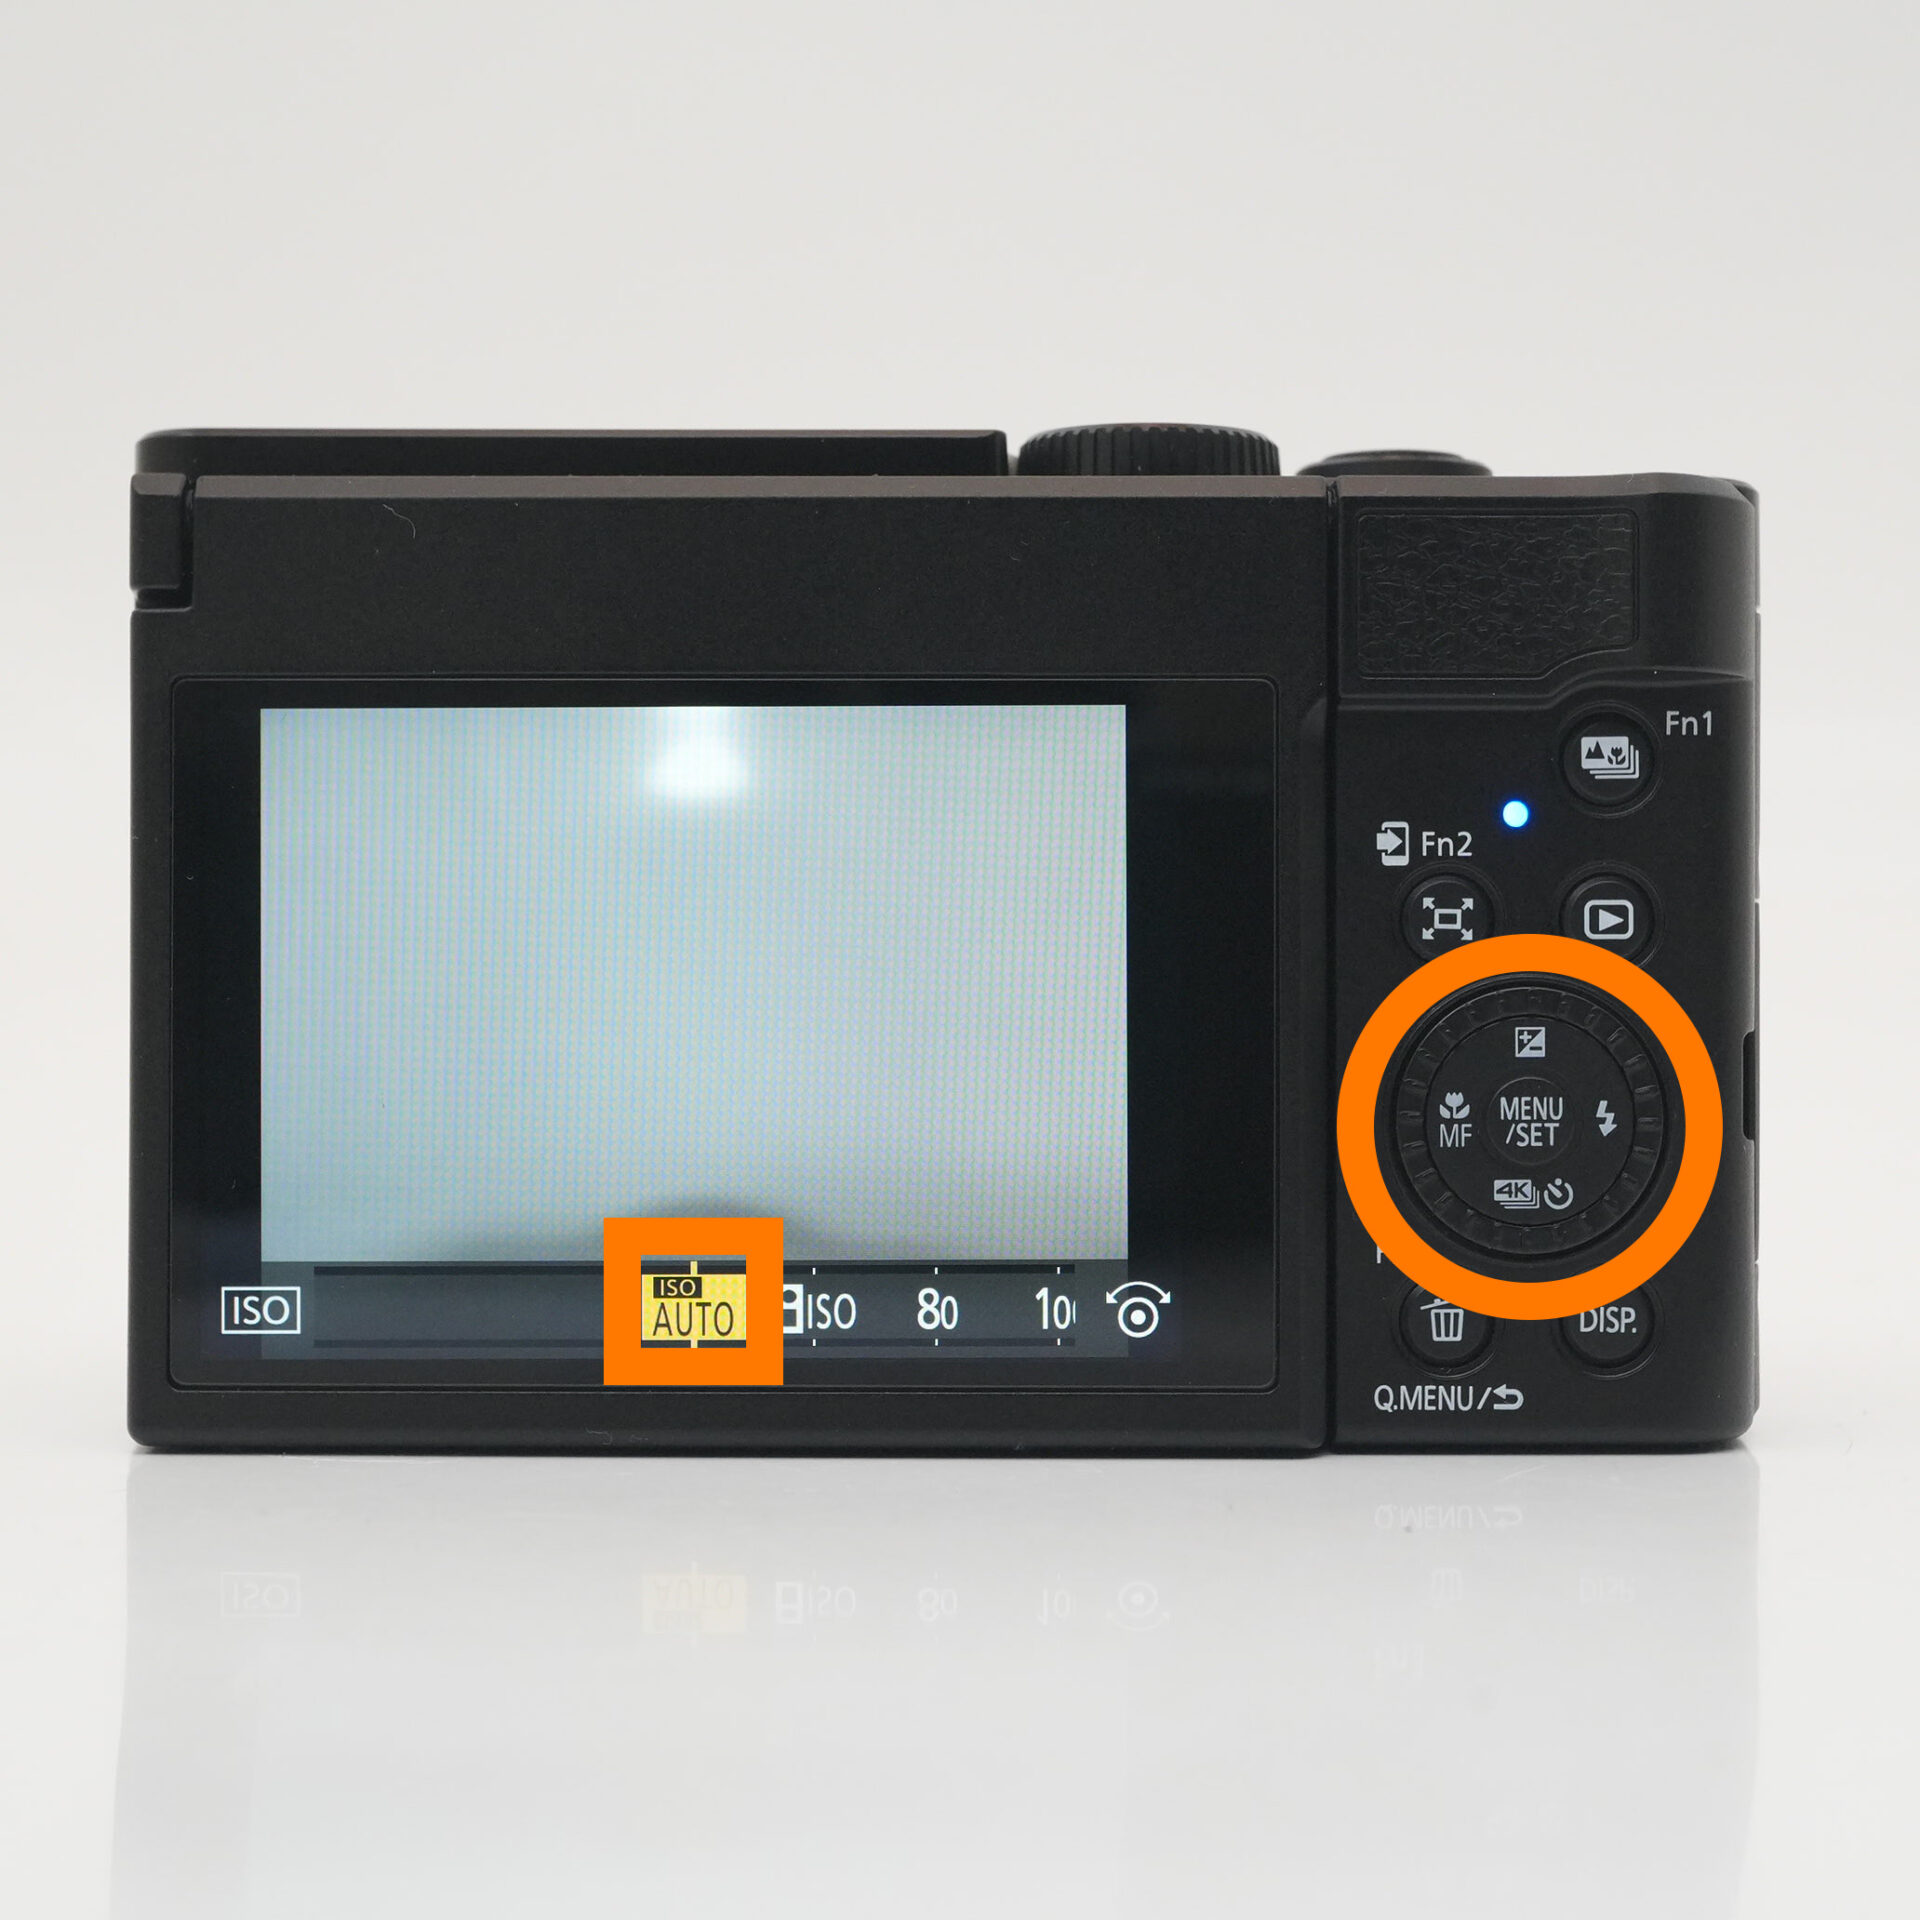 |
| Set the ISO dial to auto |
If the photo is too dark or too bright, adjust it with exposure compensation.
When shooting relying on your camera's automatic settings, you may find that the image is a little dark or too bright.
In situations like these, the "exposure compensation" function can be useful.
This function enables you to adjust the brightness determined by the camera to make it a little brighter or darker, allowing you to achieve the brightness you desire.
STEP.1
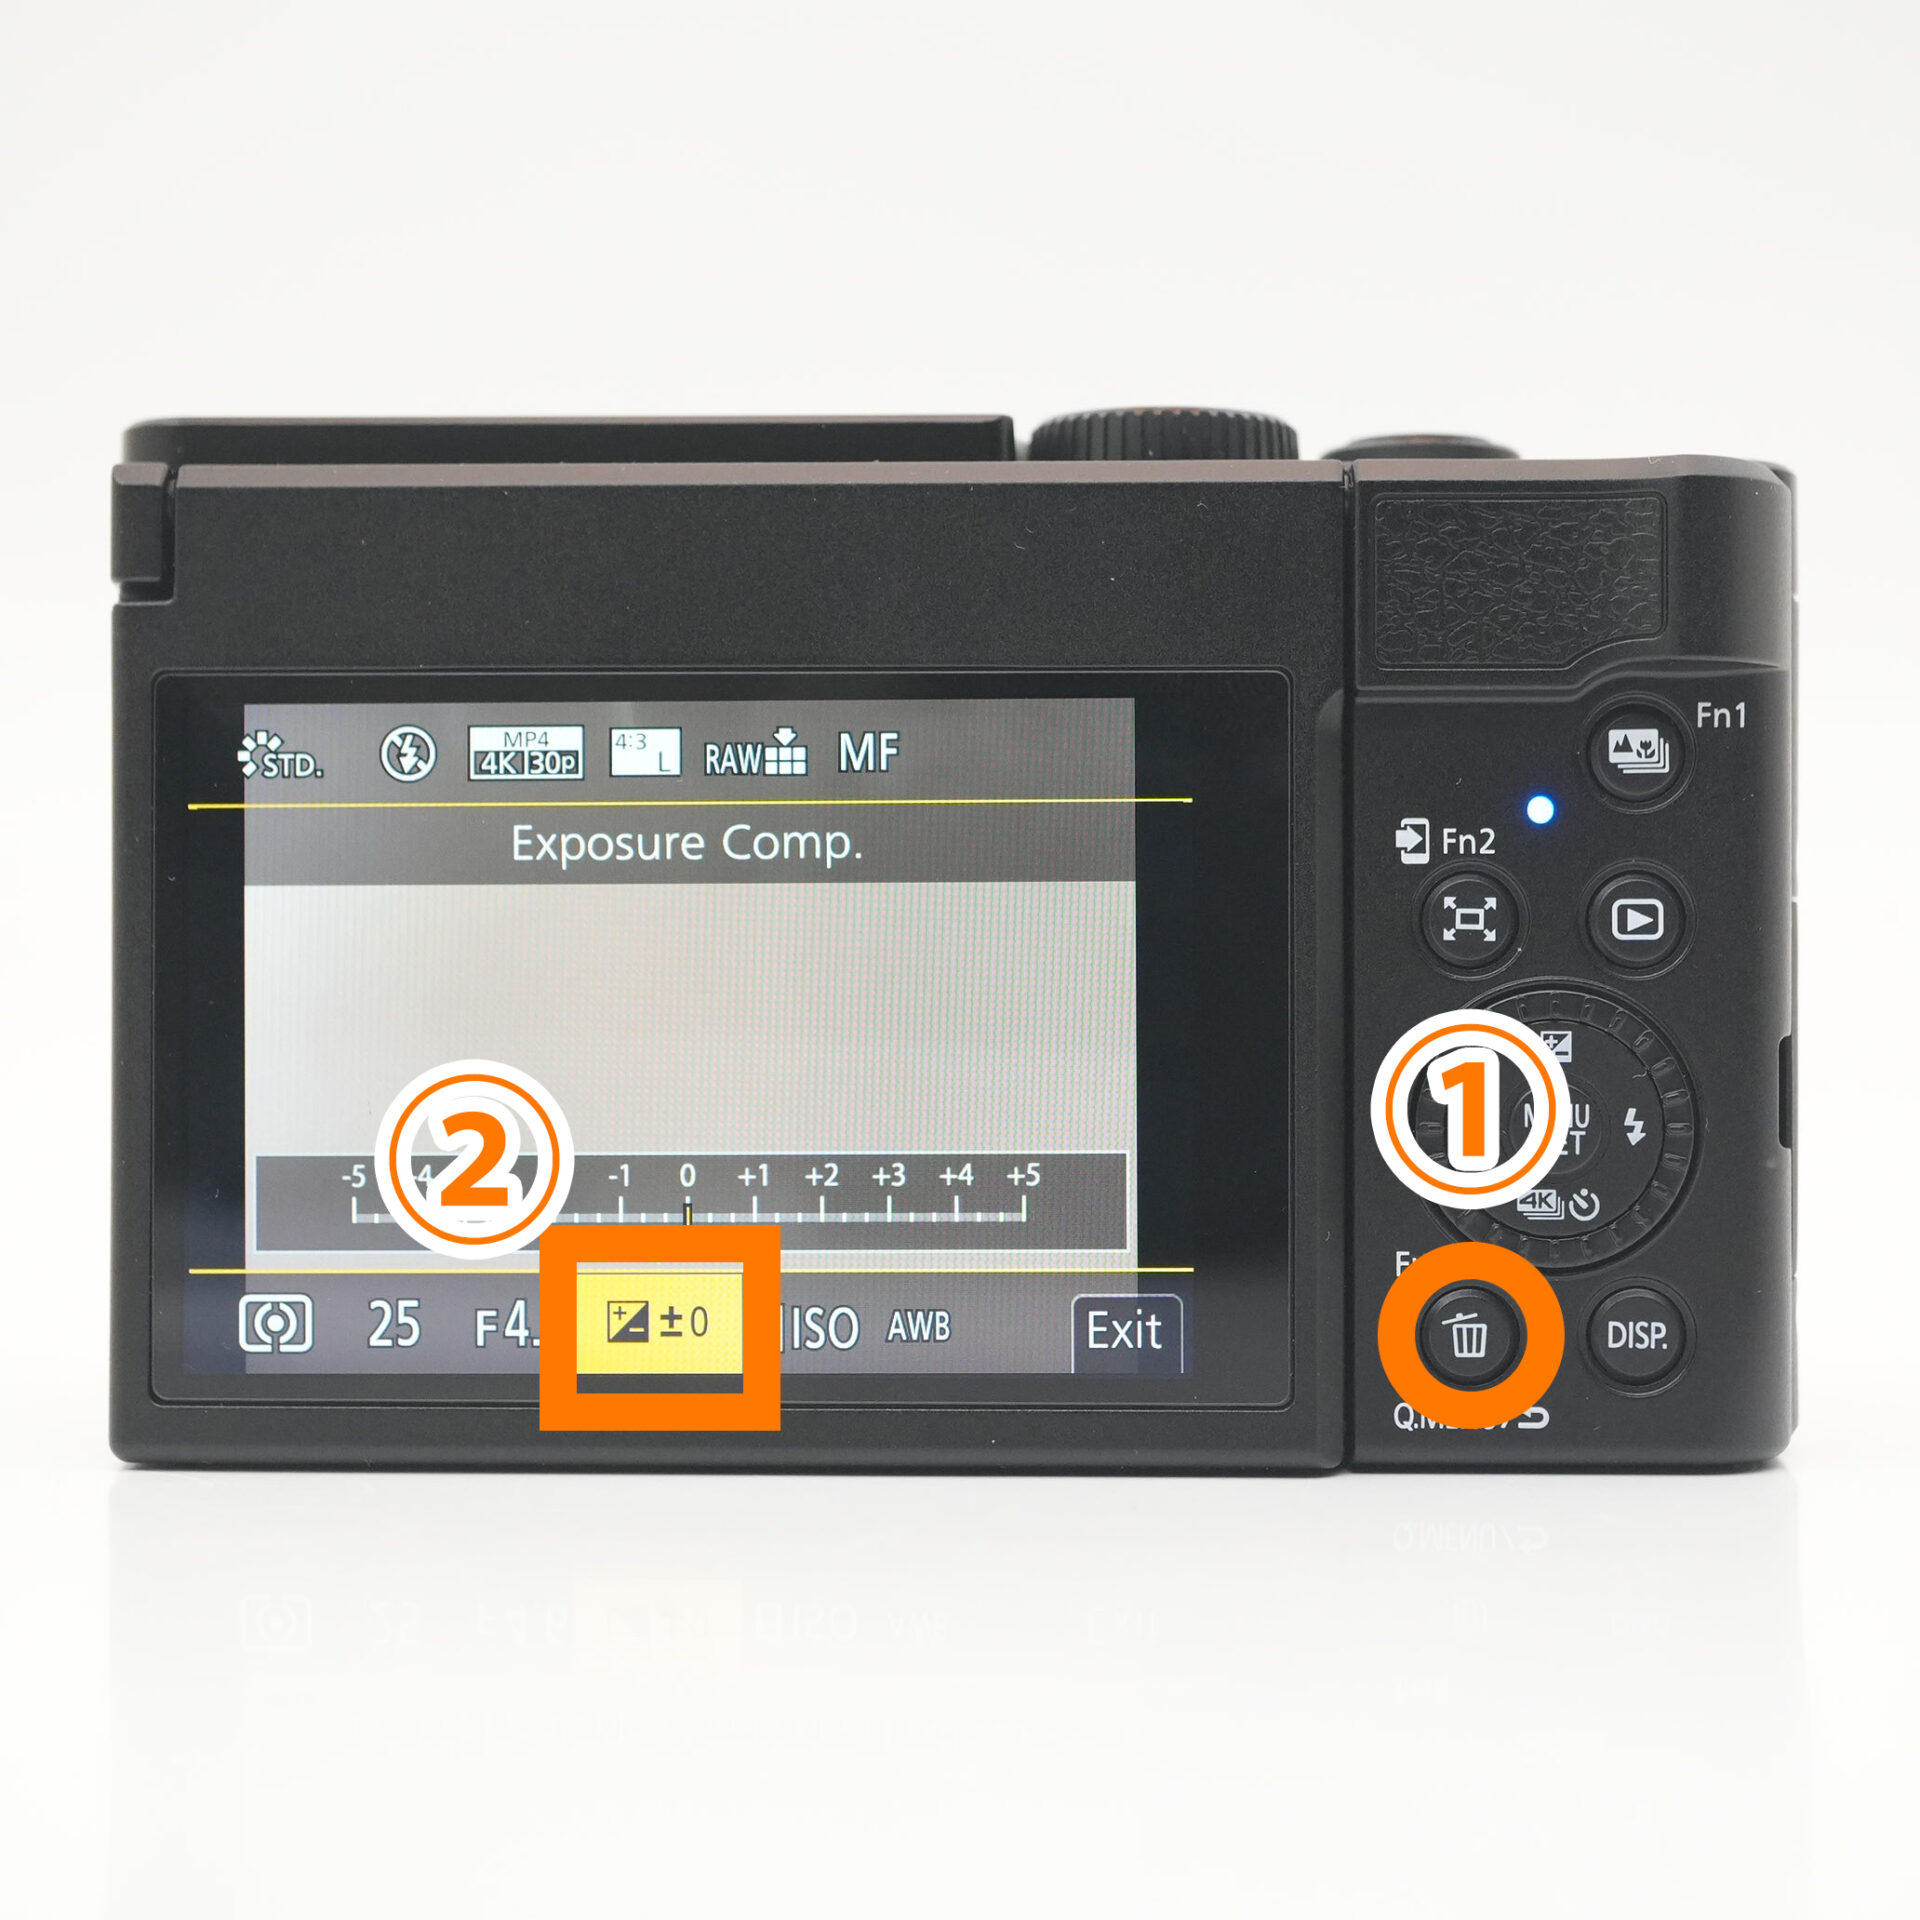 |
| Select the trash icon → Exposure compensation |
STEP.2
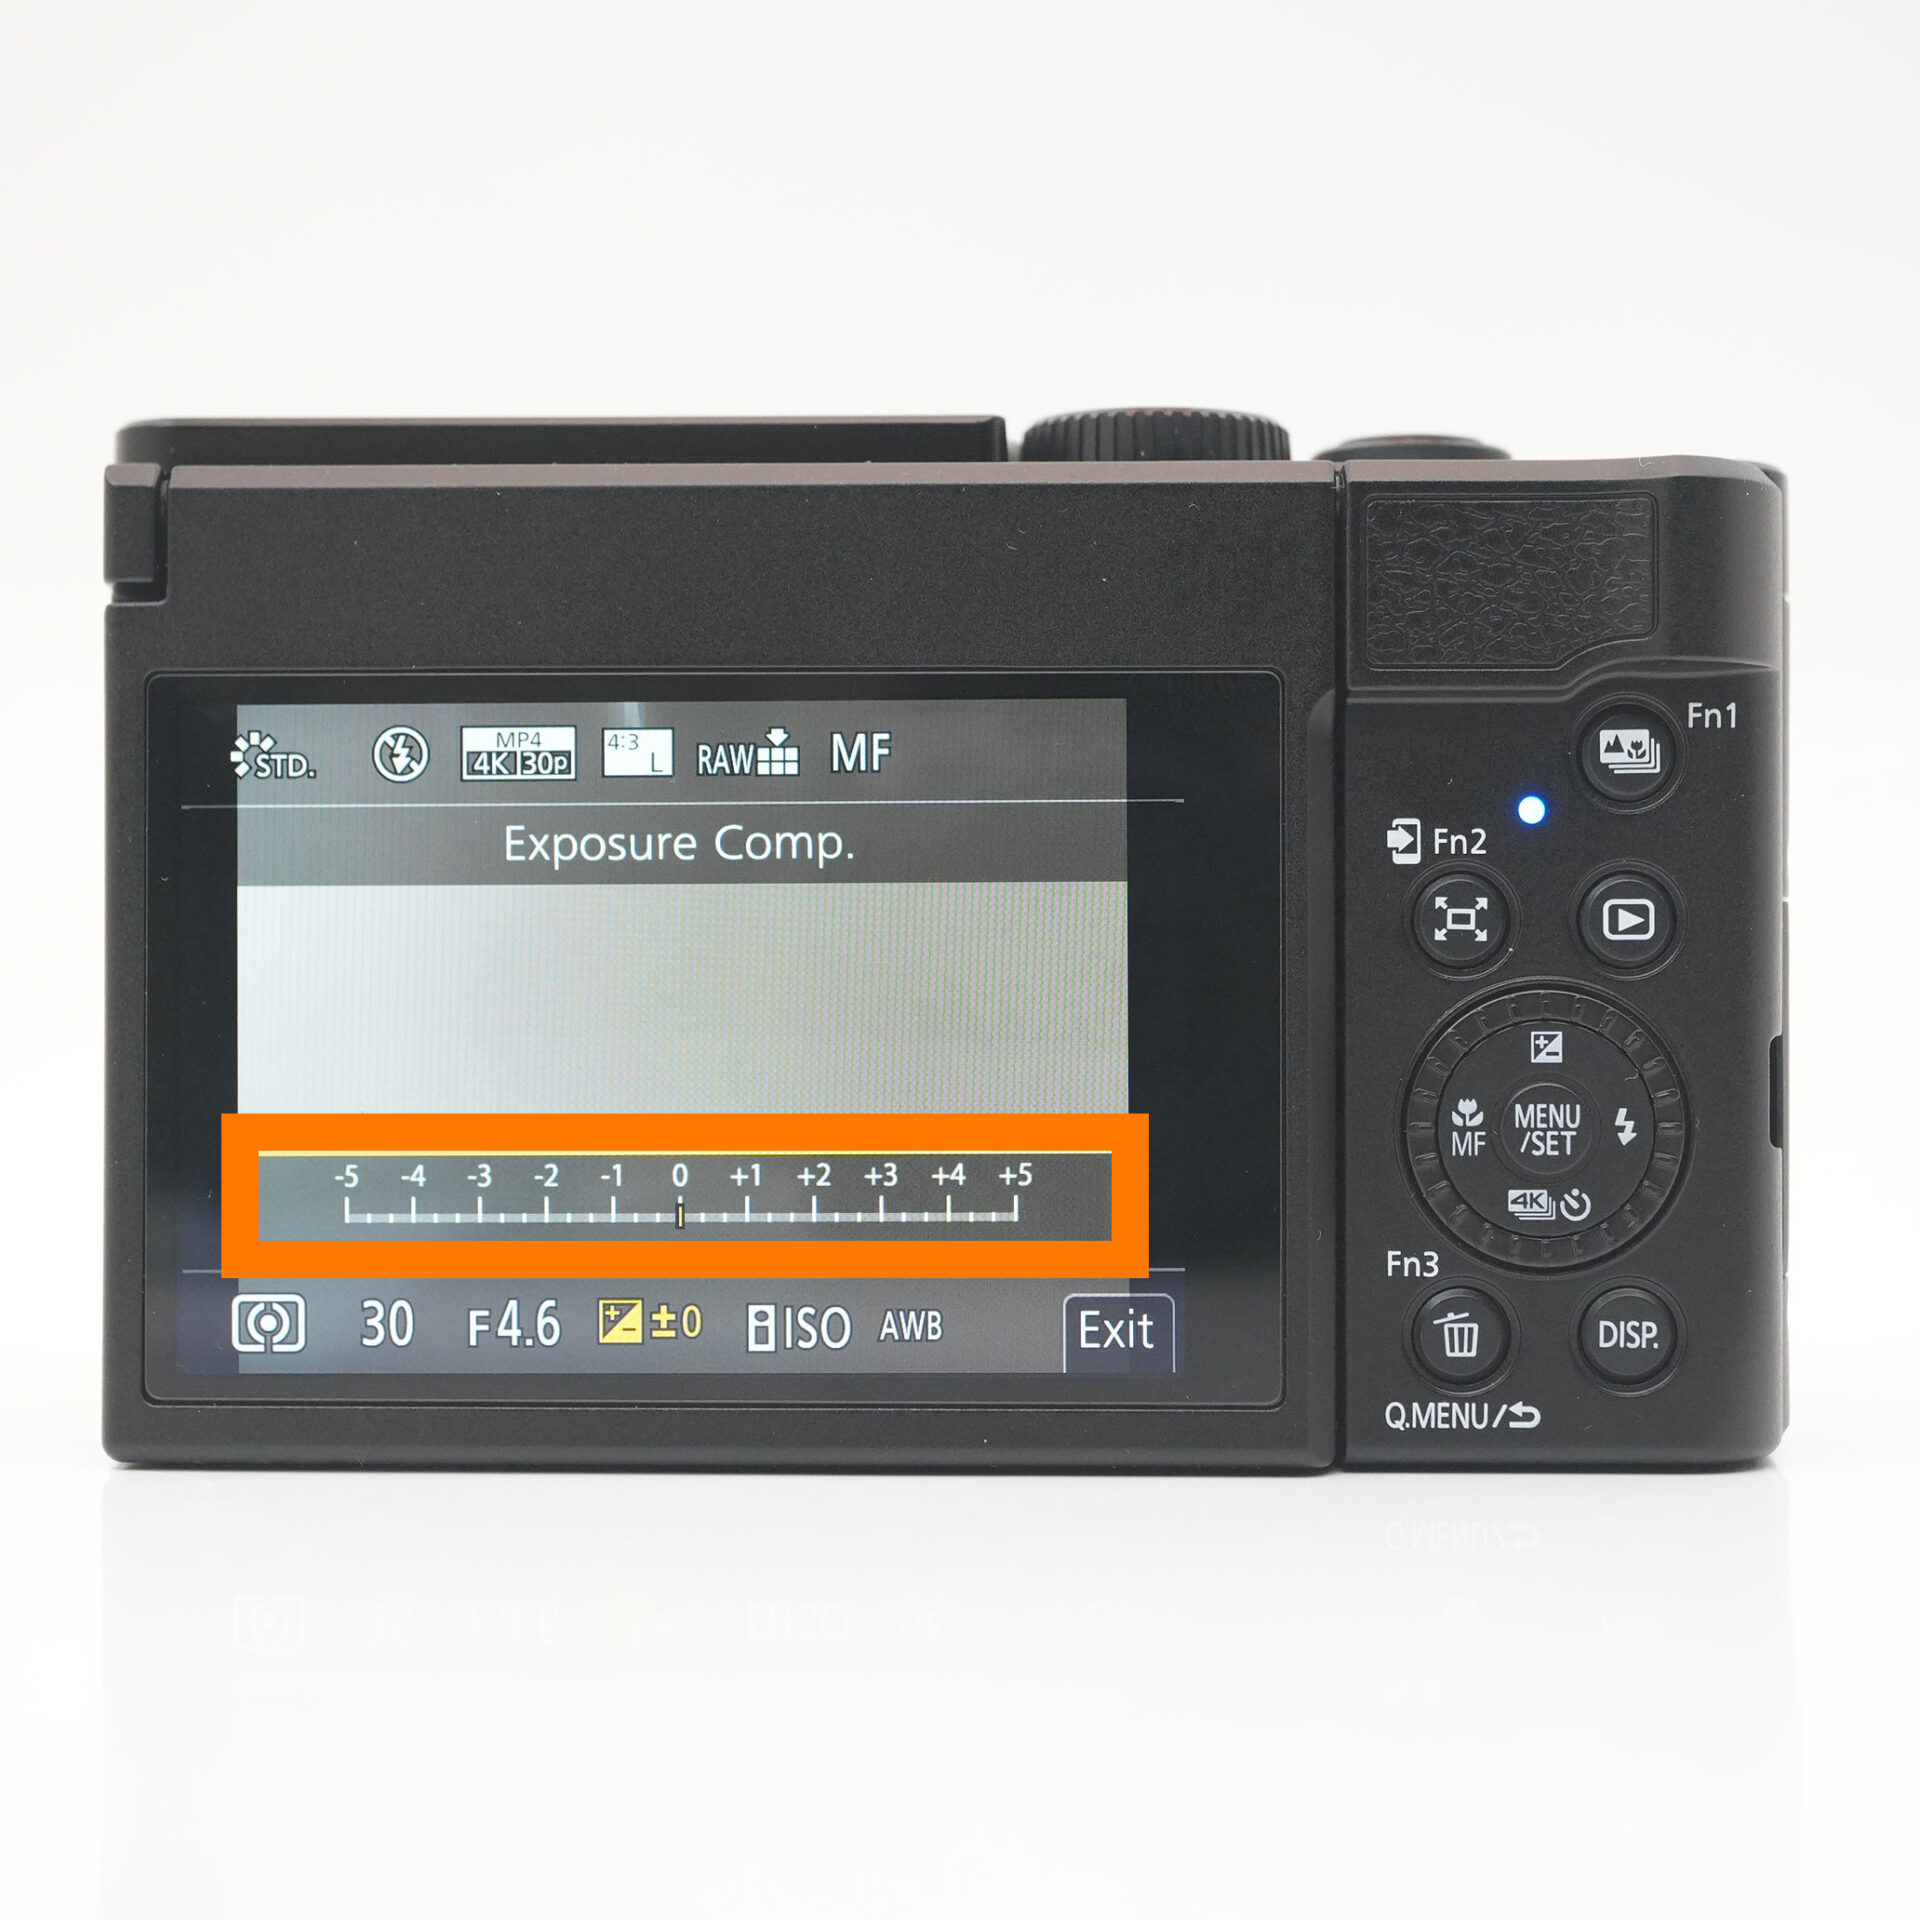 |
| Set appropriate brightness |
Tips for setting white balance
White balance (WB) is an important setting that determines the overall color tone (color temperature) of a photo.
Adjusting the white balance can greatly change the impression of a photo, especially at times when orange and blue light has a strong influence, such as during the sunrise or sunset.
- What changes with white balance?
- ・You can control the mood of your photo by adjusting the color temperature.
Make it more bluish for a cooler impression.
Make it more orange for a warmer, softer atmosphere.
・You can adjust the color to be close to what you see with the naked eye, or you can emphasize the atmosphere.
Recommended white balance settings
| Scene | Example Setting | Effect / Impression |
|---|---|---|
| Capture sunrise with natural colors | Daylight (around 5200K) | Colors appear close to what you see with the naked eye |
| Emphasize the sunset in a dramatic way | Cloudy (6000–6500K) | The sky looks redder and gives a warmer impression |
| Accurately reproduce colors (for landscape documentation) | Custom WB or specific Kelvin value | Fine-tune the color temperature to match your intended tones |
White balance is not just about "adjusting colors"; it is an important element that can change the mood and emotion of a photograph.
When photographing sunrises or sunsets, be sure to consider "what colors do you want to preserve?" and pay attention to white balance.
When you can get the colors you want, you'll have a lot more fun with photography!
STEP.1
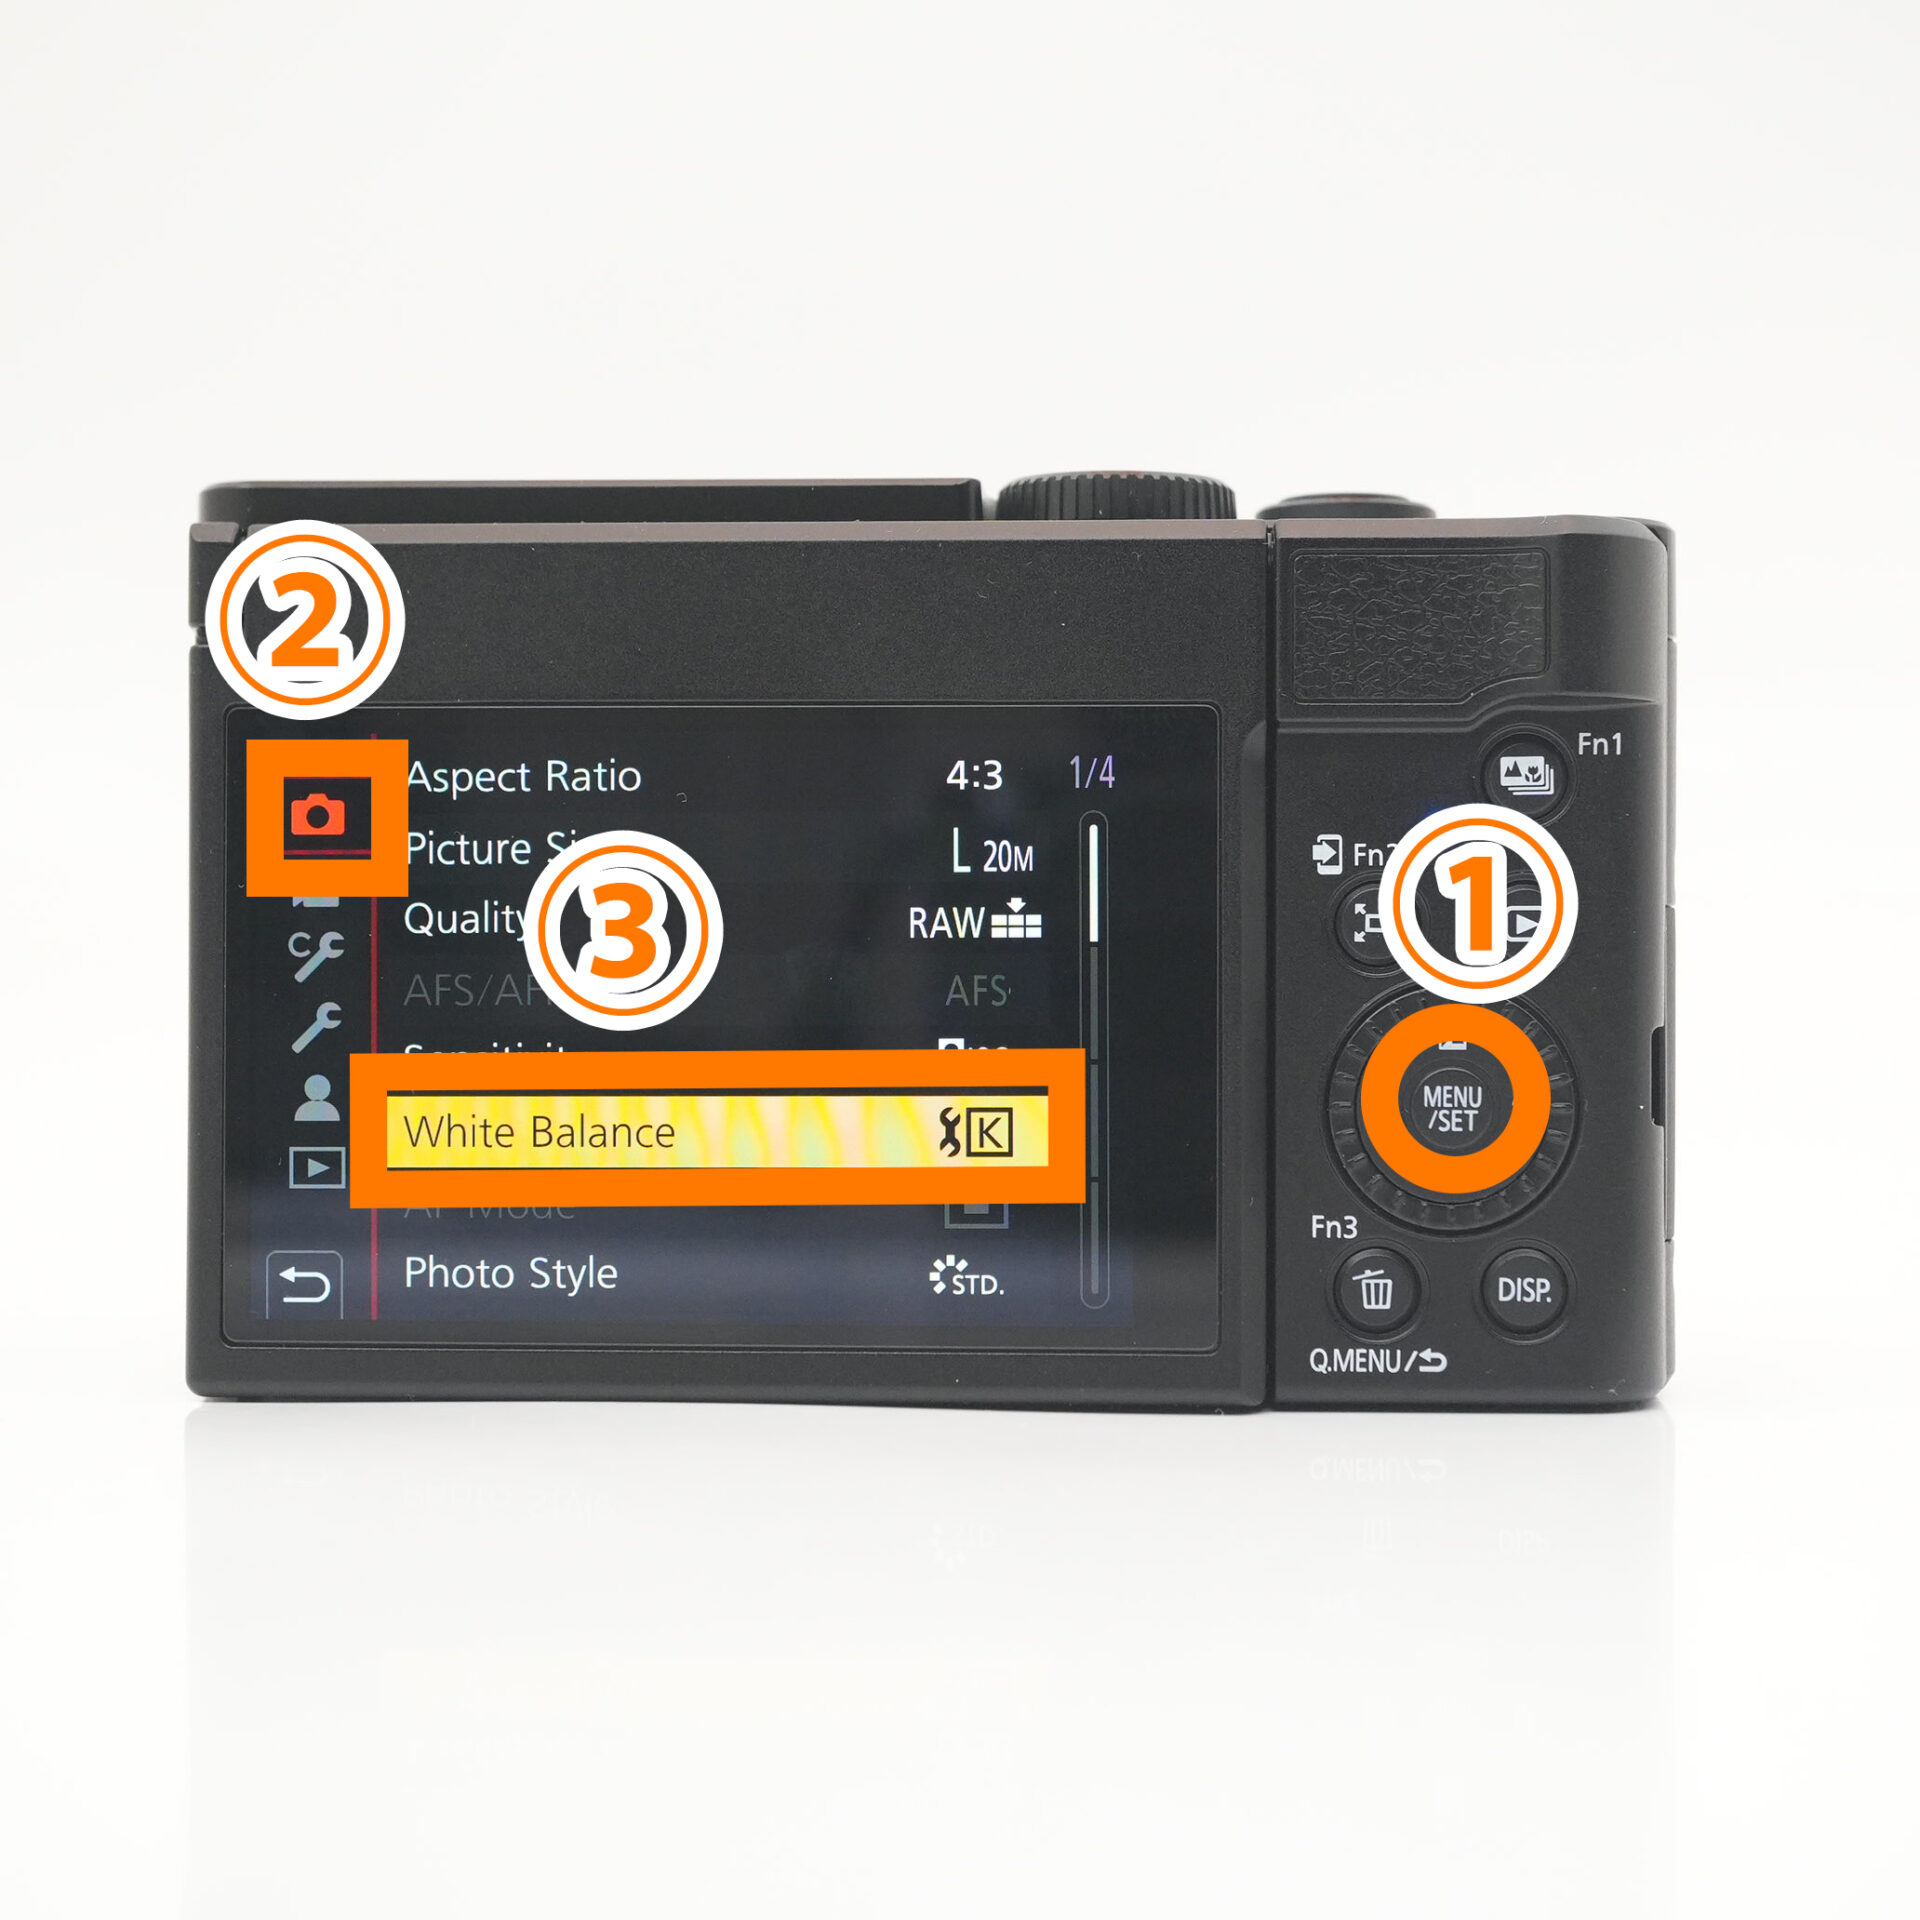 |
| MENU → camera icon → Select White Balance |
STEP.2
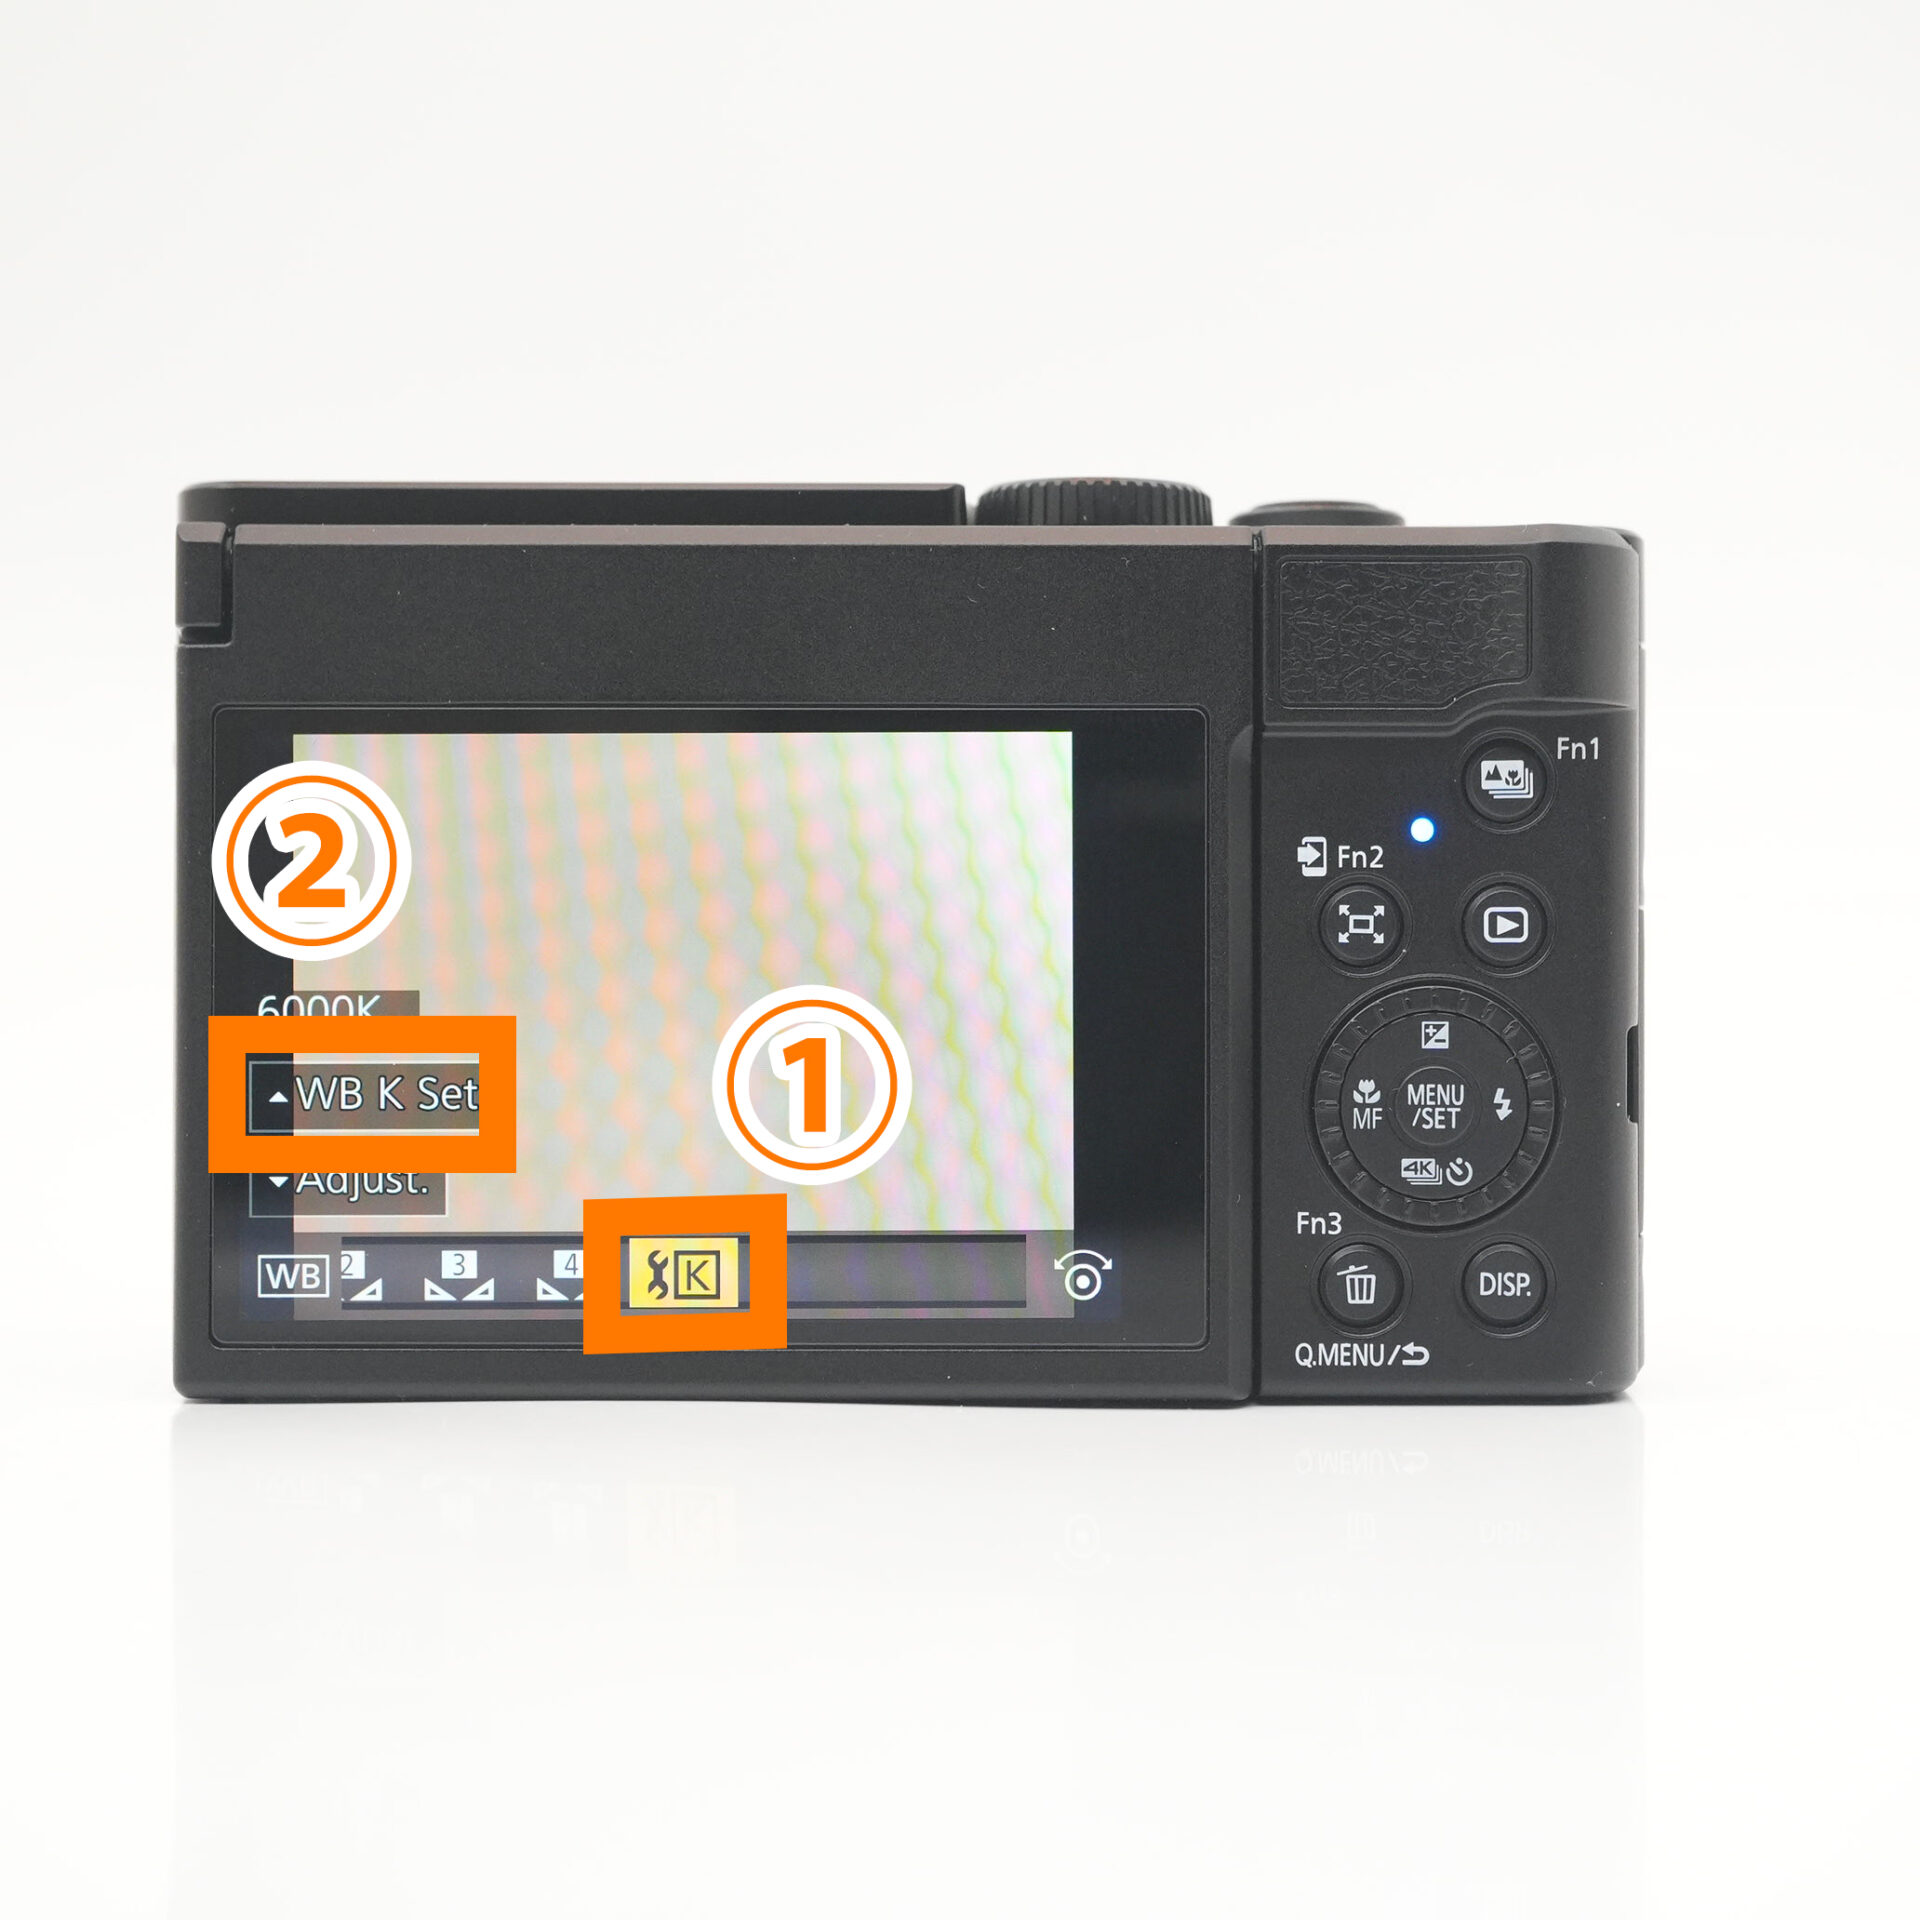 |
| Select K → Select the top of the dial |
summary

Even if you don't have any difficult techniques, just being a little conscious can make a huge difference in the outcome of your photo.
The color of the sky, the shape of the clouds, the angle of the light.
Enjoy every moment and try to take a photo of a sunrise or sunset that is uniquely yours.