- Recommended for these people
- ・Those who want to take professional-looking photos with a softly blurred background
・Those who don't know how to create bokeh
・Those who want to express a "photographic quality" that can't be achieved with a smartphone
I want to blur the background beautifully.
Have you ever felt that way?
You can now control the beautiful bokeh that's hard to achieve with a smartphone.
In this article, even beginners will understand the settings for blurring the background.
This page contains advertisements
Just changing the F-stop can change the background of your photo so much!
CHECK
-

-
Richo GRⅣ Top 5 Must-Have Accessories to Buy with Your Camera
Over the years, I’ve used a variety of cameras,and today I want to share some of the accessories I’v ...
続きを見る
Among all the camera settings, the F-number (aperture value) is an important factor that greatly affects the level of background blur (depth of field).
Did you know that simply changing this number can completely change the impression of a photo?
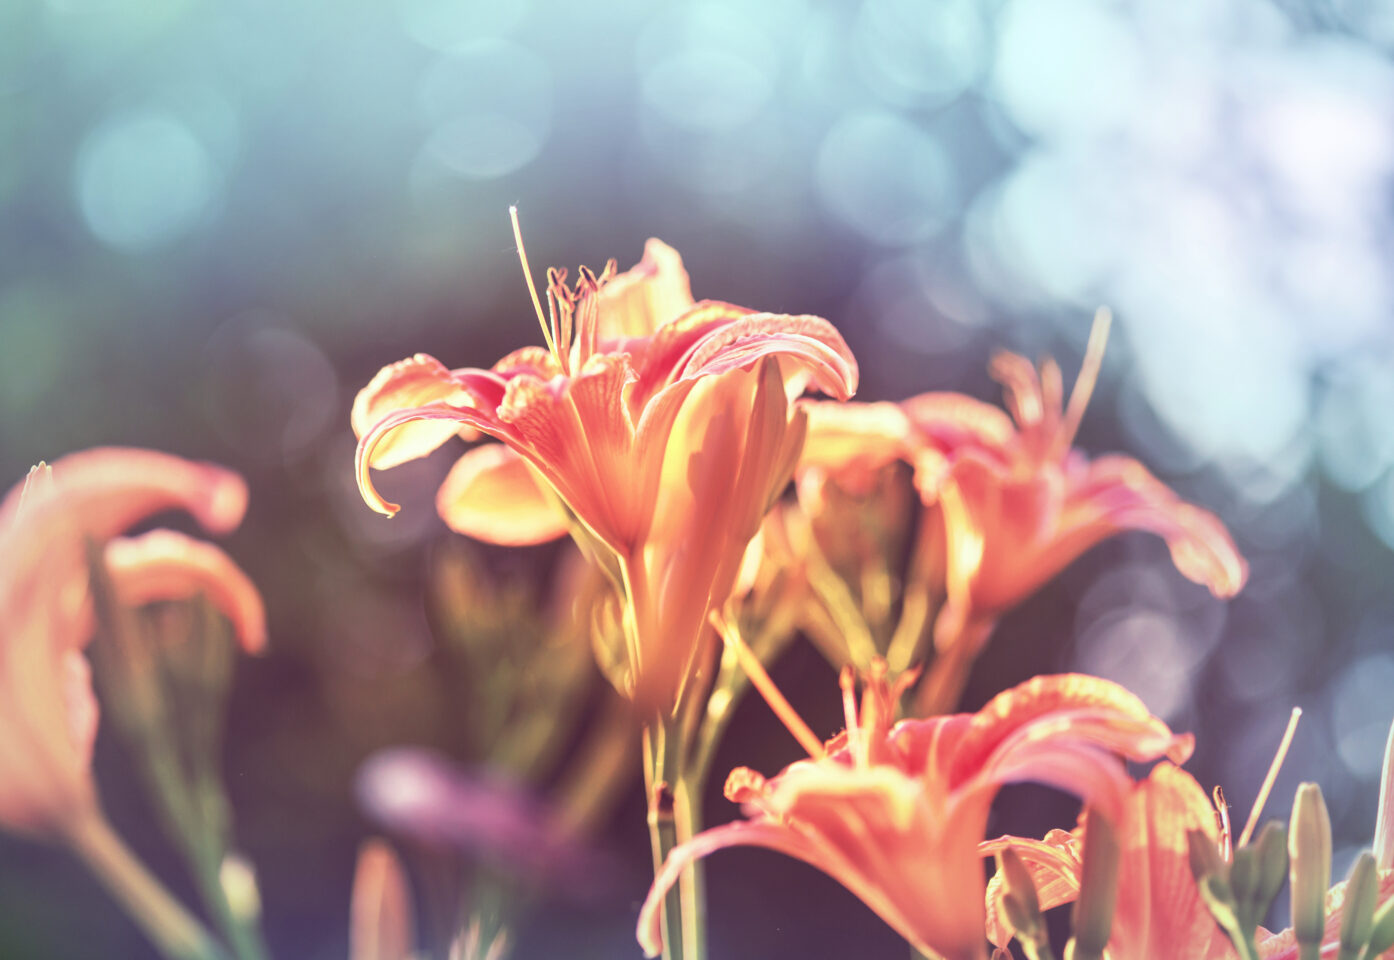
The images below were taken with different F-numbers.
I think you can see that the level of background blur is different.
F2.8
The background is blurred to make the subject stand out.

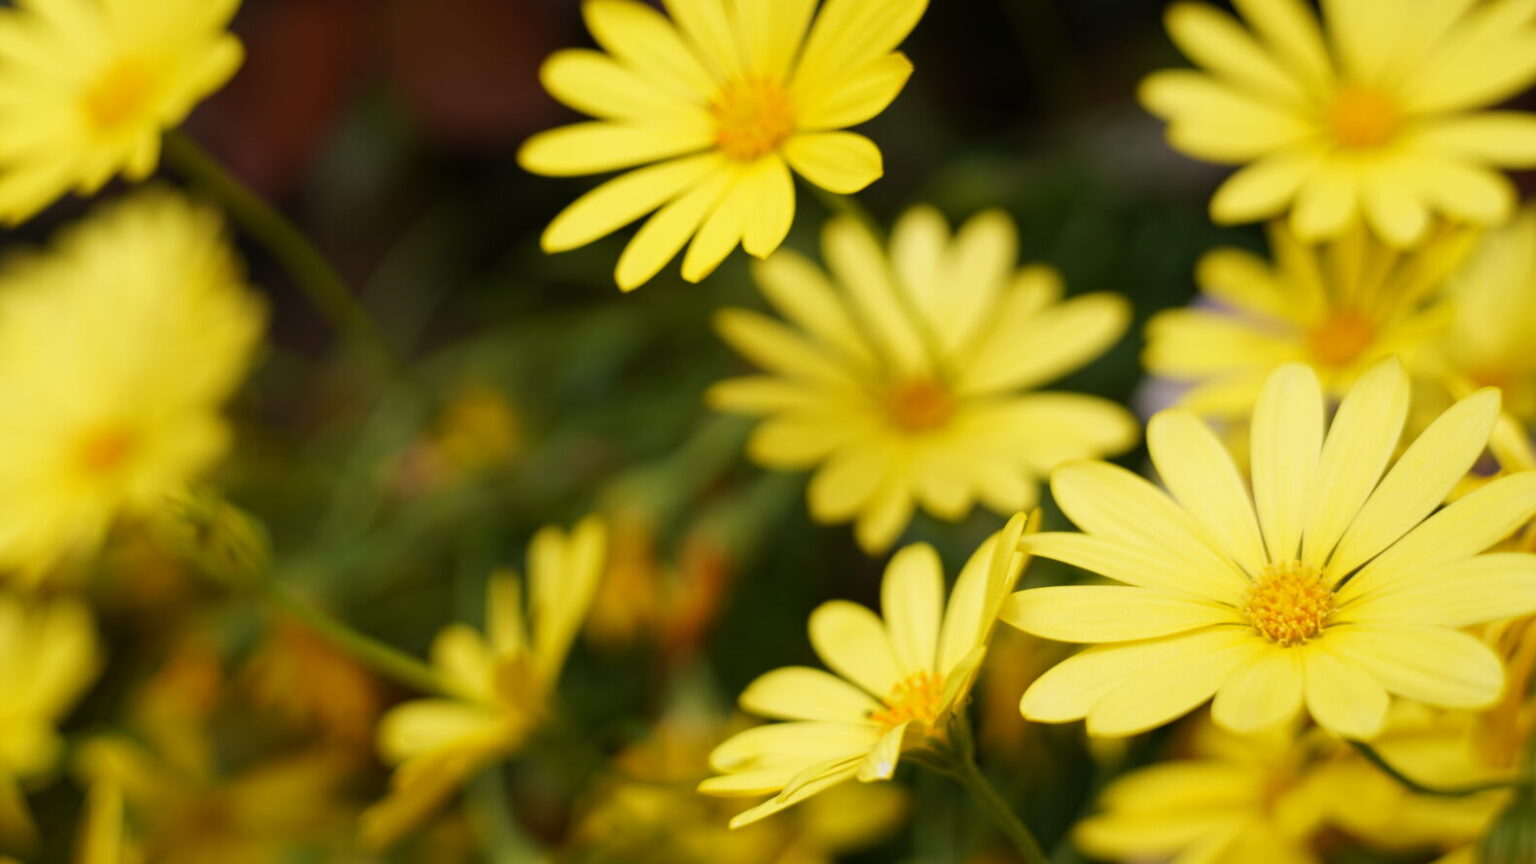
F4.5
The shapes in the background are slightly visible, but the bokeh is still soft.
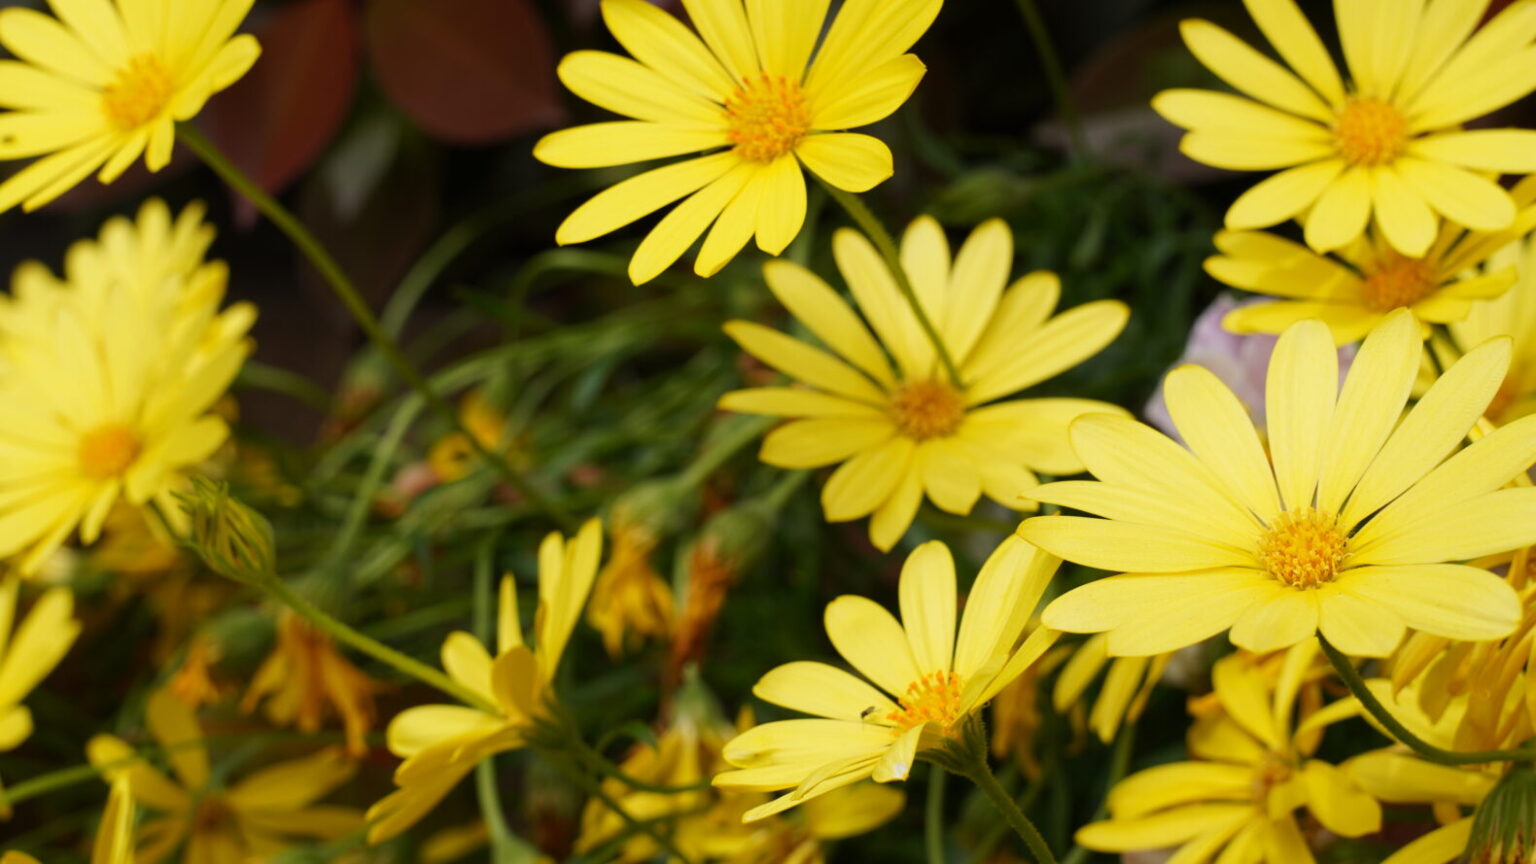
F8
Background details become visible
In this way, changes in the F-stop are a major factor that affects not only the sense of bokeh but also the overall "impression of the photograph."
- First, a basic review of F-numbers
- Small F-numbers (e.g. F1.8) → Background is largely blurred (shallow depth of field)
Large F-numbers (e.g. F8-F11) → Background is clearly visible (deep depth of field)
In other words, the key is to use a small F-number when you want to emphasize just the subject, and a larger F-number when you want to see the whole picture.
- Practical points
- ・F1.4 to F2.8: Portraits that make the most of bokeh
・F4 to F5.6: Add a moderate amount of bokeh when shooting indoors or objects
・F8 to F11: Take clear, full-length shots of landscapes and night scenes
・F11 to F16: Narrow the aperture to an extreme degree, resulting in a slightly "blurred" image
Once you understand the F-stop and can use it appropriately, the range of photographic expression will expand dramatically.
Use two different setting modes to blur the background
In order to blur the background beautifully, it is very important to set the camera's shooting mode.
There are two modes we especially recommend for beginners: A mode (Aperture priority) and M mode (Manual).
You can blur the background in either mode, but each has different features and uses. Here we will explain the differences and how to use them depending on the scene.
| Mode | Main Features | Advantages |
|---|---|---|
| A Mode (Aperture Priority) | You manually set the aperture (F-number), the camera handles the rest | Easily create background blur / Great for beginners |
| M Mode (Manual) | You manually control aperture, shutter speed, and ISO | Full control over your shooting intent |
How to easily blur the background by setting it to Av mode
If you want to take photos with a softly blurred background, the first thing you should try is "Av mode (aperture priority mode)."
In this mode, you decide the F-stop (aperture), and the camera automatically adjusts the shutter speed and ISO, so I will explain using Av mode.
STEP.1
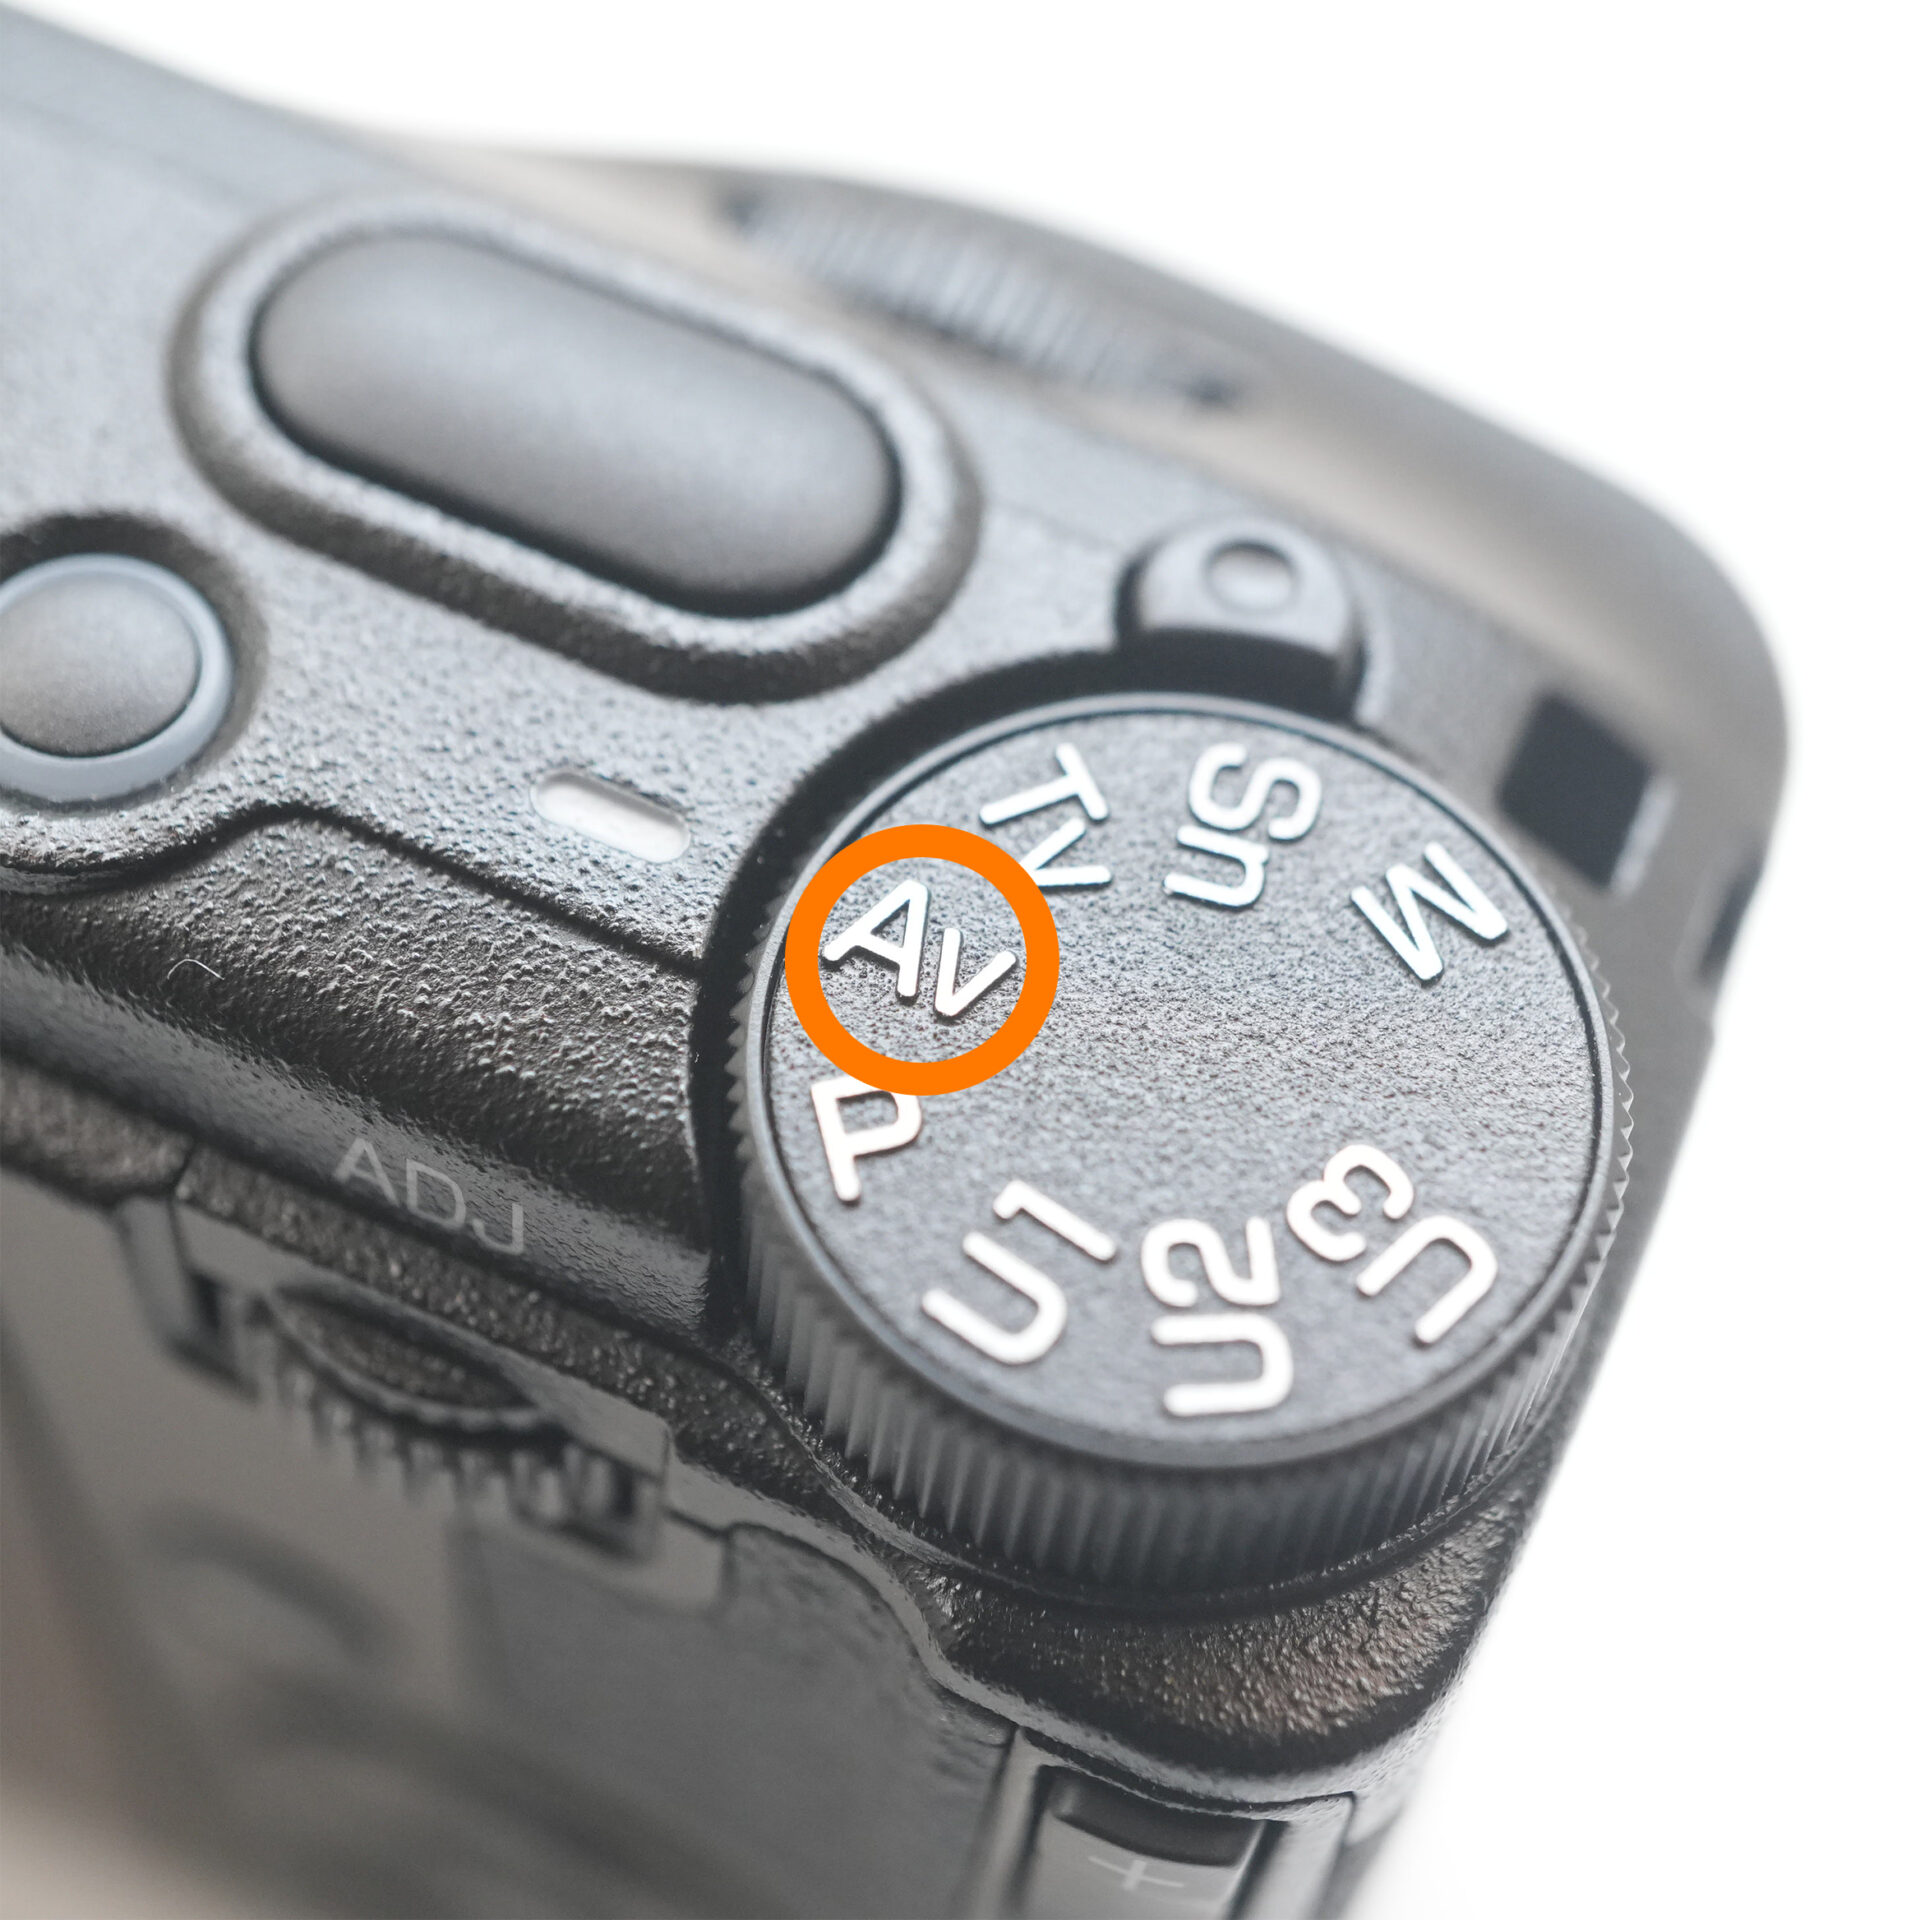 |
| Set the dial to Av mode |
Change the F-stop to freely adjust the impression of the background
The F-stop is an important setting that controls the degree of background blur.
Here, we'll roughly review how different F-stops affect the impression of a photograph.
・Small F-number (e.g. F1.8) → The background is blurred and the subject stands out.
・Large F-number (e.g. F8-F11) → The background is clearly visible and the whole image is sharp.
If you want to focus on the blur effect, the key is to first set the F-stop to a small value.
STEP.1
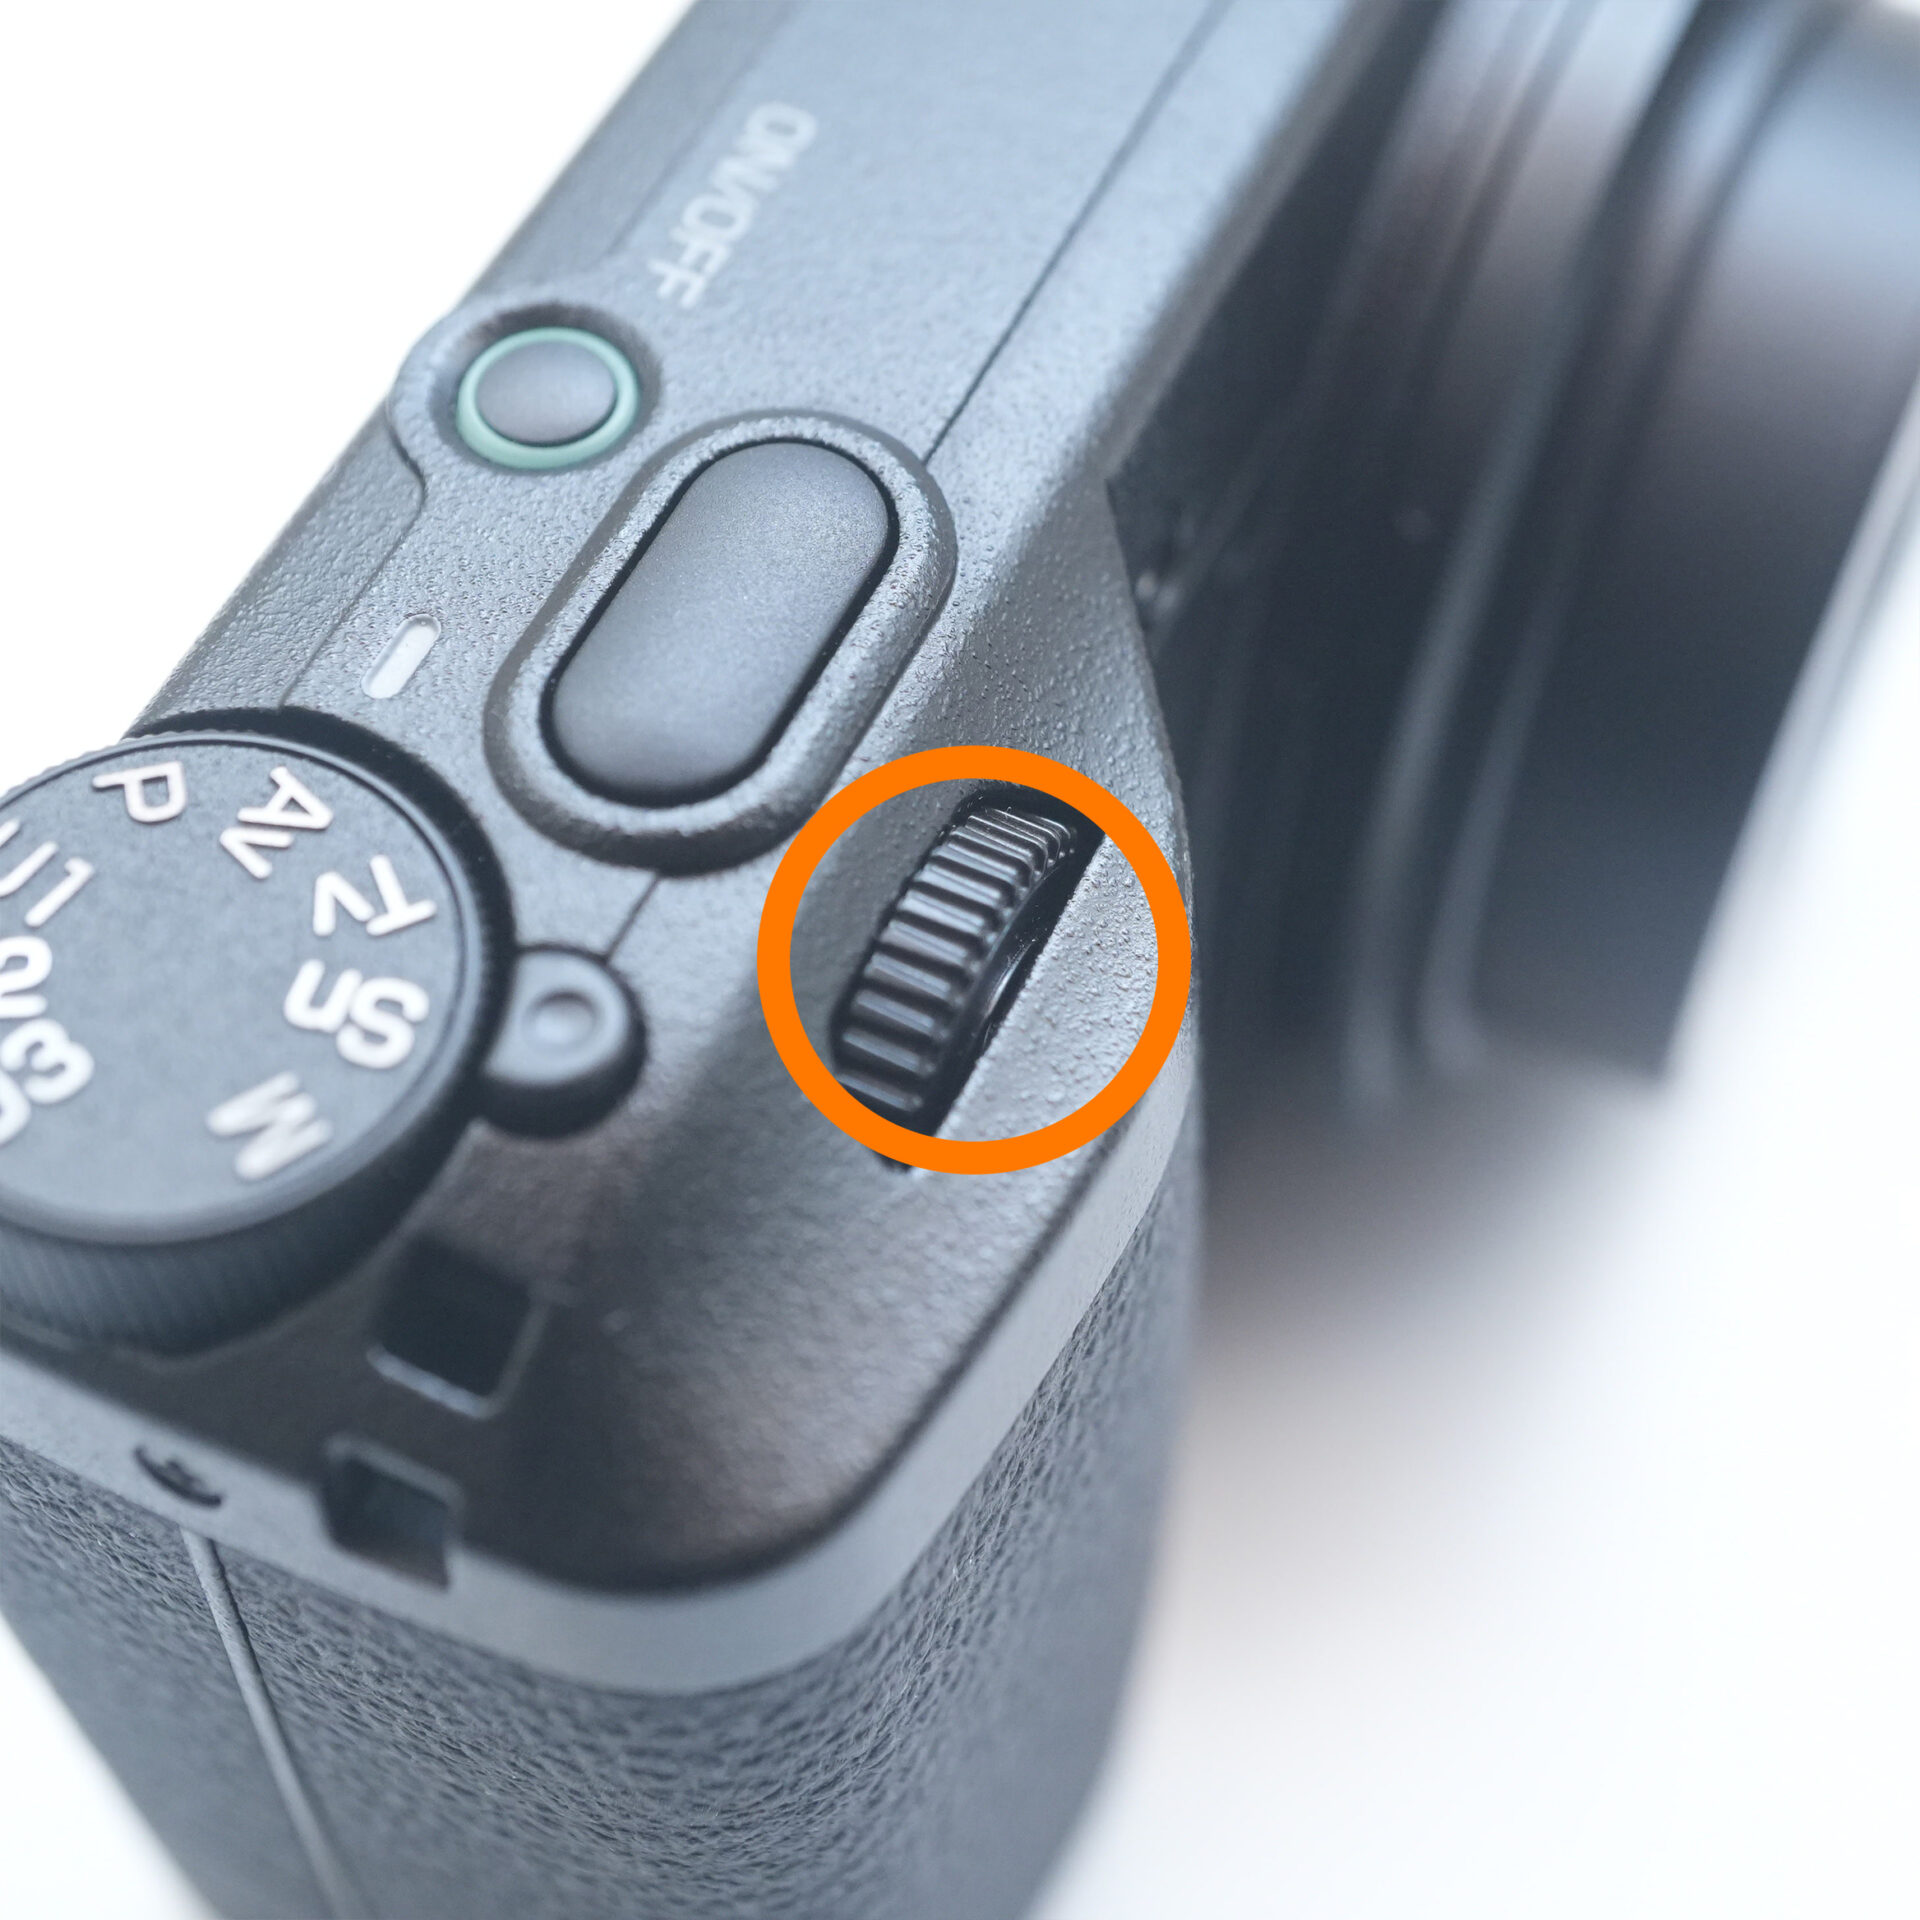 |
| Turn the dial on the front |
STEP.2
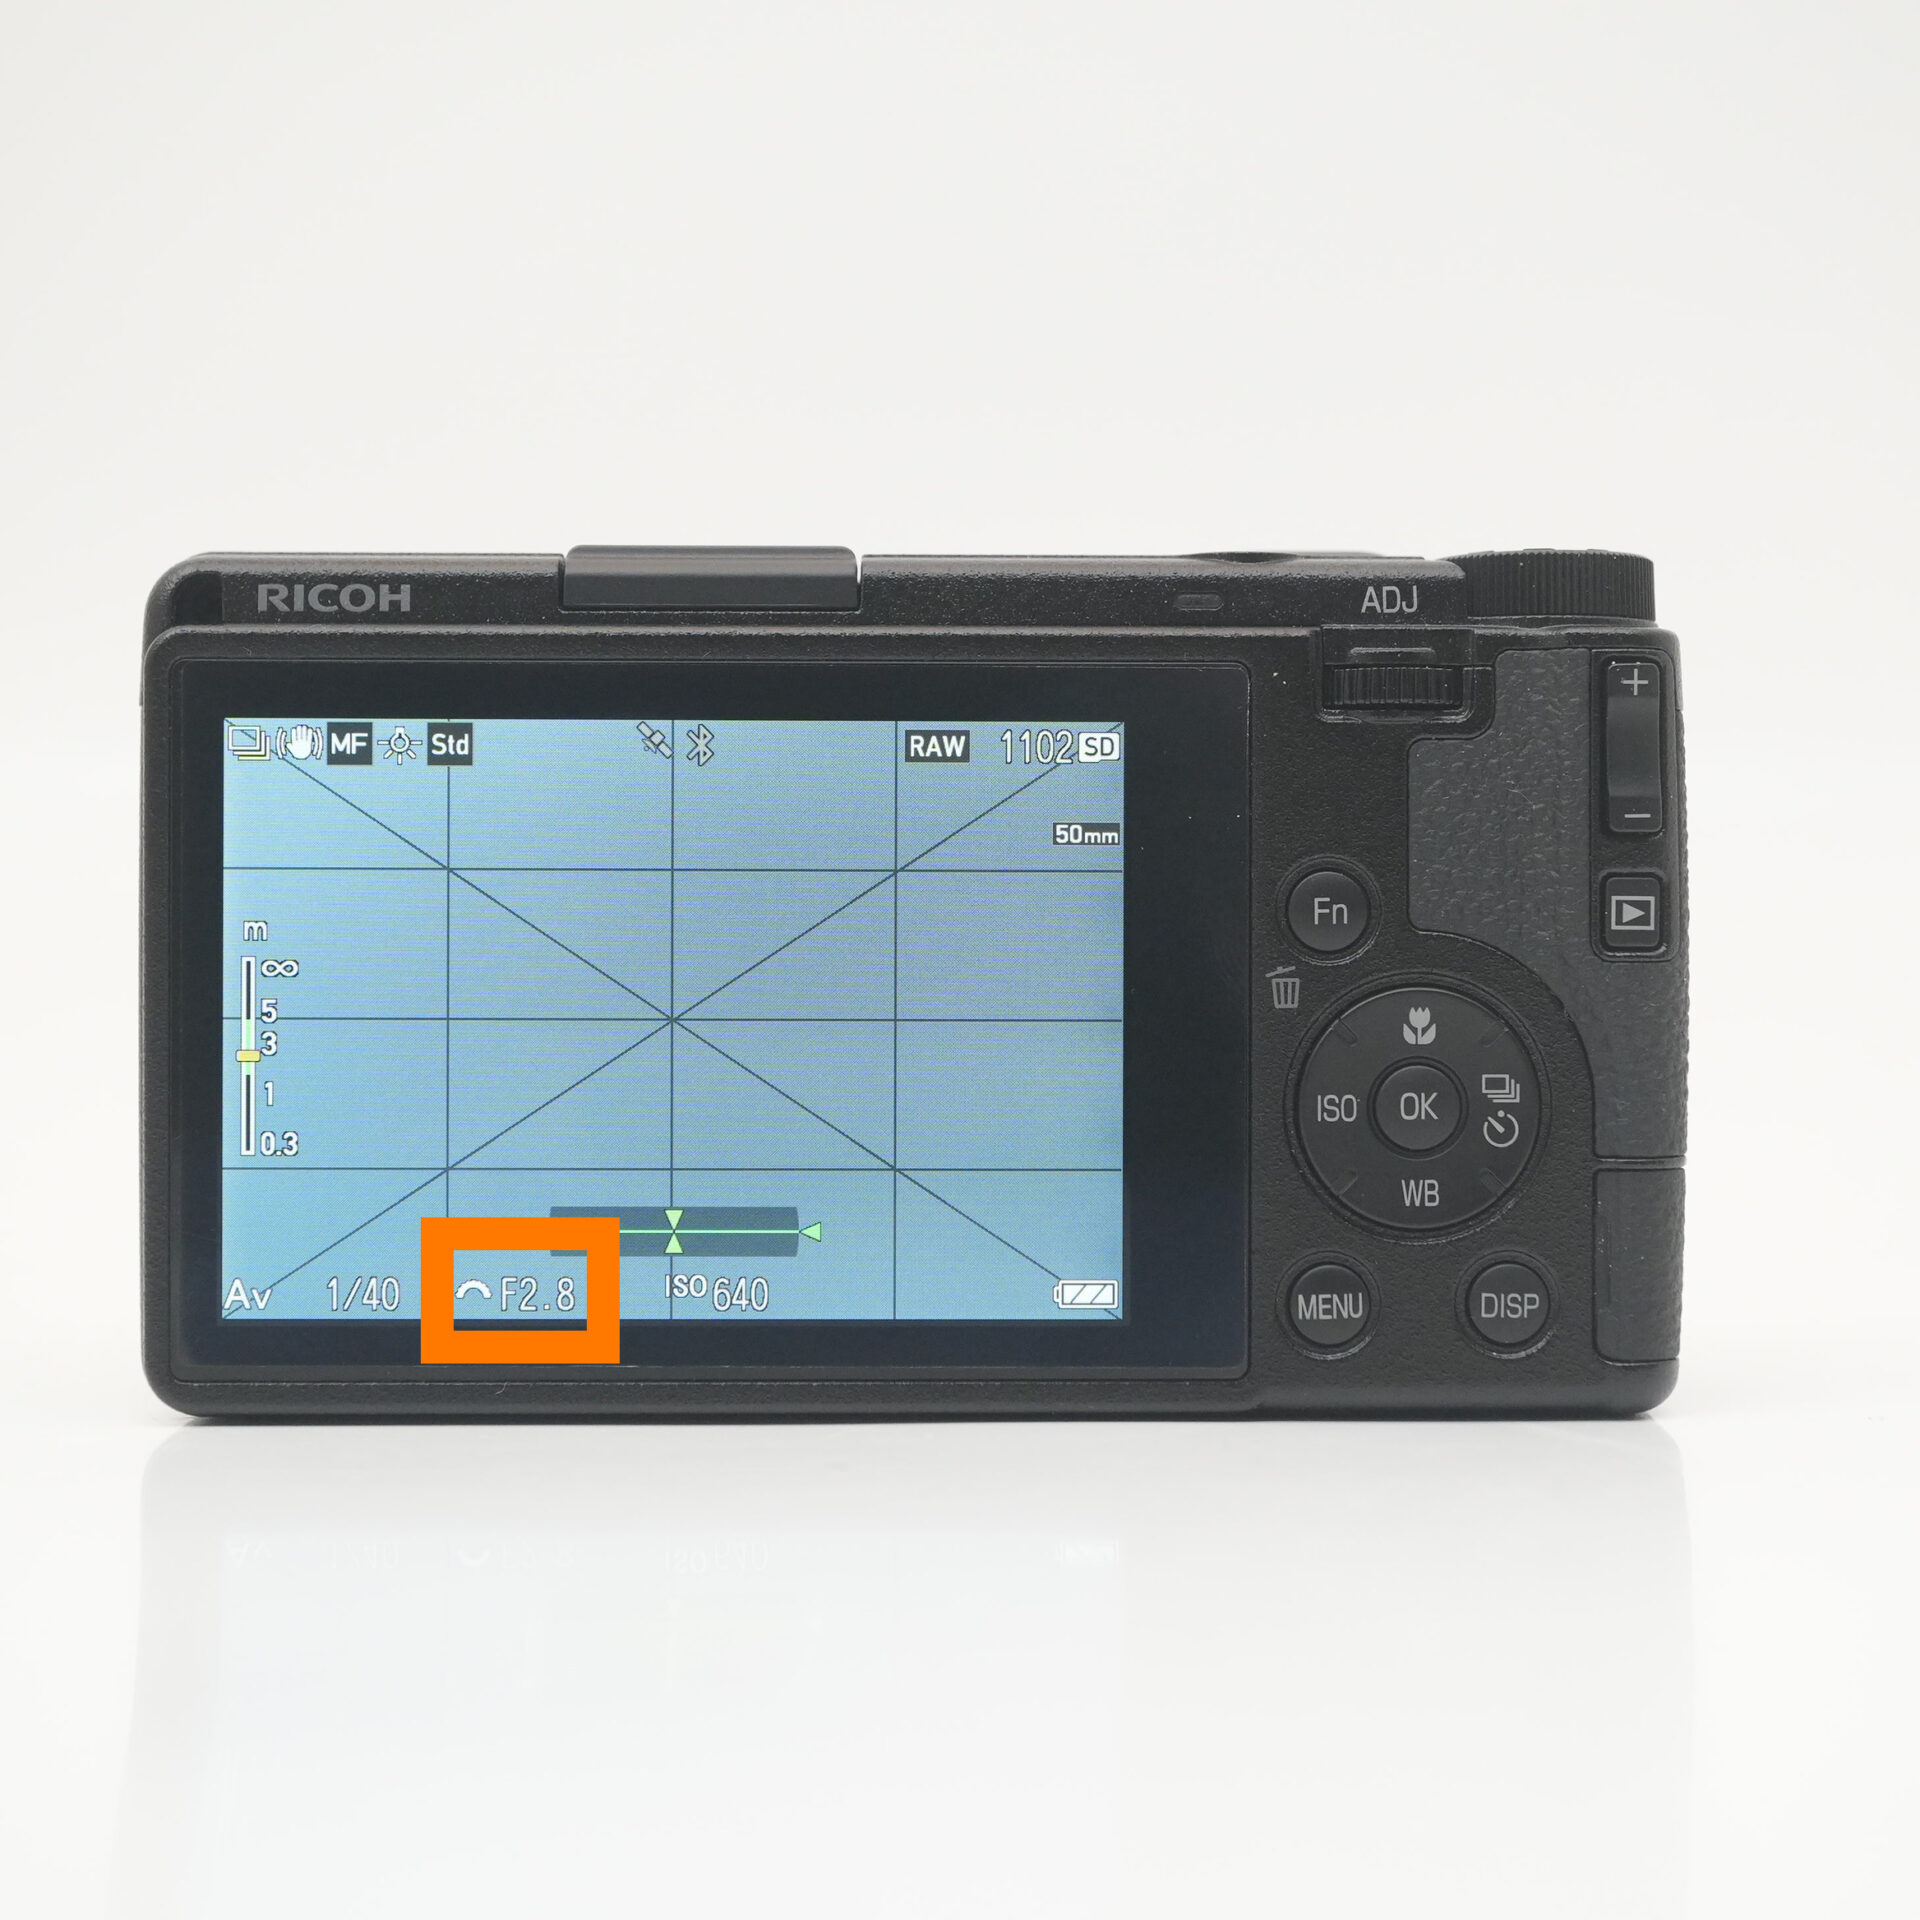 |
| Your favorite F |
We recommend setting the ISO sensitivity to Auto! How to easily adjust brightness
ISO sensitivity is an important setting that has a large impact on the brightness of a photograph.
Set the ISO to automatic to get the right brightness.
Advantages and Disadvantages of Auto ISO
- The brightness is automatically adjusted, eliminating the need to worry about settings
- You can shoot without disturbing the balance of shutter speed and F-stop.
- Even when it gets dark, the camera automatically increases the ISO so you don't have to worry.
- If the ISO is too high, the image will tend to become noisy (grainy).
- How to avoid noise
- Setting the ISO to auto is convenient because it automatically adjusts the brightness. However, in dark scenes, the sensitivity may be too high, resulting in noise. For this reason, it is recommended to set an upper limit for the ISO to prevent deterioration of image quality.

STEP.1
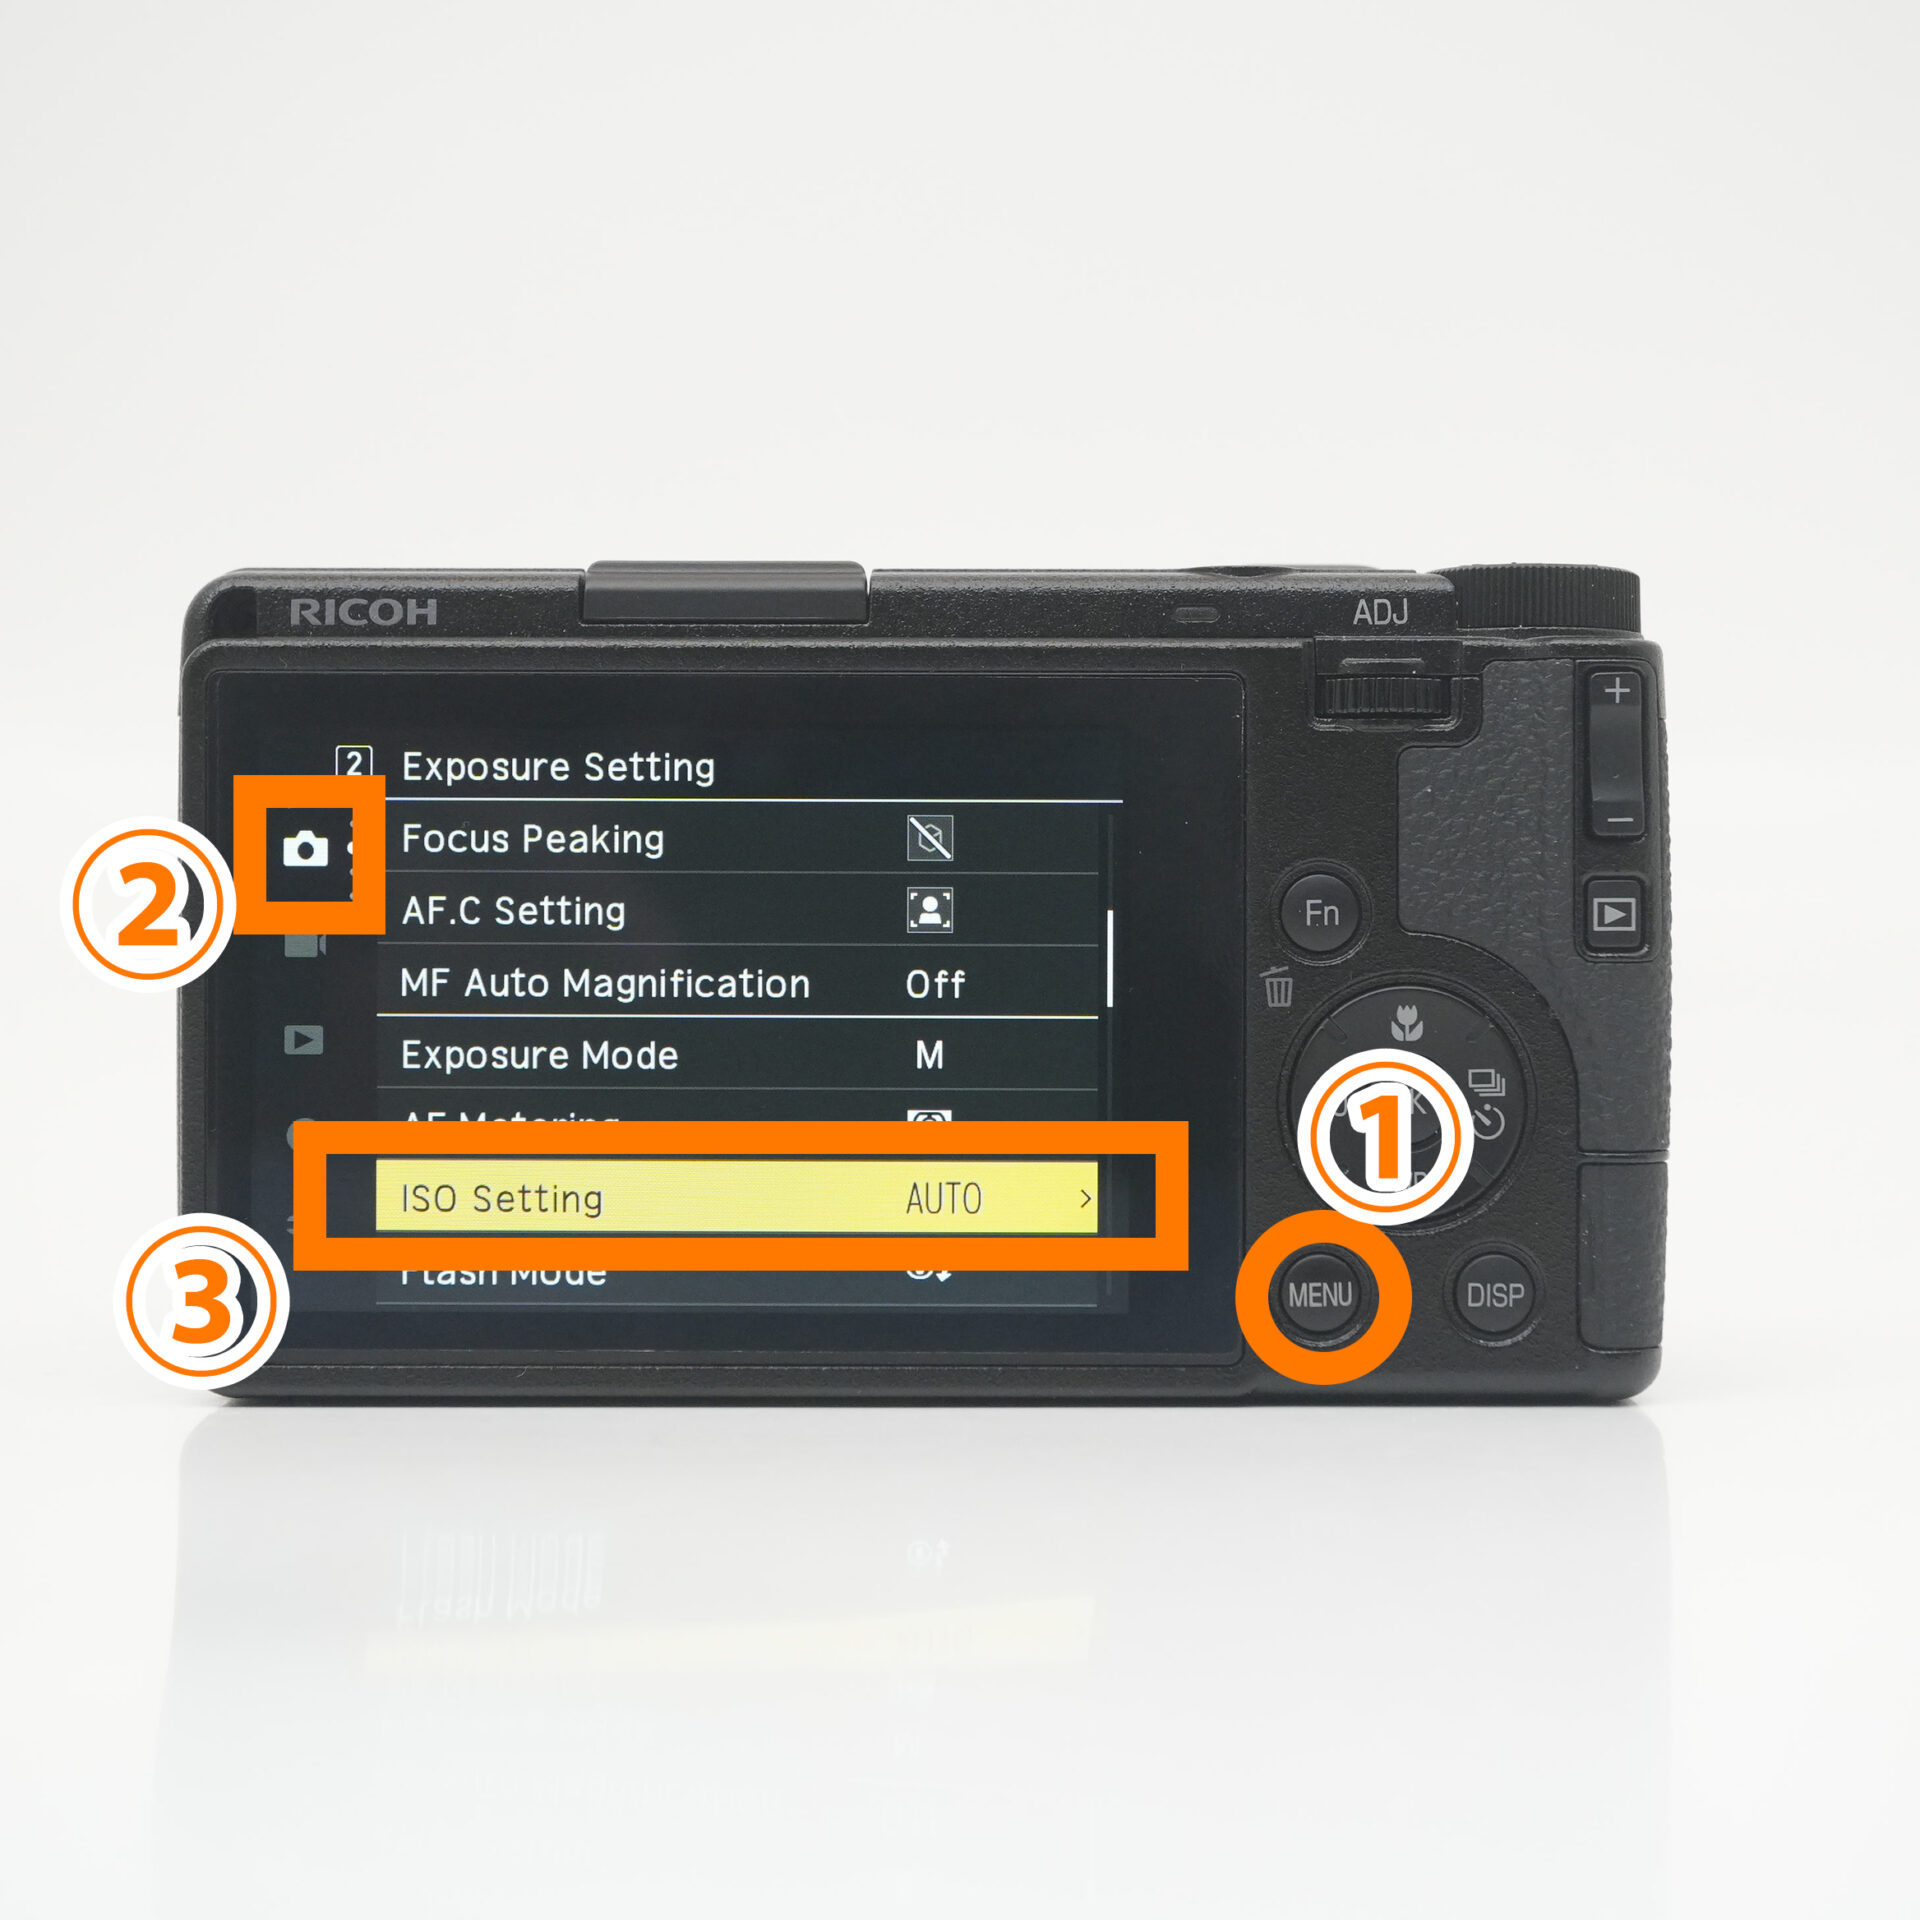 |
| select Menu→camera icon→ISO Setting |
STEP.2
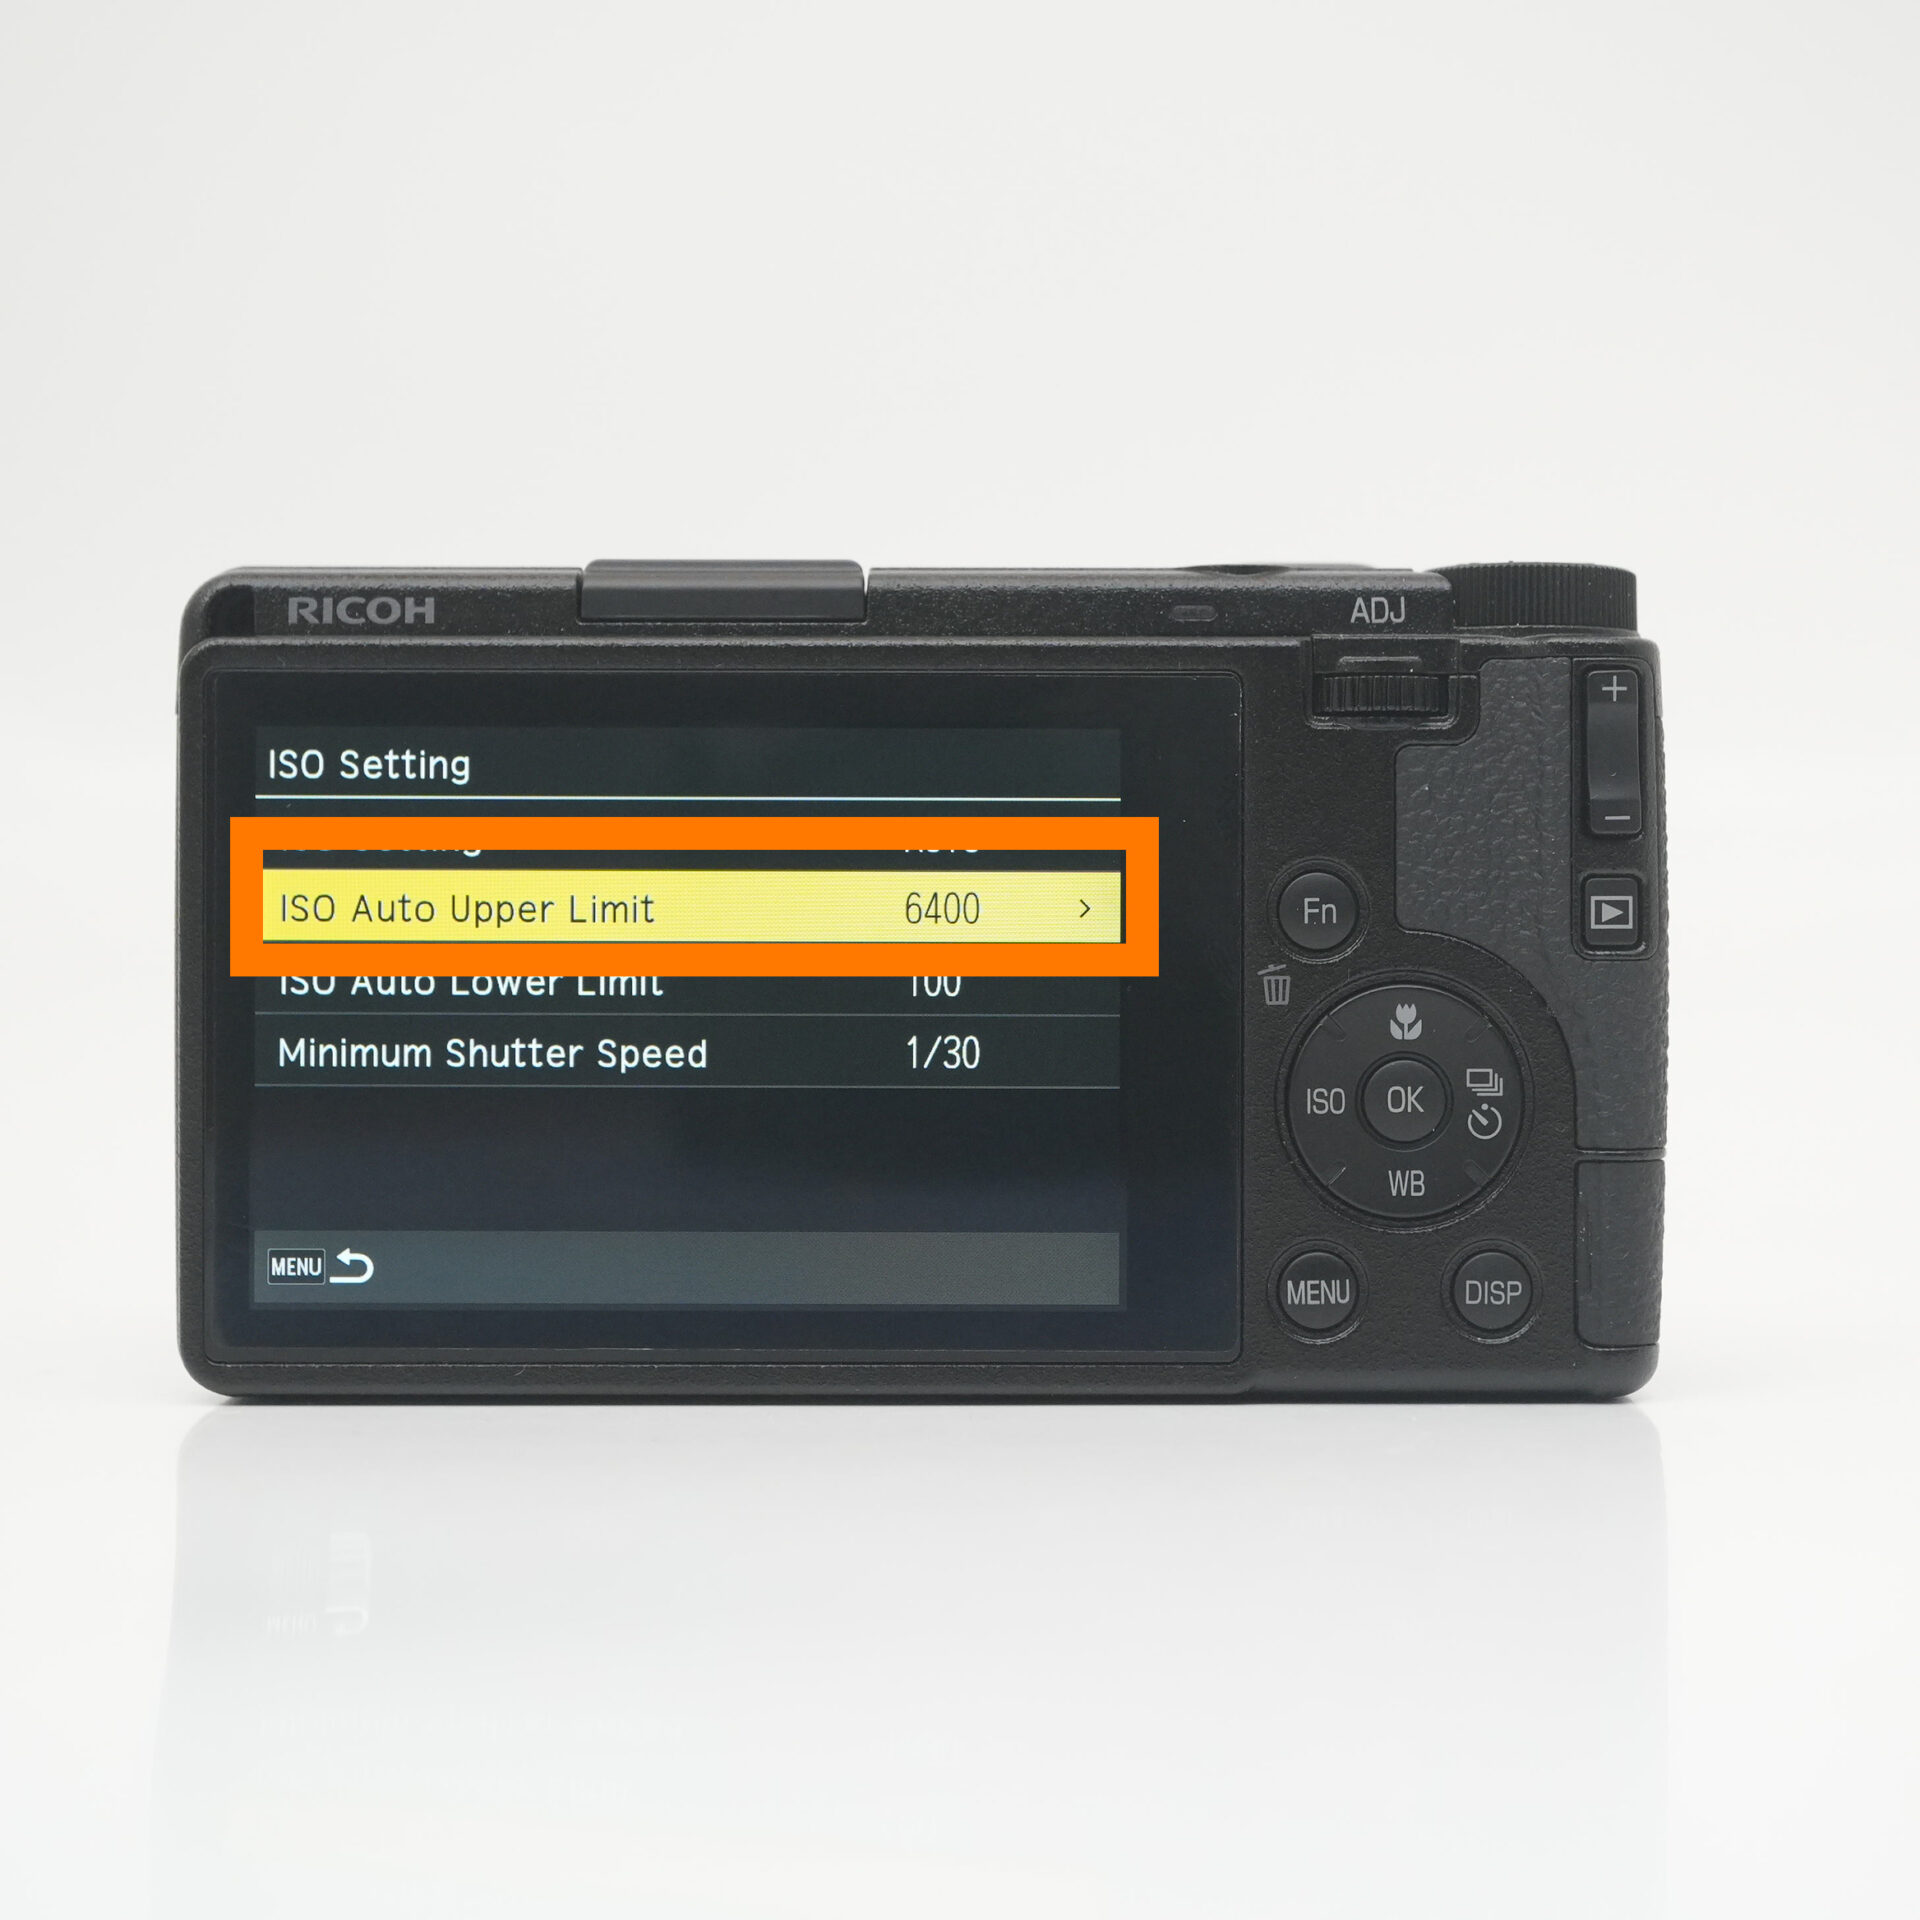 |
| Selecto ISO Suto Upper Limit |
STEP.3
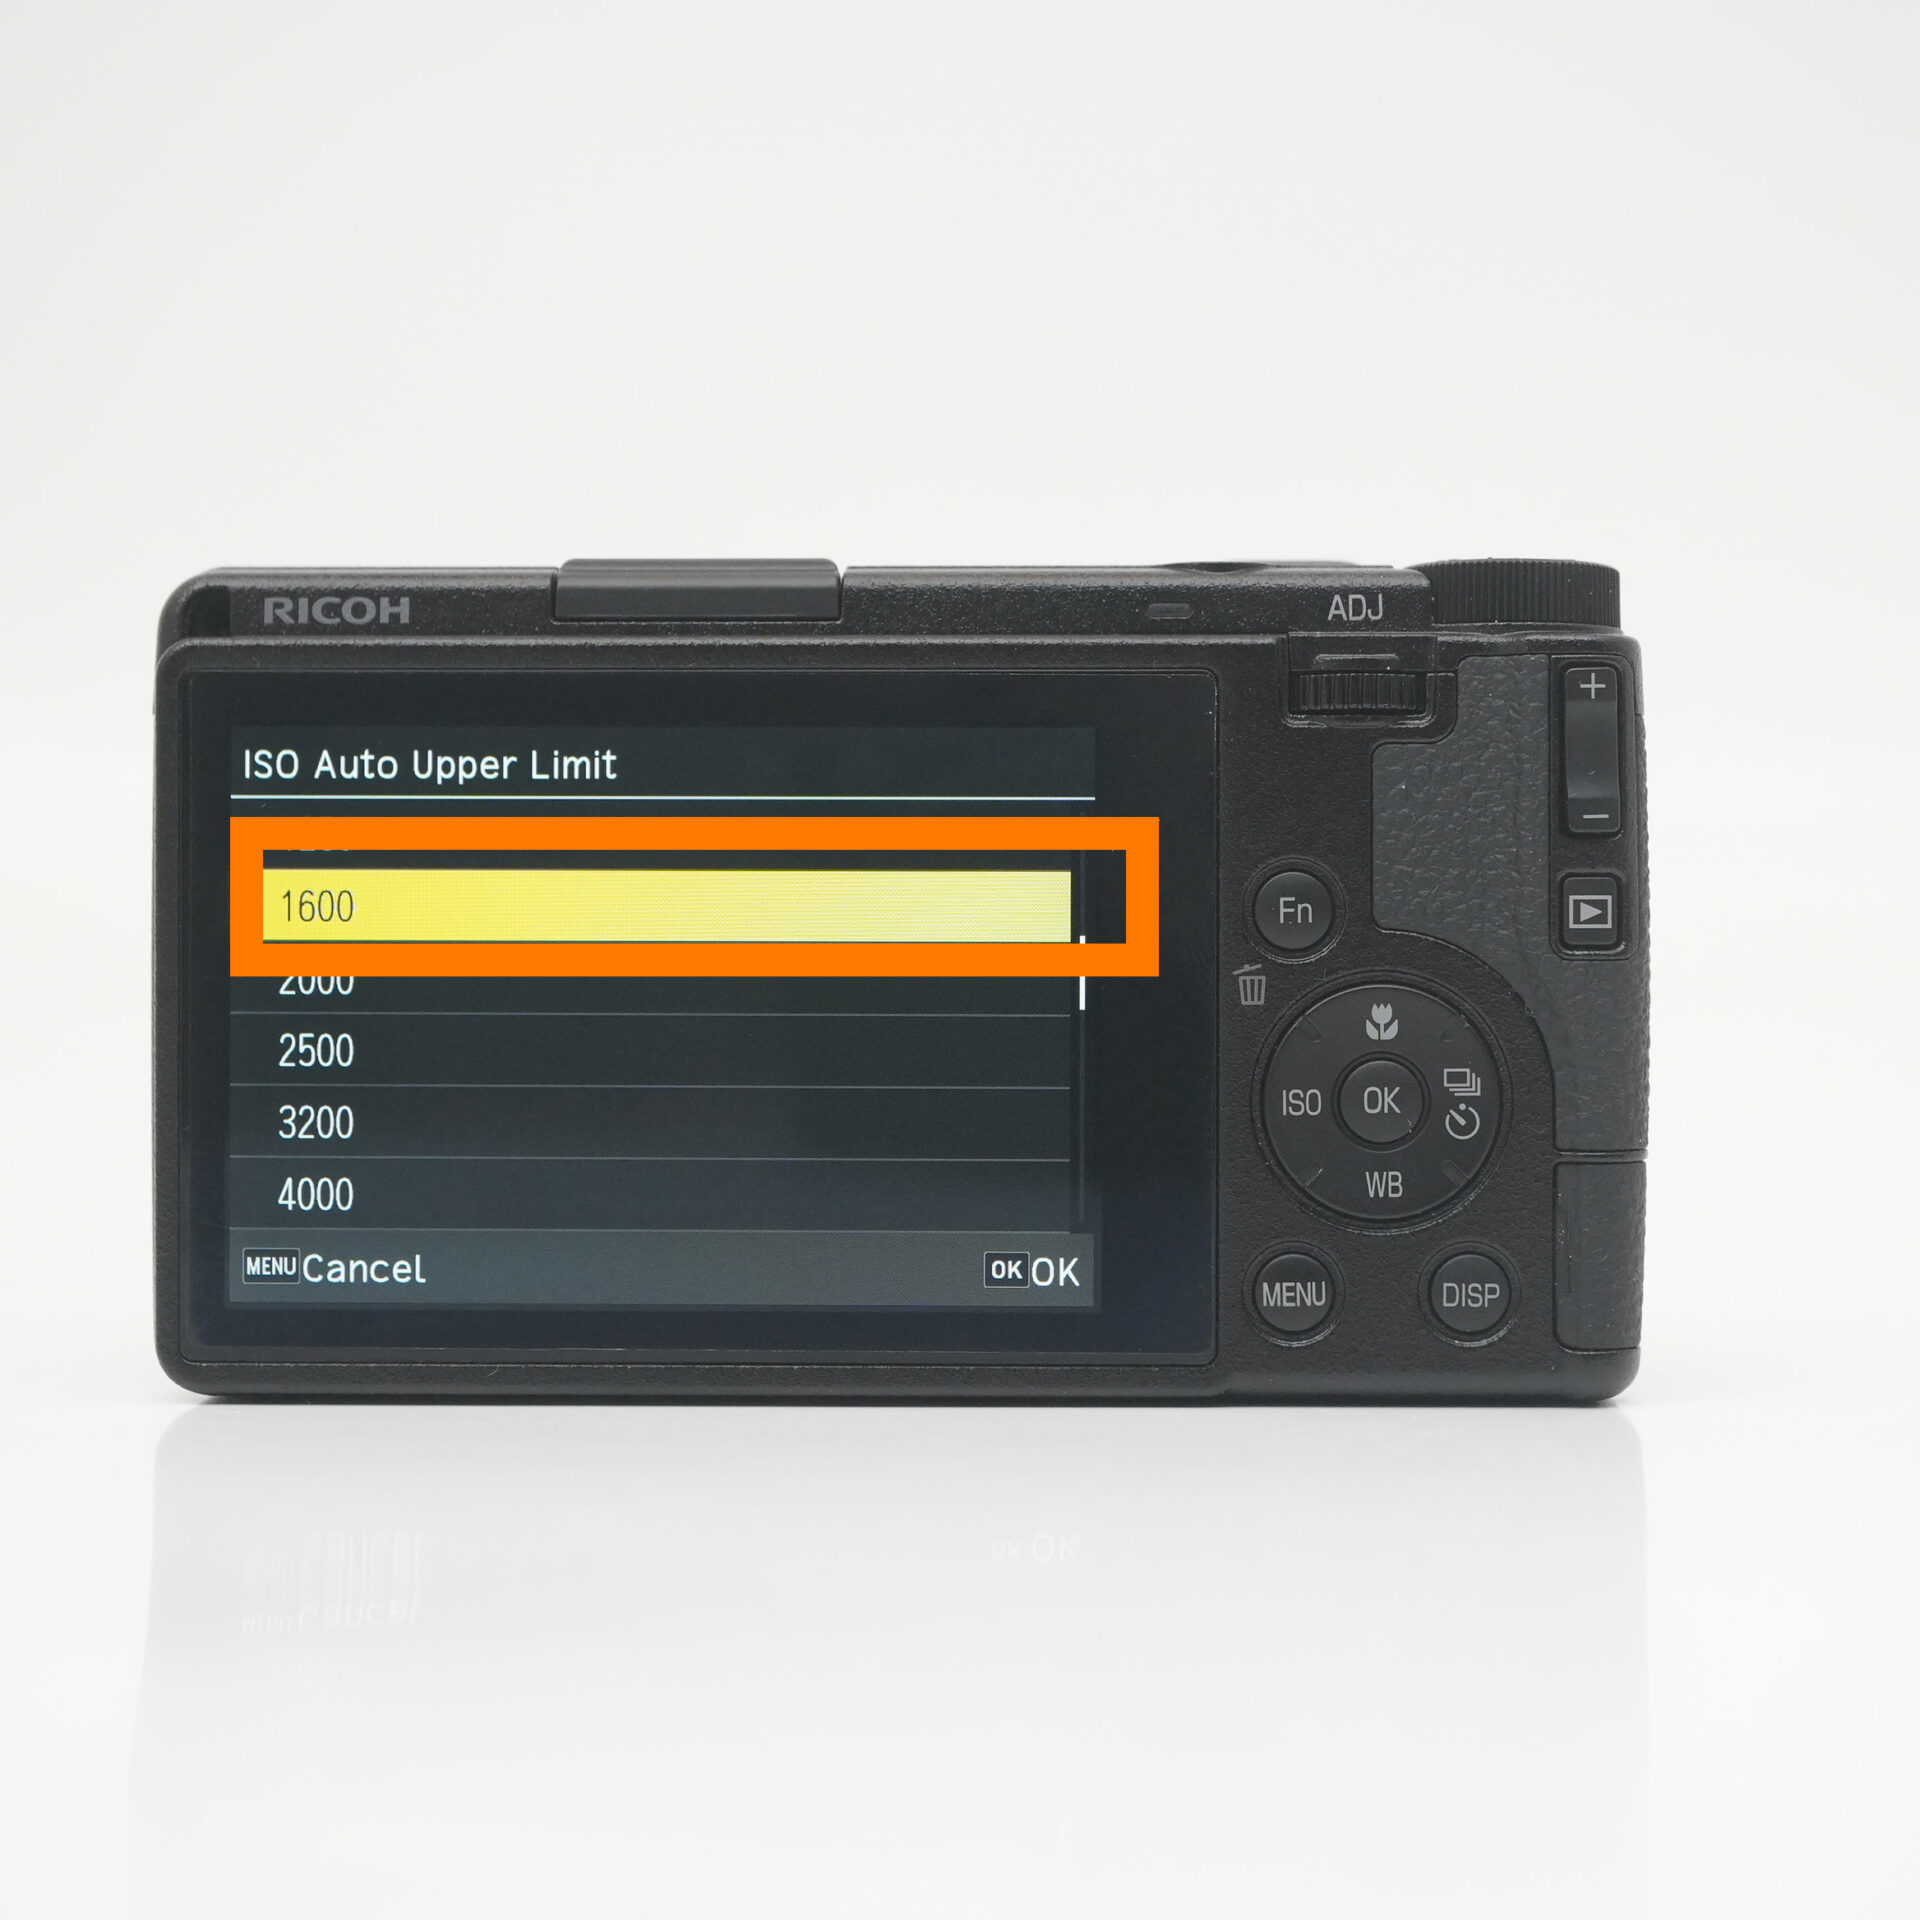 |
| Selecto 1600 |
STEP.4
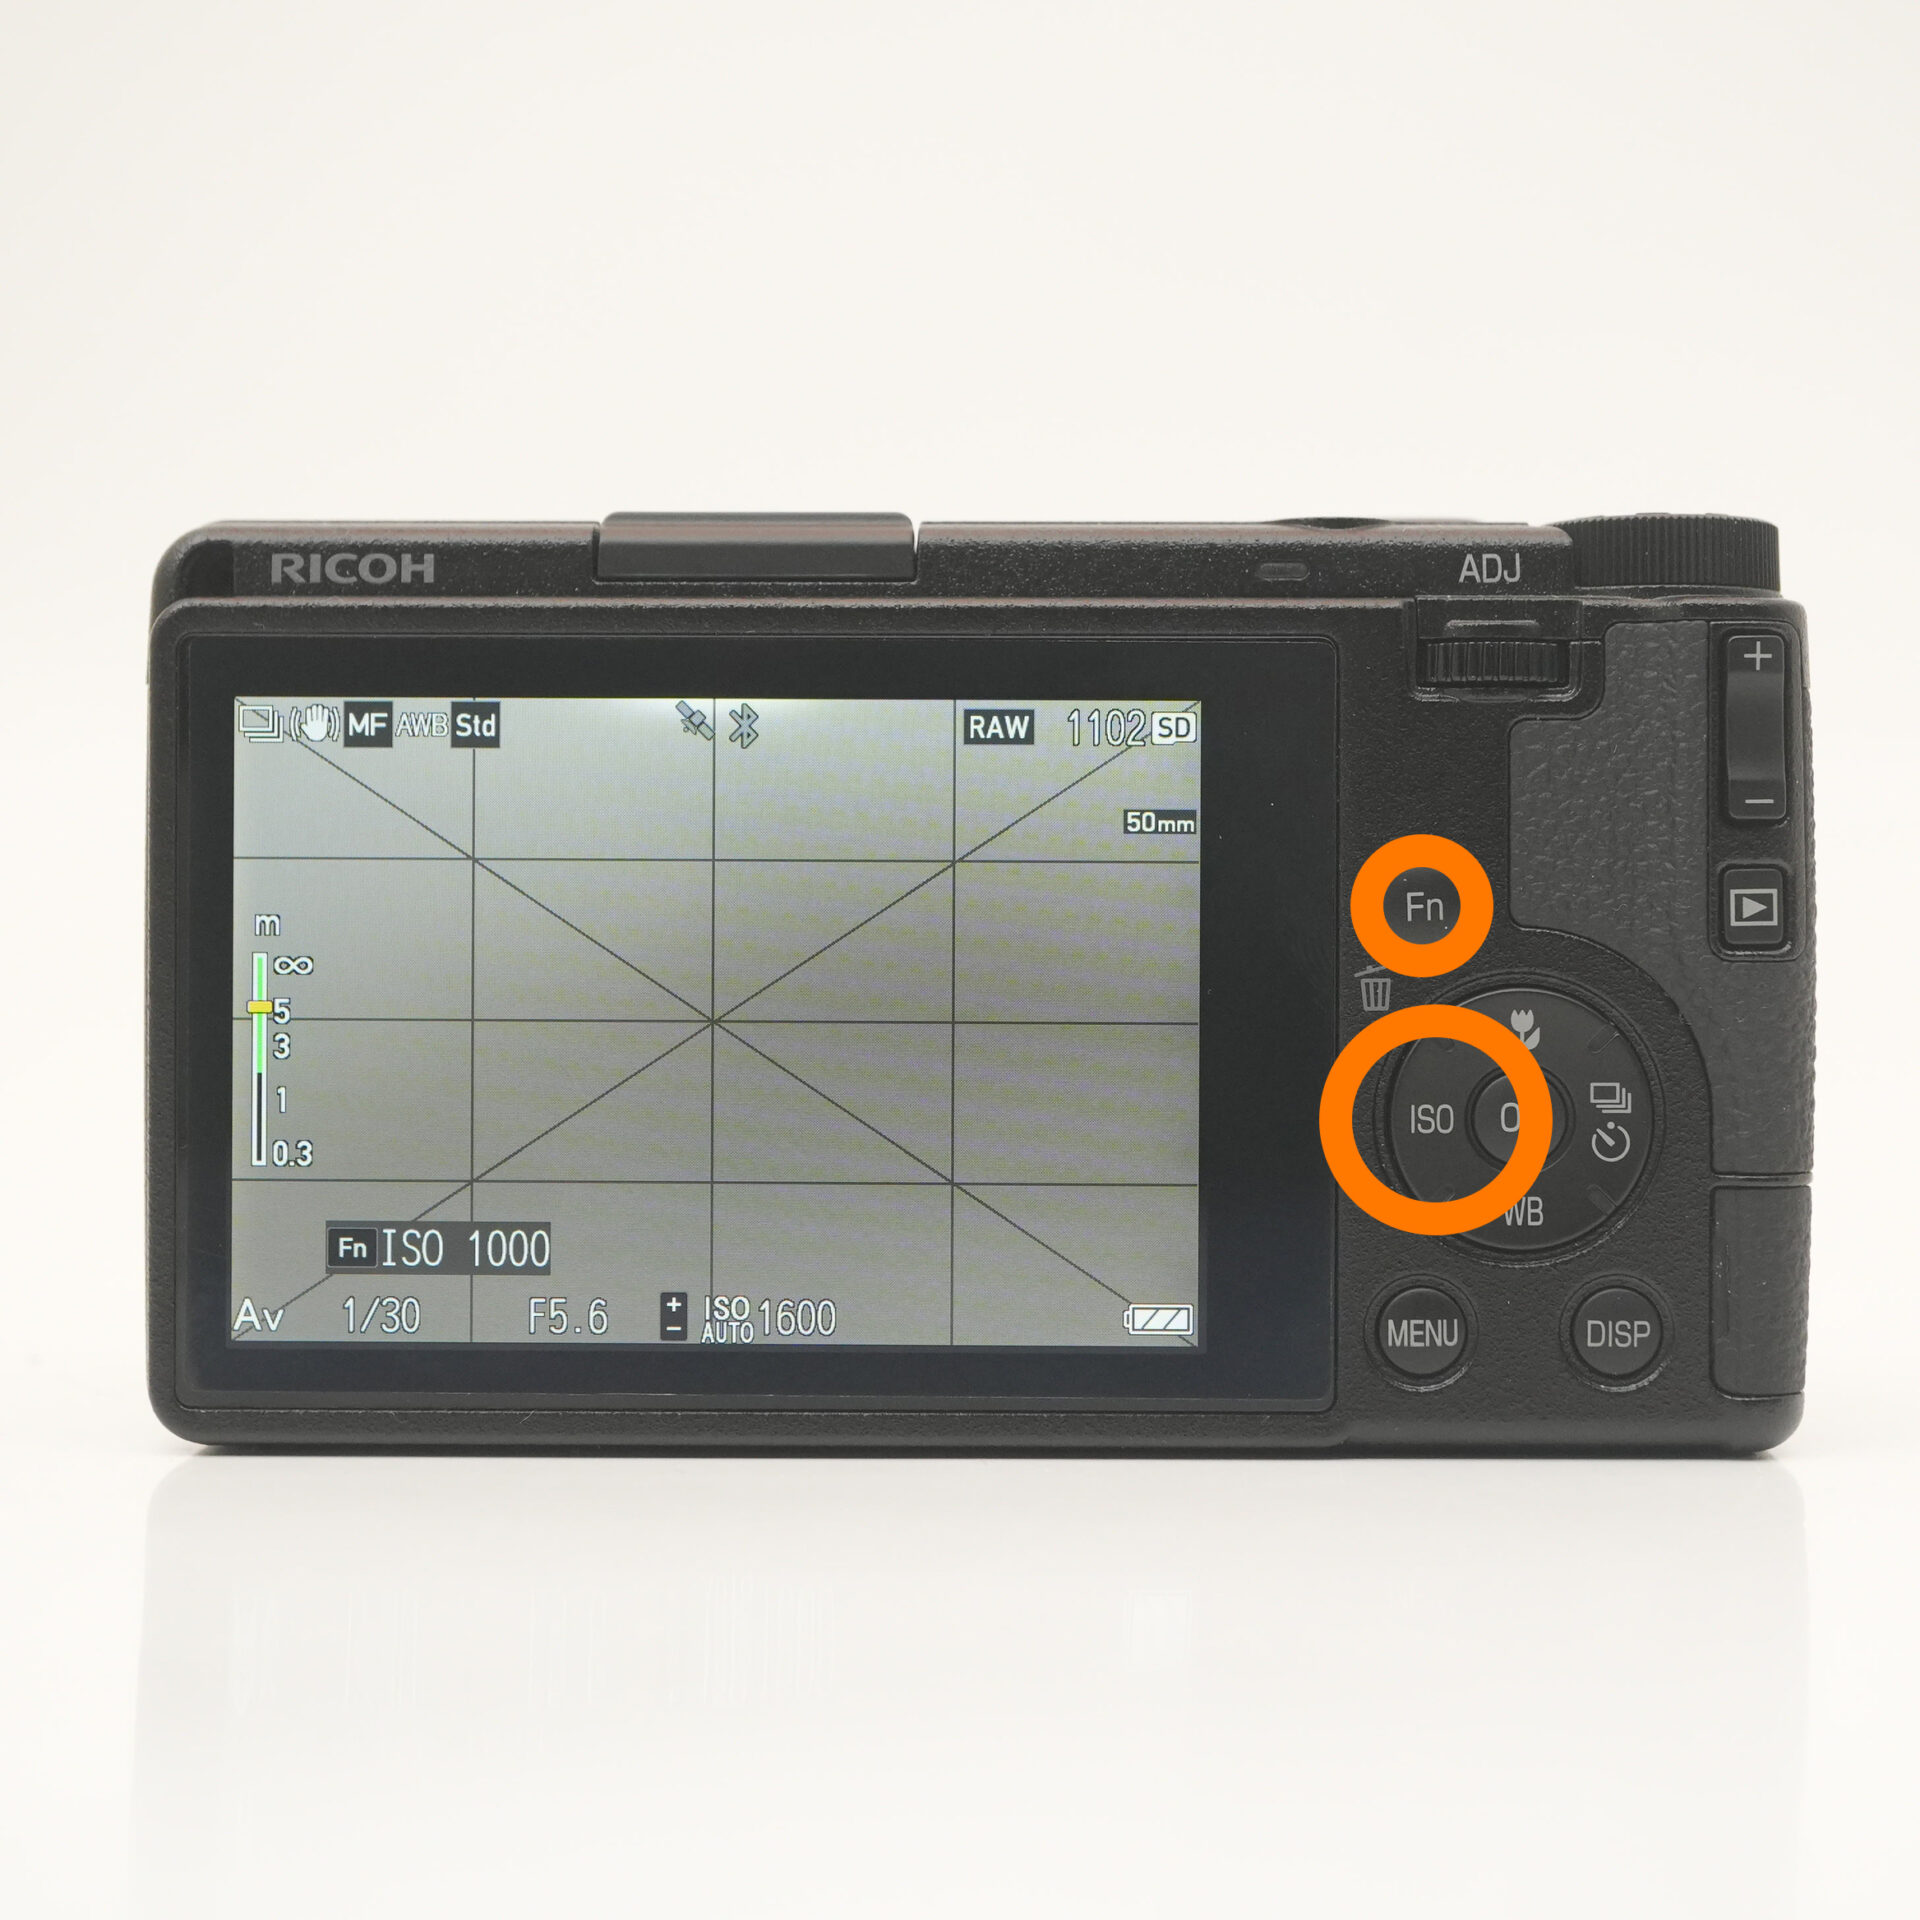 |
| Press left on the directional pad to select Fn |
STEP.5
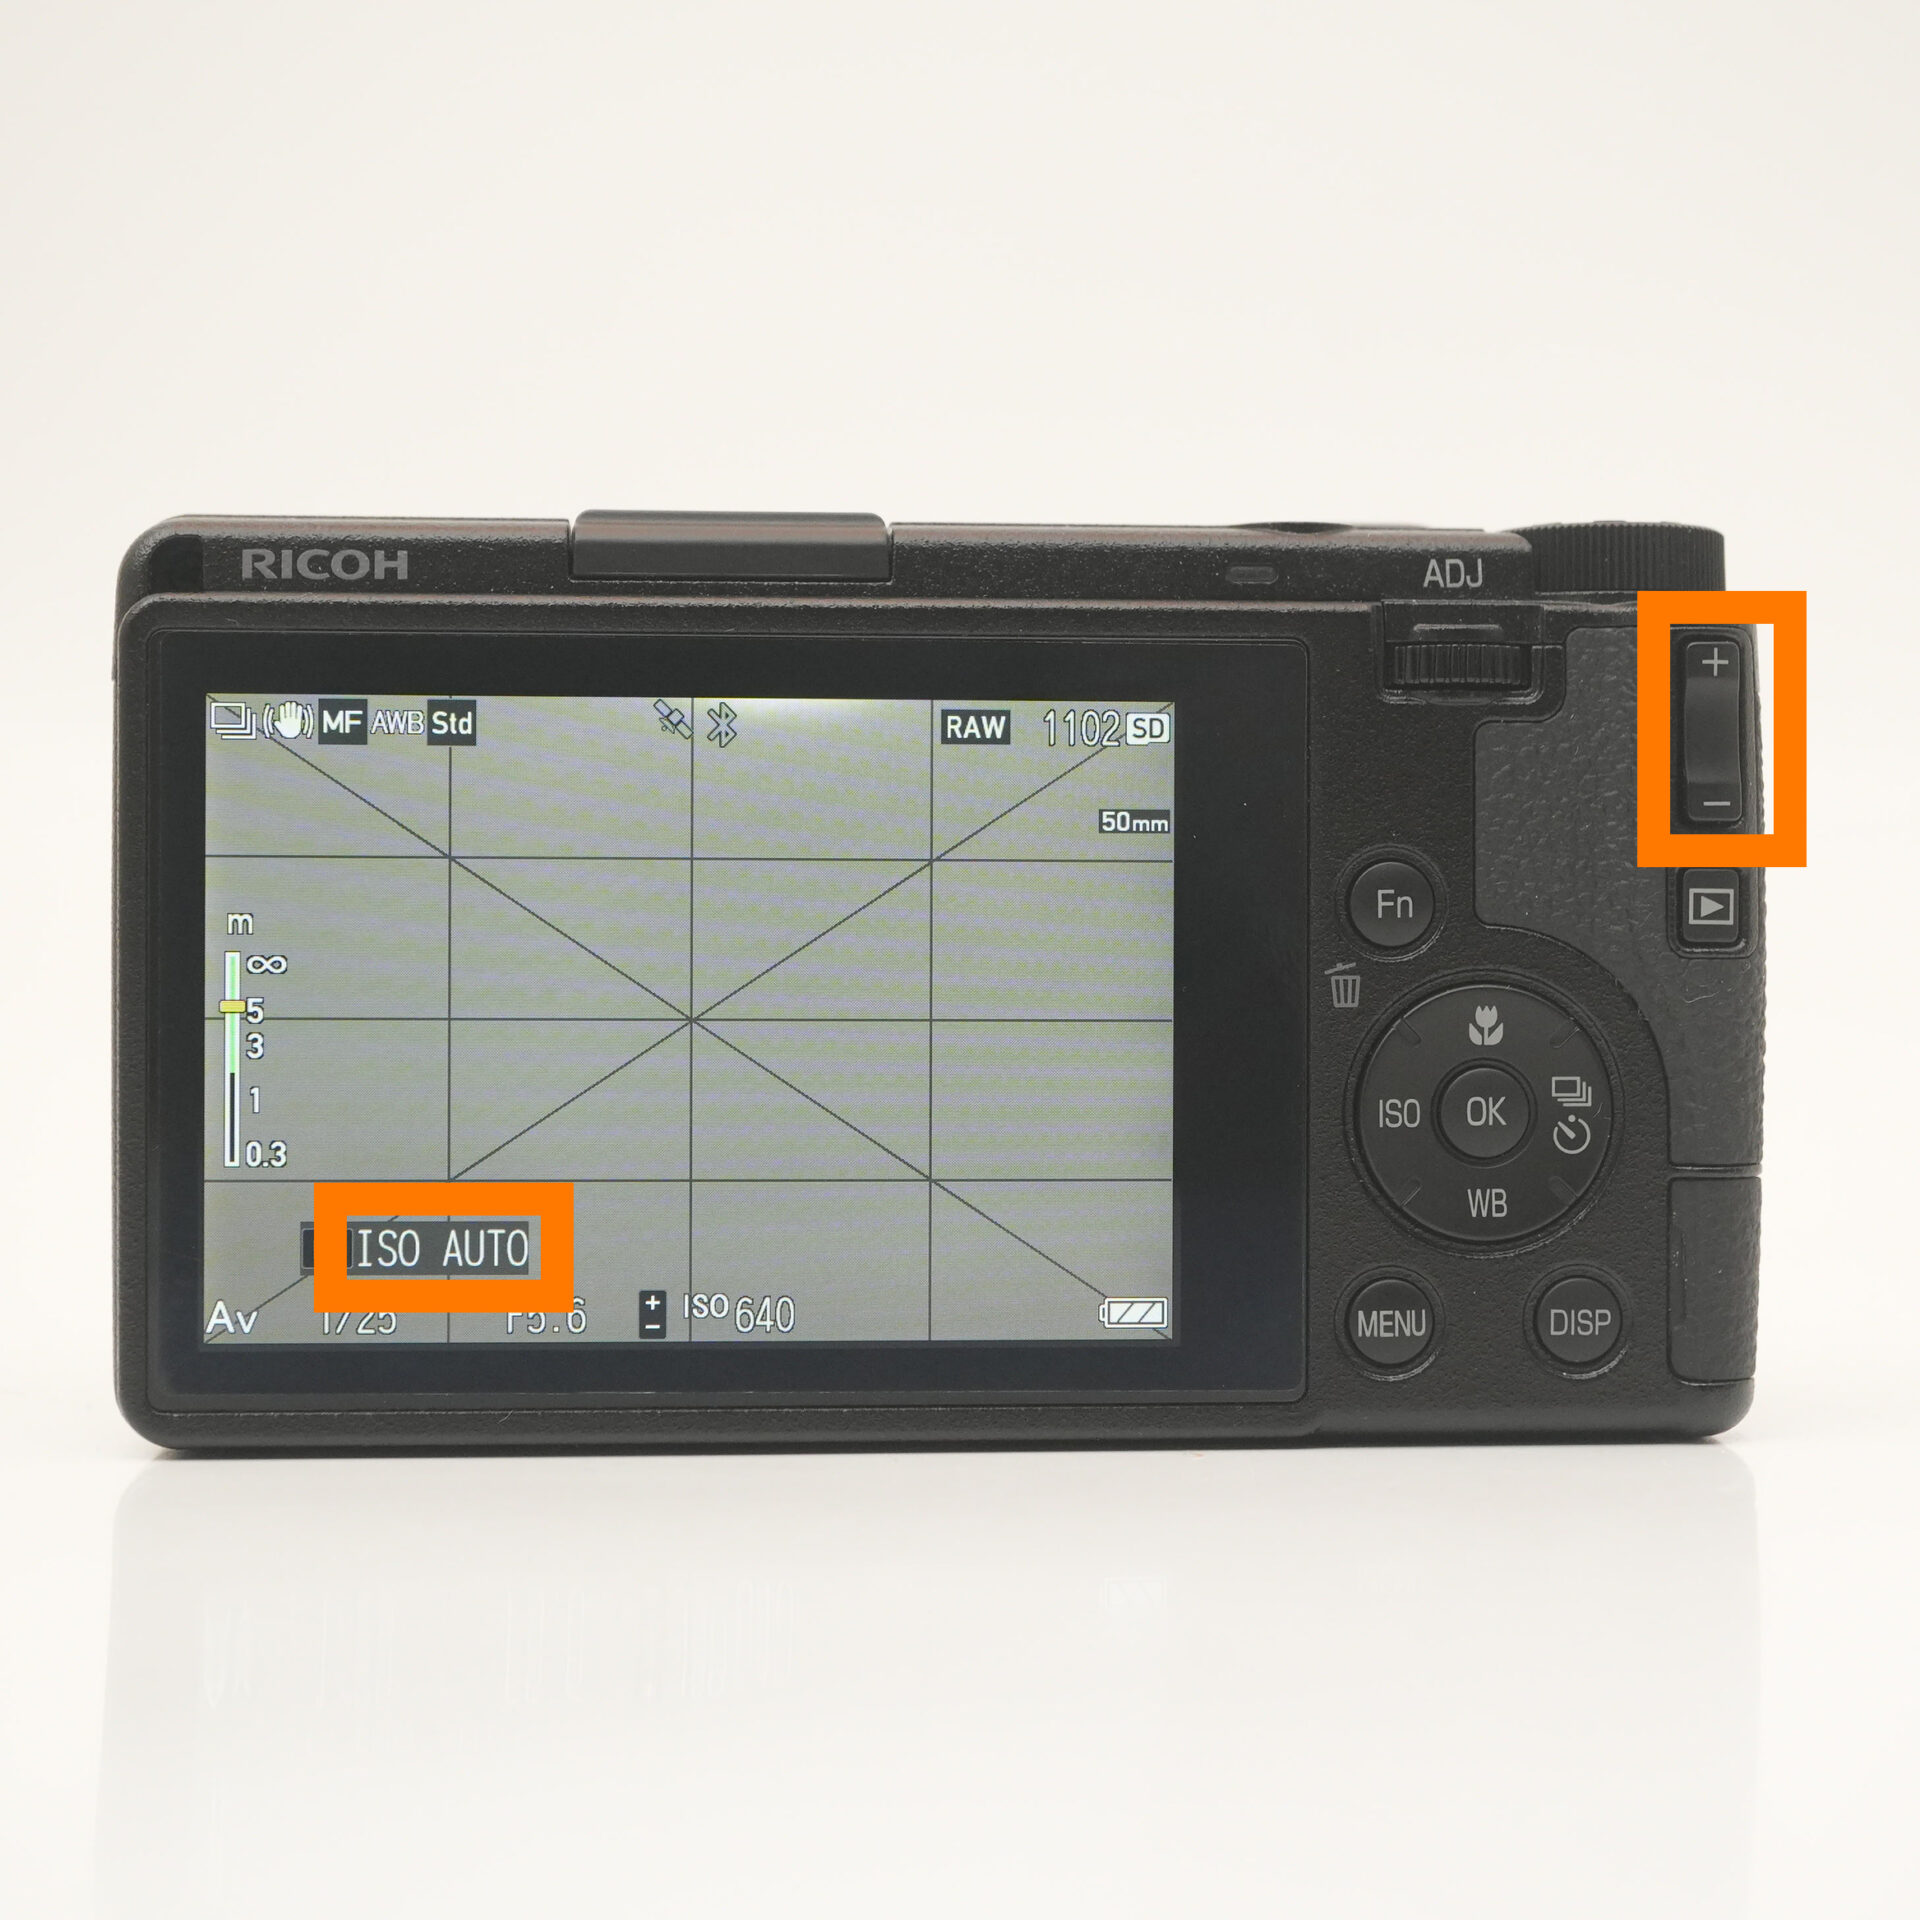 |
| Set ISO to auto |
Use exposure compensation to adjust brightness
"The photo is a little dark" or "It's too white"In times like these, exposure compensation is useful.
When using A mode or ISO auto, the camera automatically adjusts the brightness,but it doesn't always turn out to be "the brightness you want."
That's where exposure compensation comes in handy.
Try using exposure compensation to adjust the brightness to what you feel is "just right."
STEP.1
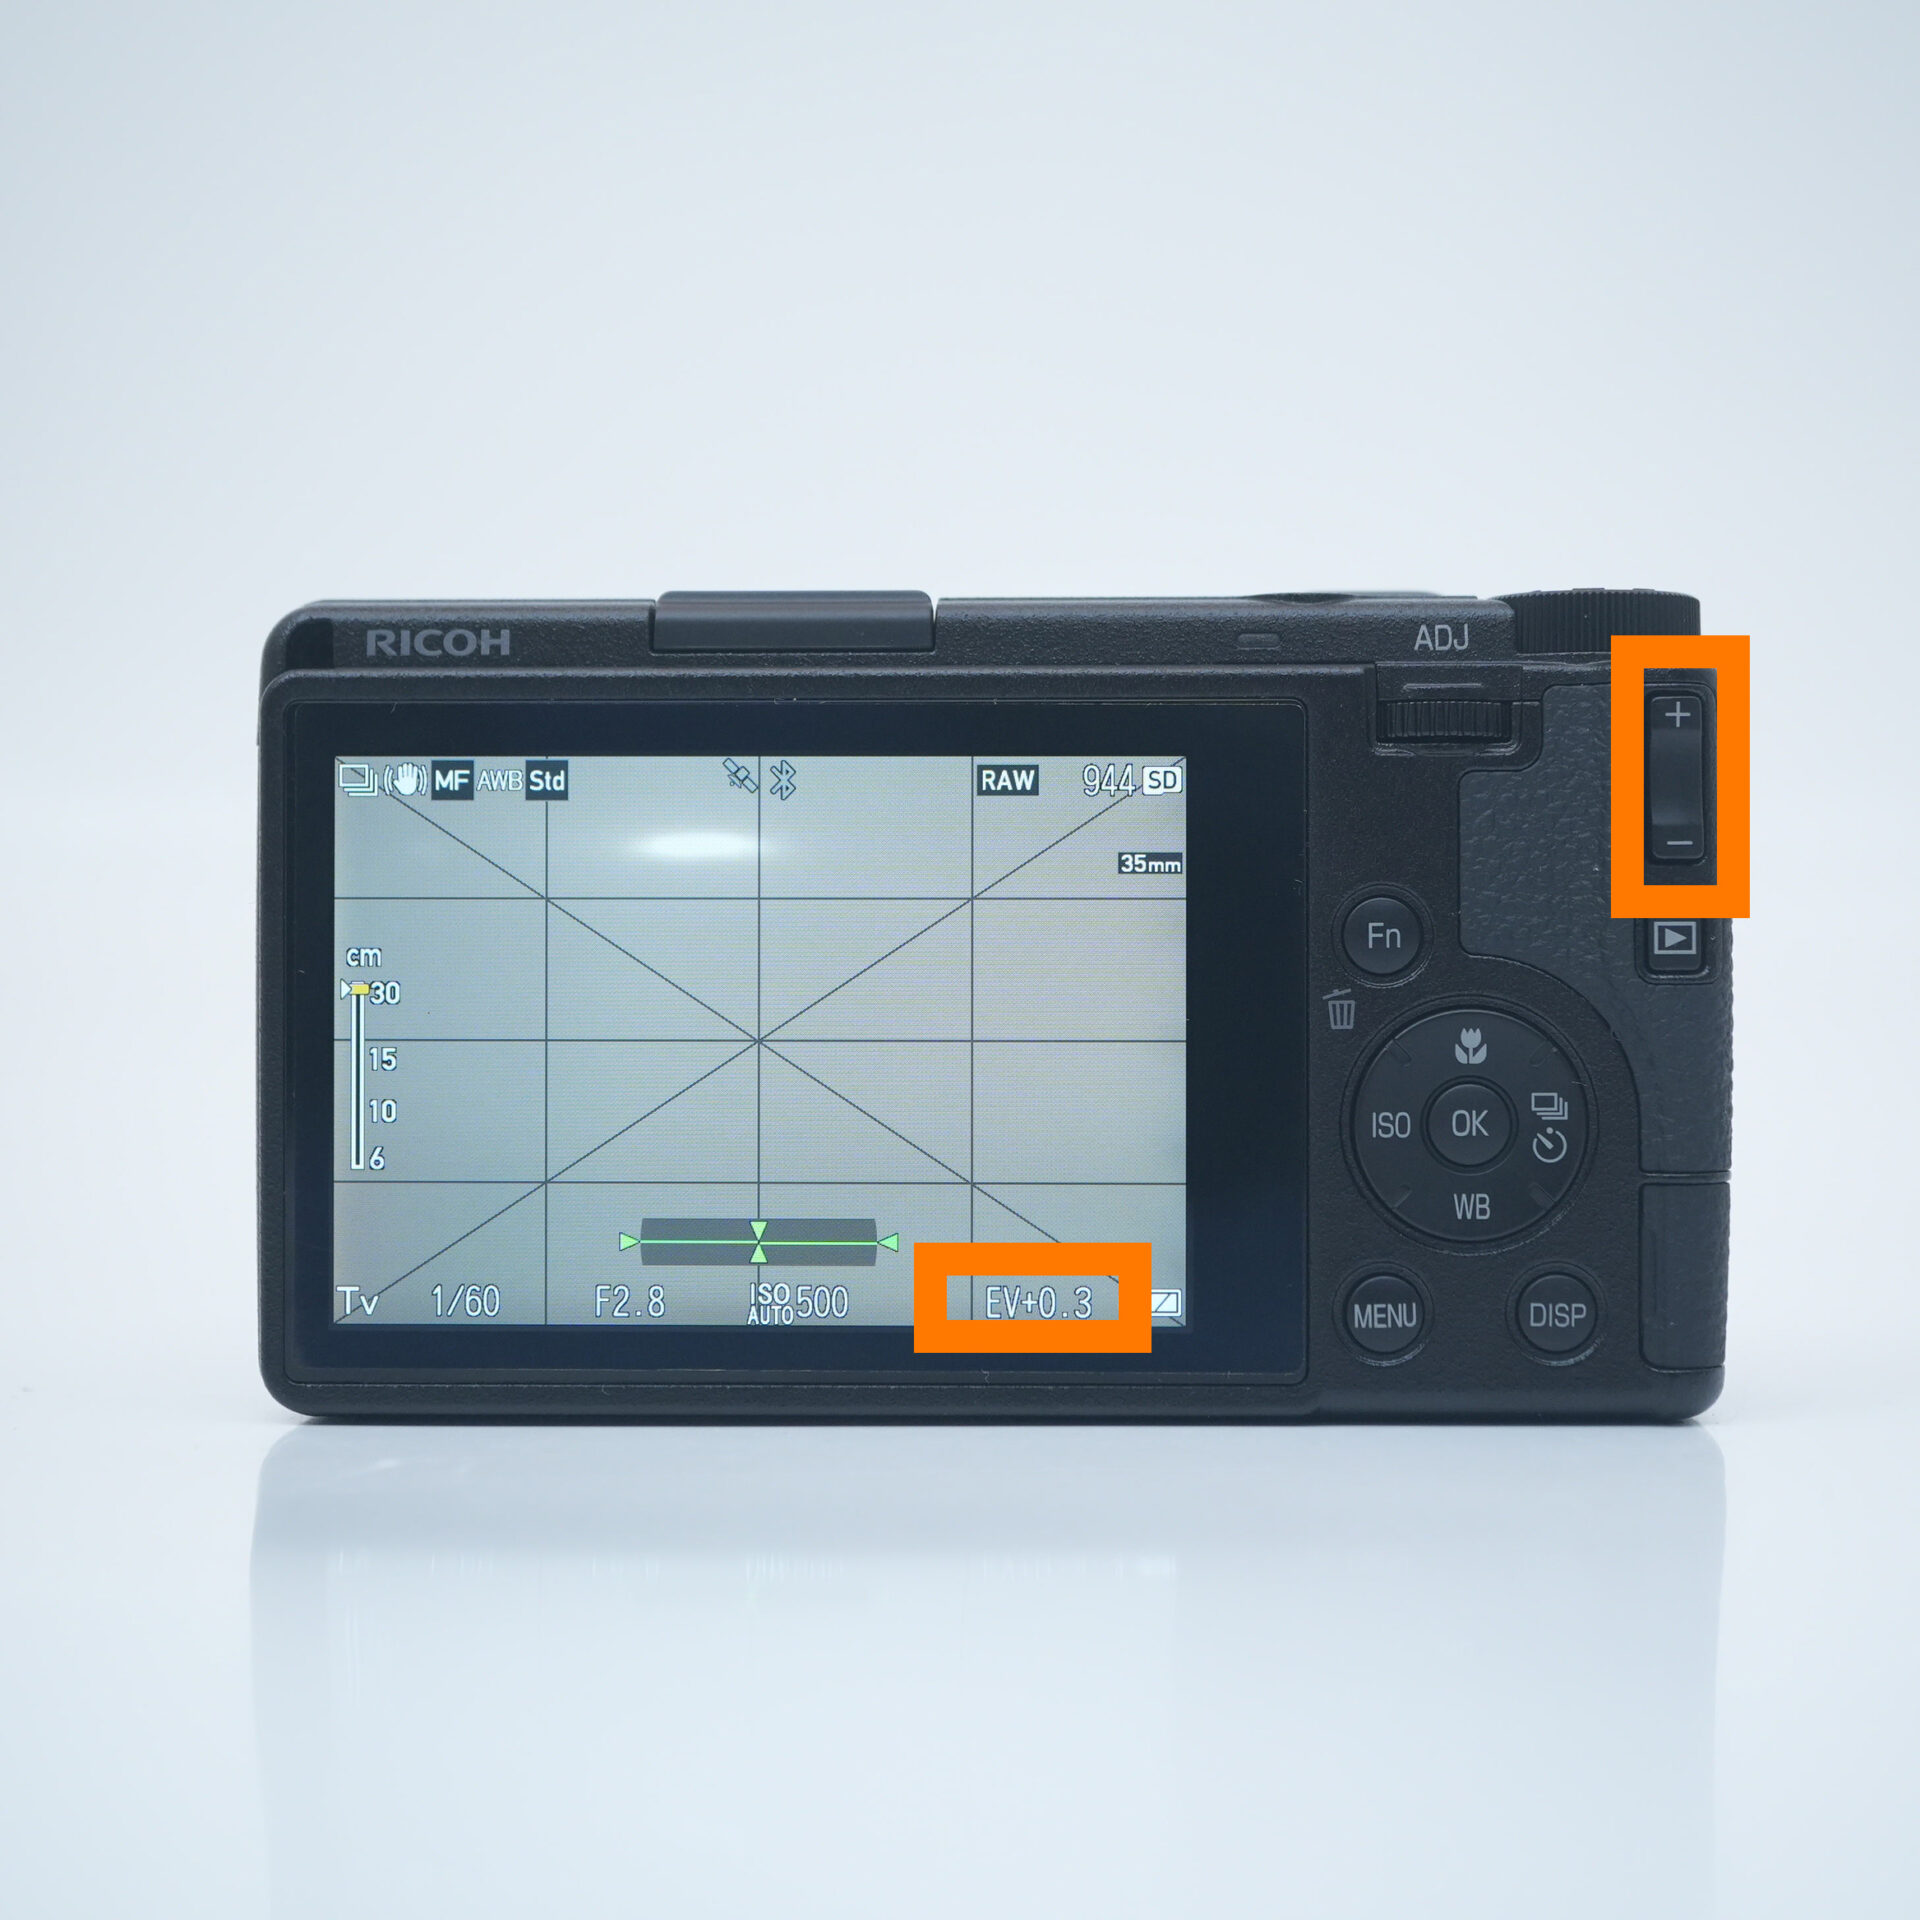 |
| Press ± to set the appropriate brightness |
summary

Using background bokeh to your advantage can make your photos and videos much more impressive.
Try putting it to use in your photography starting today.