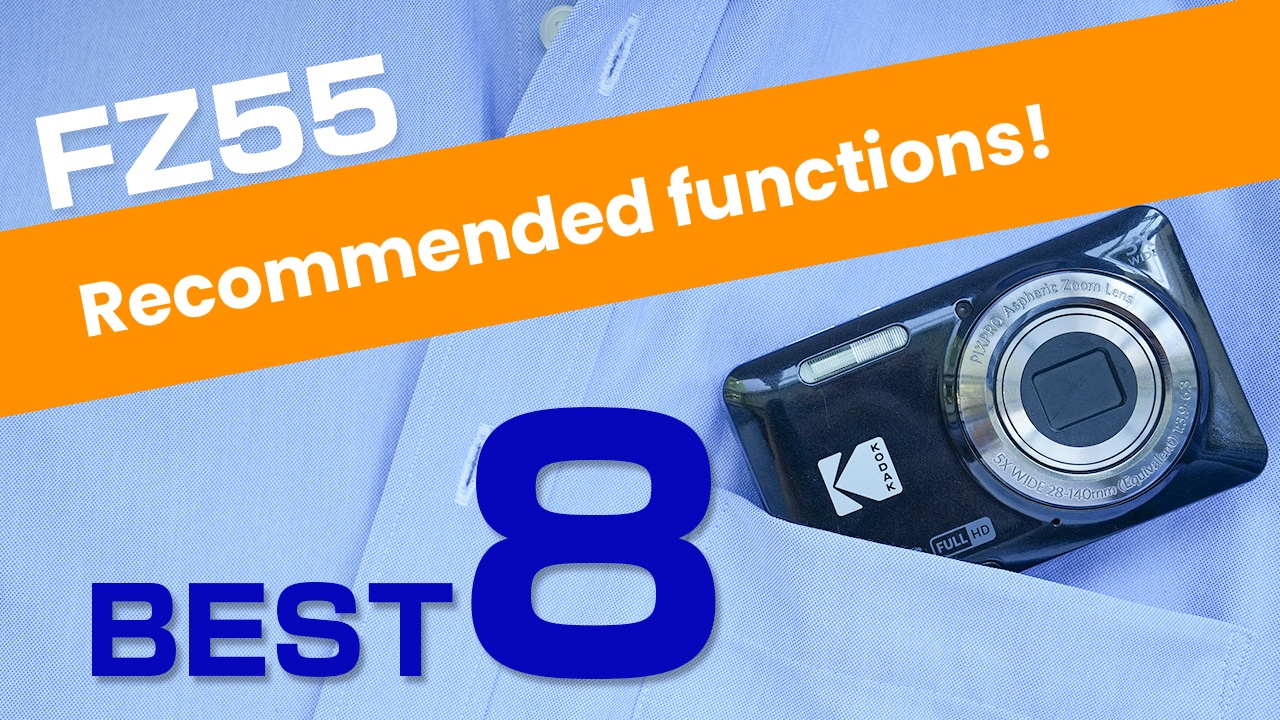
Have you ever wanted to change a certain setting, but couldn't find it no matter how hard you looked?
And then, by the time you finally got it set up, you'd already missed the shot? Sound familiar?
That's why today I want to introduce 8 of my favorite basic settings that I use all the time!
This page contains advertisements.
Grid Lines
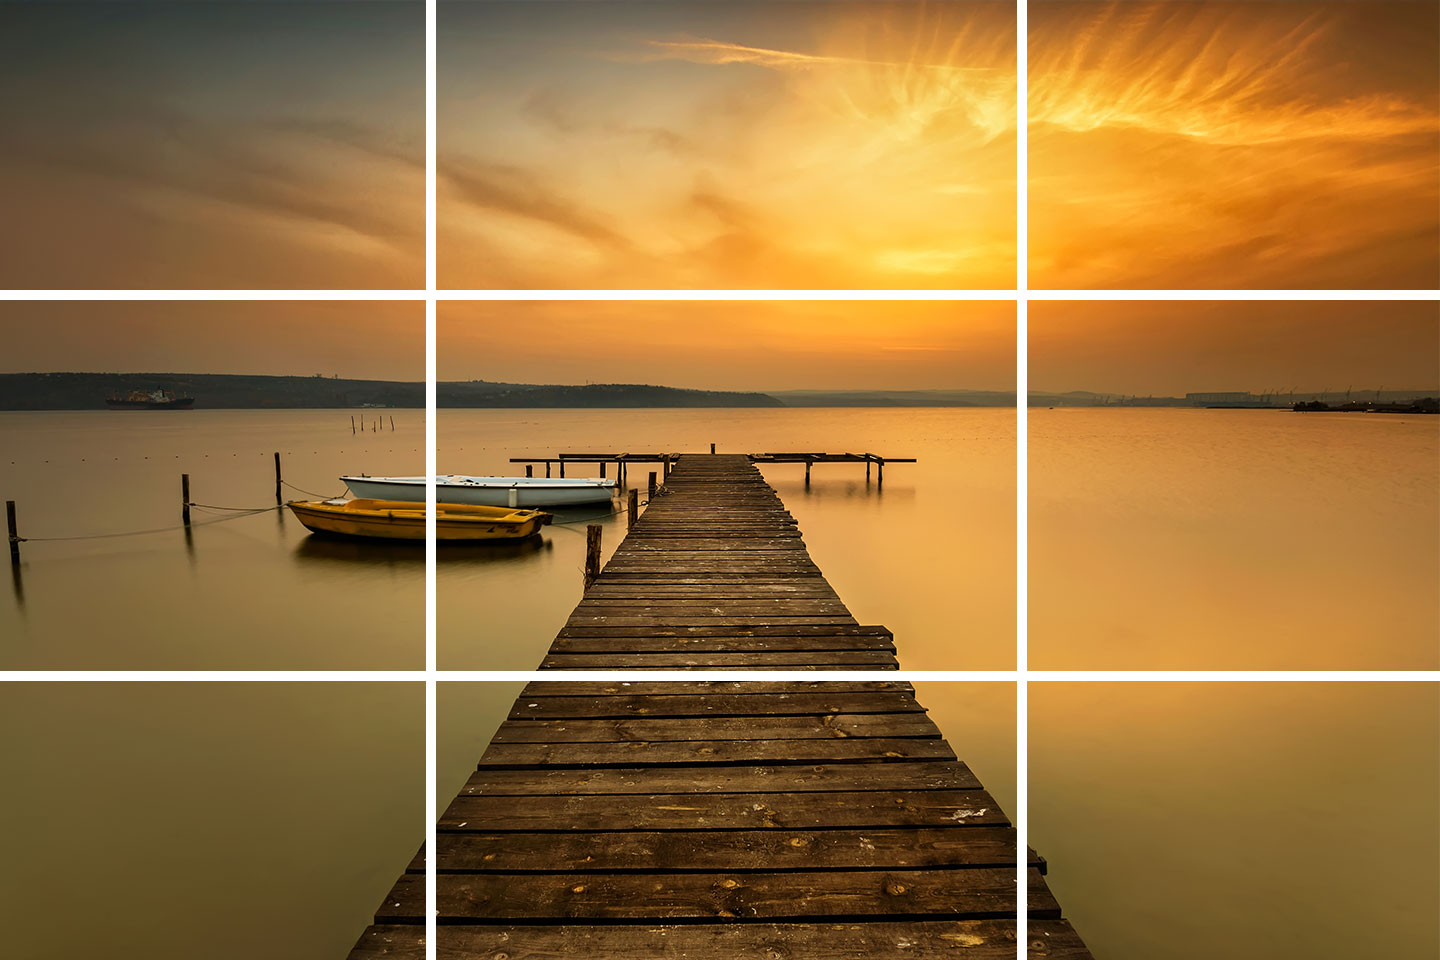
Grid Lines...... Displays vertical and horizontal lines on the screen, a handy guide when you want to work on your composition or keep your shot level.
It's a convenient setting that can improve the quality of your shots.
Recommended Scenes
- Shooting with a perfectly level horizon, such as a shrine's torii gate.
- Portrait shooting.
- Snapshots, and more.
STEP.1
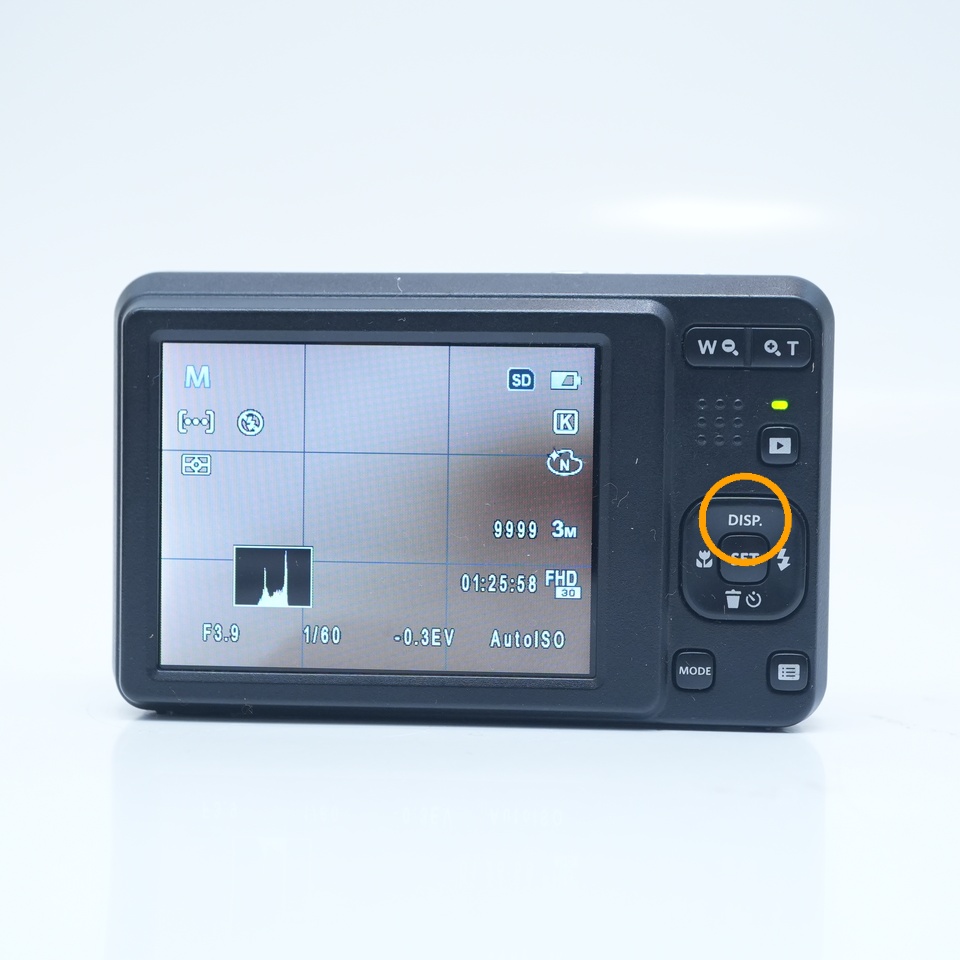 |
| Press up on the cursor button to display the grid |
Magnified Display

Magnified Display...... Magnifies the exact spot you want to check.
On the monitor or viewfinder, it can be hard to tell whether your subject is really in focus.
In those cases, magnifying the image lets you check it properly.
Recommended Scenes
- Magnifying the image to check focus.
- Checking facial expressions in commemorative photos.
STEP.1
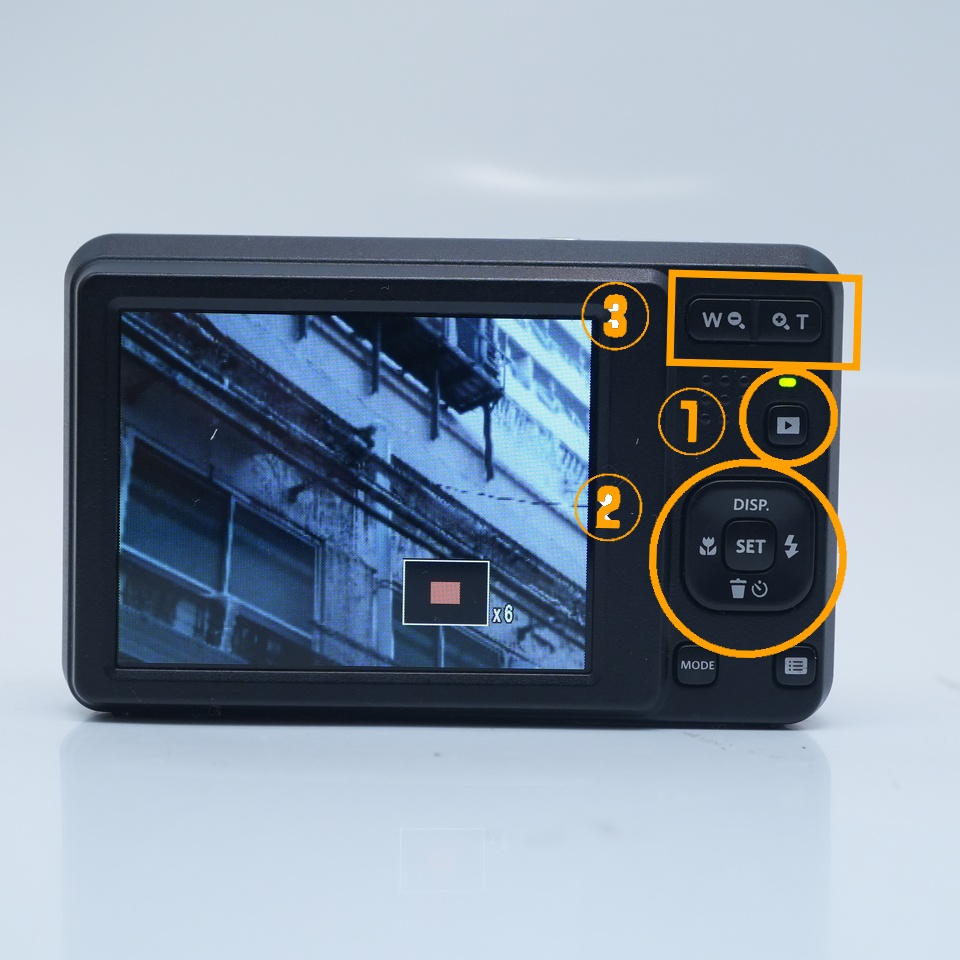 |
| Press the playback button → press the zoom button → use the cursor button to move to the area you want to magnify |
Silent Shooting
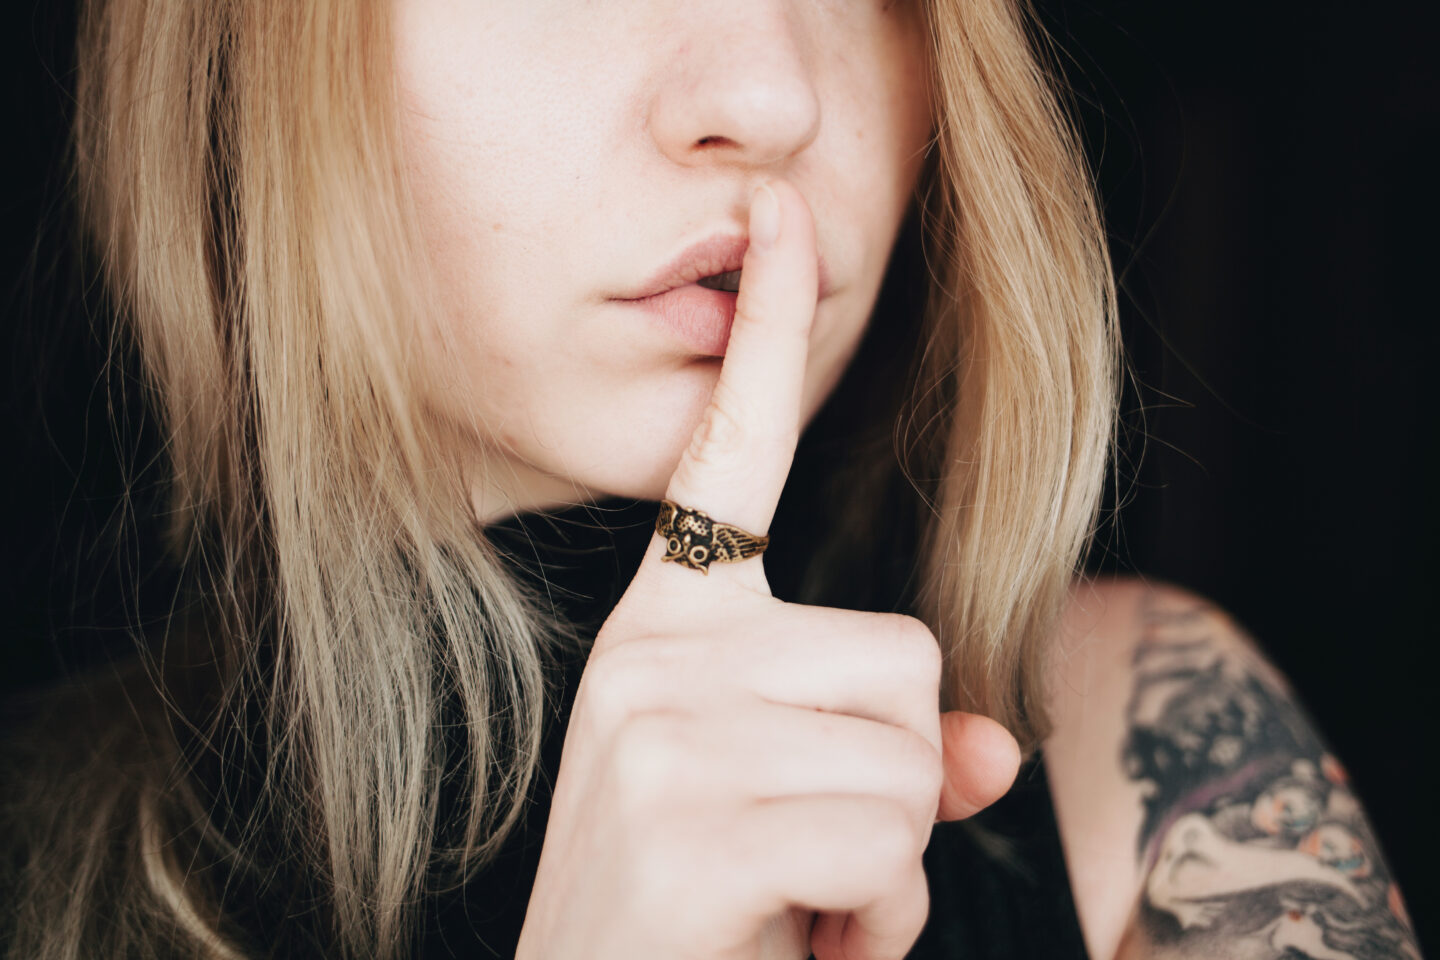
Silent Shooting...... Lets you take photos without the shutter sound.
When you want to shoot without anyone hearing the shutter, Silent Shooting comes in handy.
Because it makes no sound, you can shoot without disturbing the people around you.
Recommended Scenes
- Shooting at a venue.
- Photographing a sleeping child, and more.
STEP.1
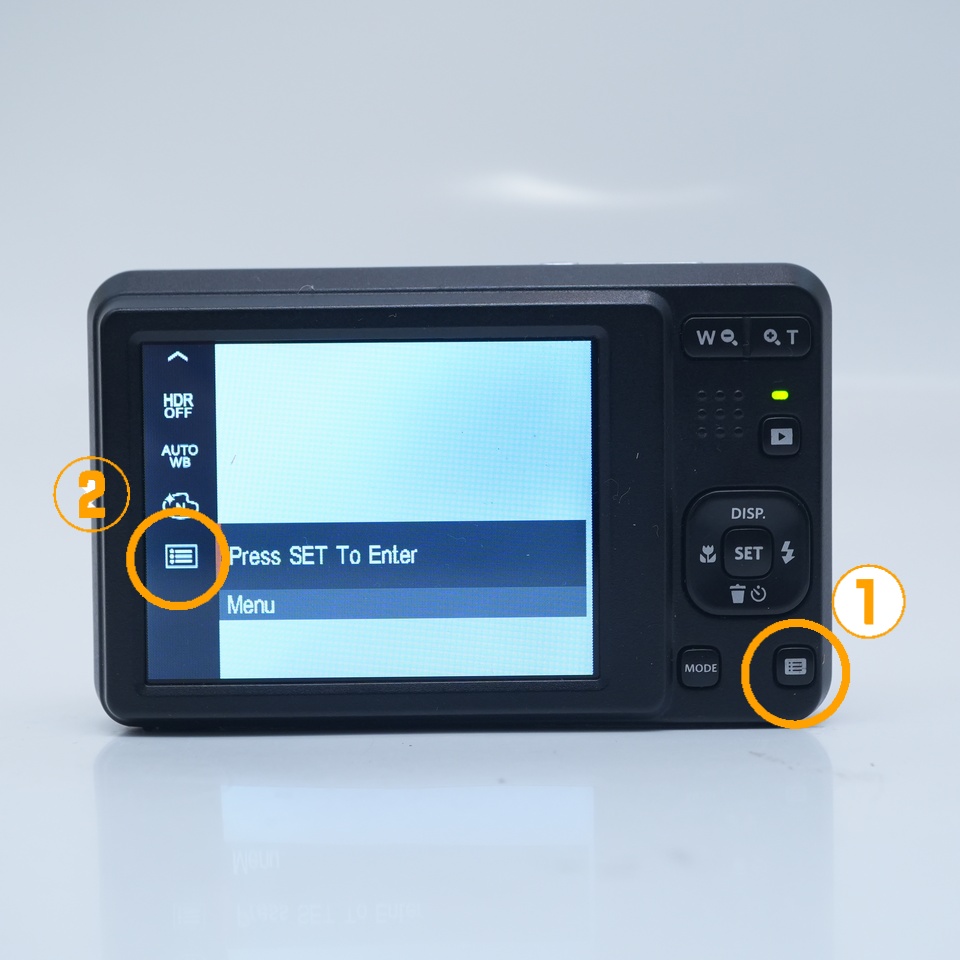 |
| Press the button at the bottom right → select Menu |
STEP.2
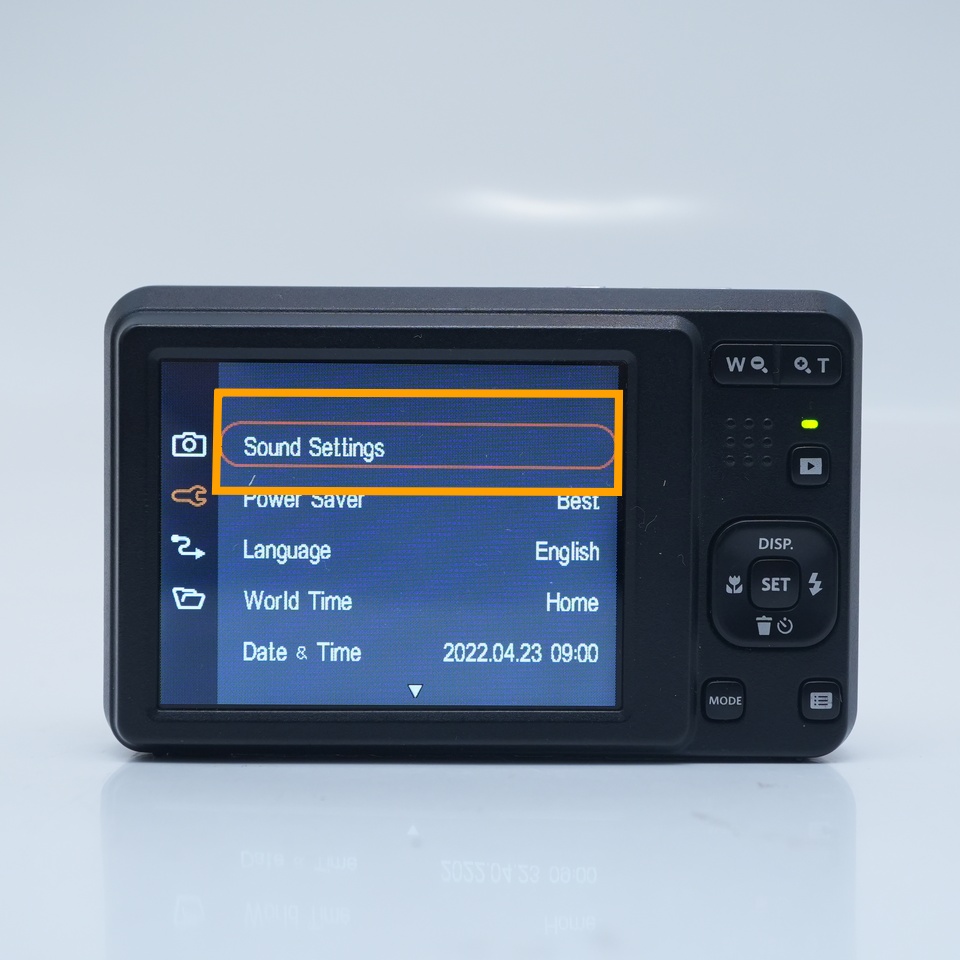 |
| Select Sound Settings |
STEP.3
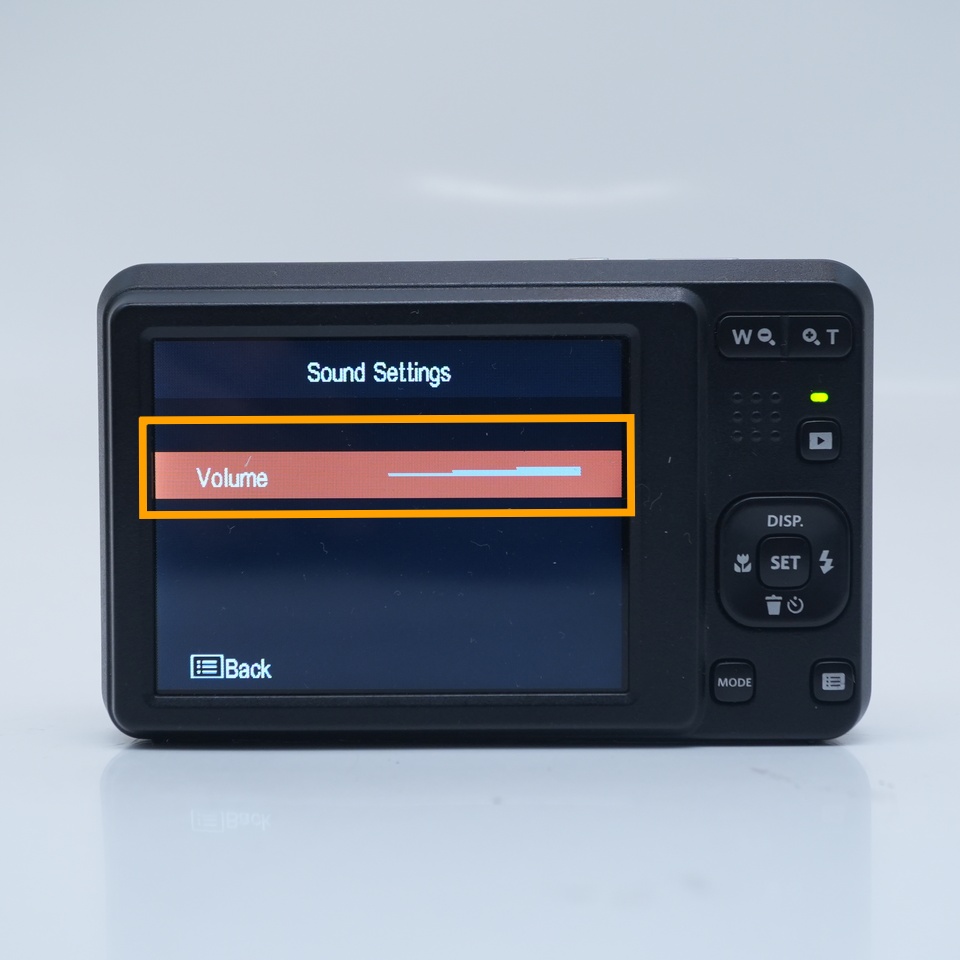 |
| Set the volume to the minimum |
Burst Shooting
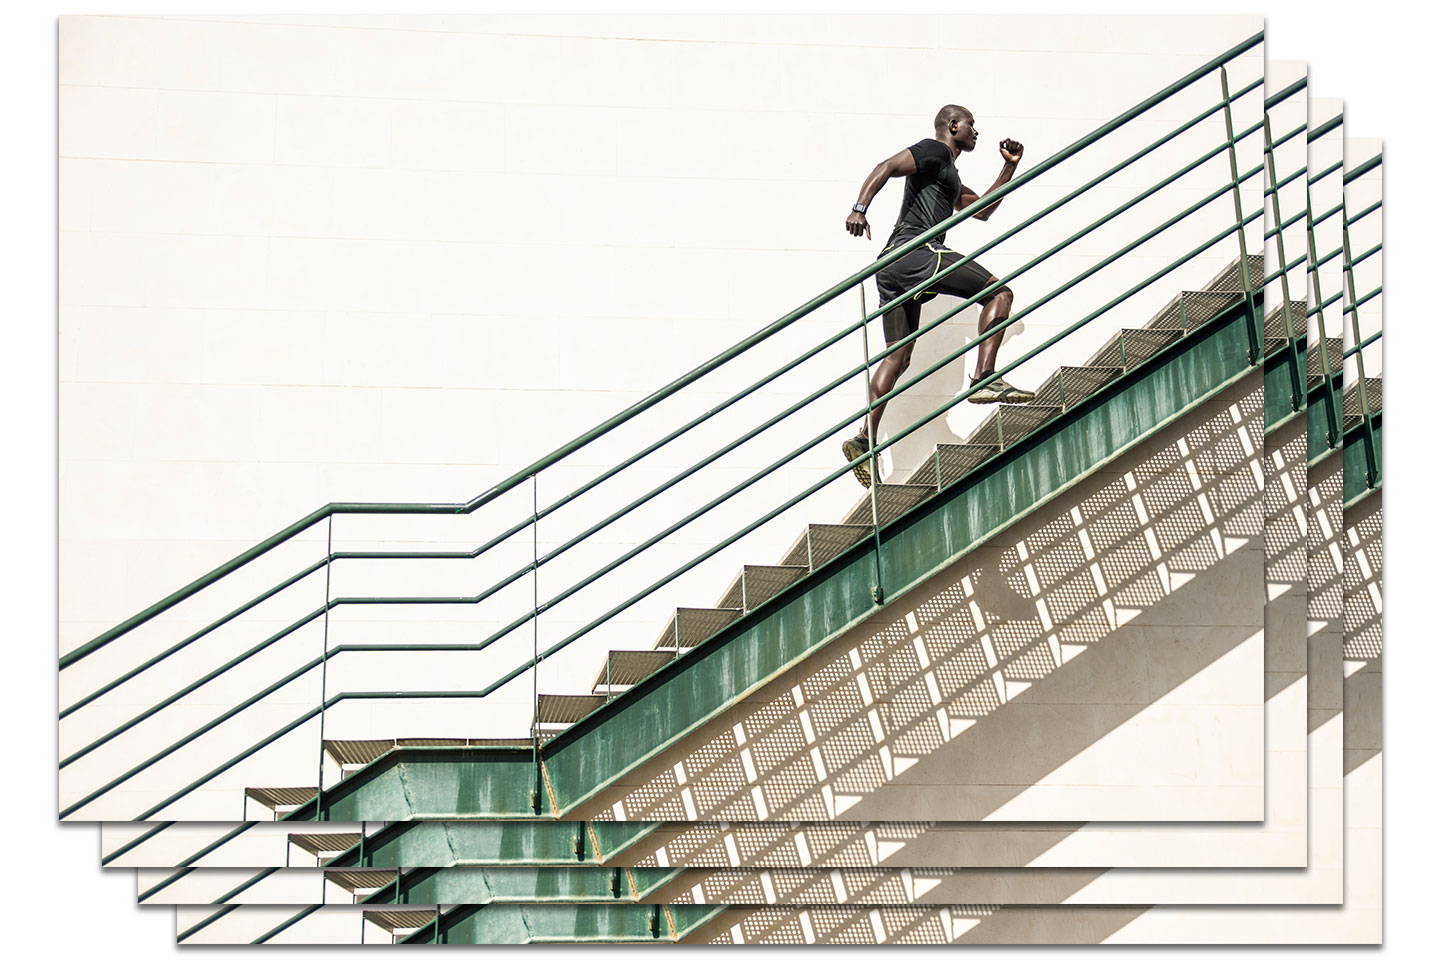
Burst Shooting...... Keeps shooting continuously for as long as you hold down the shutter button.
With single shots alone, it's hard to capture the perfect moment.
The benefit of burst shooting is that you can choose the best shot from several frames.
Recommended Scenes
- Sports photography.
- Wild bird photography.
- Race photography, and more.
STEP.1
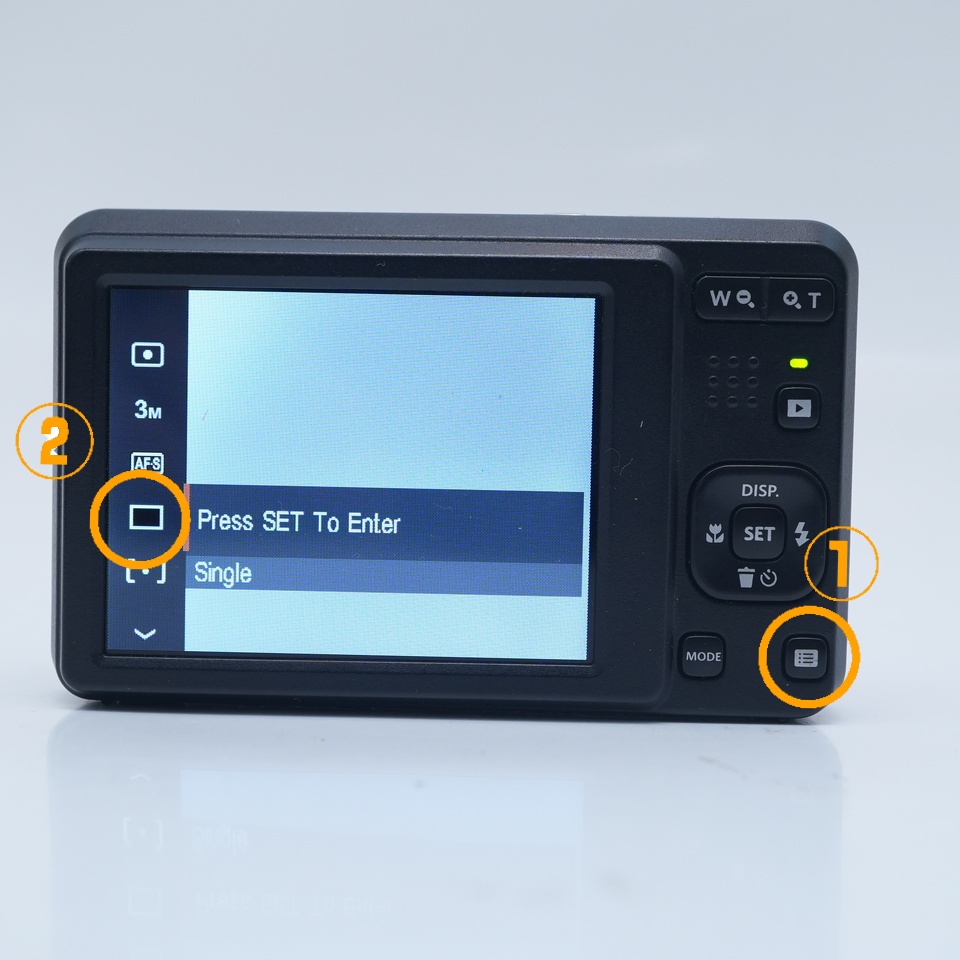 |
| Press the button at the bottom right and select the drive mode |
STEP.2
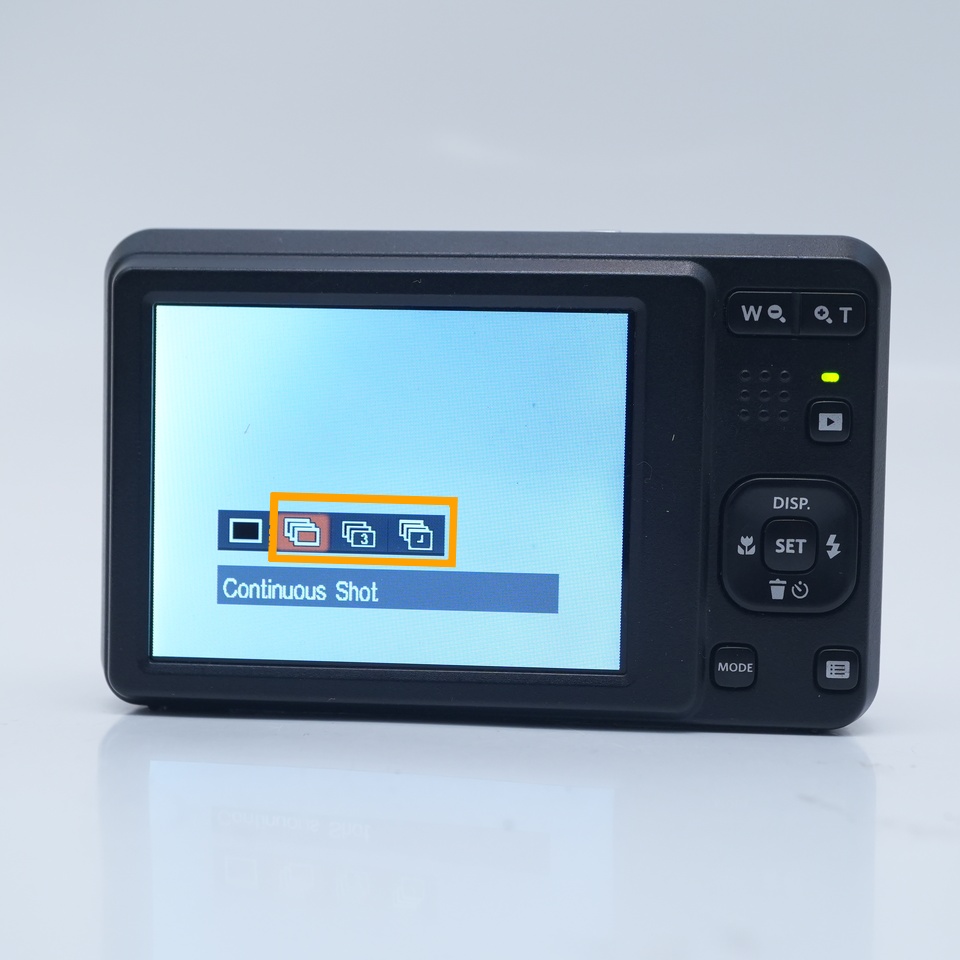 |
| Select the burst mode you prefer |
Self-Timer
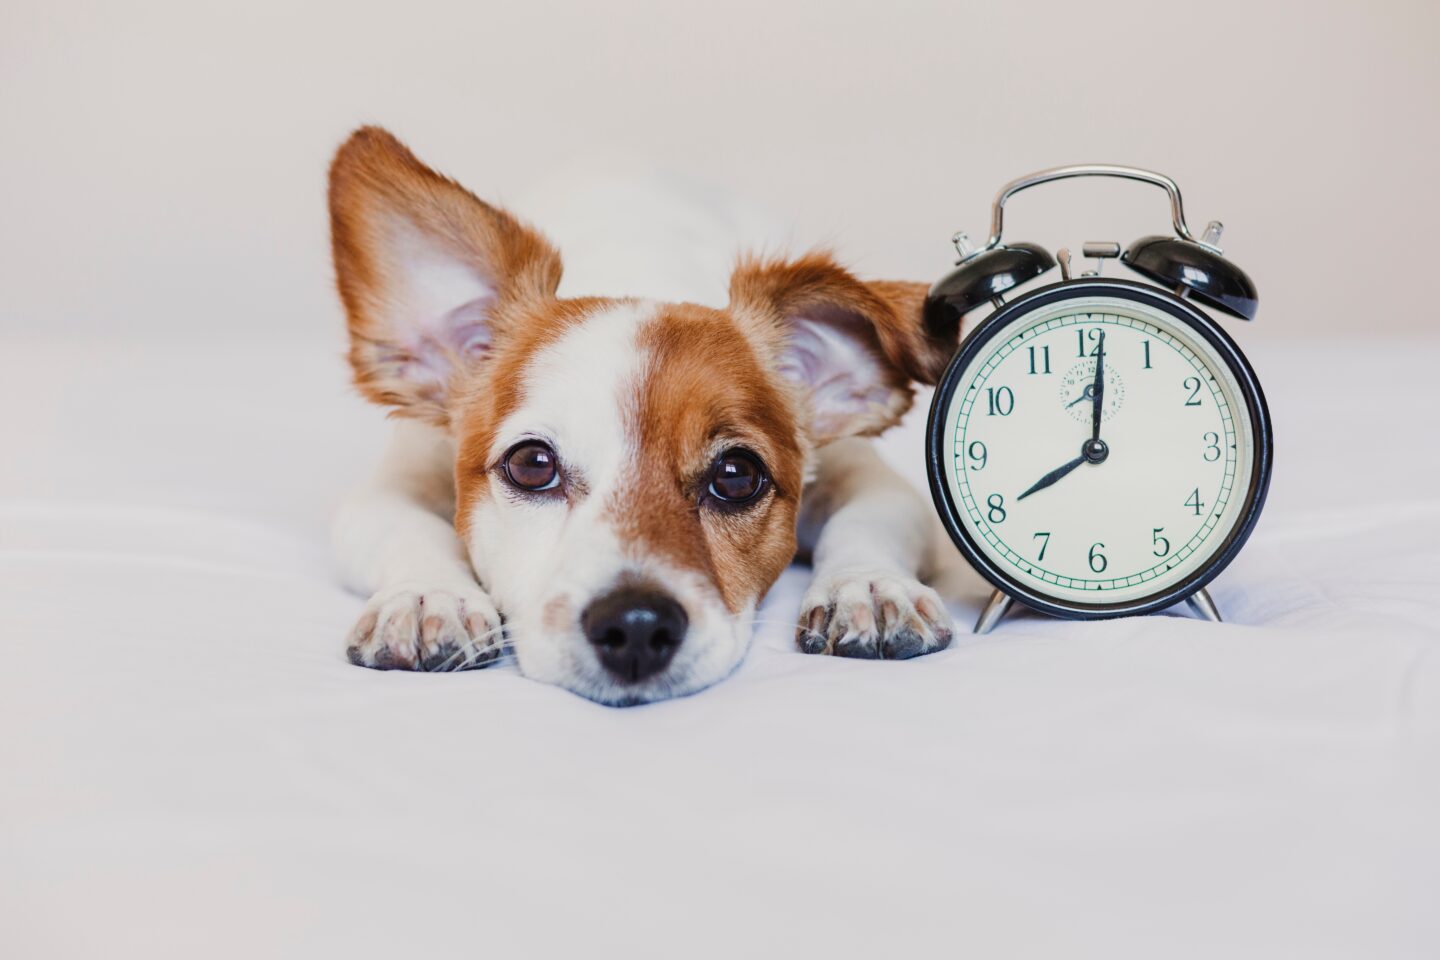
Self-Timer......Fires the shutter after the number of seconds you set once you press the shutter button.
Connecting to a smartphone makes it easy to fire the shutter, but the self-timer can be set using the camera body alone.
Recommended Scenes
- Commemorative photos.
- Long-exposure shots, such as waterfalls.
STEP.1
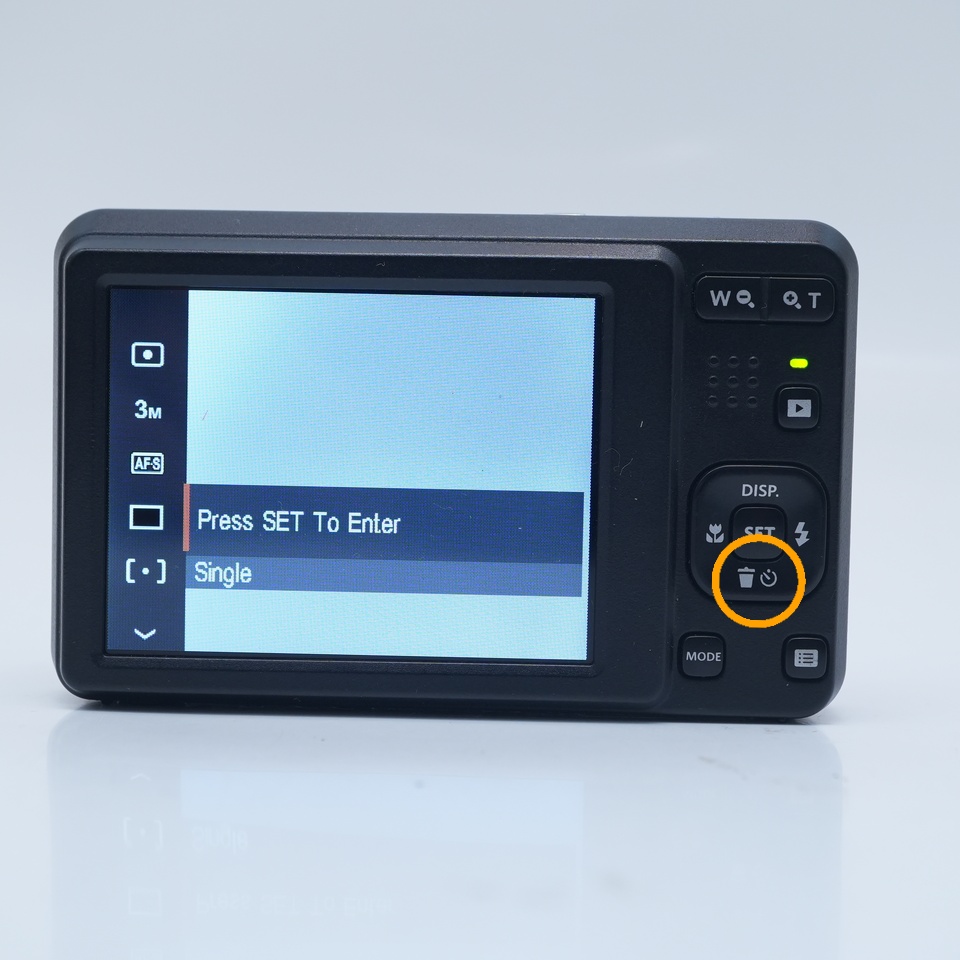 |
| Press down on the cursor button |
STEP.2
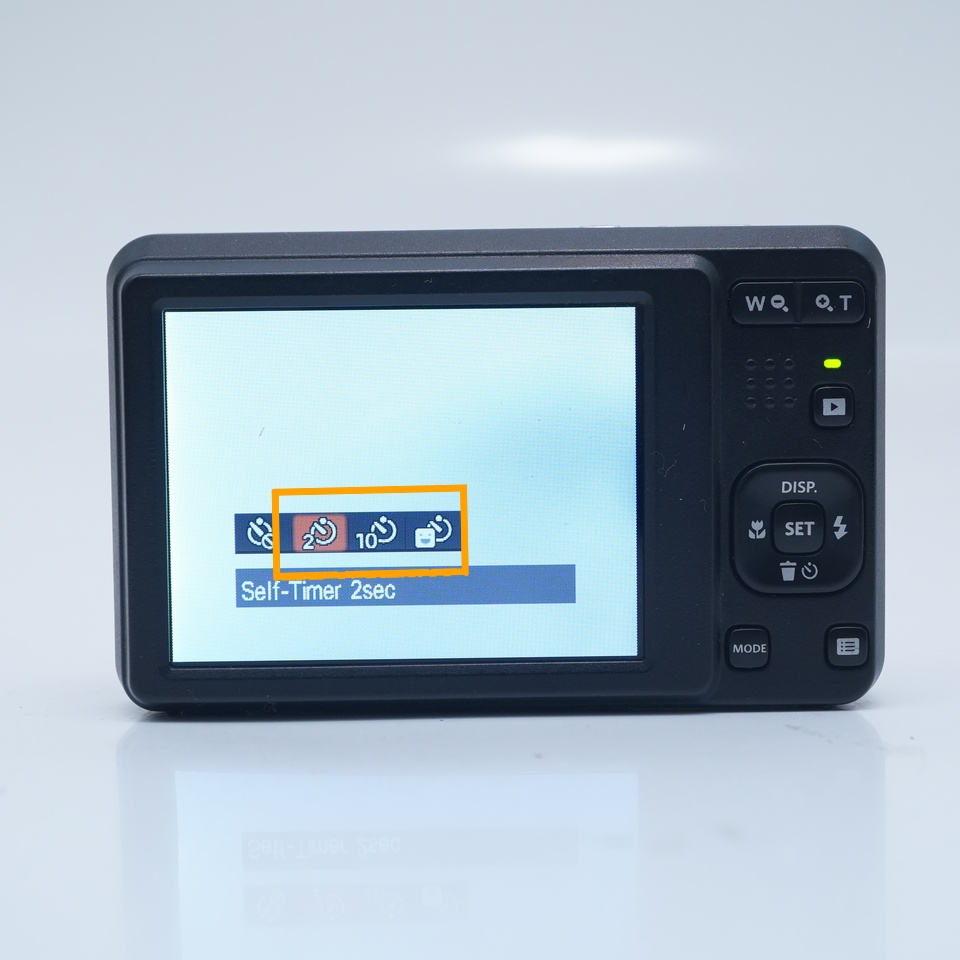 |
| Select the number of seconds you prefer |
Auto Review
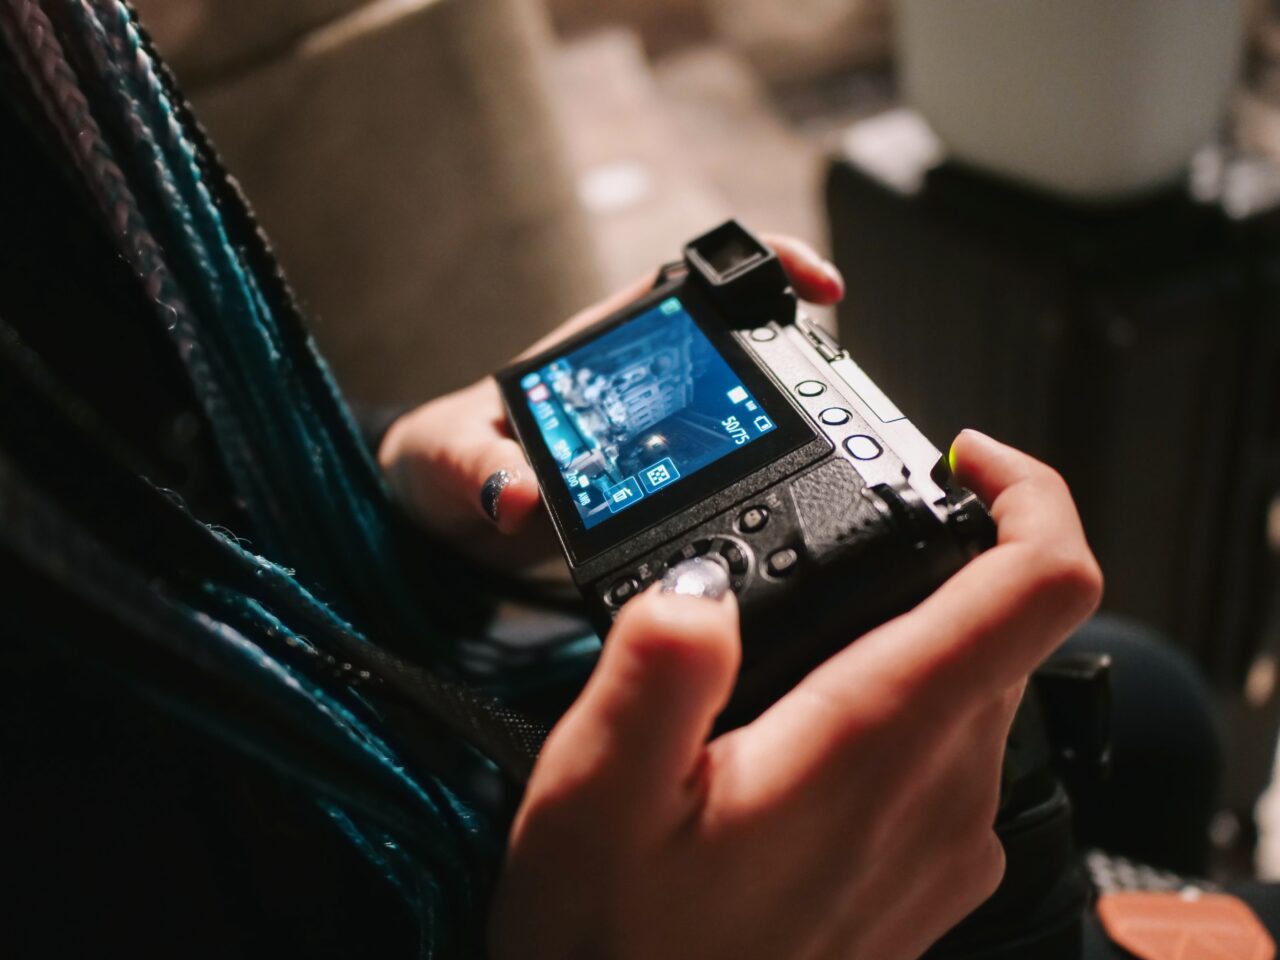
Auto Review...... Shows the photo you just took on the screen for a few seconds right after shooting.
Some of you probably want to check a shot right away.
The photo appears automatically, so you can instantly check whether it's in focus without having to press the playback button.
When It's Useful
- Checking a photo right after you take it.
STEP.1
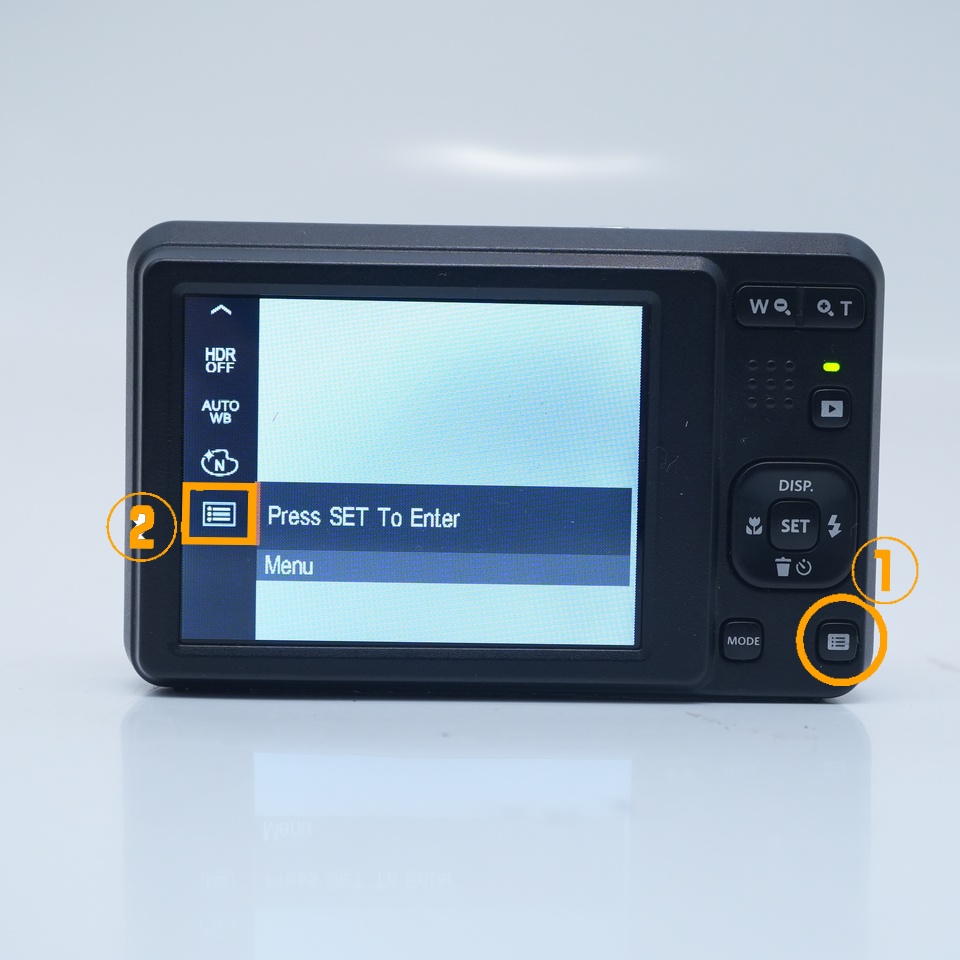 |
| Press the button at the bottom right → select Menu |
STEP.2
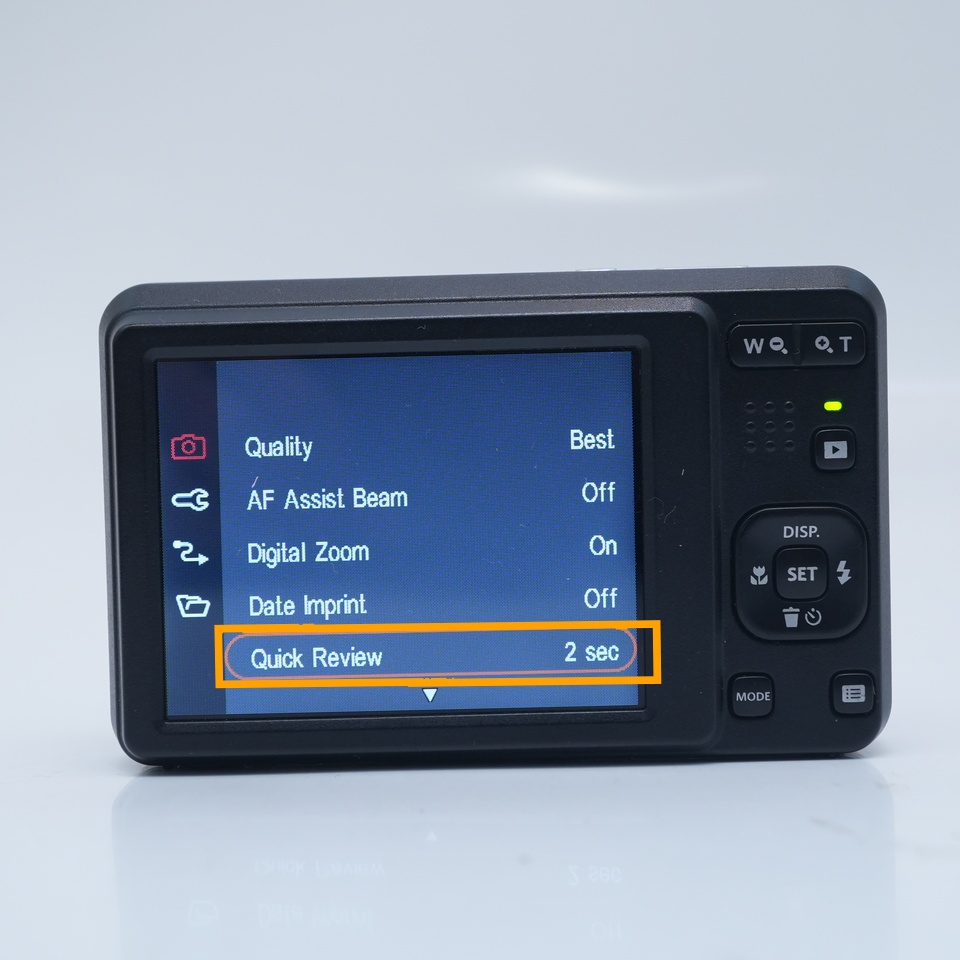 |
| Select Quick Review |
STEP.3
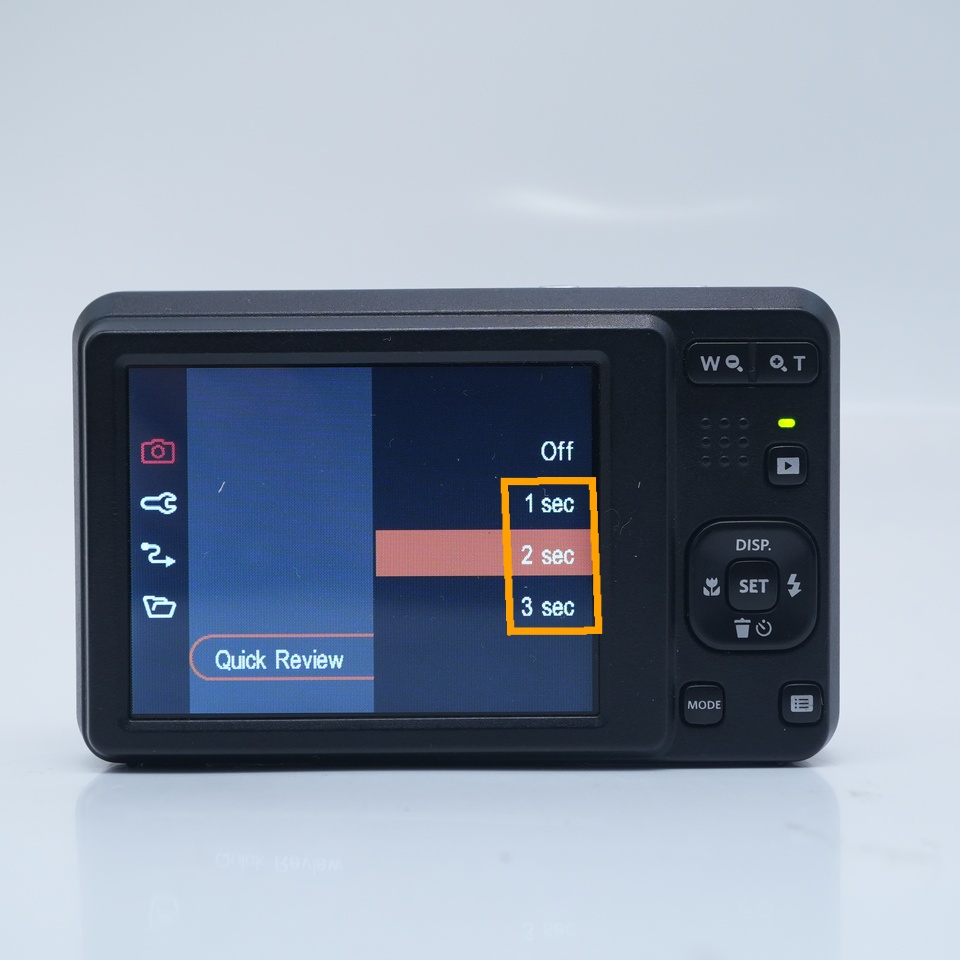 |
| Select the number of seconds you prefer |
Display Switching
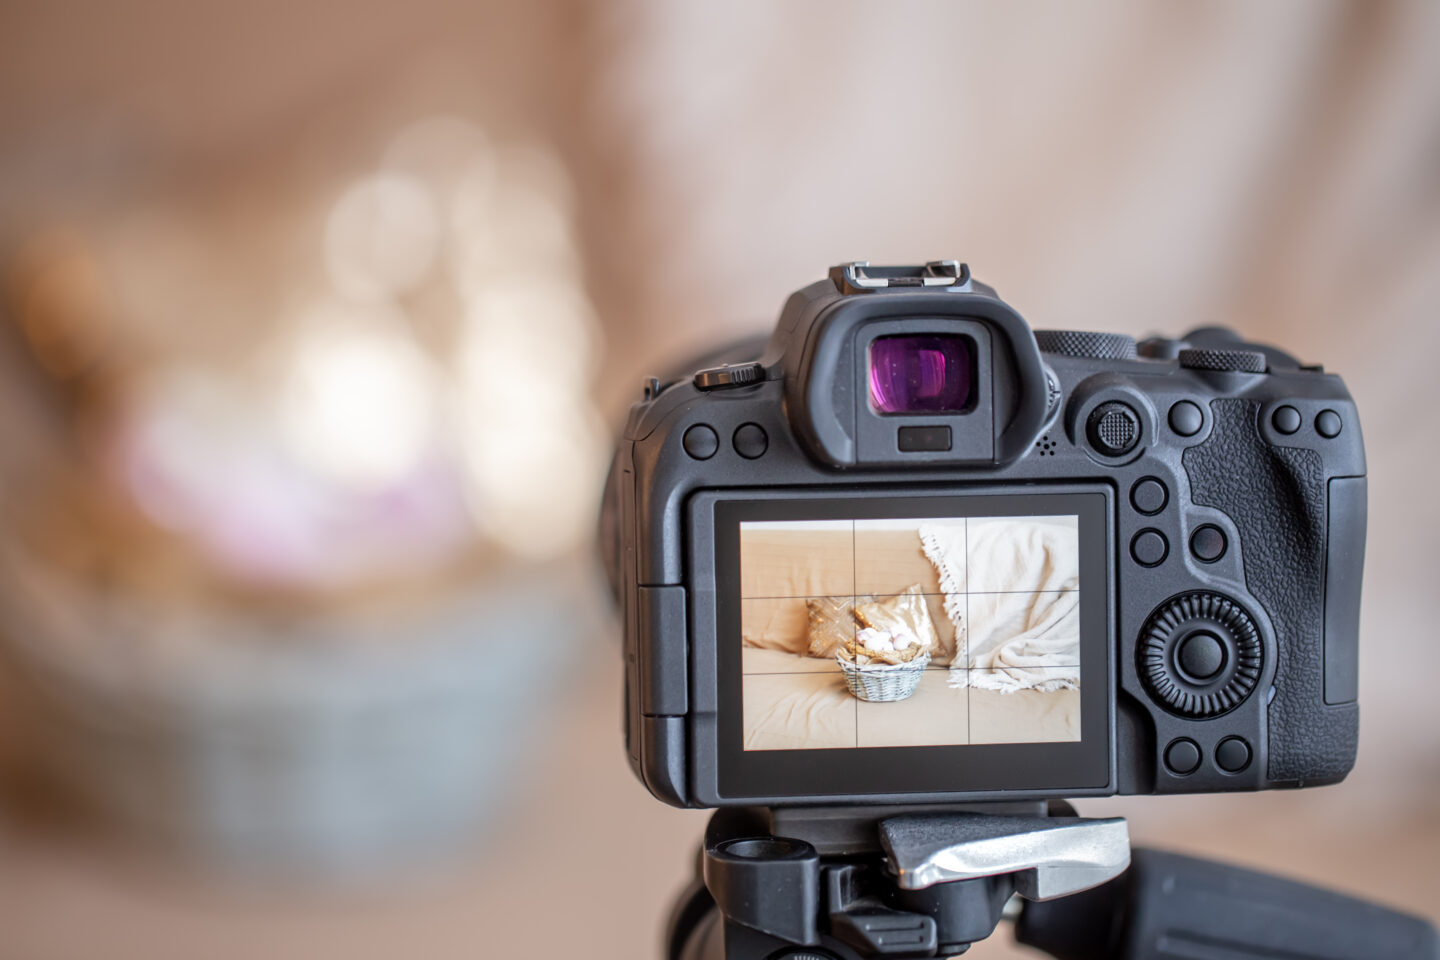
Display Switching...... Lets you change the information shown on the screen.
Having lots of information on the screen can be helpful in some situations, but in others it makes the view harder to read.
In those cases, you can easily switch what is shown on the screen.
When It's Useful
- The on-screen information is in the way and the screen is hard to see
- You want to check the displayed information carefully
STEP.1
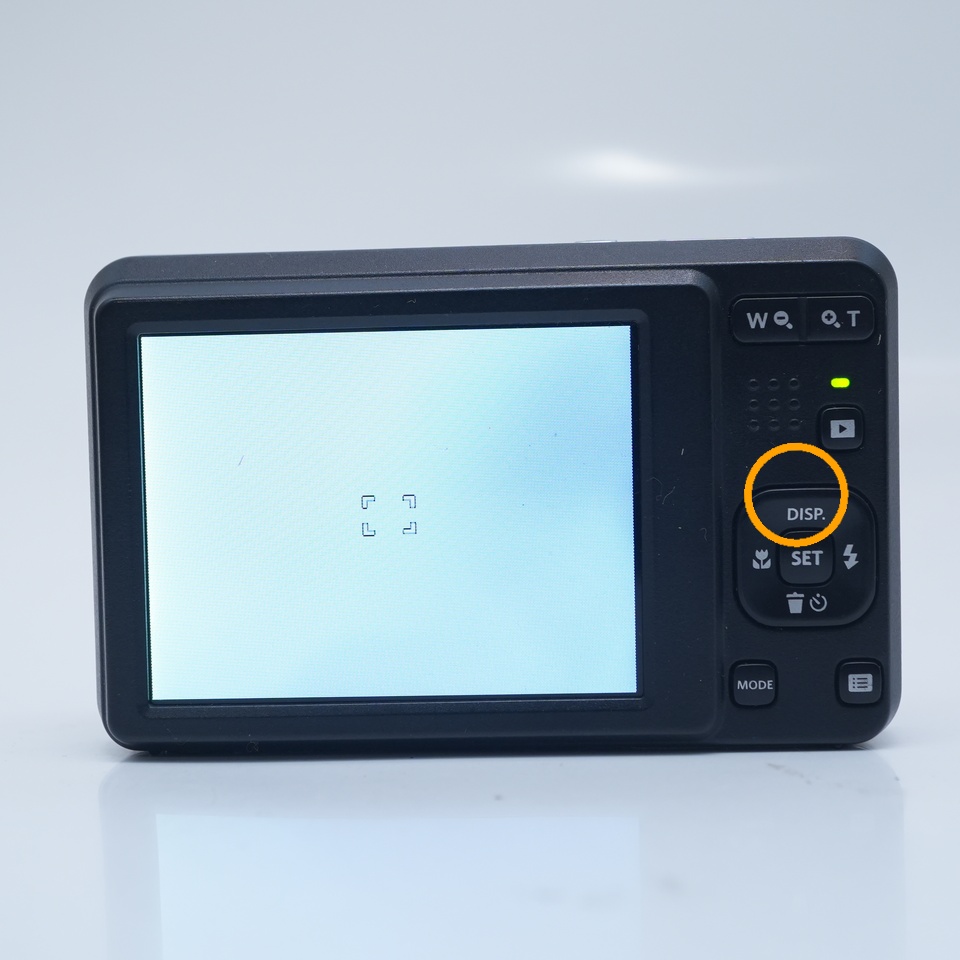 |
| Press DISP to switch the display |
White Balance
Have you ever looked at a photo and thought, "Something about these colors looks off..."?
That's where "White Balance" comes in handy! By adjusting it to match the type of light, you can capture photos with natural colors.
Auto is convenient, but in some scenes it can produce unnatural colors, so switching to match the situation is recommended.
When It's Useful
- The colors look wrong
- You want consistent colors within the same scene
- You want to change the colors on purpose for a moody look
Recommended Scenes
| Auto (AWB) | Works fine in almost any scene. When in doubt, this is a safe choice. |
| Sunlight | Sunny outdoors, under blue skies, at the beach or in the park |
| Cloudy | Cloudy days, outdoor shade, the soft light of the evening |
| Incandescent | Warm indoor lighting (orange-tinted bulbs), cafés, living rooms |
| Fluorescent | Offices, schools, supermarkets, and other indoor spaces with whitish lighting |
| Custom | Ideal for special lighting (stage lighting, LED lights) and product photography |
STEP.1
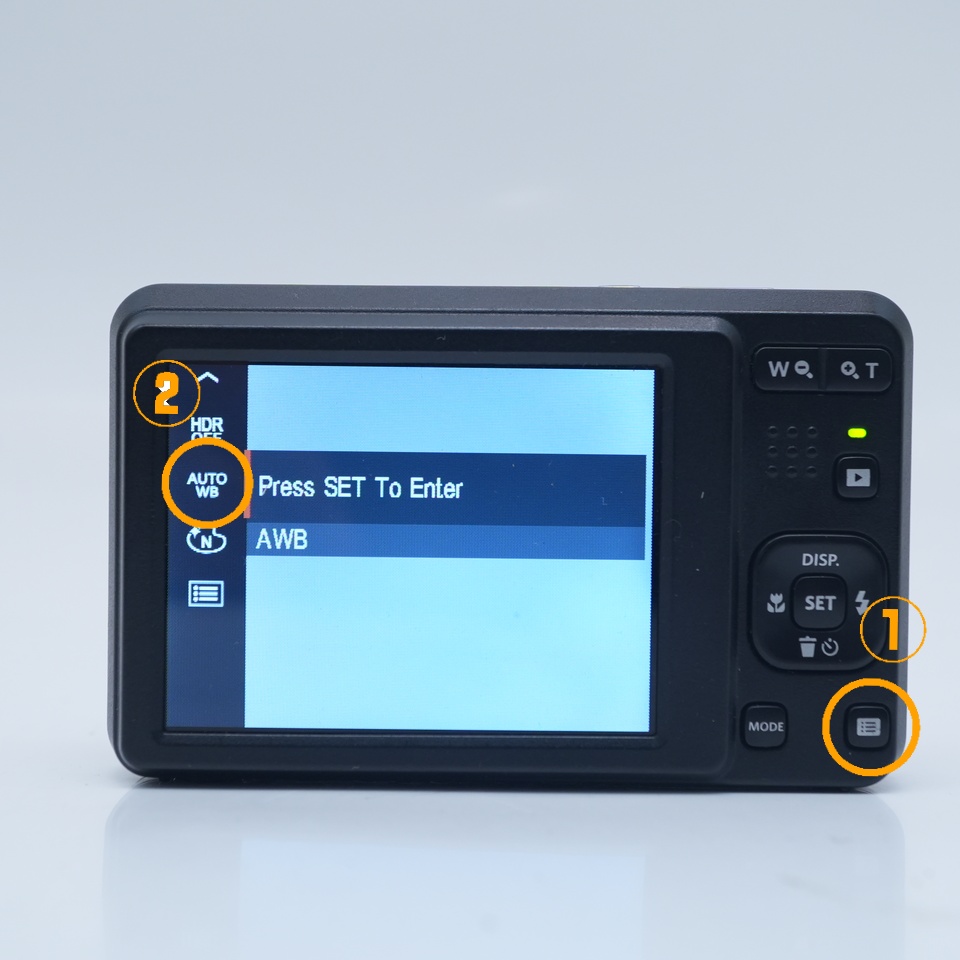 |
| Press the button at the bottom right → select White Balance |
STEP.2
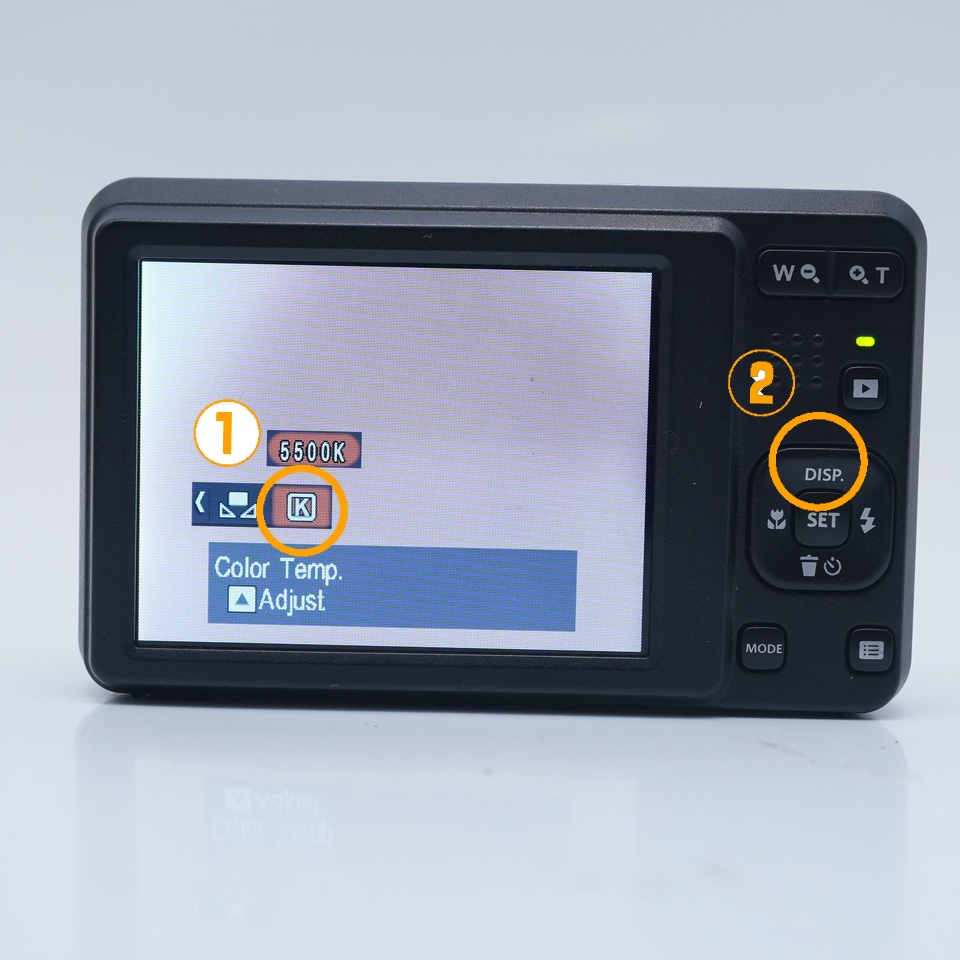 |
| Select the color temperature (K) → press up on the cursor button |
STEP.3
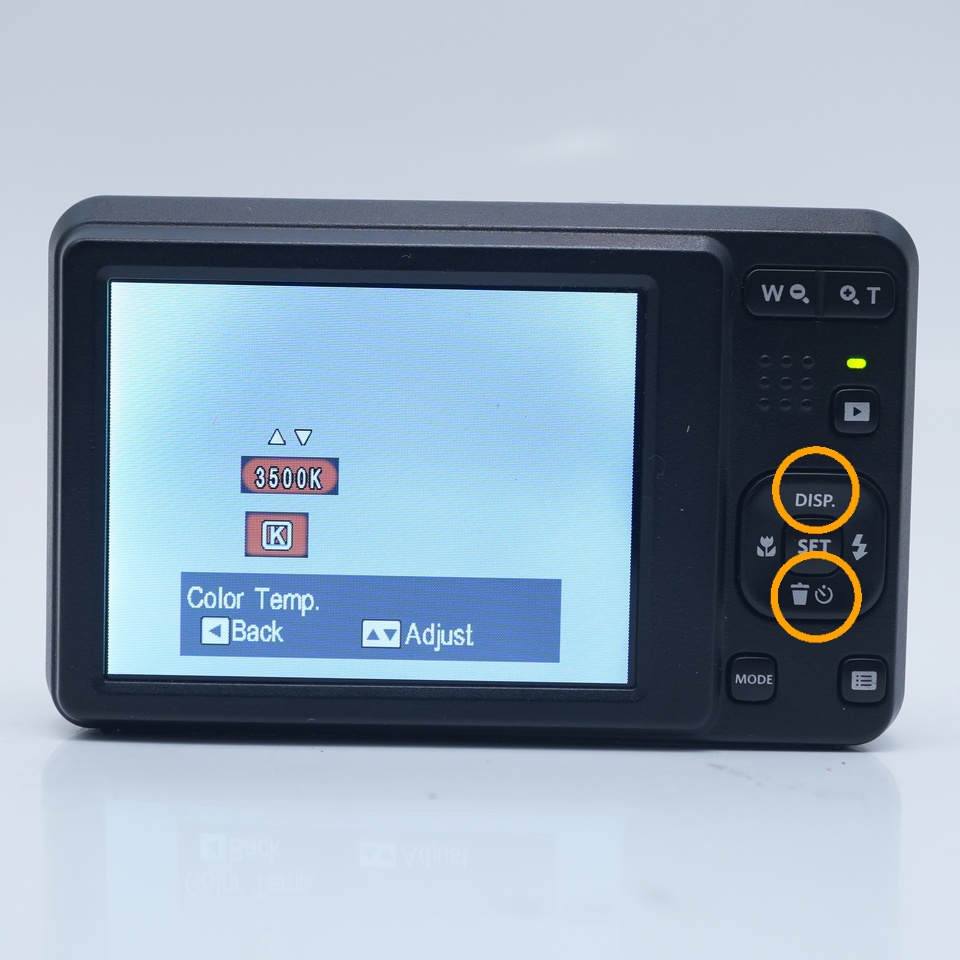 |
| Press up and down on the cursor button to set the color tone you like |
Summary

And that wraps up our 8 favorite basic settings!
This time I've covered the essentials to get you started.
Using these features will really expand what you can do with your shots, so they're well worth remembering.
See you next time!