Have you ever wanted to change a certain setting, but couldn't find it no matter how hard you looked?
And then, by the time you finally got it set up, you'd already missed the shot? Sound familiar?
That's why today I want to introduce 11 of my favorite basic settings that I use all the time!
This page contains advertisements.
Grid Lines
CHECK
-
-
Panasonic FZ80D | 7 Must-Have Accessories You'll Actually Use
Over the years, I’ve used a variety of cameras,and today I want to share some of the accessories I’v ...
続きを見る
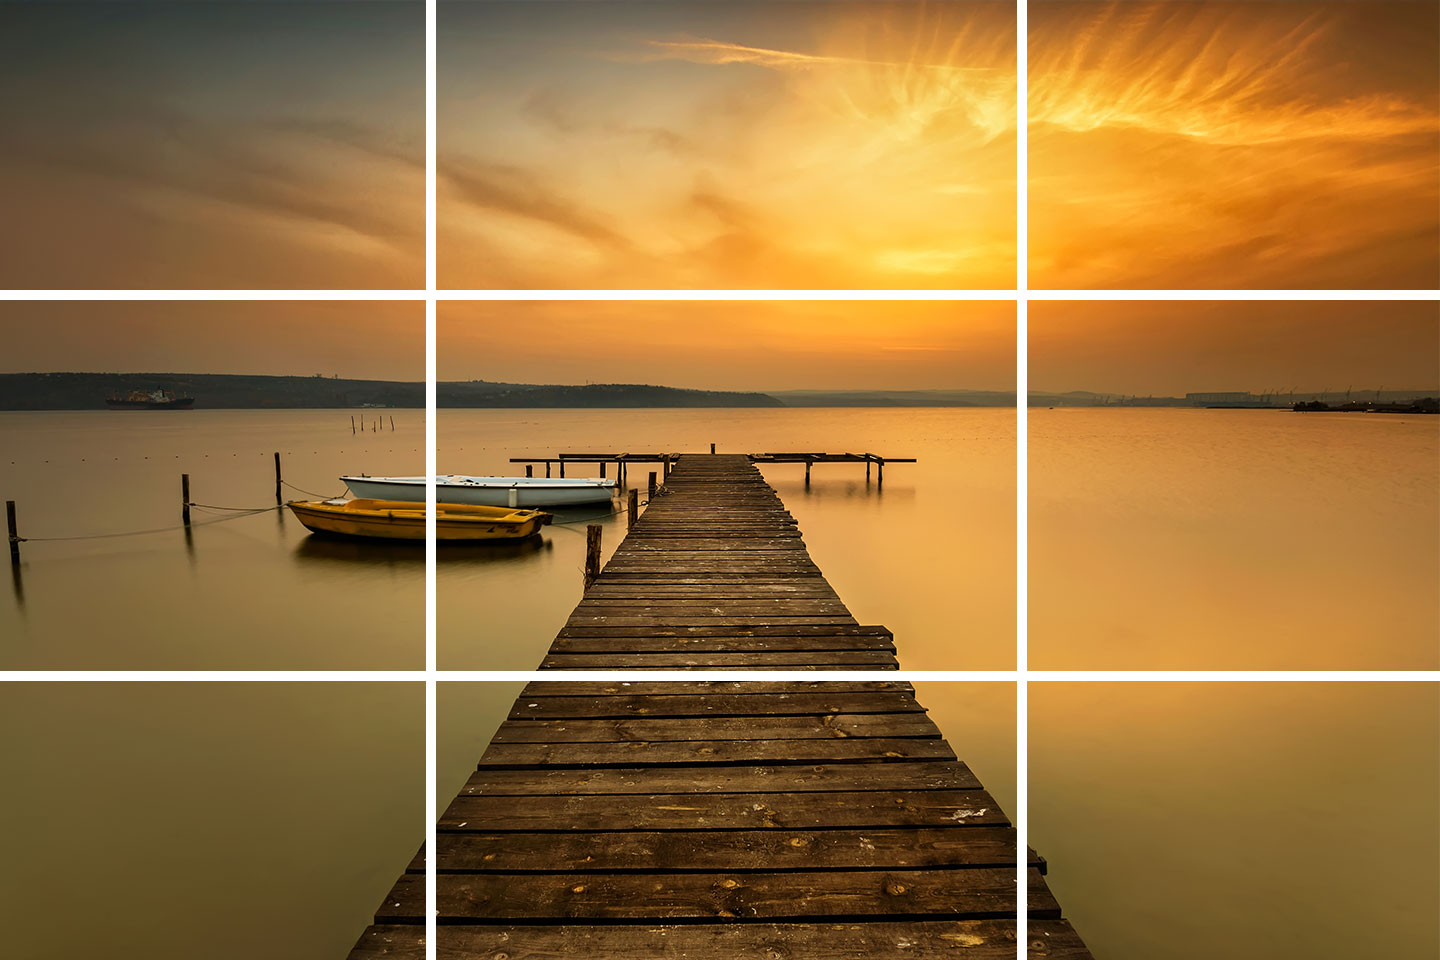
Grid Lines...... A handy feature that displays horizontal and vertical lines on screen, giving you a reference point when you want to keep your composition or horizon level.
It's a simple setting that can really boost the quality of your shots.
Recommended Scenes
- Shooting torii gates and other subjects where keeping things level really matters.
- Portrait photography.
- Snapshot photography, and more.
STEP.1
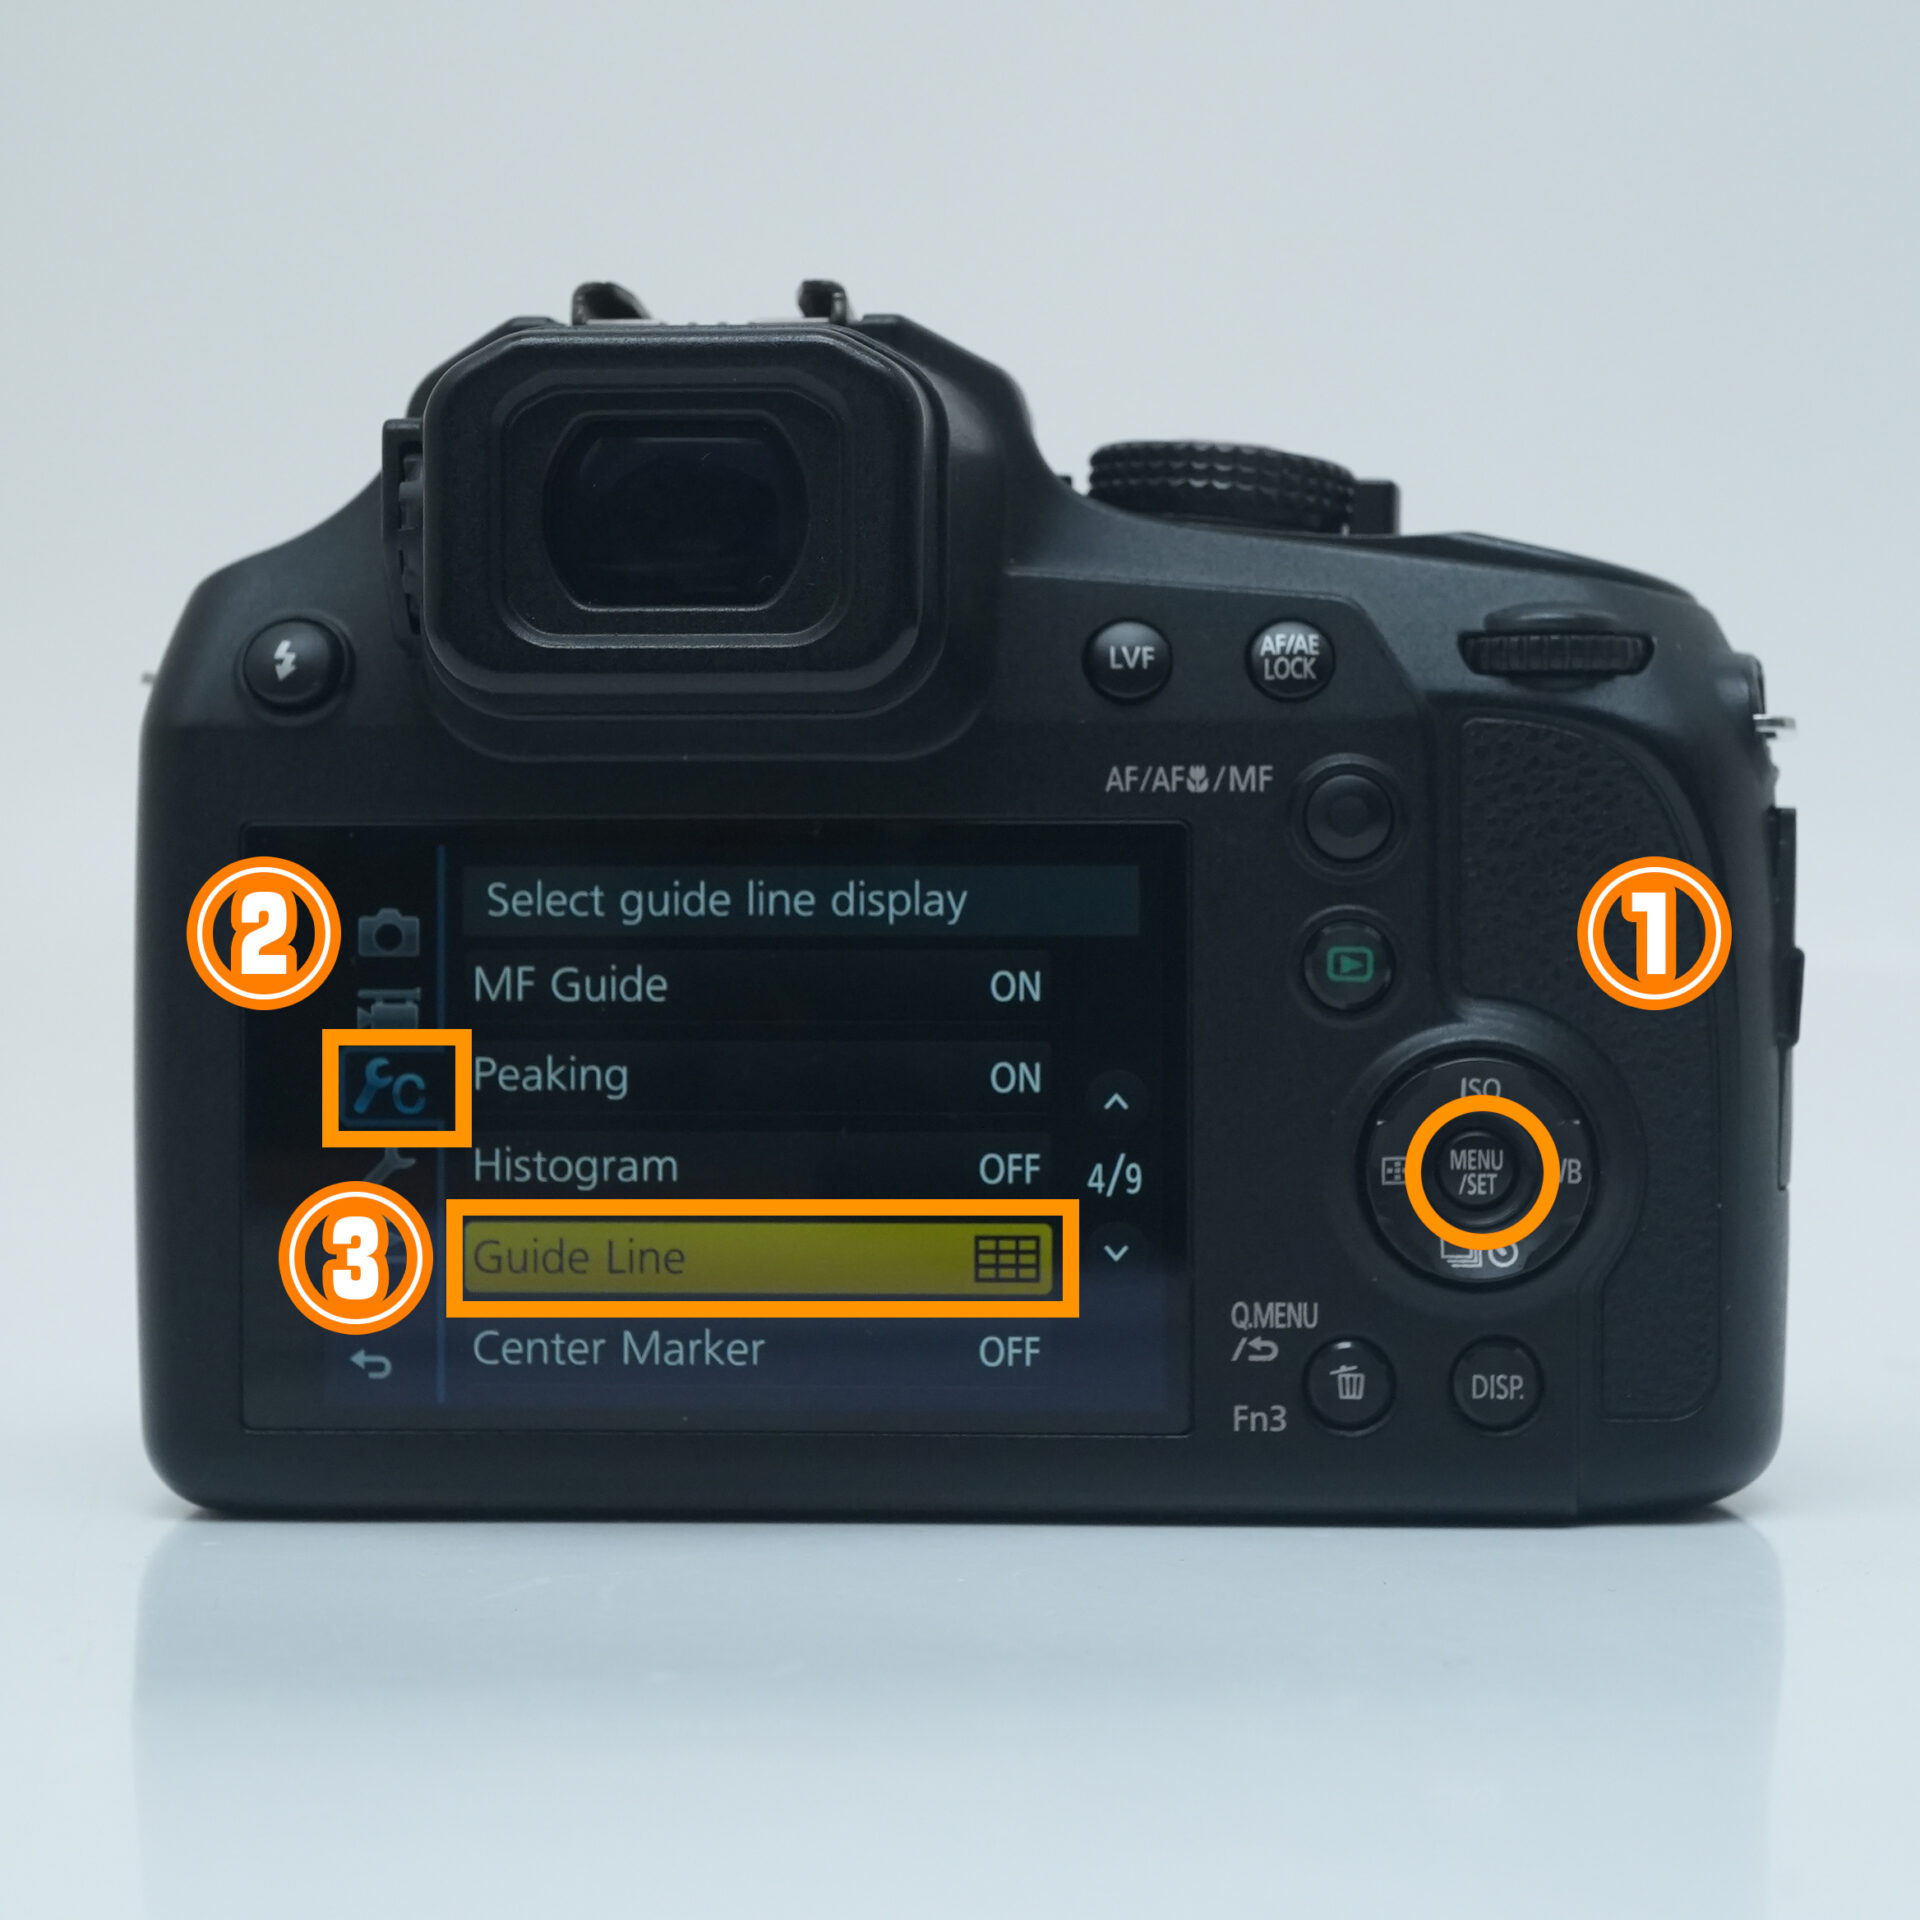 |
| MENU → Select Guide Line Display |
STEP.2
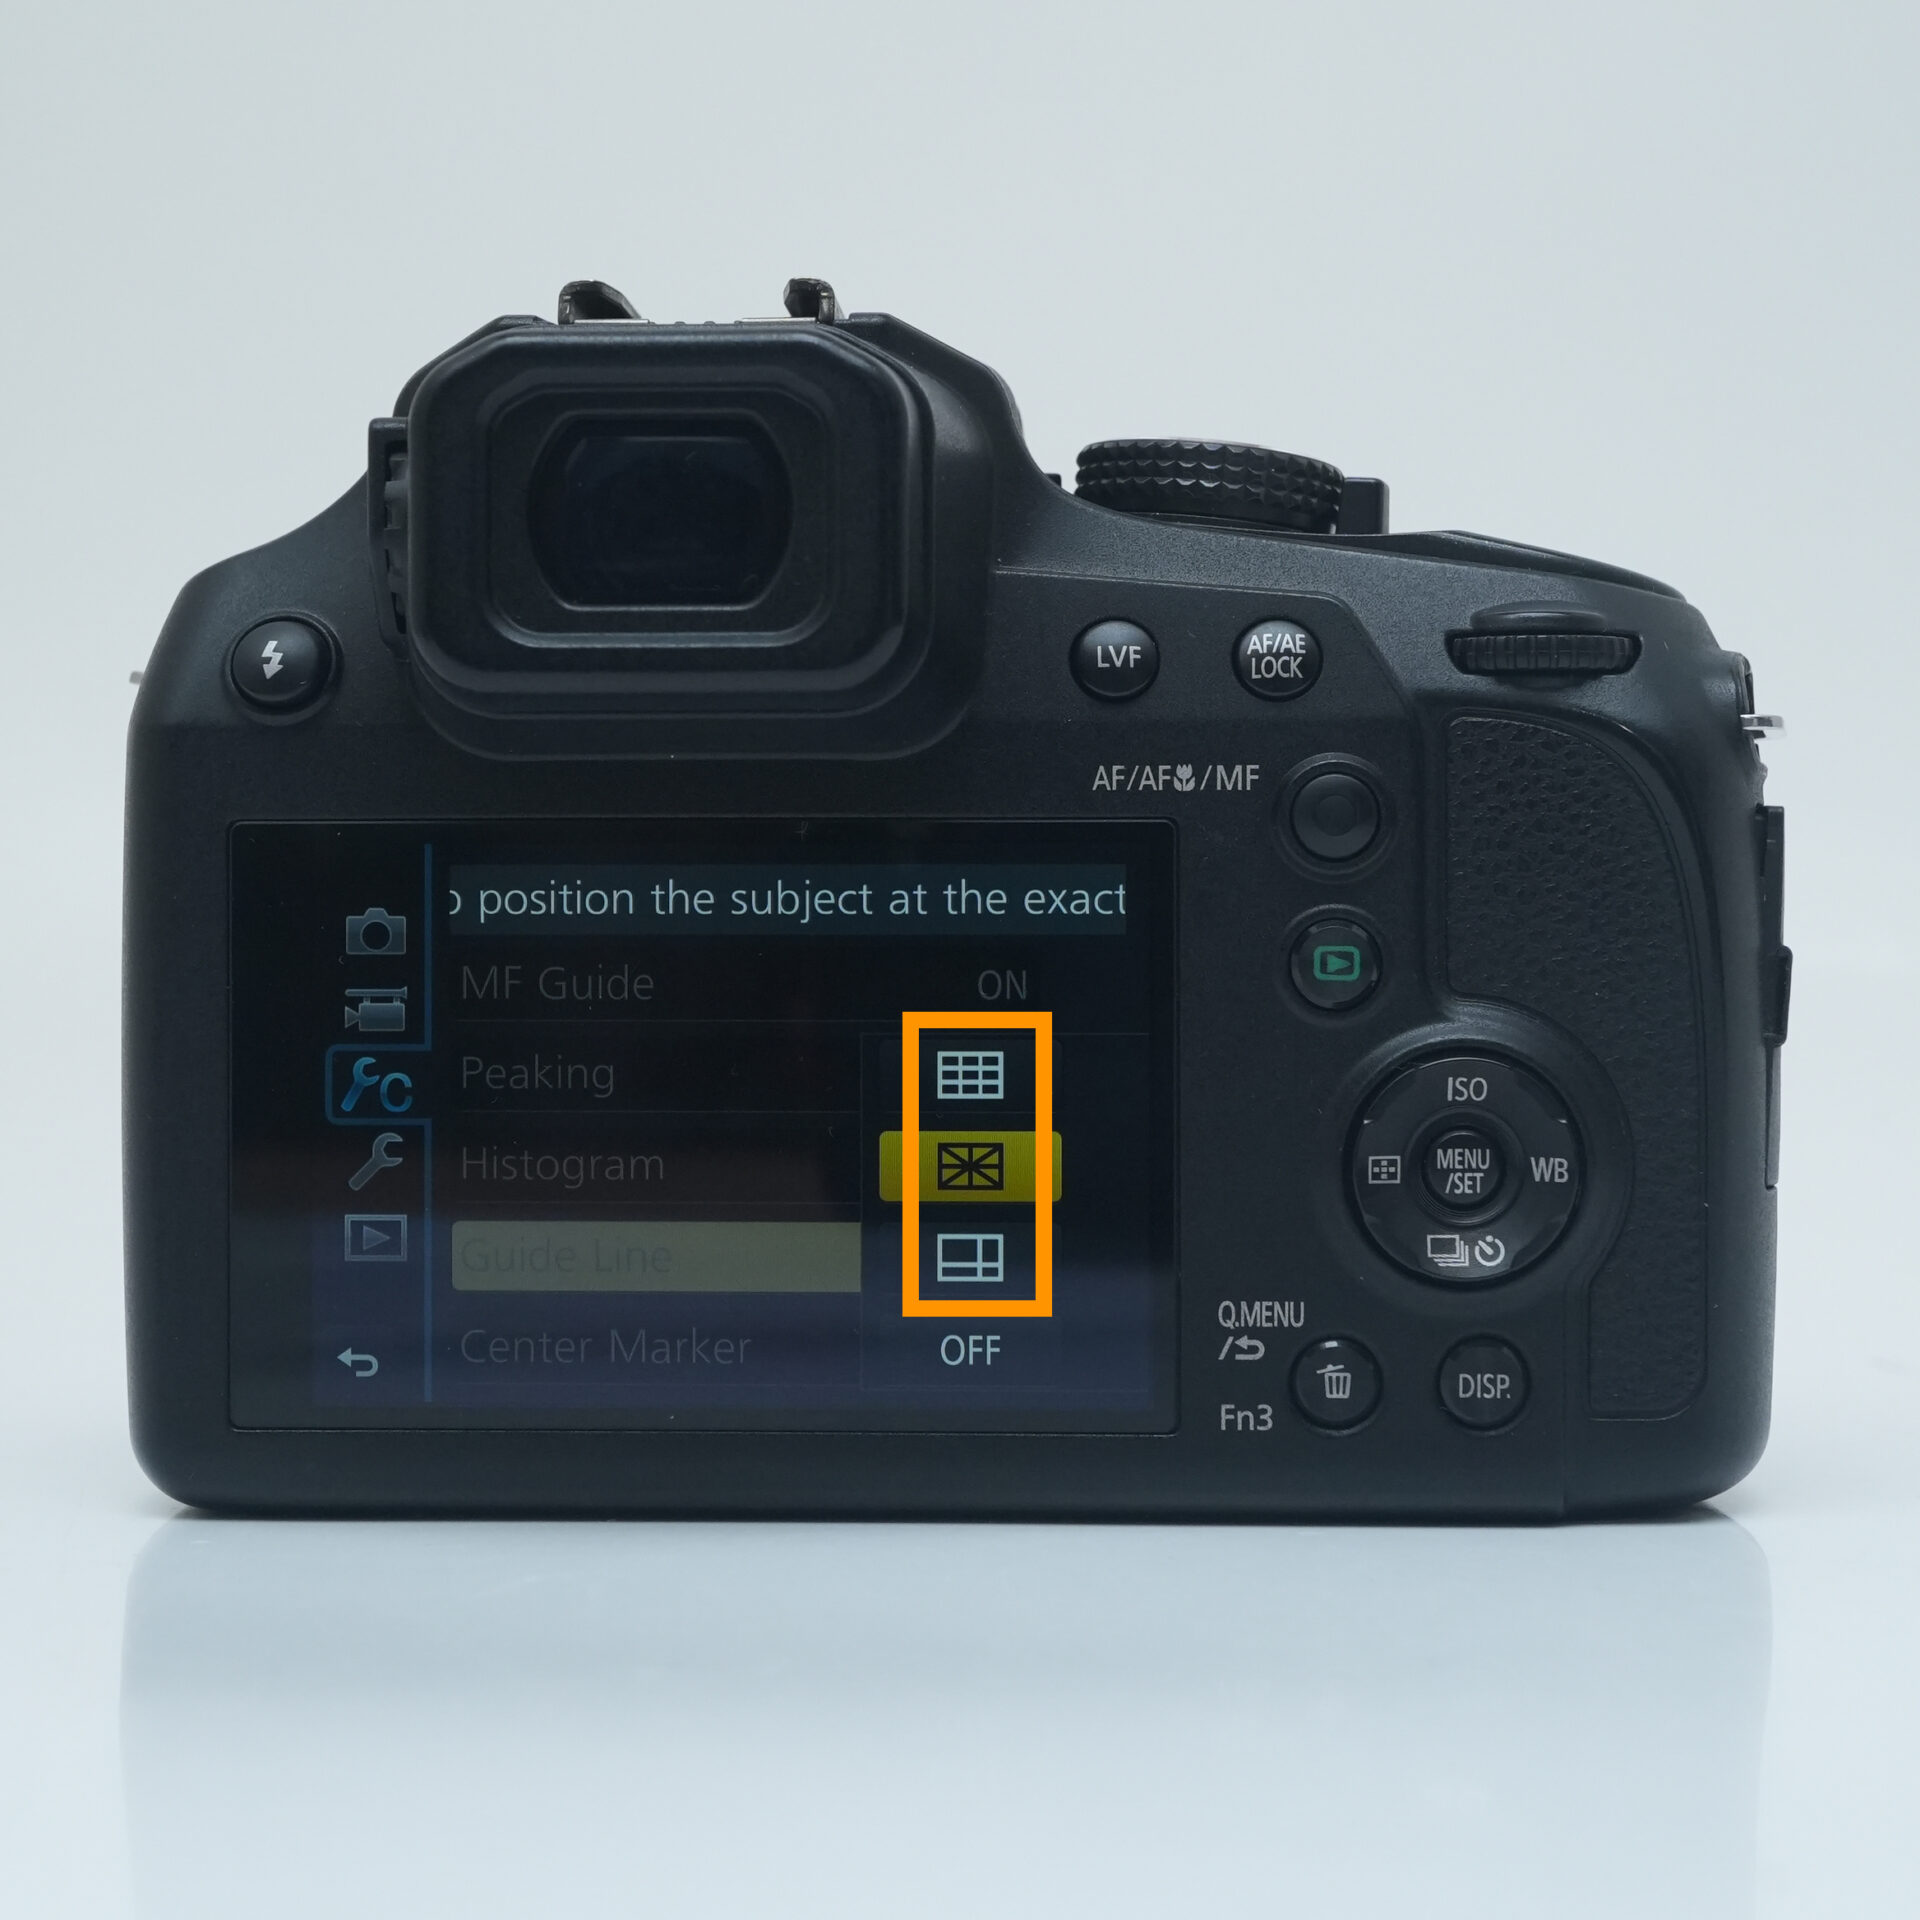 |
| Choose your preferred grid pattern |
STEP.3
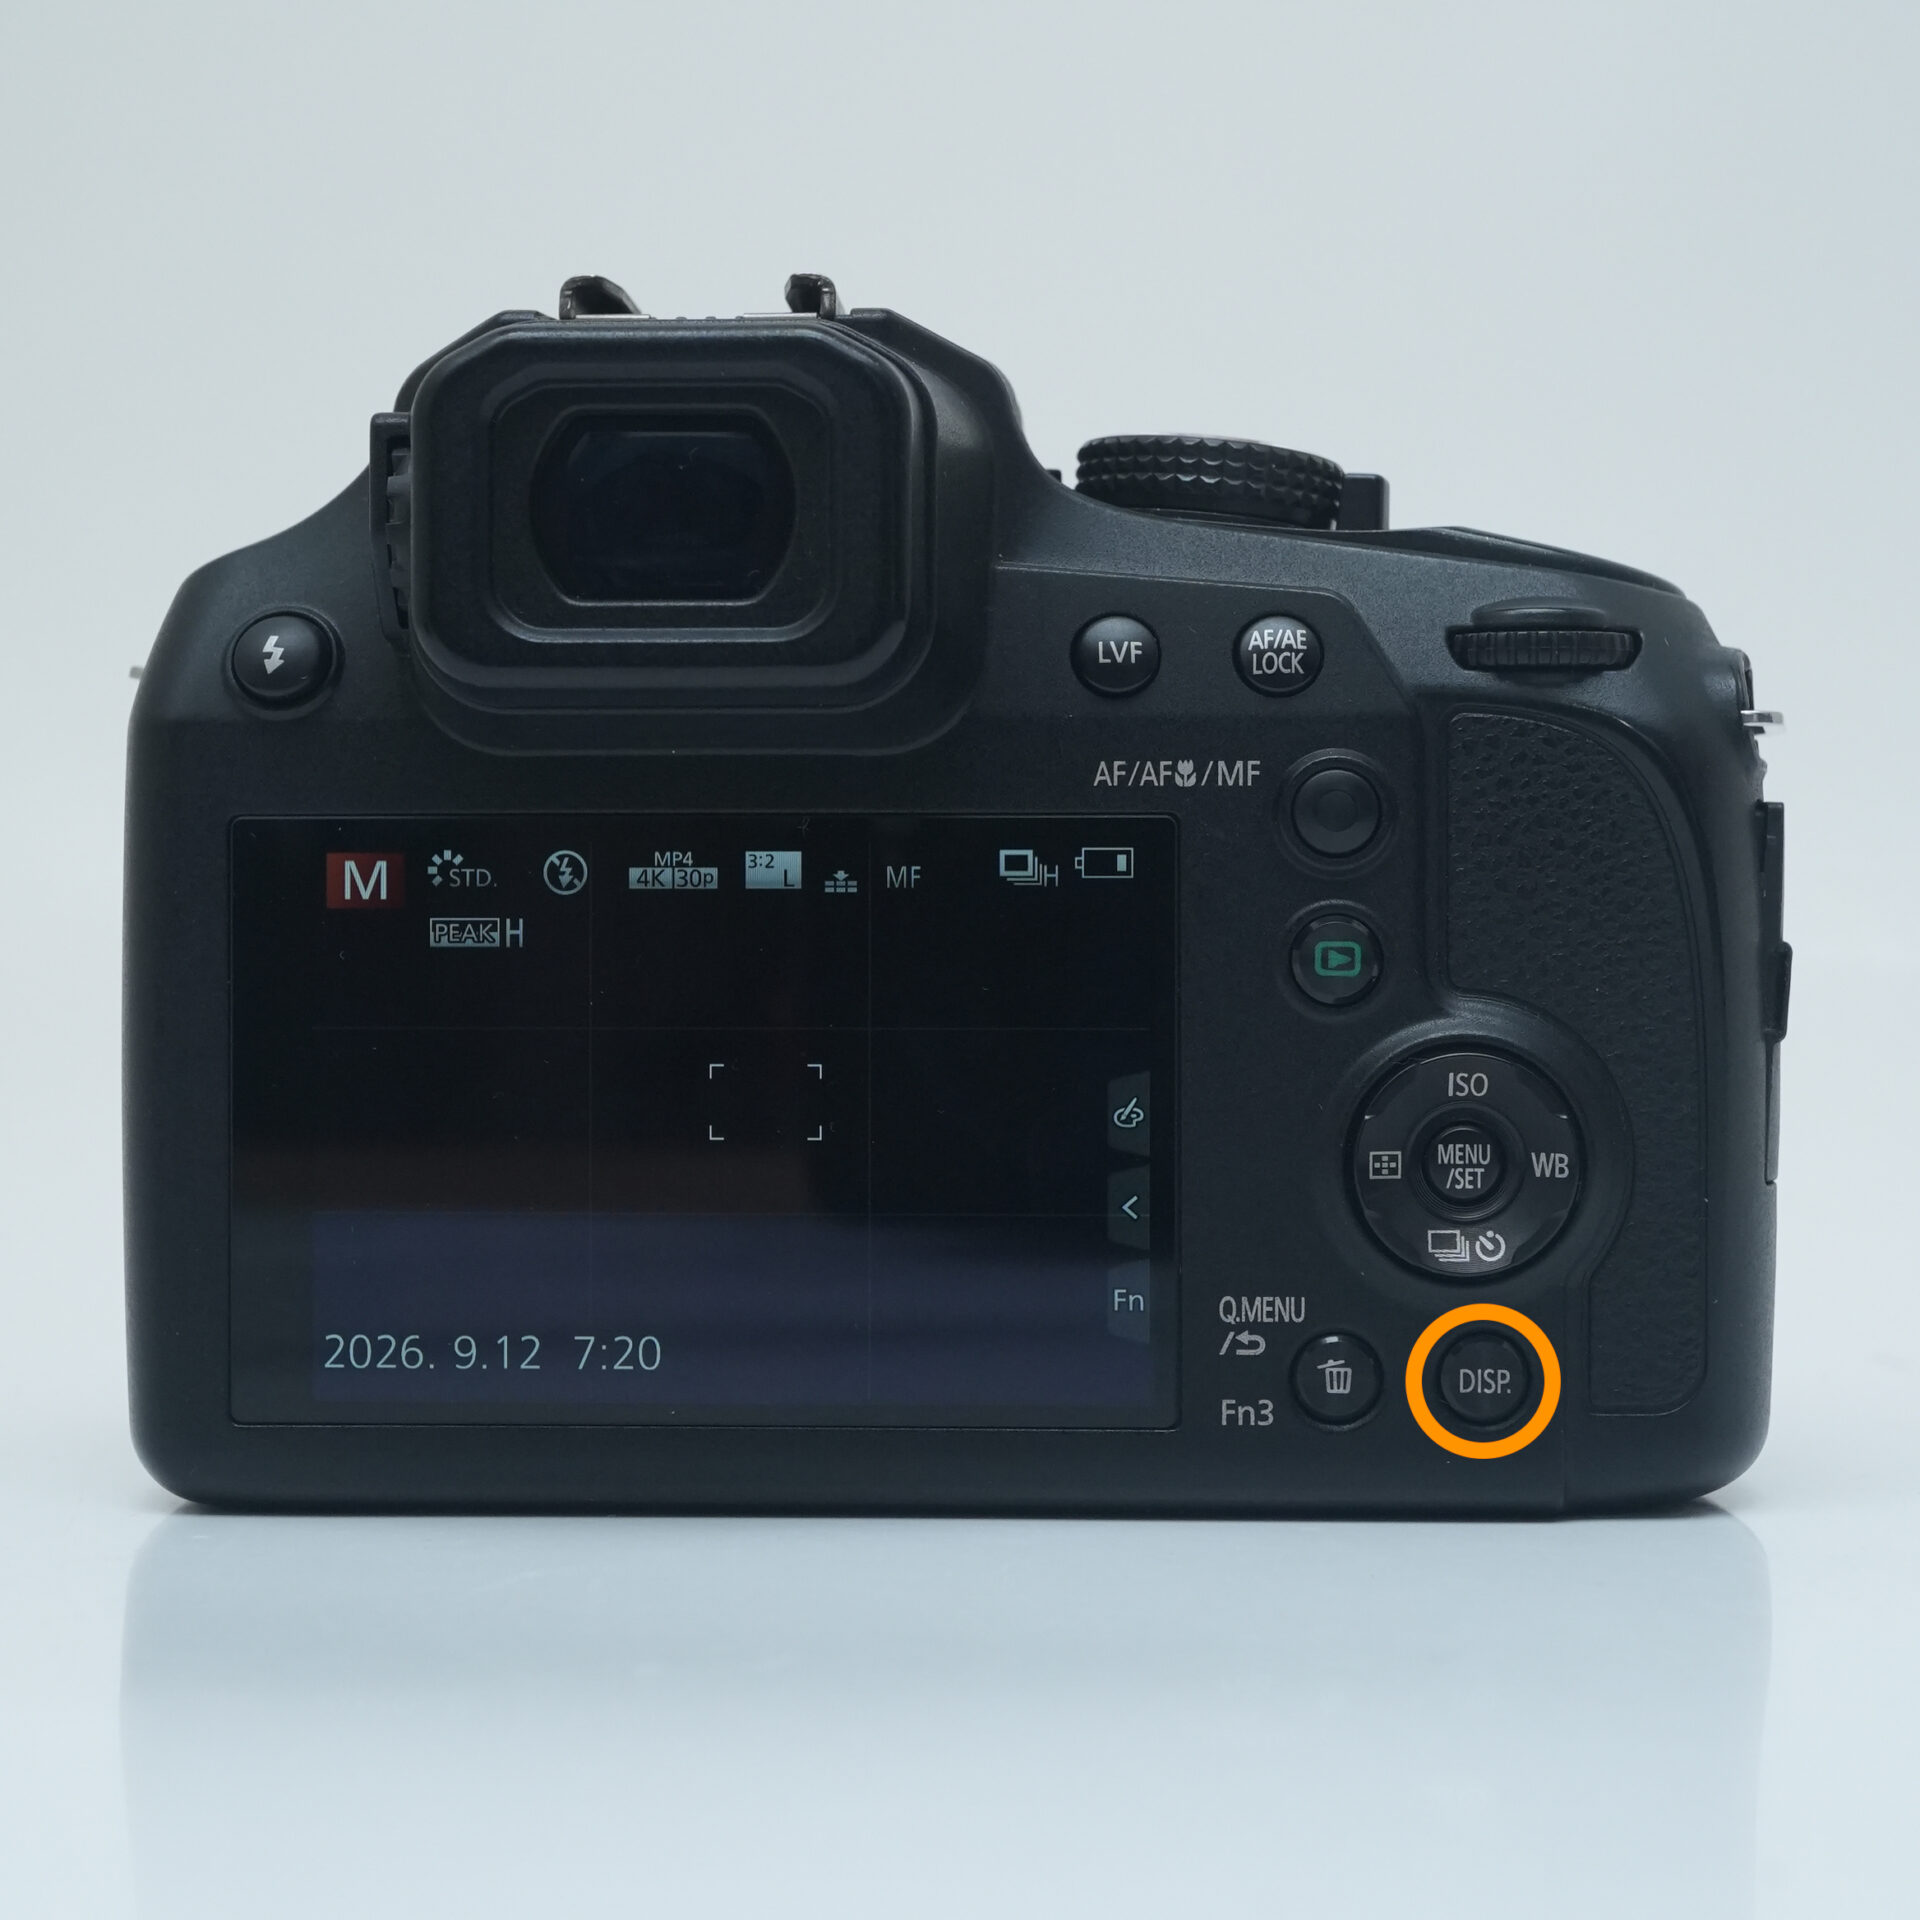 |
| If the grid isn't showing on screen, press DISP a few times to bring it up |
Magnified Display

Magnified Display…… Lets you zoom in on a specific spot to check it in detail.
Sometimes it's hard to tell from the monitor or viewfinder alone whether your focus is really sharp.
In cases like that, zooming in lets you check it properly.
Recommended Scenes
- Zooming in to double-check focus.
- Checking facial expressions during commemorative photos, and more.
STEP.1
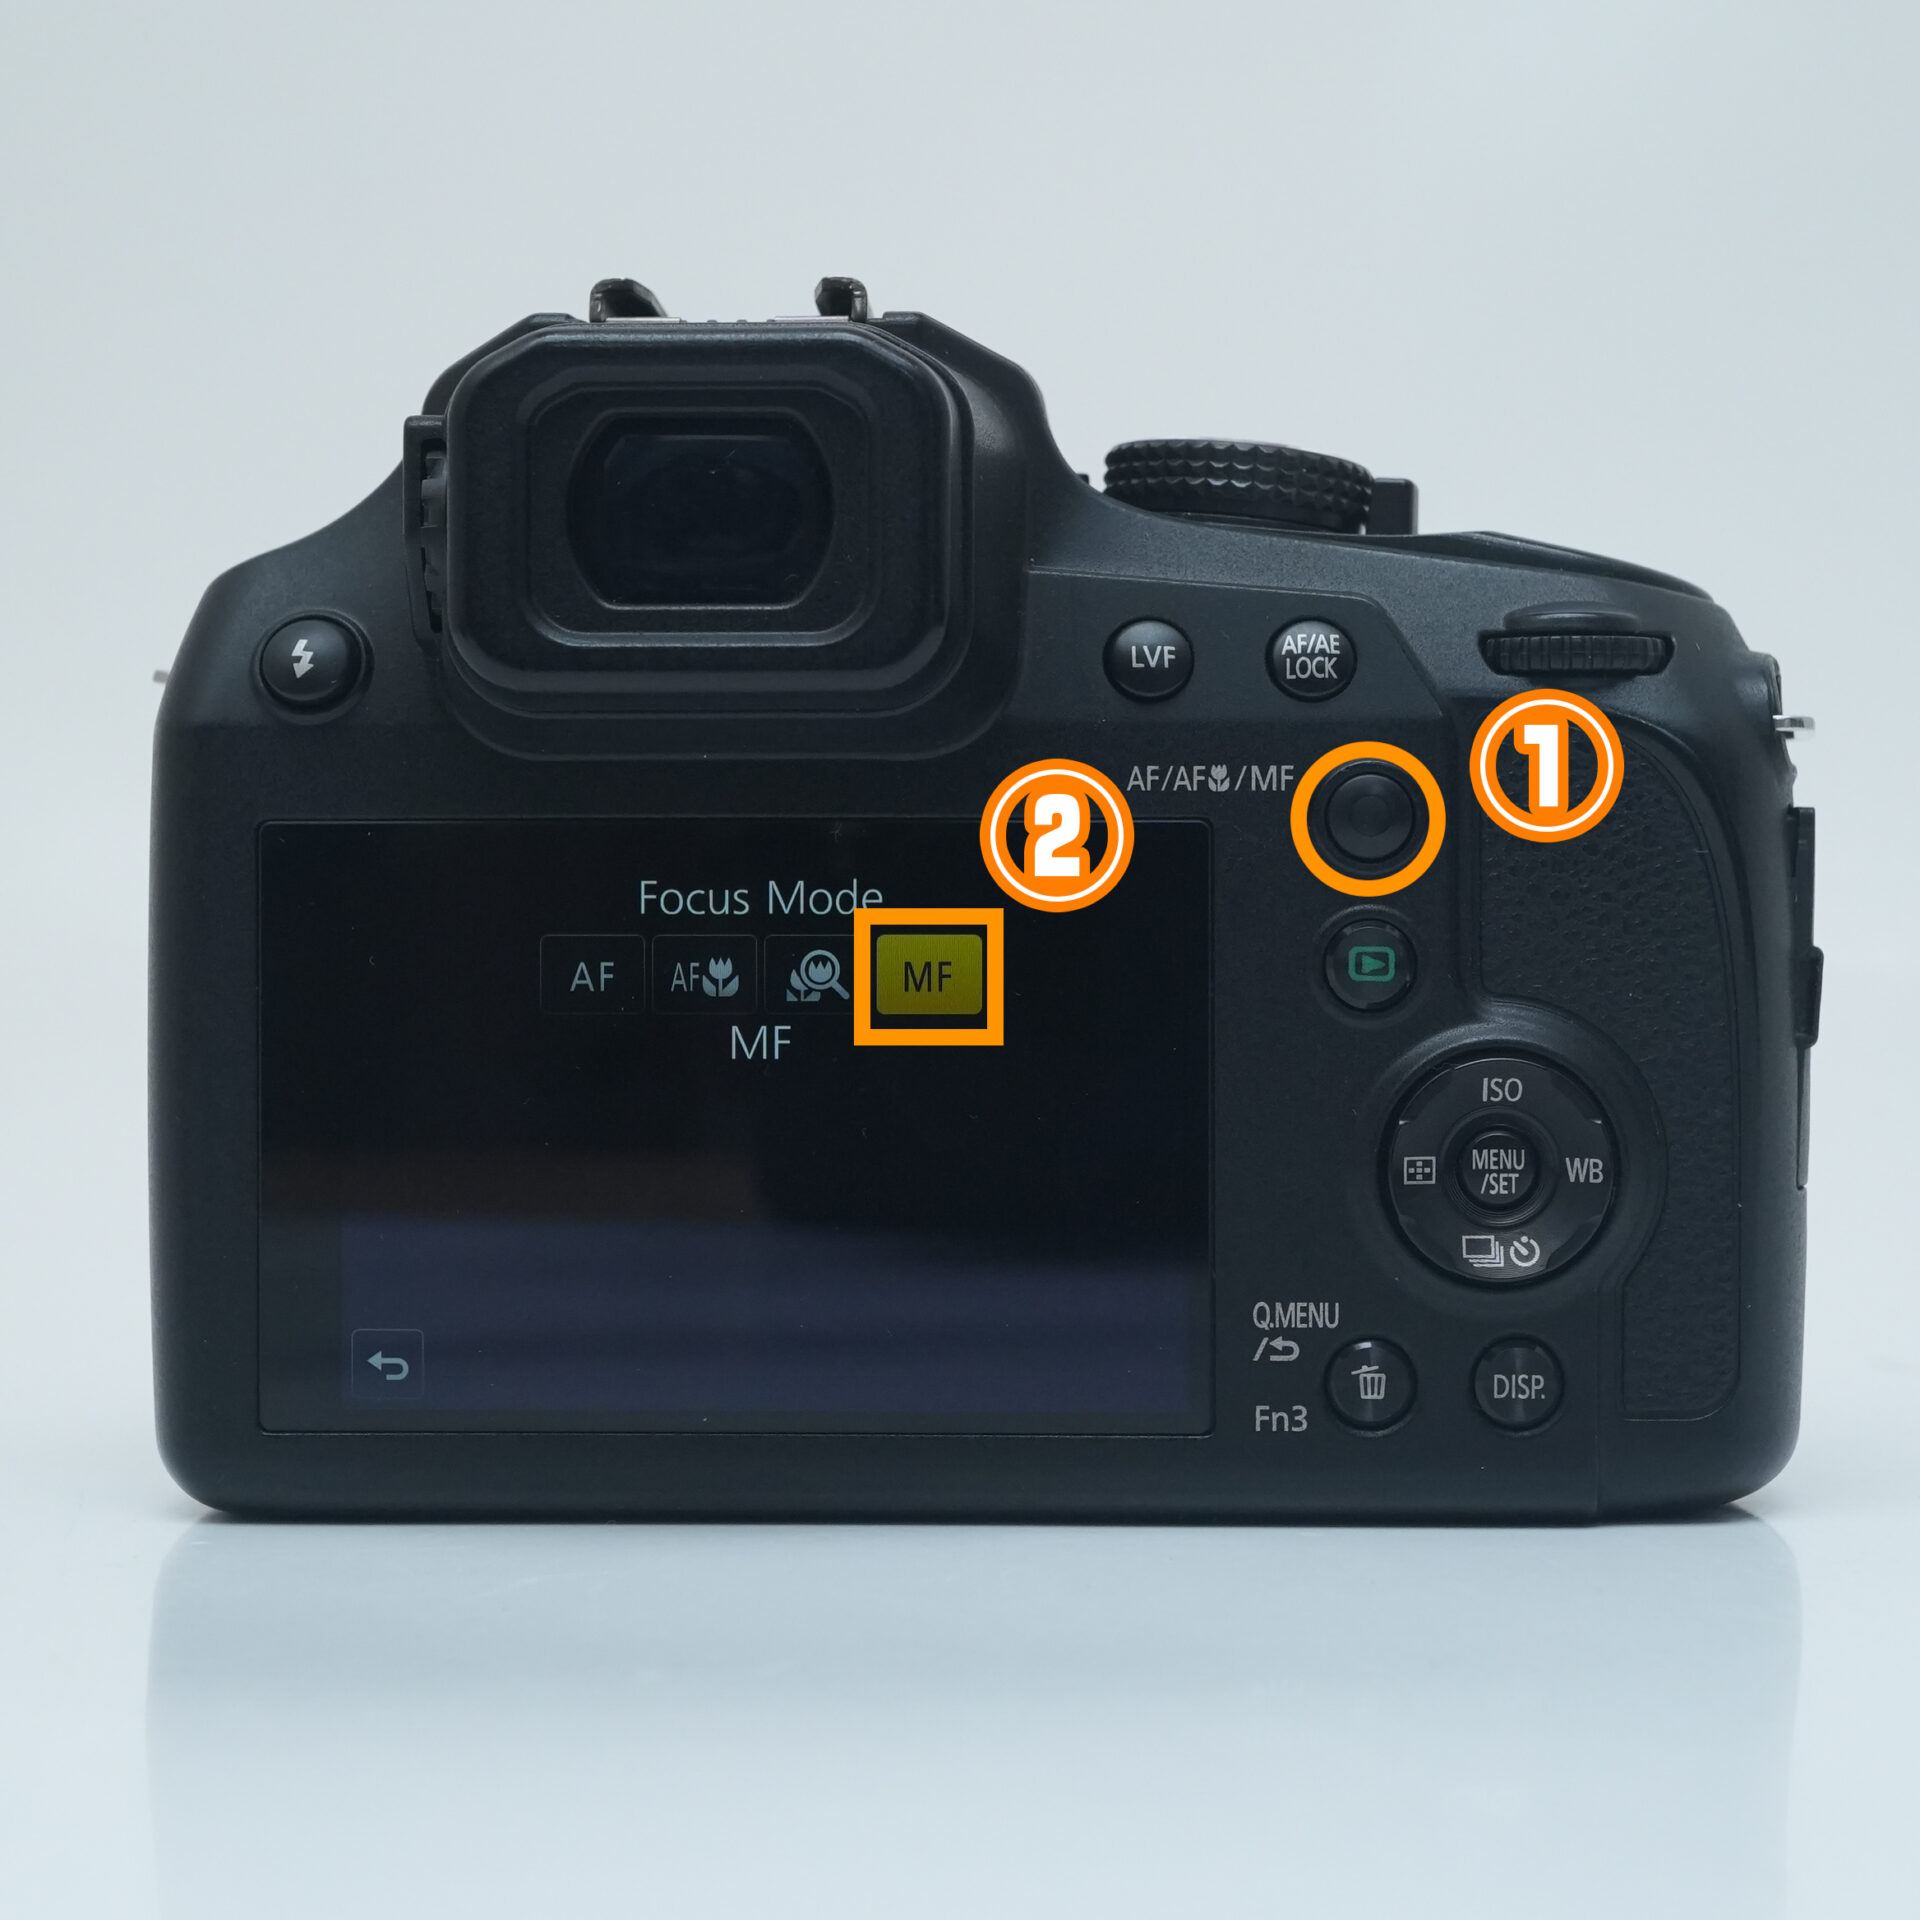 |
| Press the MF button and select MF |
STEP.2
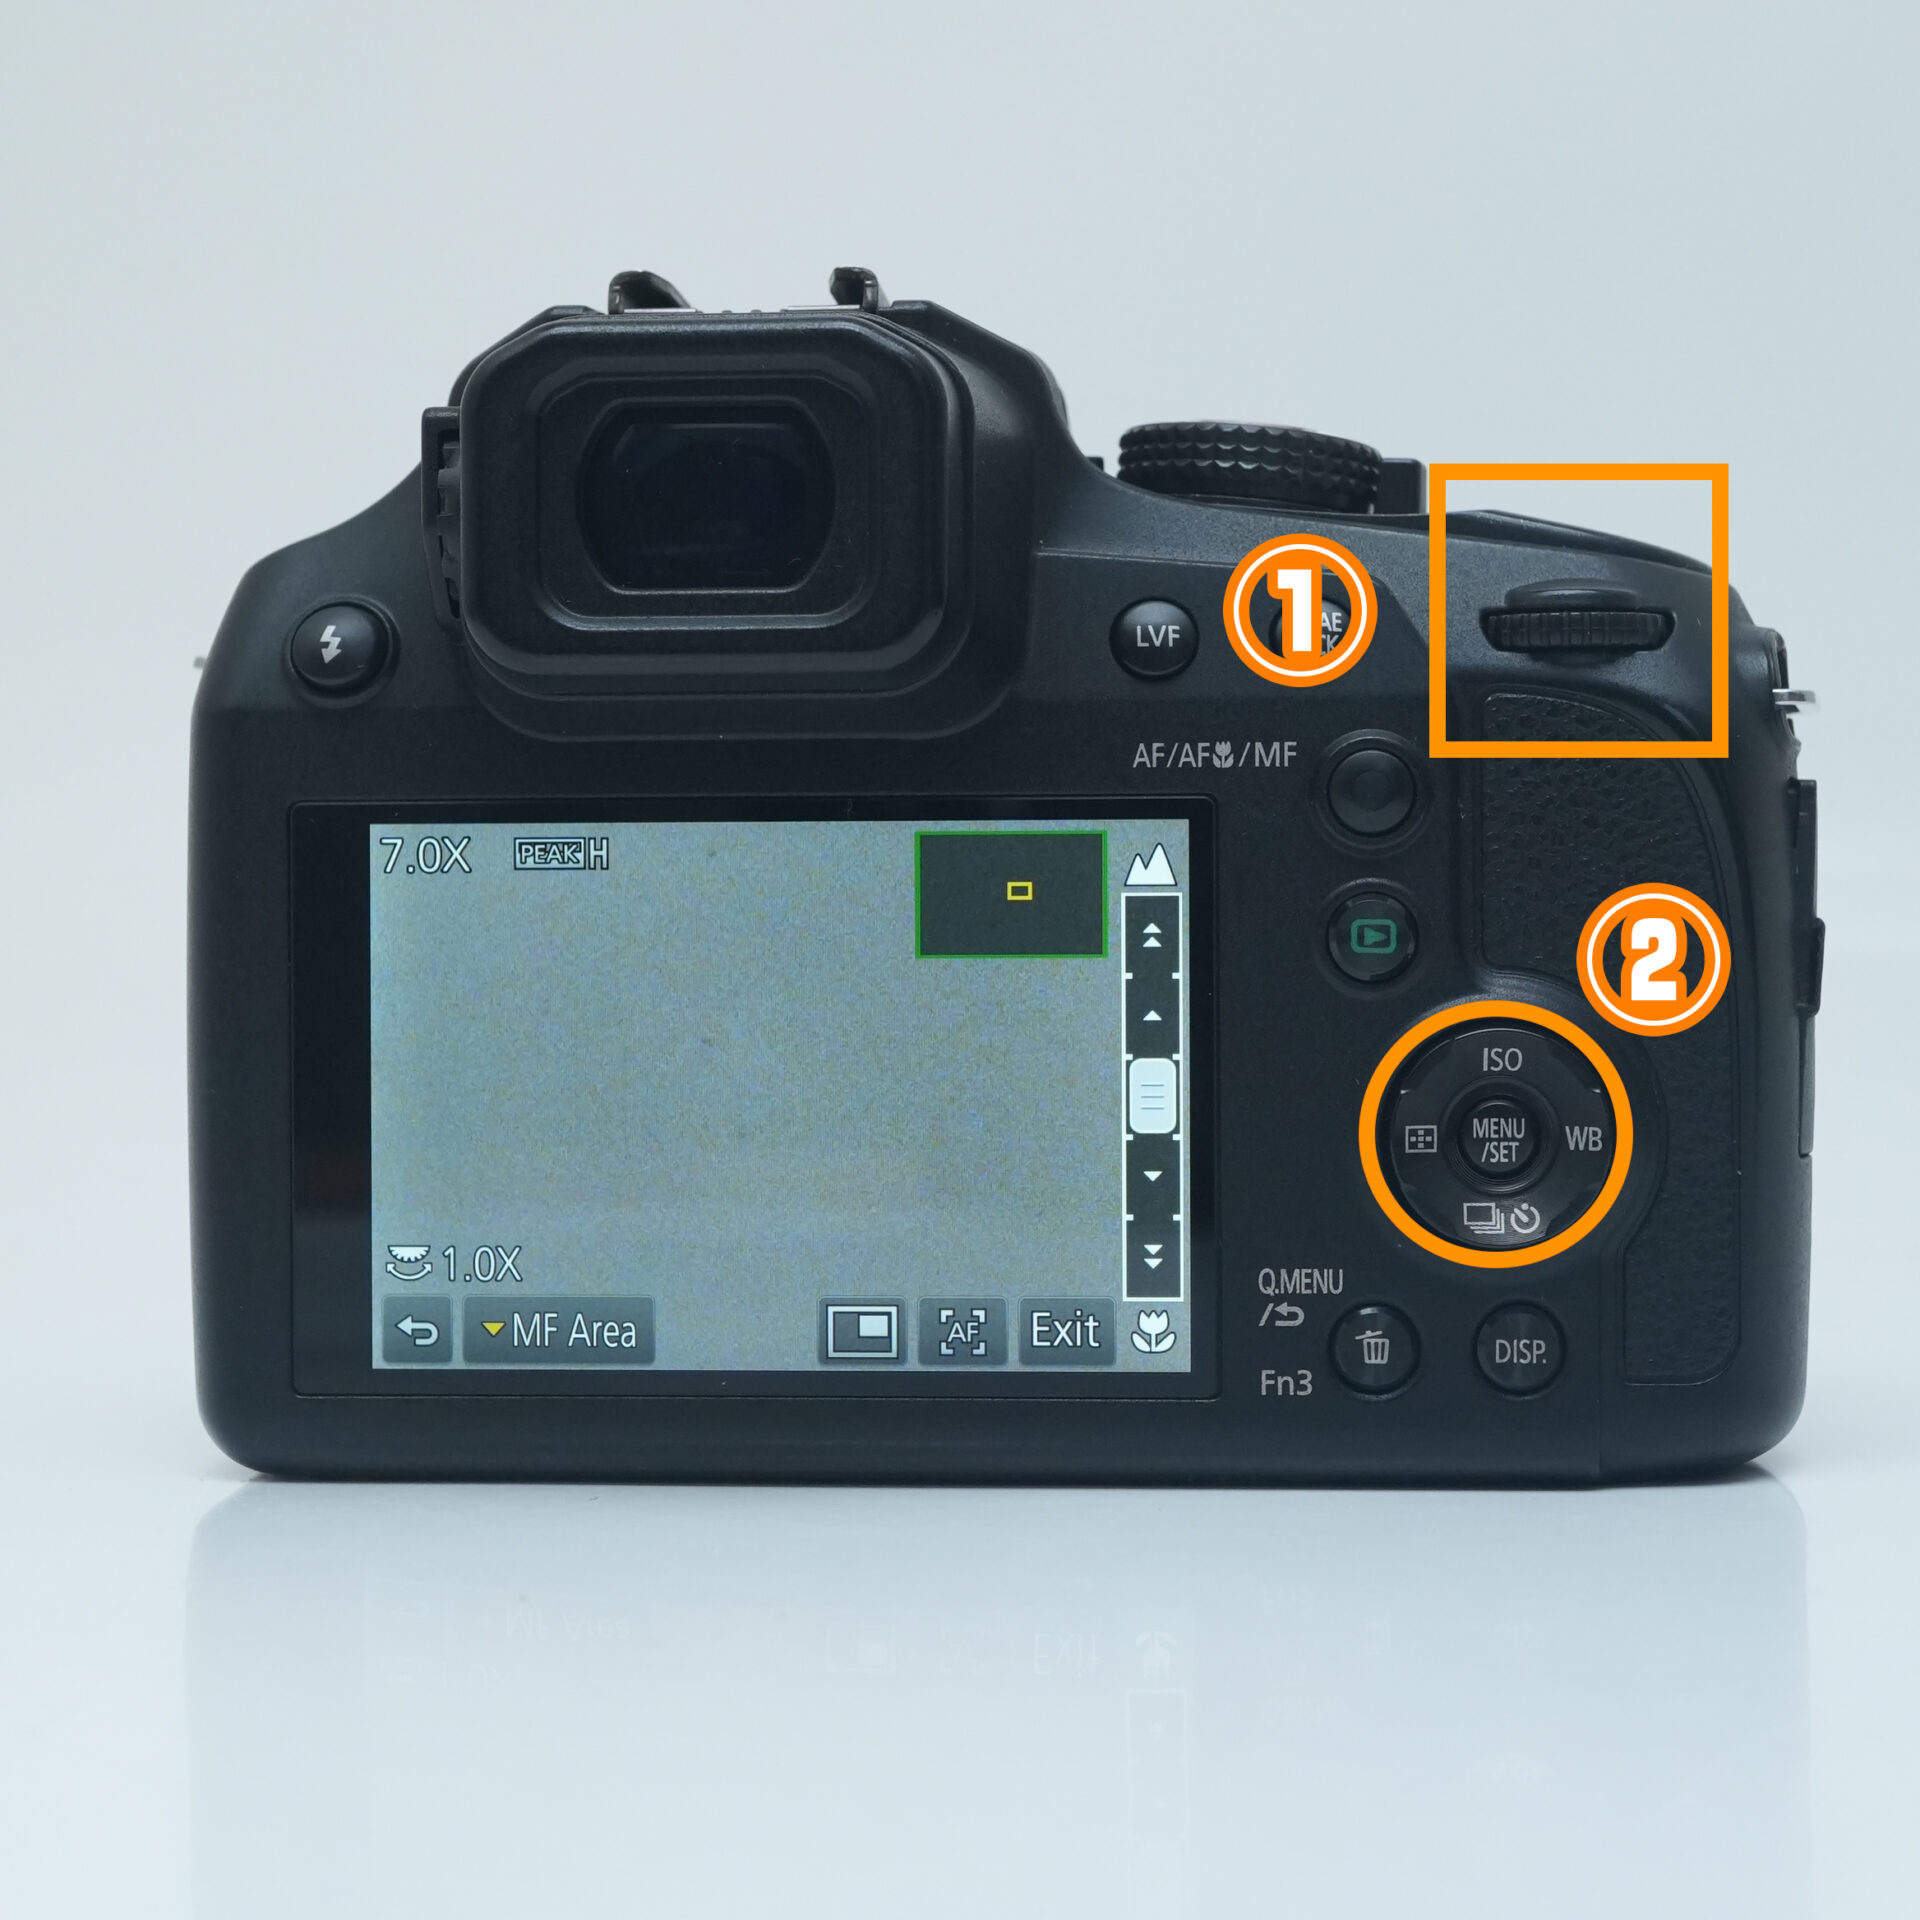 |
| Press the dial button to zoom in, then use the cursor buttons to move around |
Diopter Adjustment
Diopter Adjustment....... Lets you fine-tune the focus inside the viewfinder itself.
Ever notice that the image looks sharp on the monitor, but blurry when you look through the viewfinder?
That's not a malfunction — it most likely just means the focus needs a small manual adjustment.
You can adjust the focus by looking through the viewfinder and sliding the diopter dial.
When It's Useful
- The monitor image is sharp, but the viewfinder image isn't.
- The viewfinder looks blurry.
STEP.1
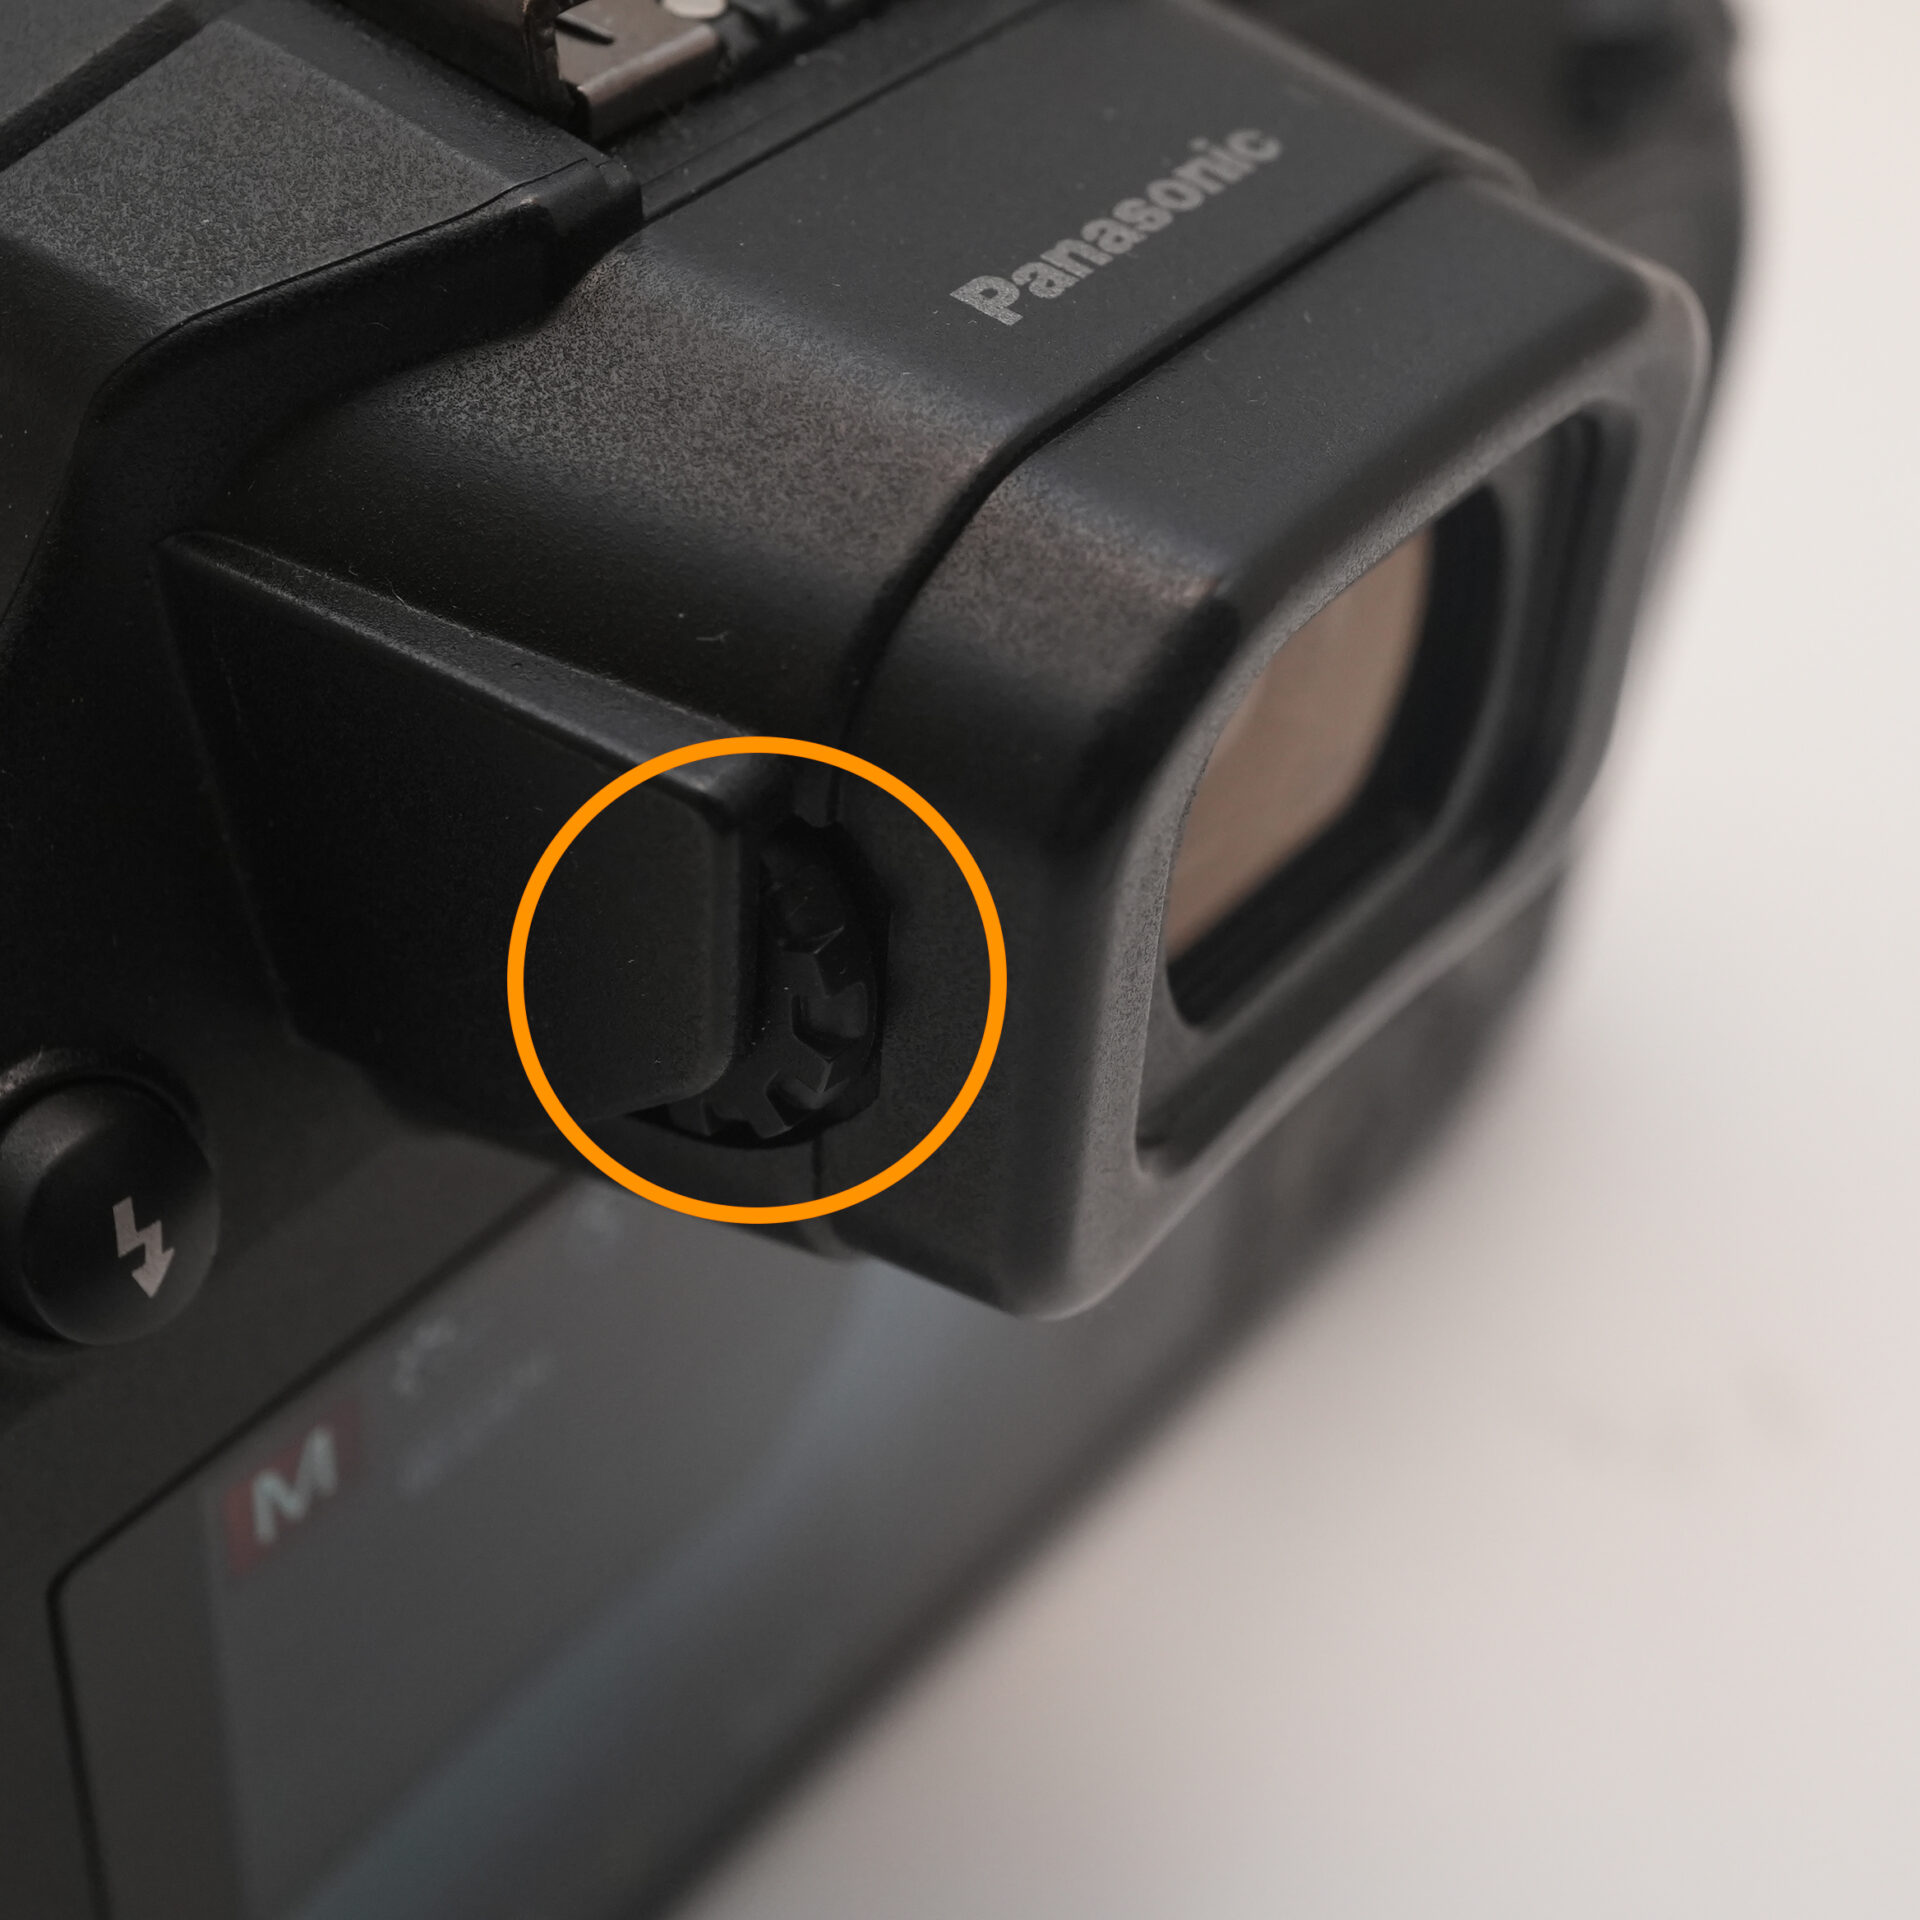 |
| Turn the dial on the side to adjust the focus |
Silent Shooting
Silent Shooting....... Lets you shoot with no shutter sound at all.
Silent Shooting comes in handy whenever you want to take a photo without anyone hearing the shutter sound.
Since it shoots completely silently, you can take pictures without disturbing the people around you.
Recommended Scenes
- Shooting at events and venues.
- Photographing a sleeping baby, and more.
STEP.1
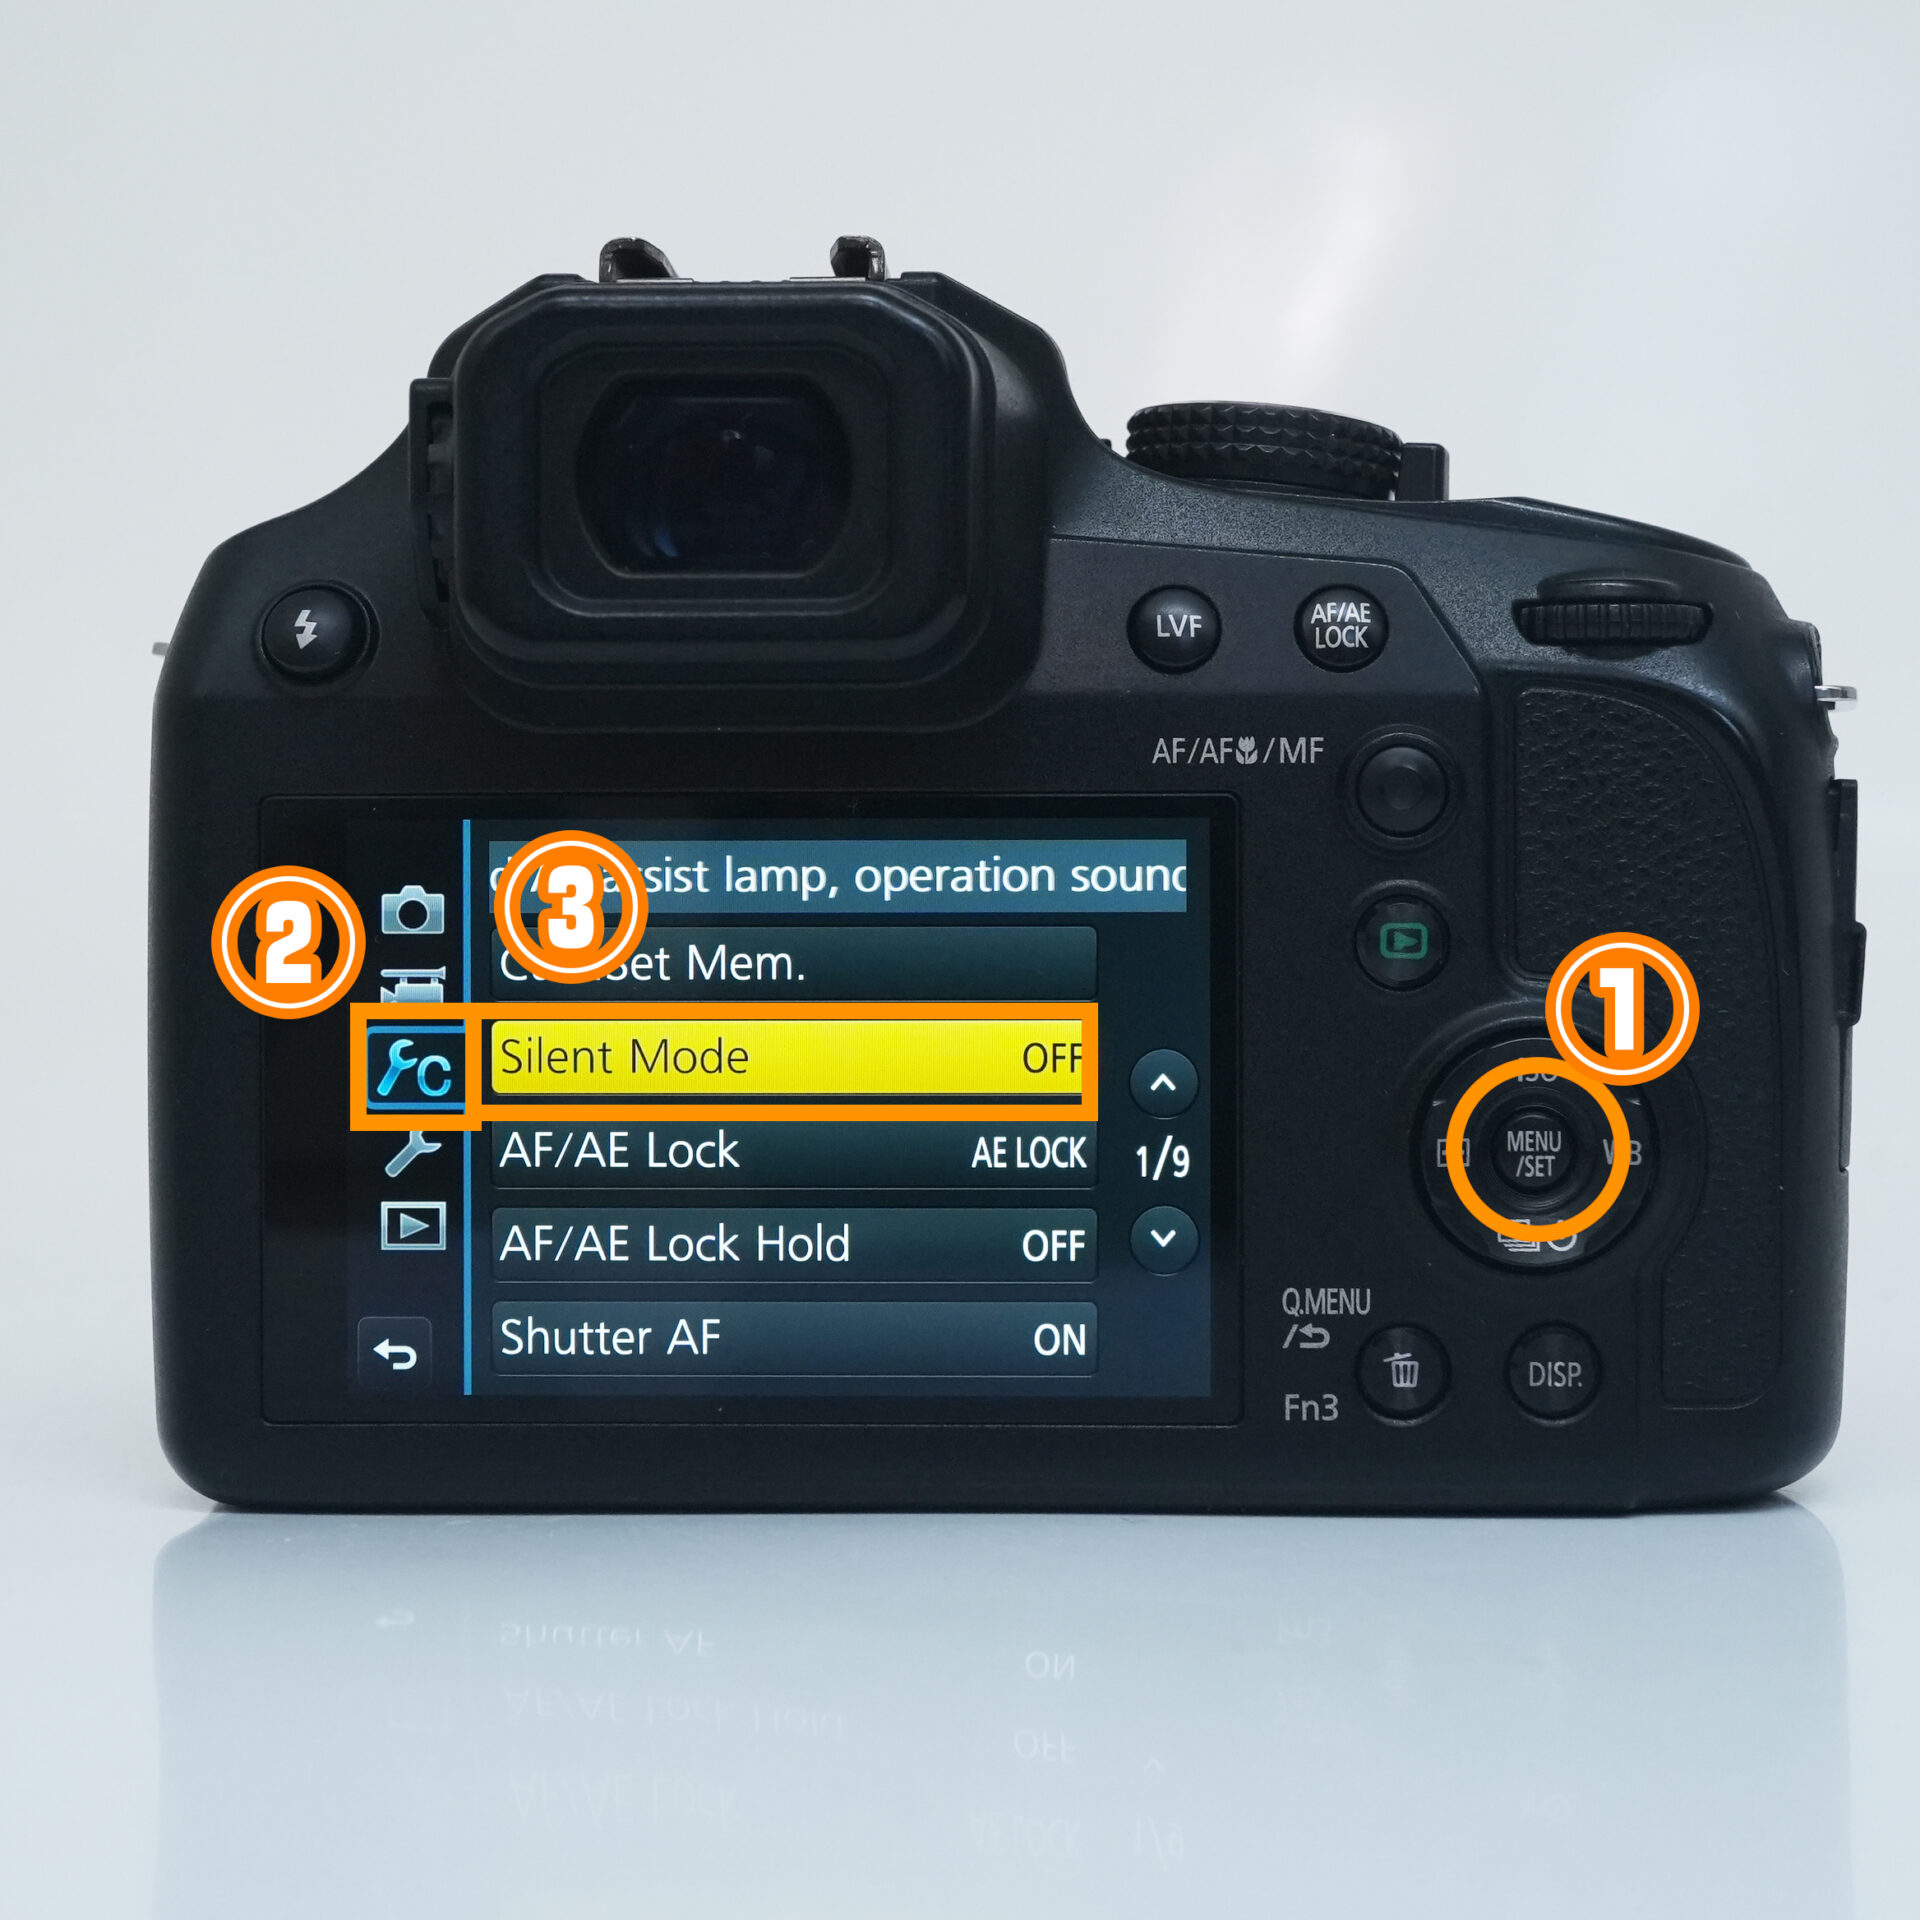 |
| MENU → Select Silent Mode and set it to ON |
Burst Shooting
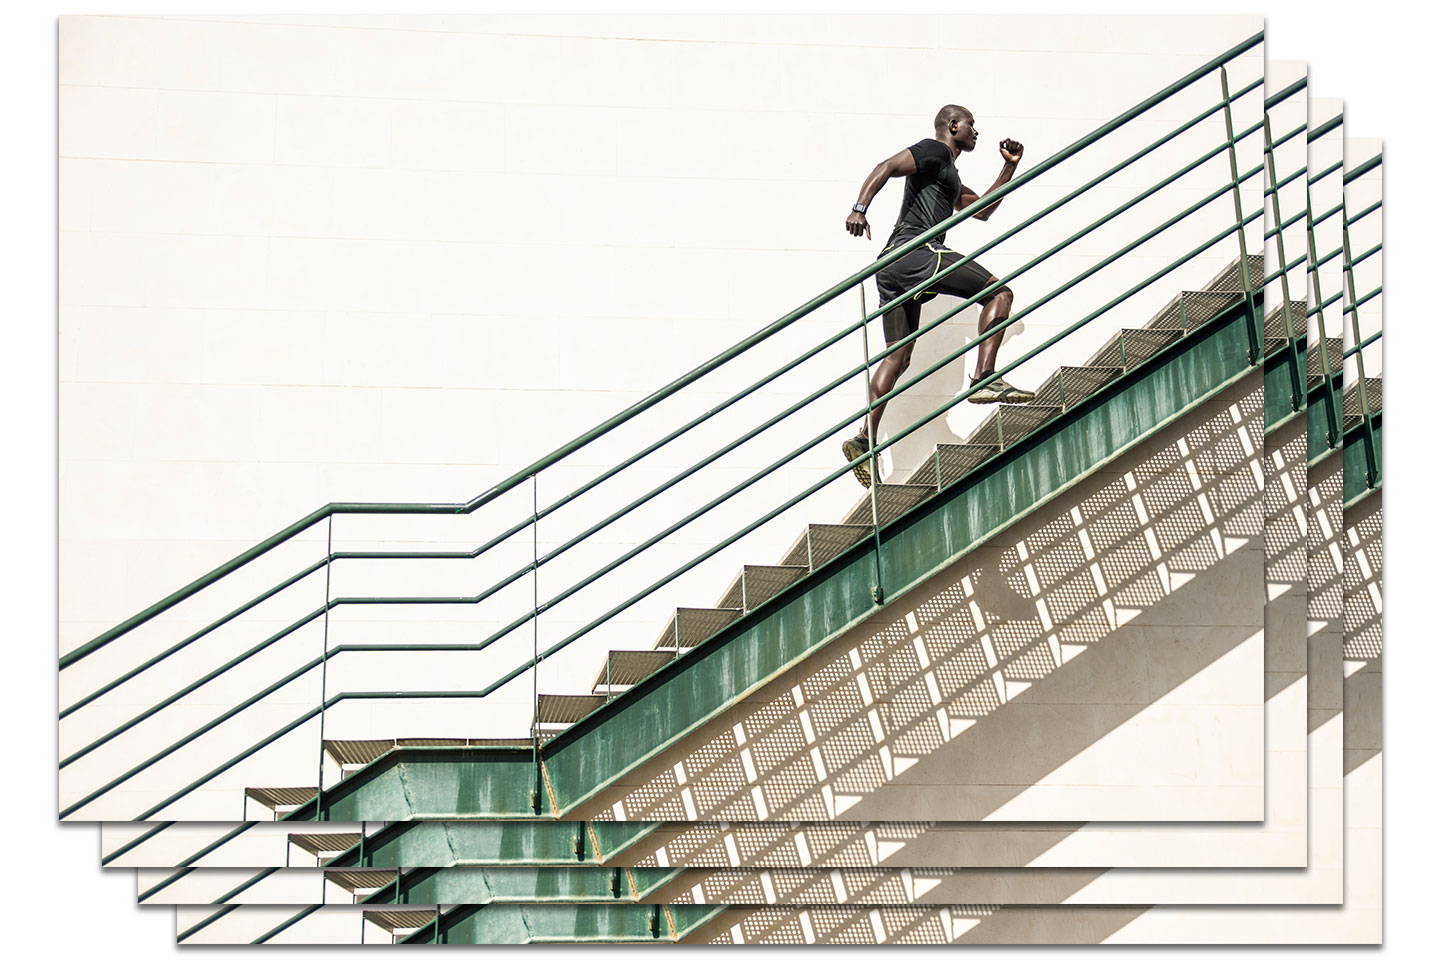
Burst Shooting....... Keeps shooting continuously for as long as you hold down the shutter button.
With single-shot mode alone, it's hard to nail the perfect shot.
With burst shooting, you get the benefit of being able to pick your best shot out of a whole series.
Recommended Scenes
- Sports photography.
- Sports day / field day events.
- Wild bird photography.
- Motorsport and racing, and more.
STEP.1
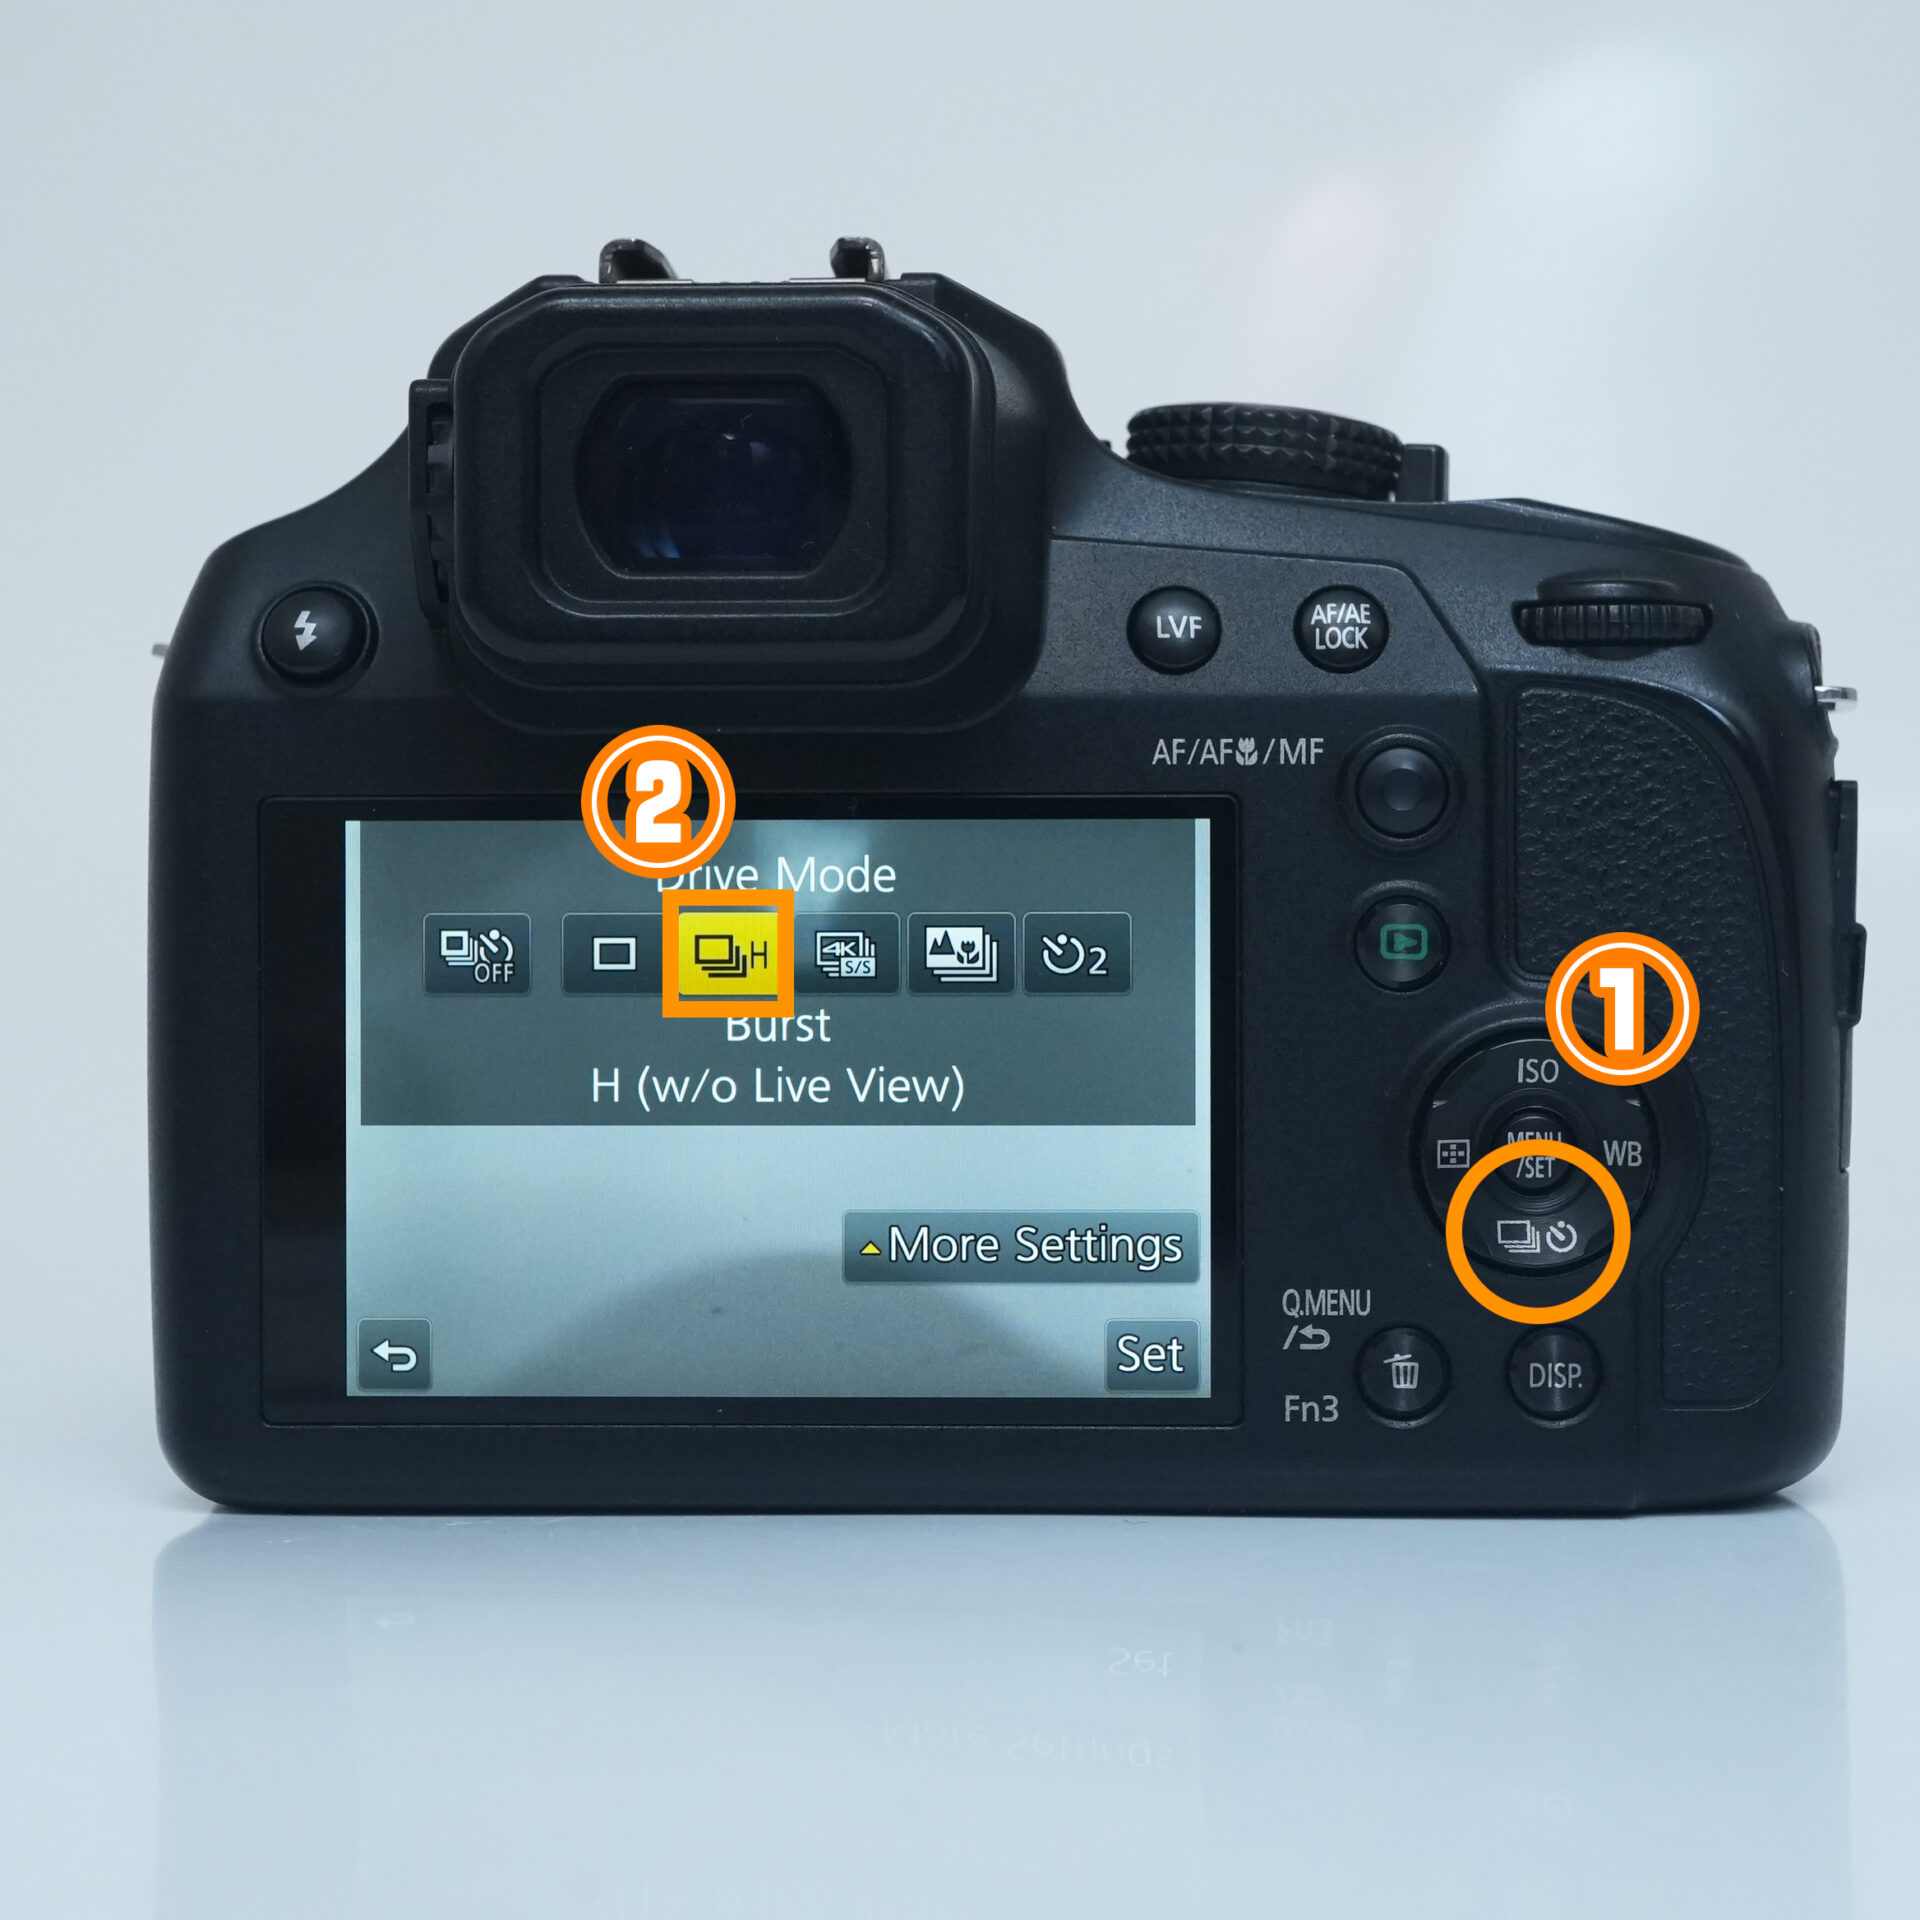 |
| Press down on the cursor button → select Burst Shooting |
Self-Timer
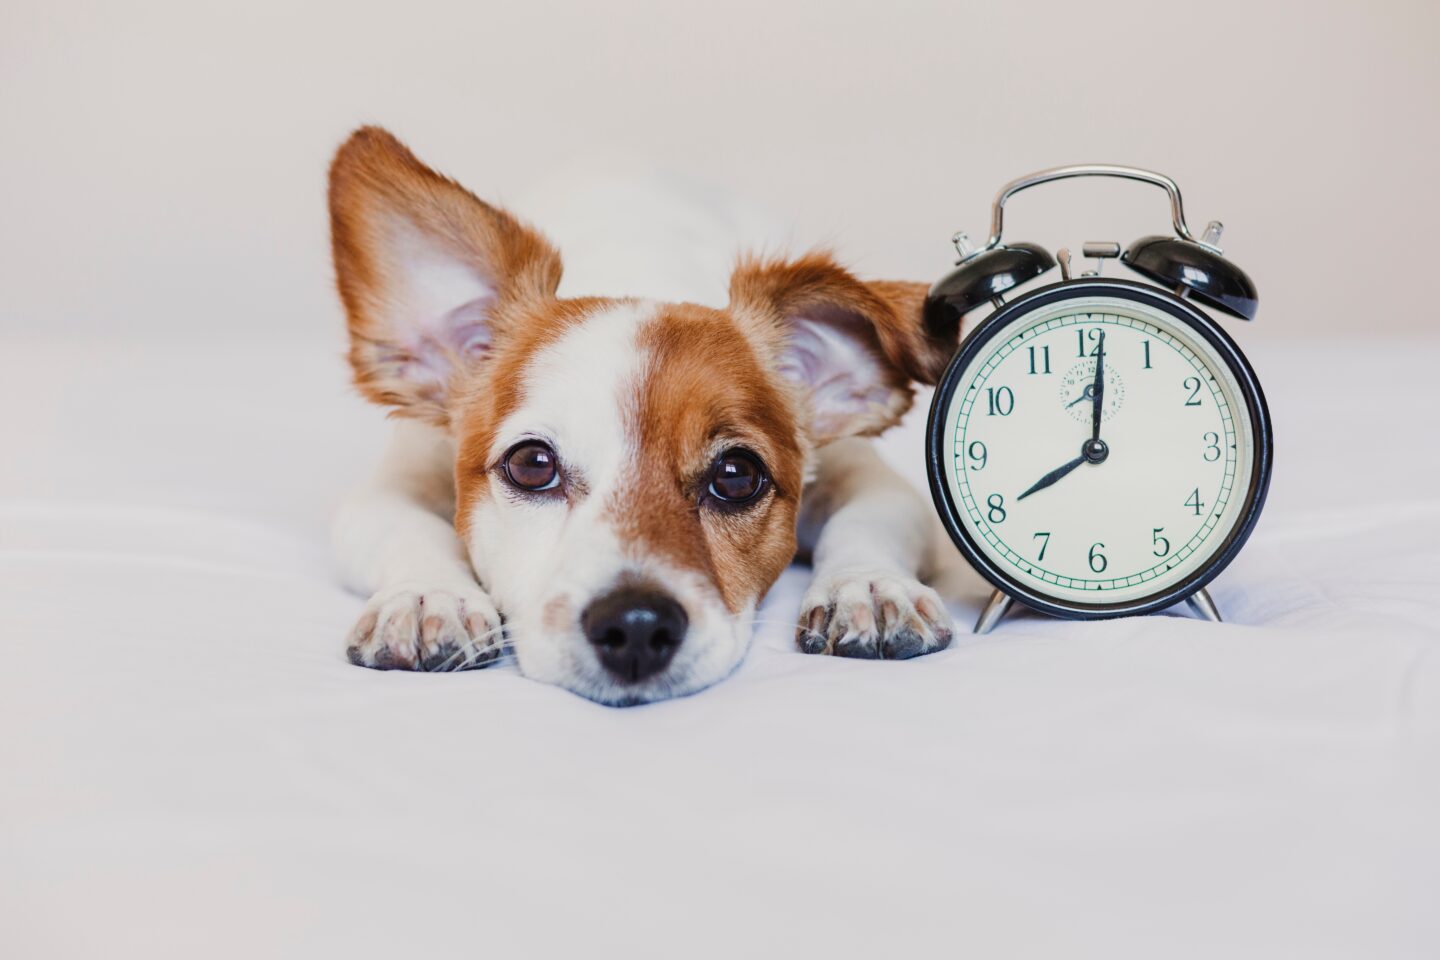
Self-Timer...... Fires the shutter a set number of seconds after you press the shutter button.
Connecting to a smartphone makes it easy to trigger the shutter remotely, but the self-timer lets you do it using just the camera body on its own.
Recommended Scenes
- Commemorative group photos.
- Long-exposure shots, like waterfalls, and more.
STEP.1
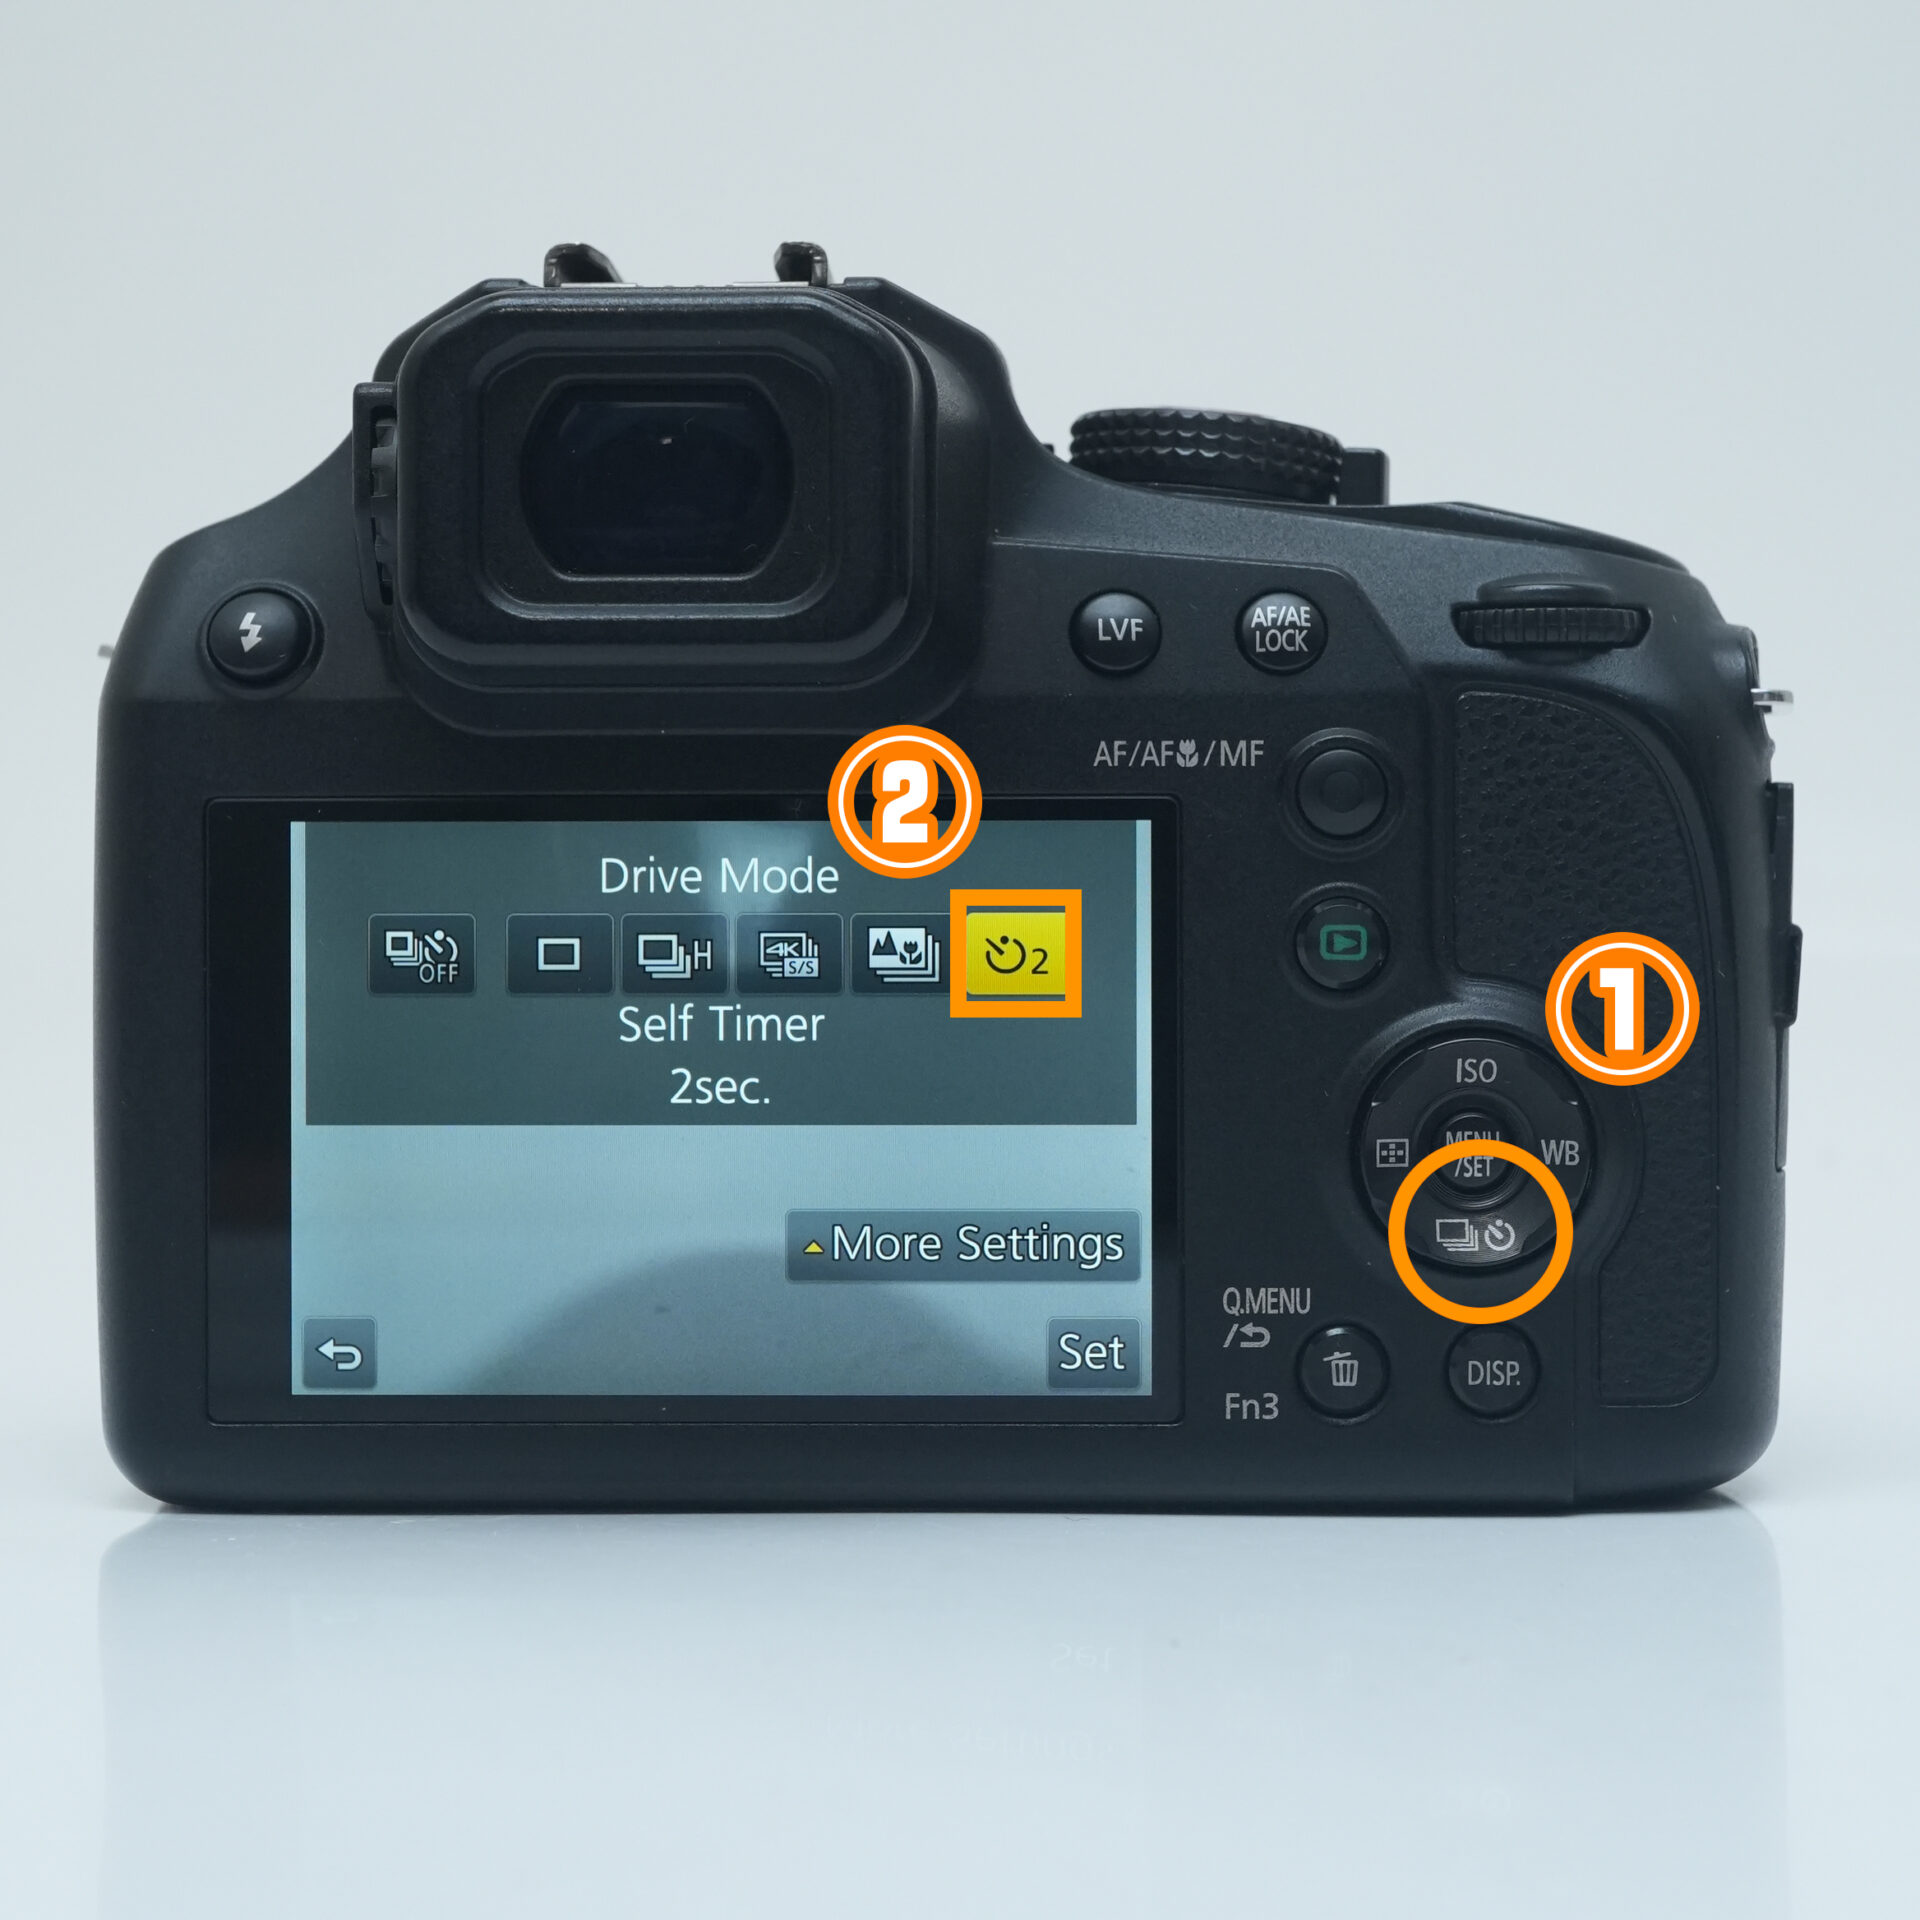 |
| Press down on the cursor button → select Self-Timer |
Manual Focus
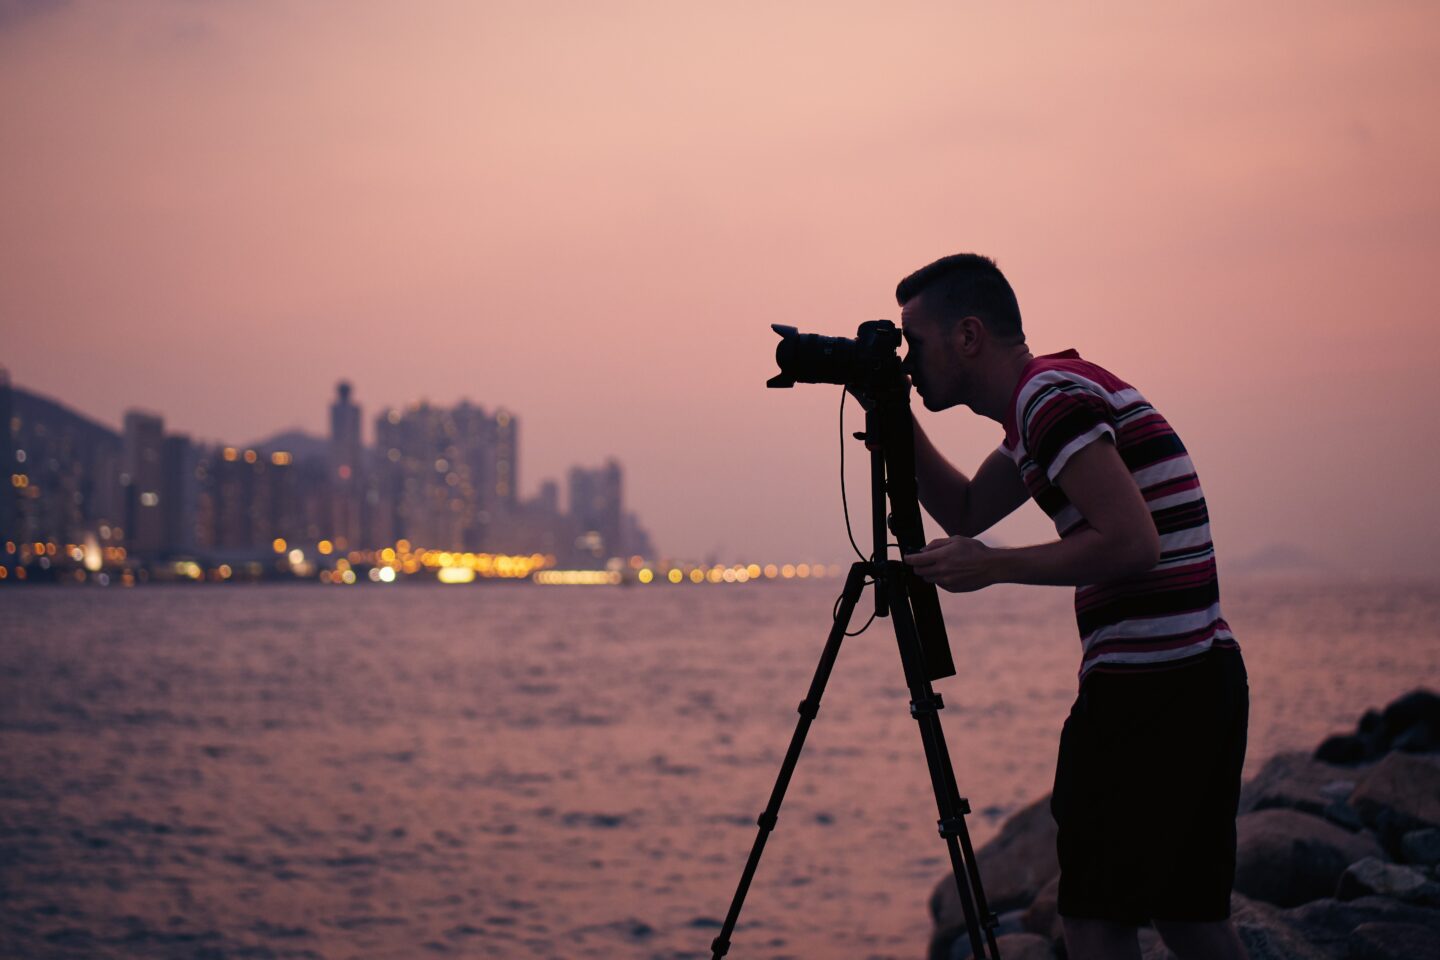
Manual Focus...... Lets you focus by hand.
Autofocus is convenient and highly capable, but there are times — like in dim scenes — when it doesn't quite lock onto the spot you actually wanted.
In situations like that, you can switch to focusing manually instead.
Recommended Scenes
- Fireworks photography.
- Night scenery.
- Astrophotography, and more.
STEP.1
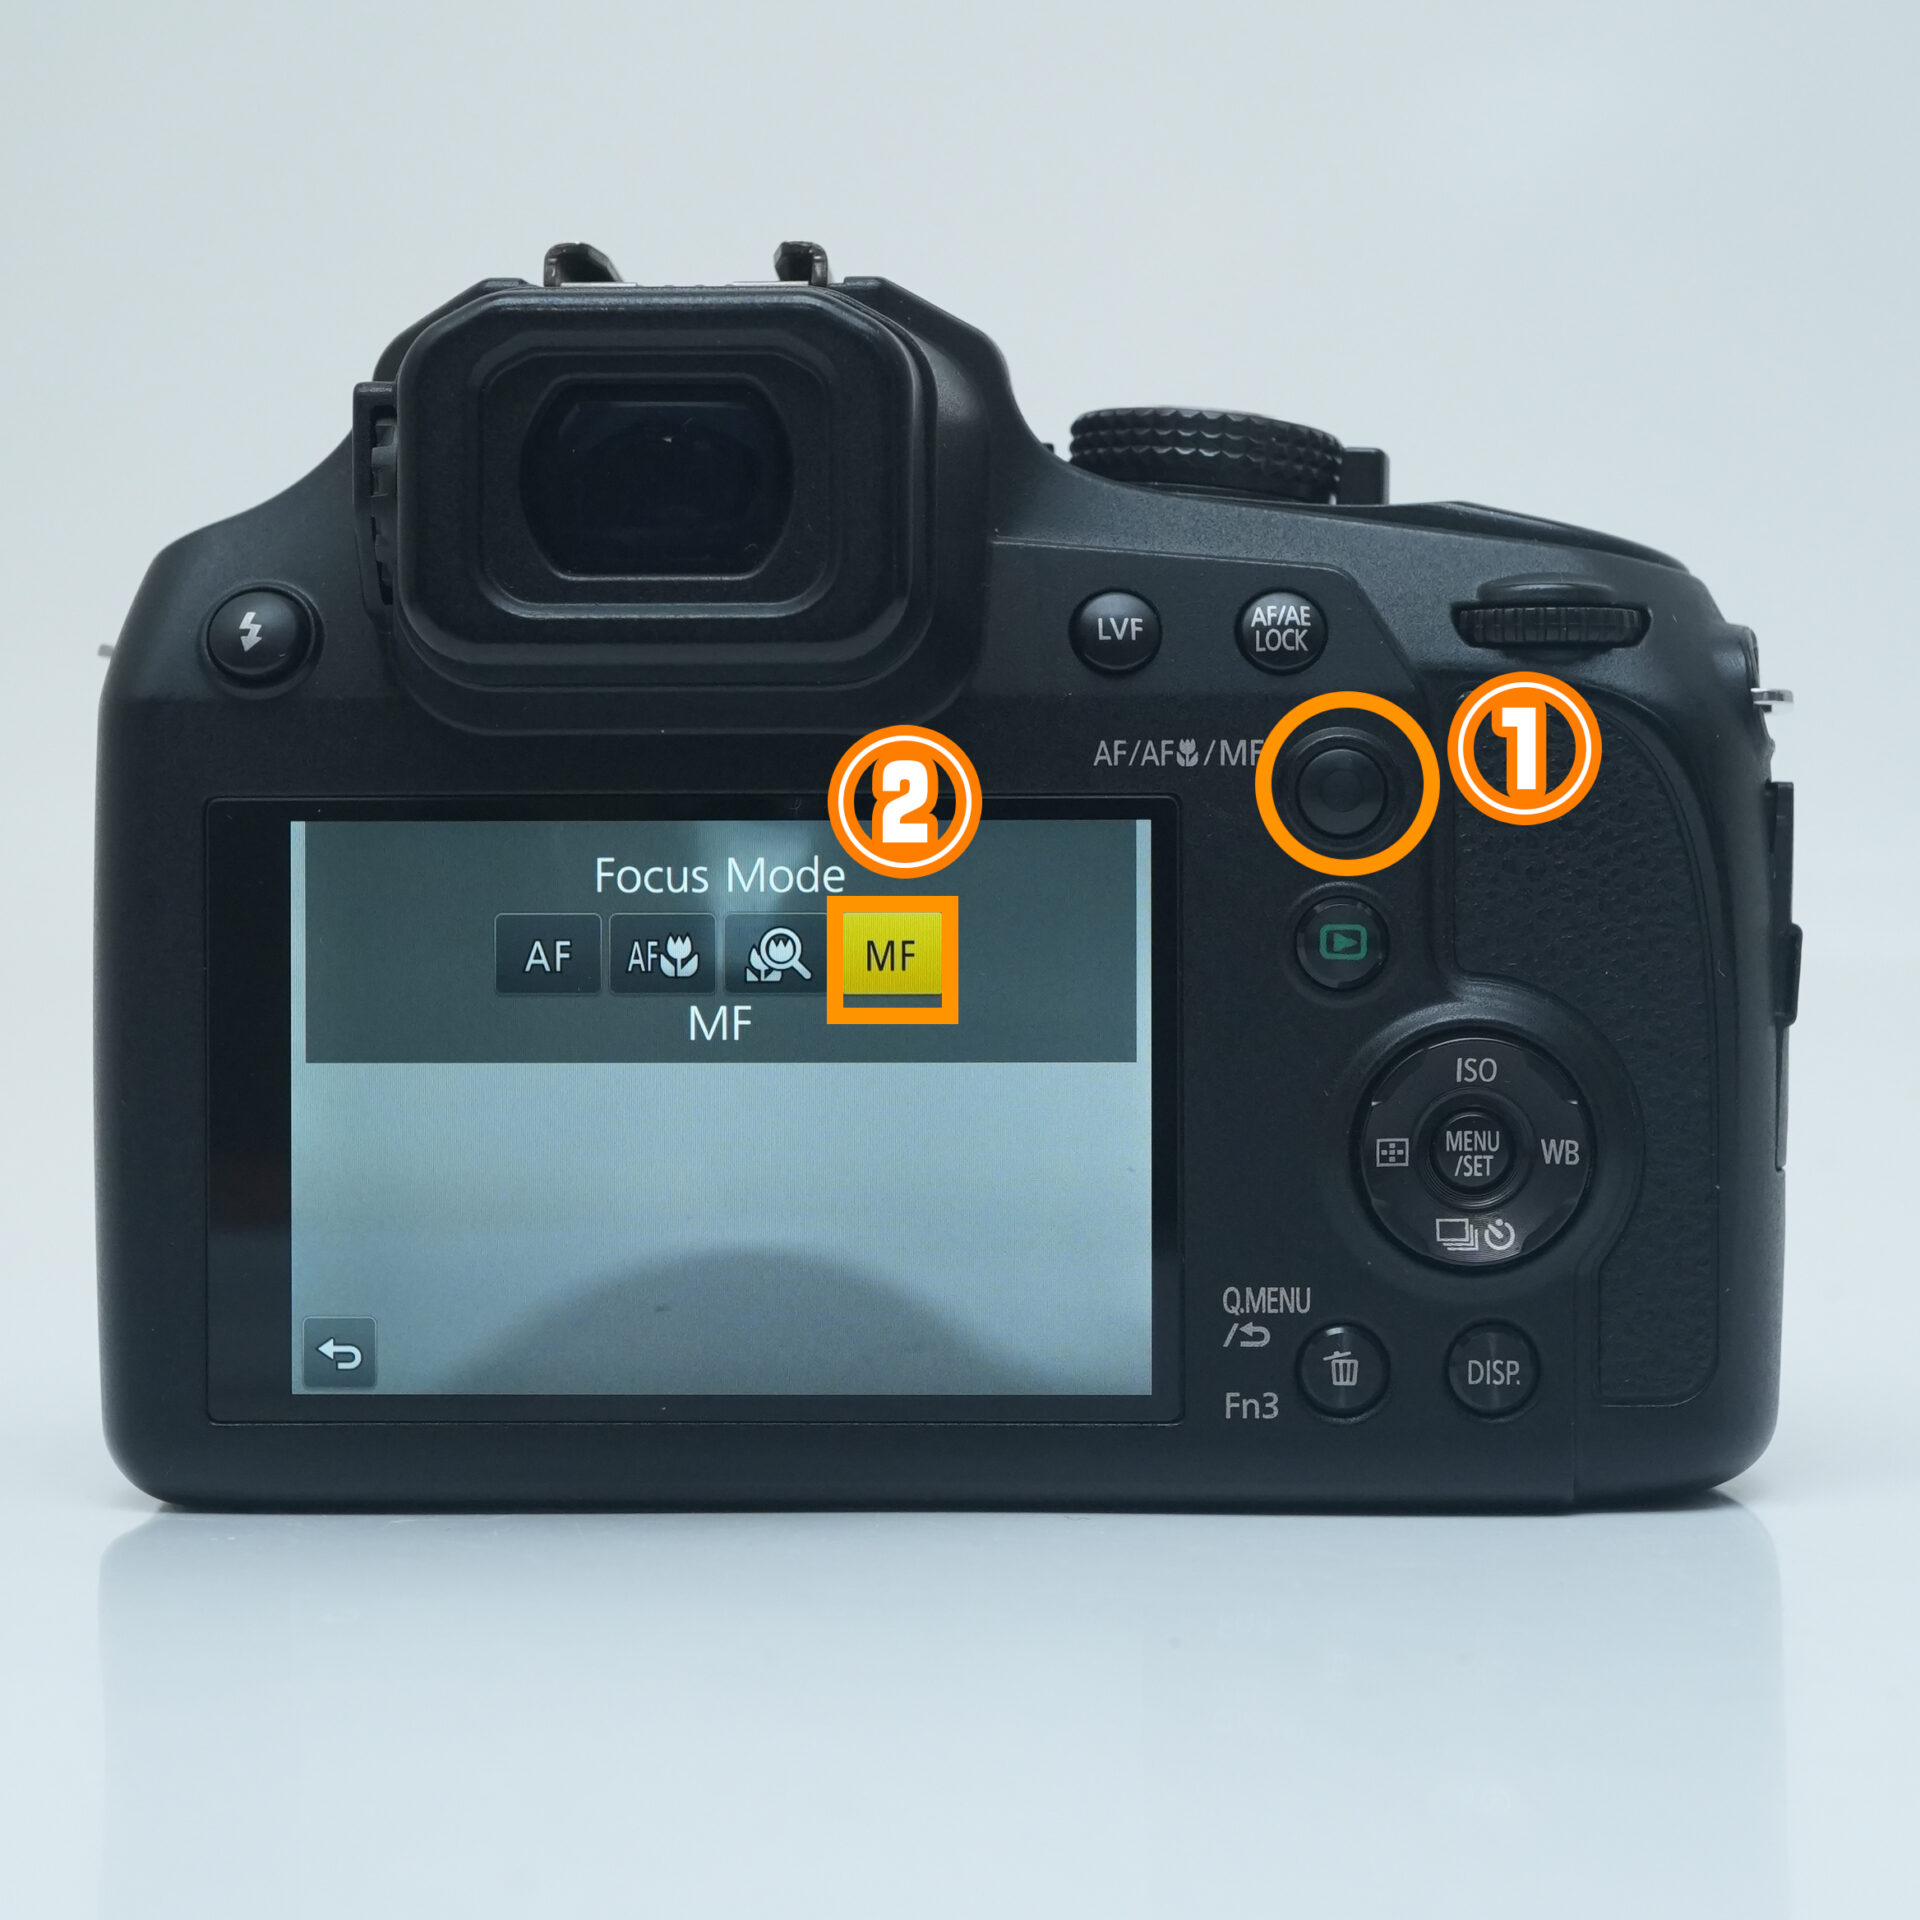 |
| Press the MF button and select MF |
STEP.2
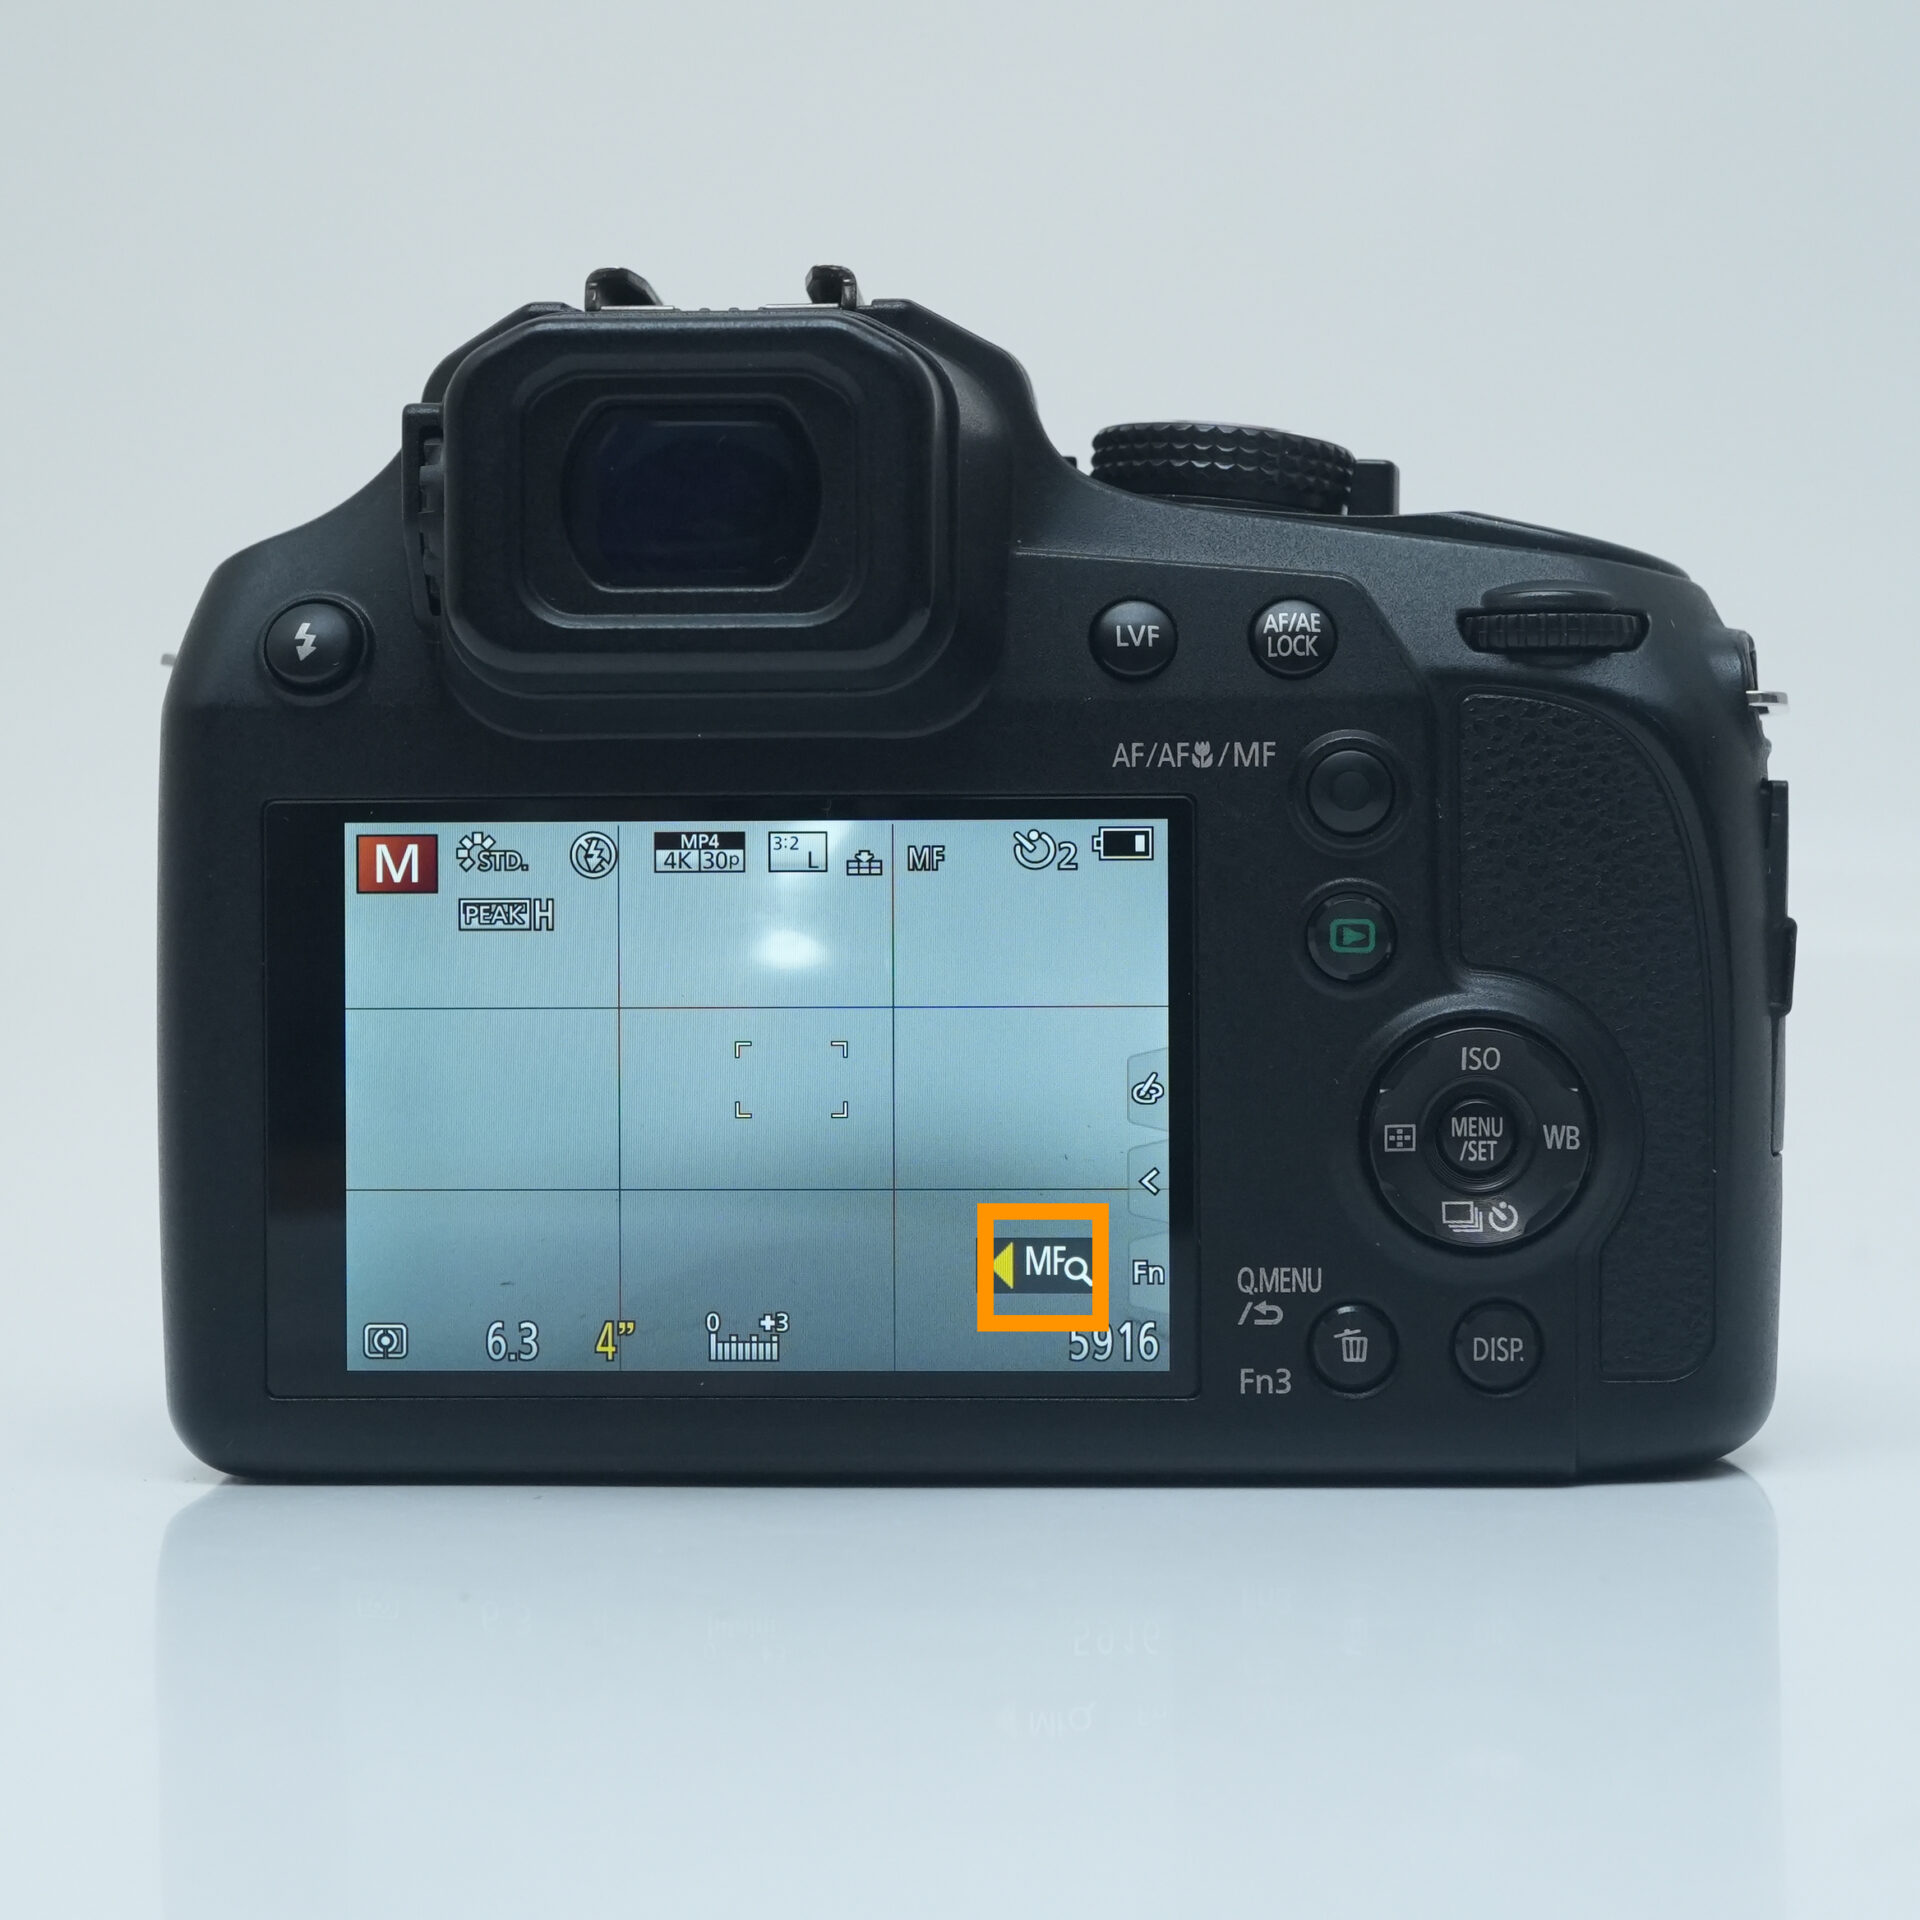 |
| Select MF |
STEP.3
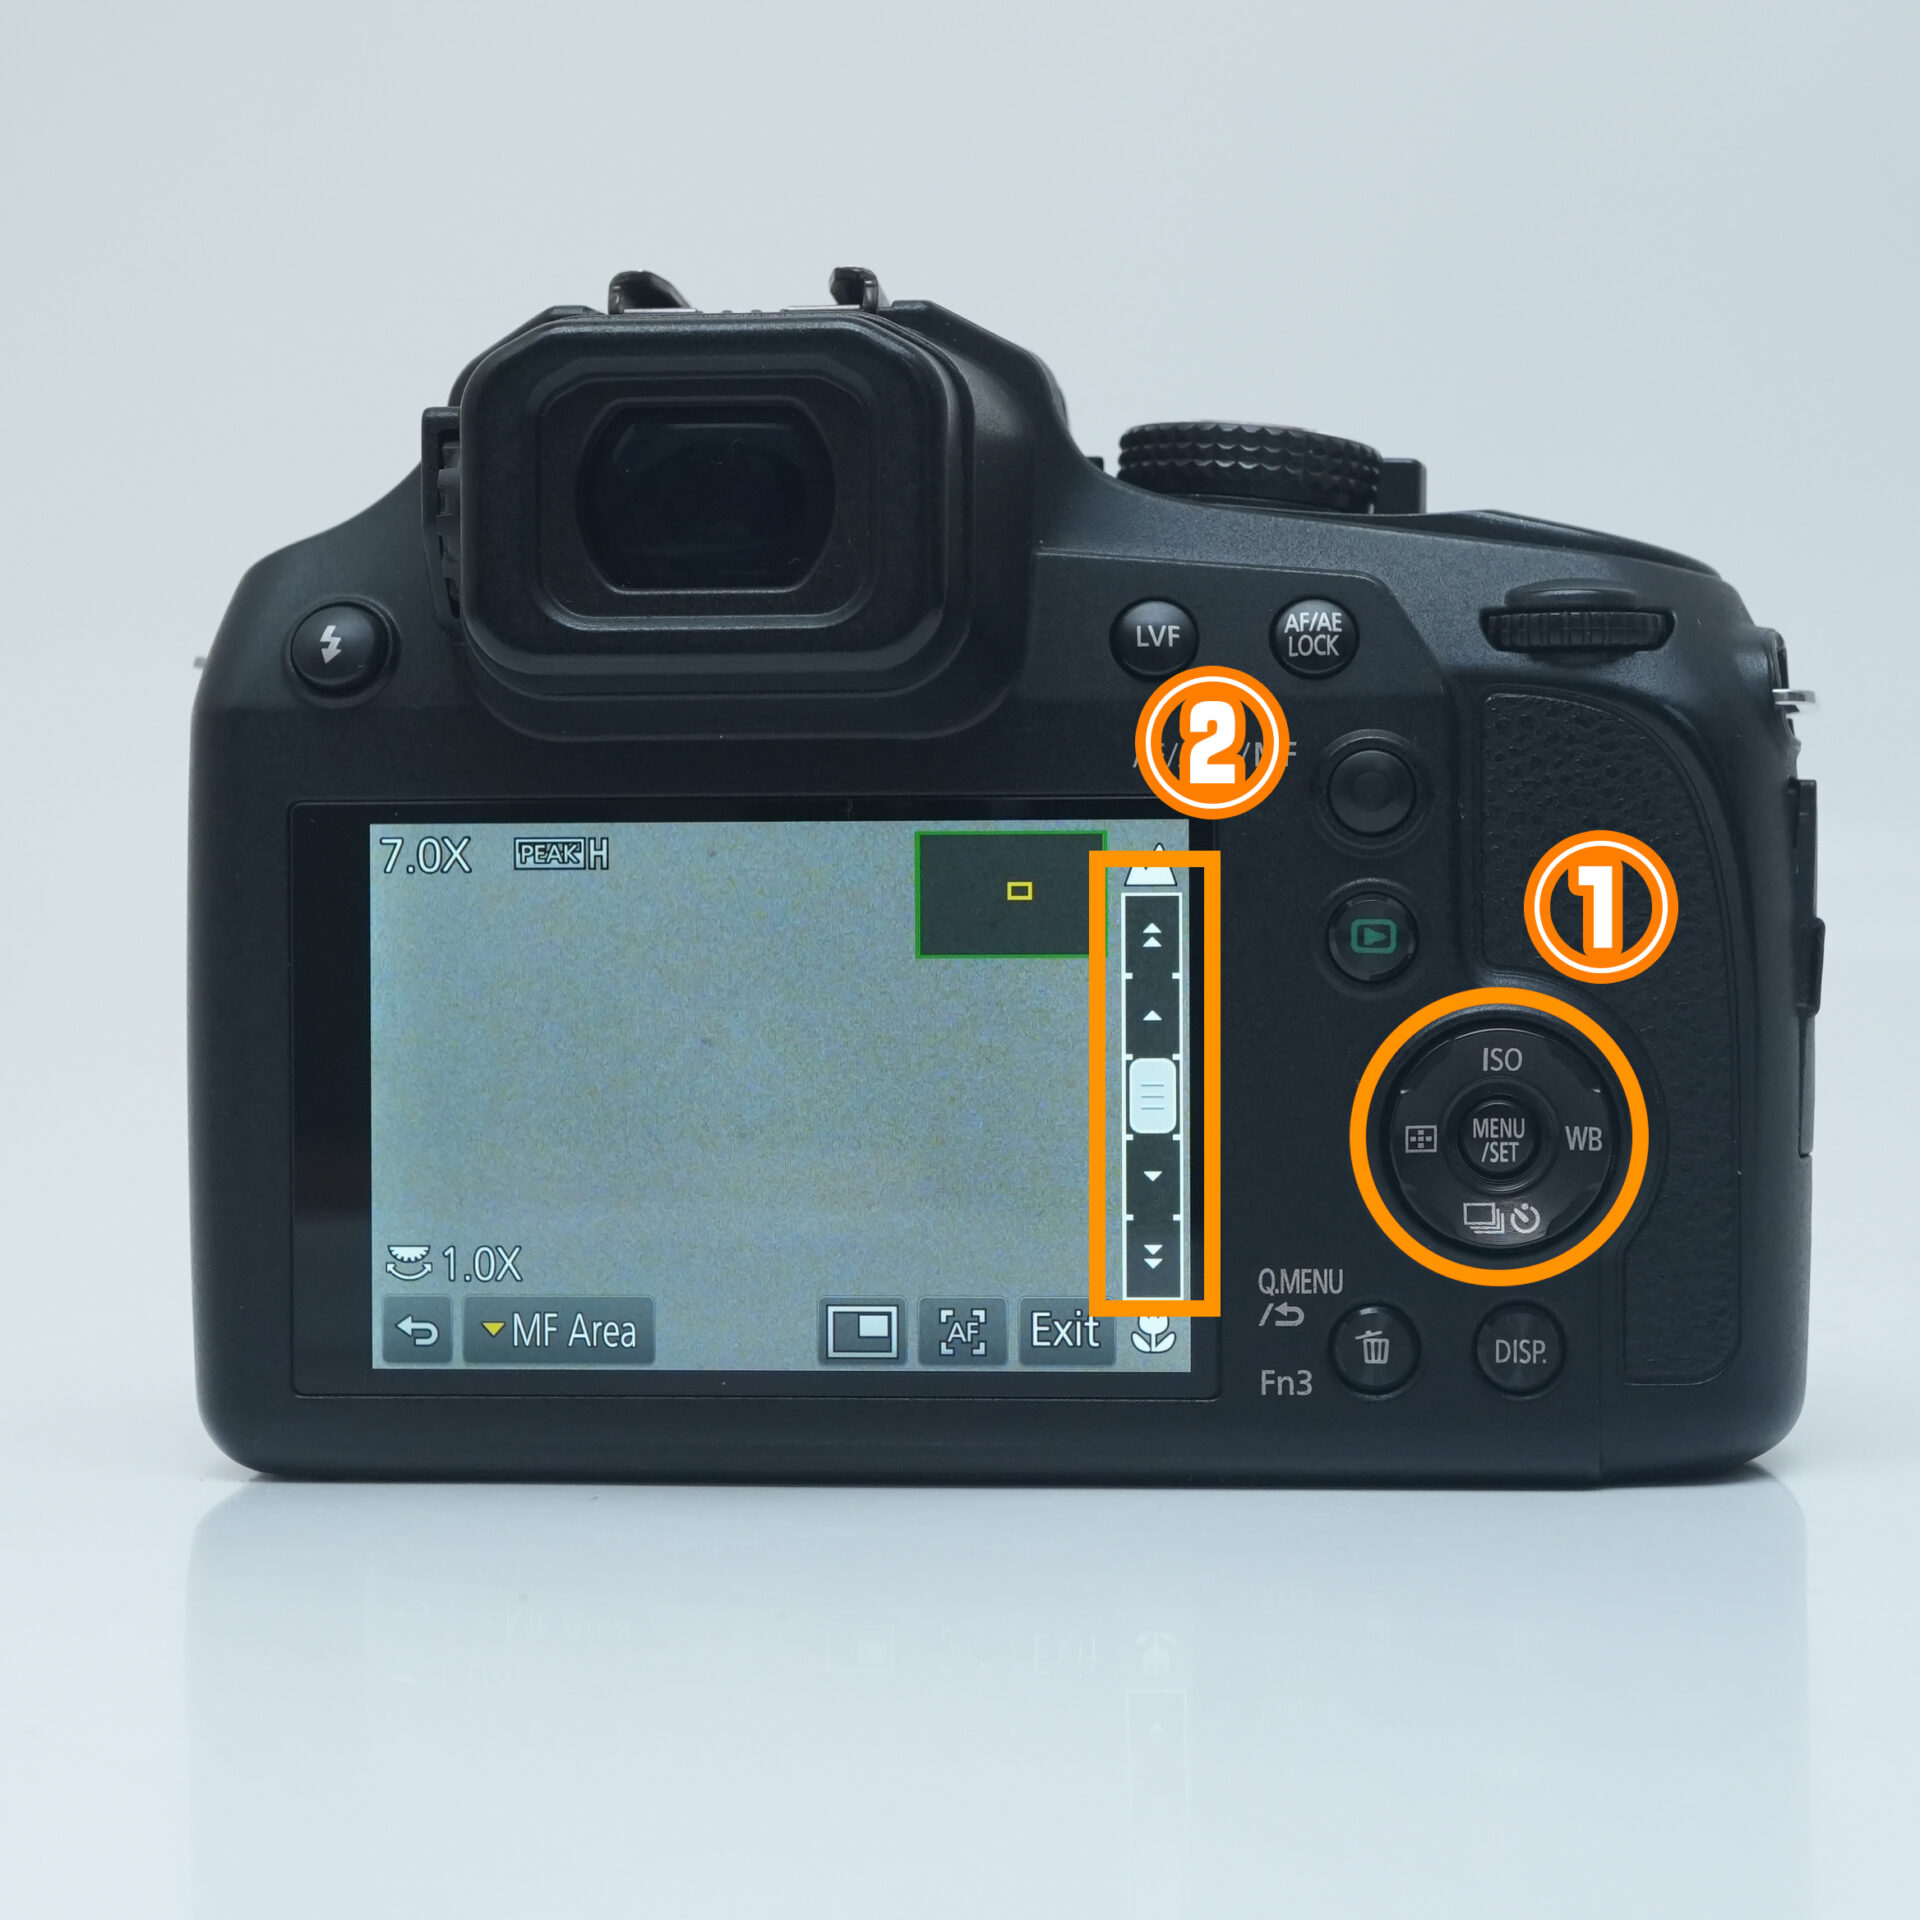 |
| Press up or down on the cursor button to adjust the focus |
Switching Between Viewfinder and Monitor
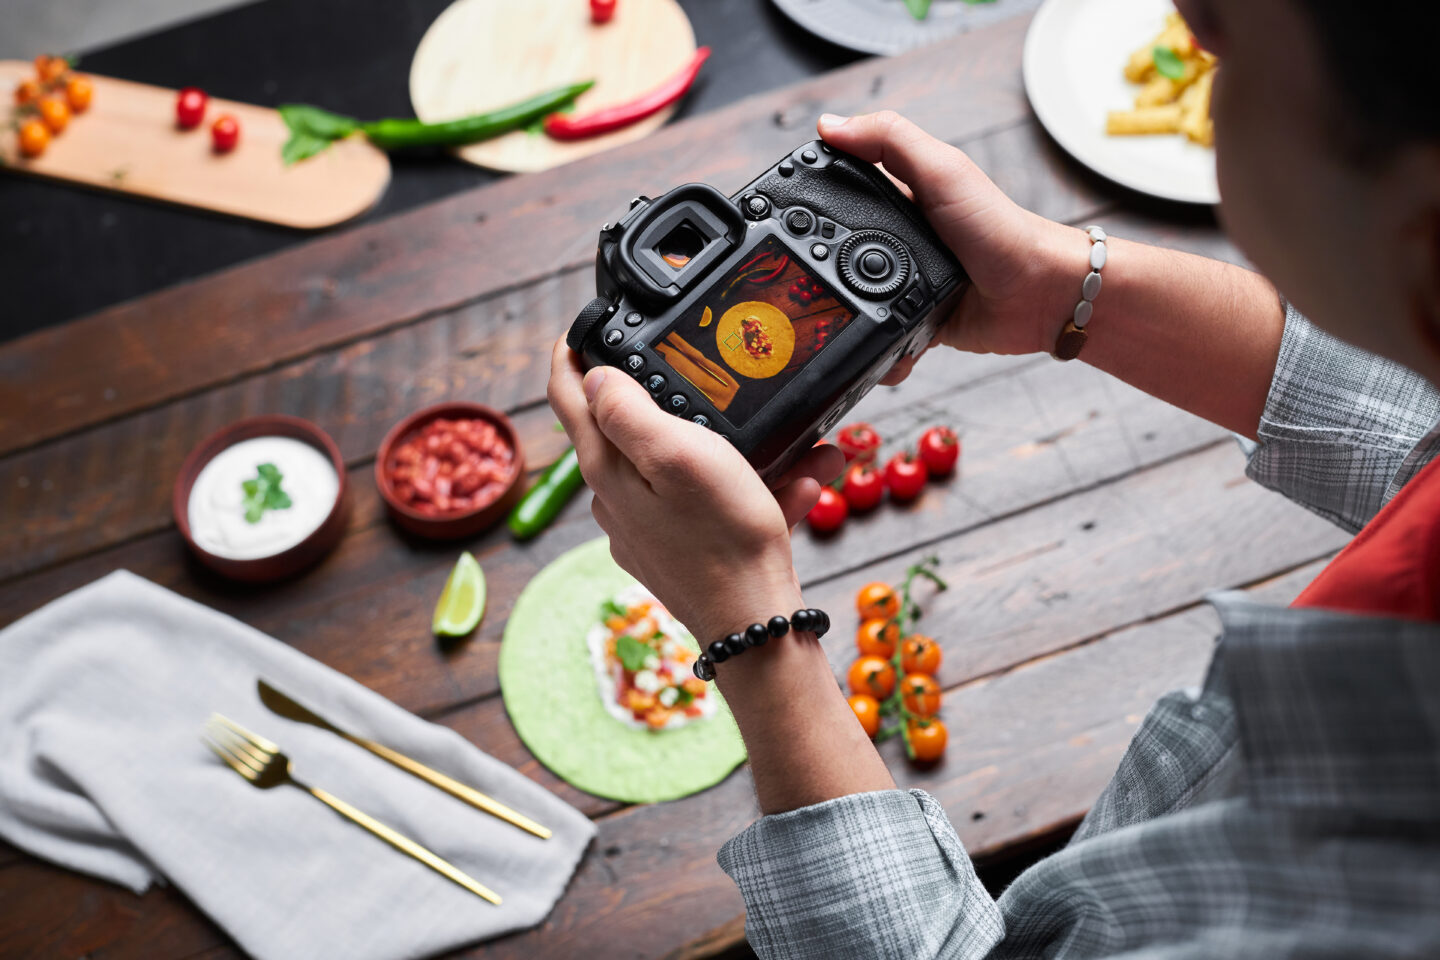
You can switch between the monitor and the viewfinder, depending on which one you'd rather use.
When It's Useful
- You want to shoot while looking at the monitor.
- You want to shoot while looking through the viewfinder.
STEP.1
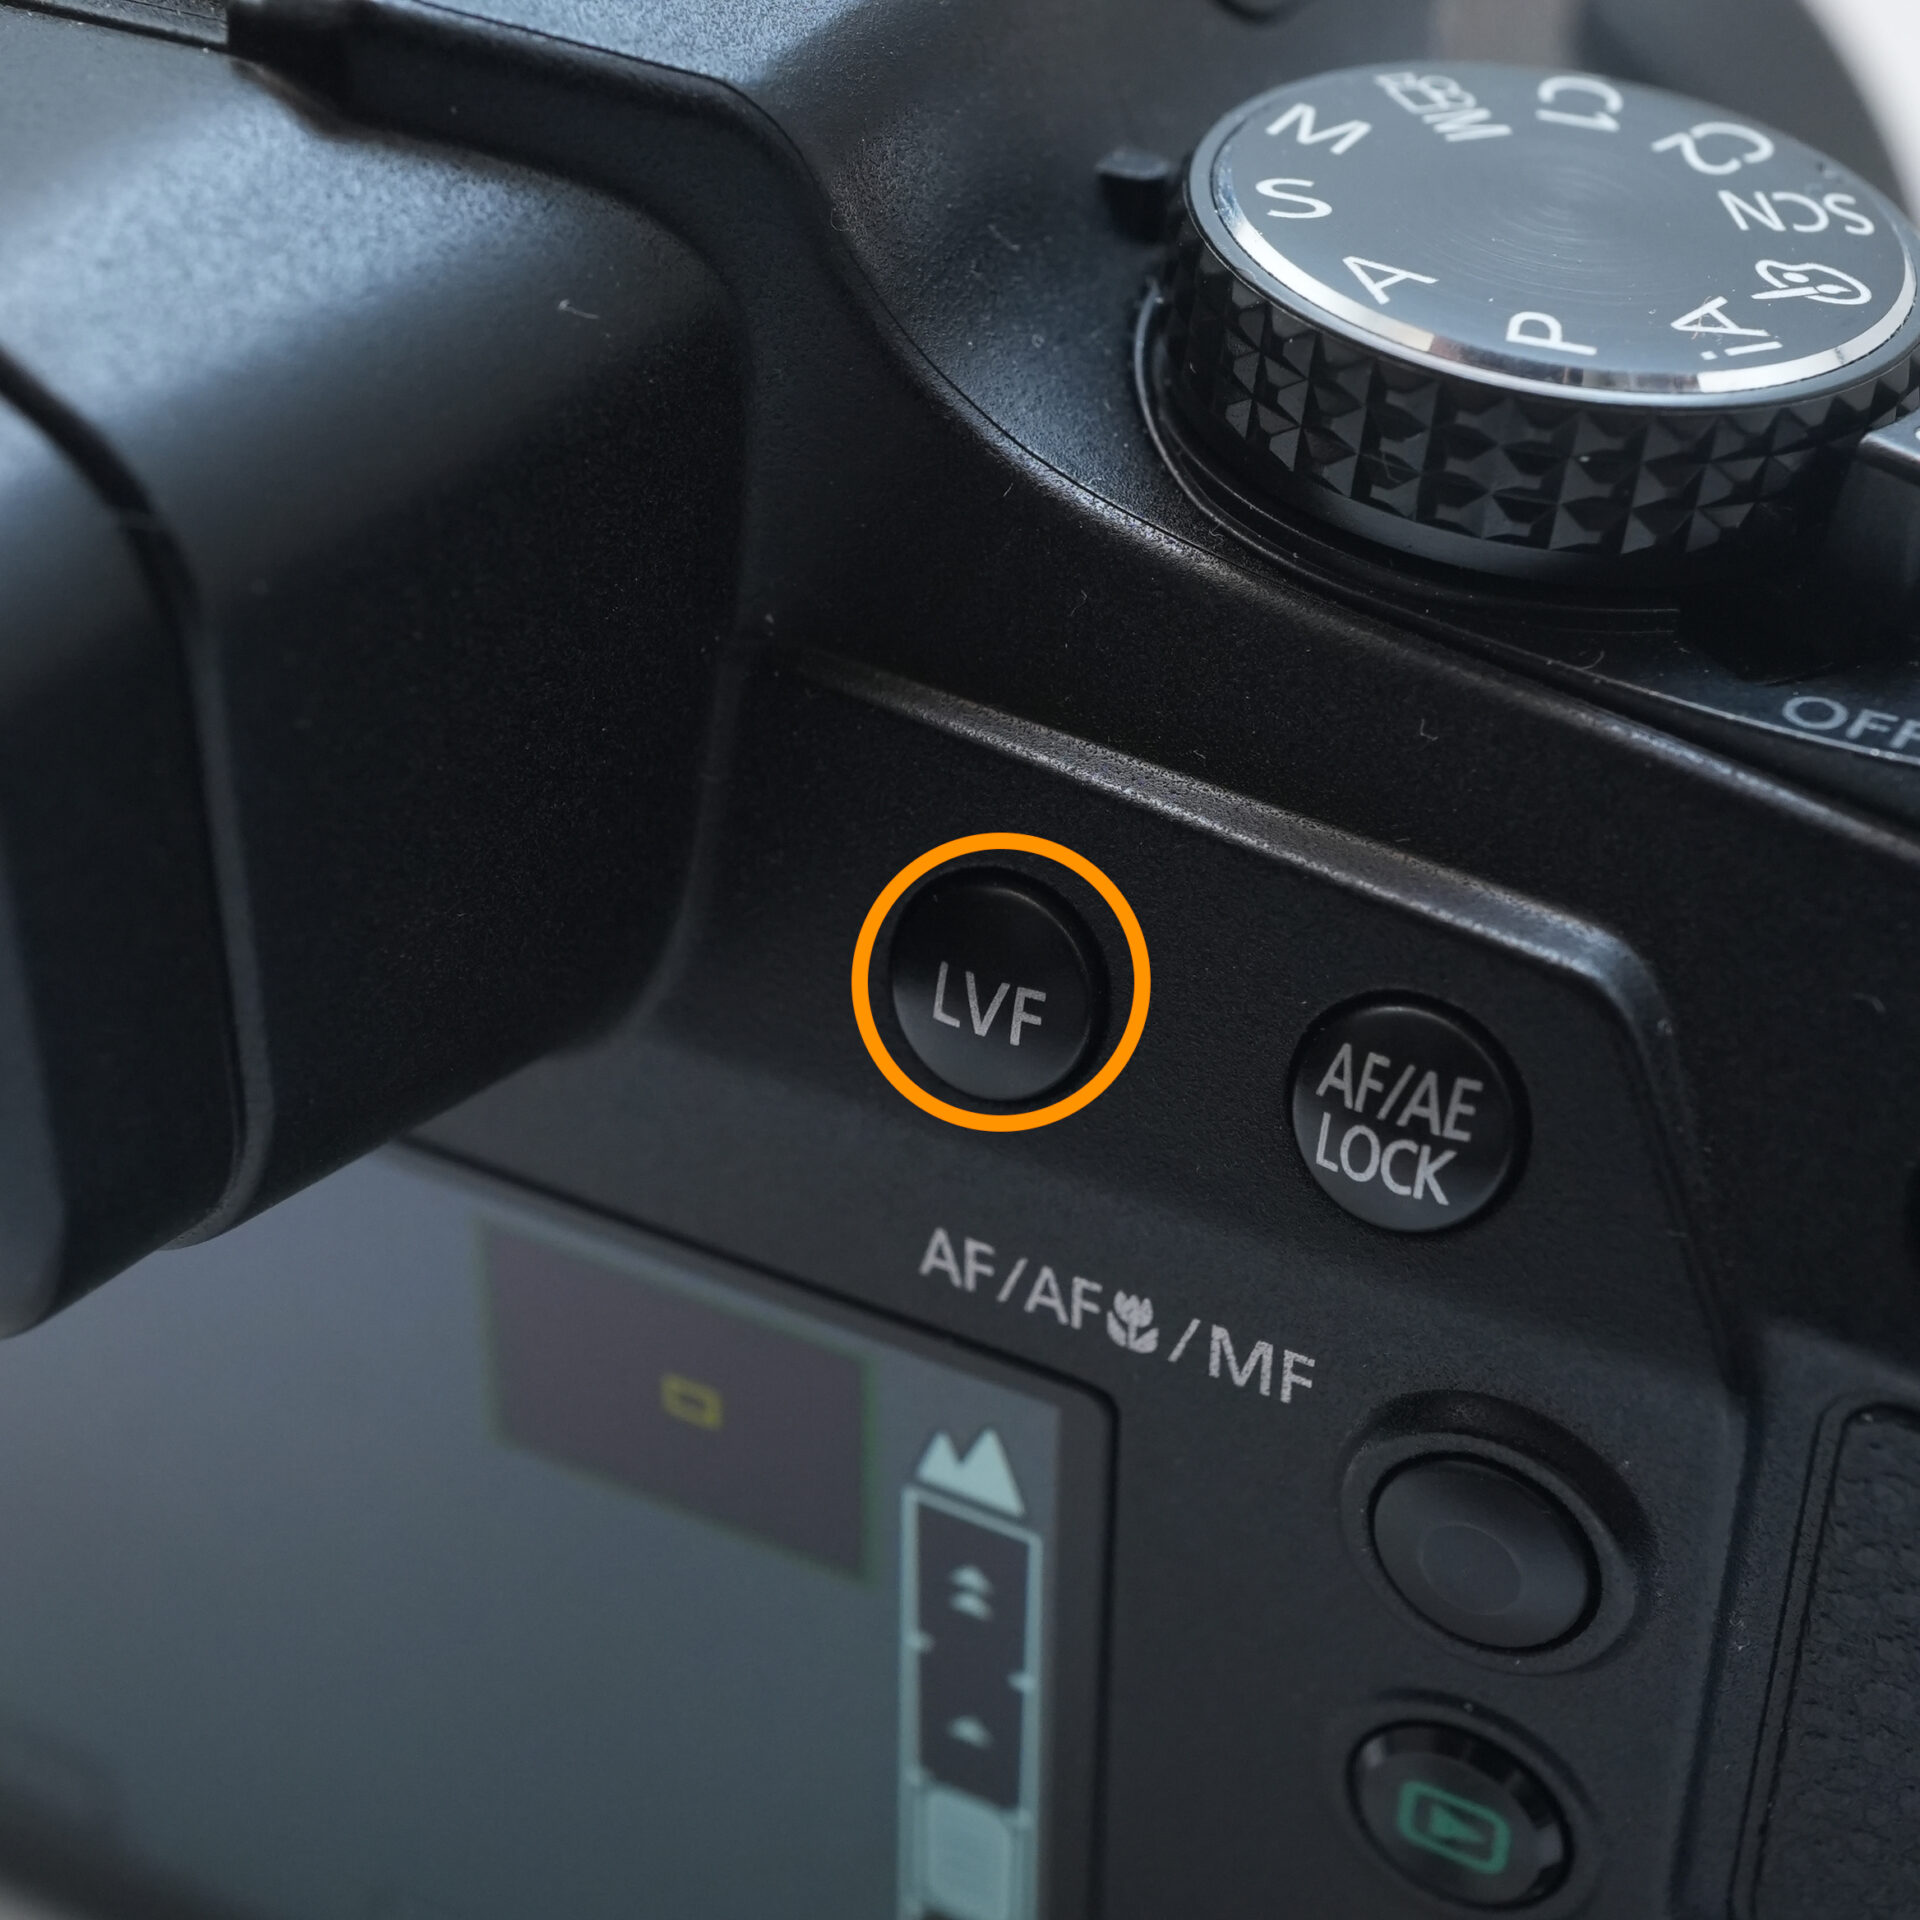 |
| Press LVF to switch the display |
Auto Review
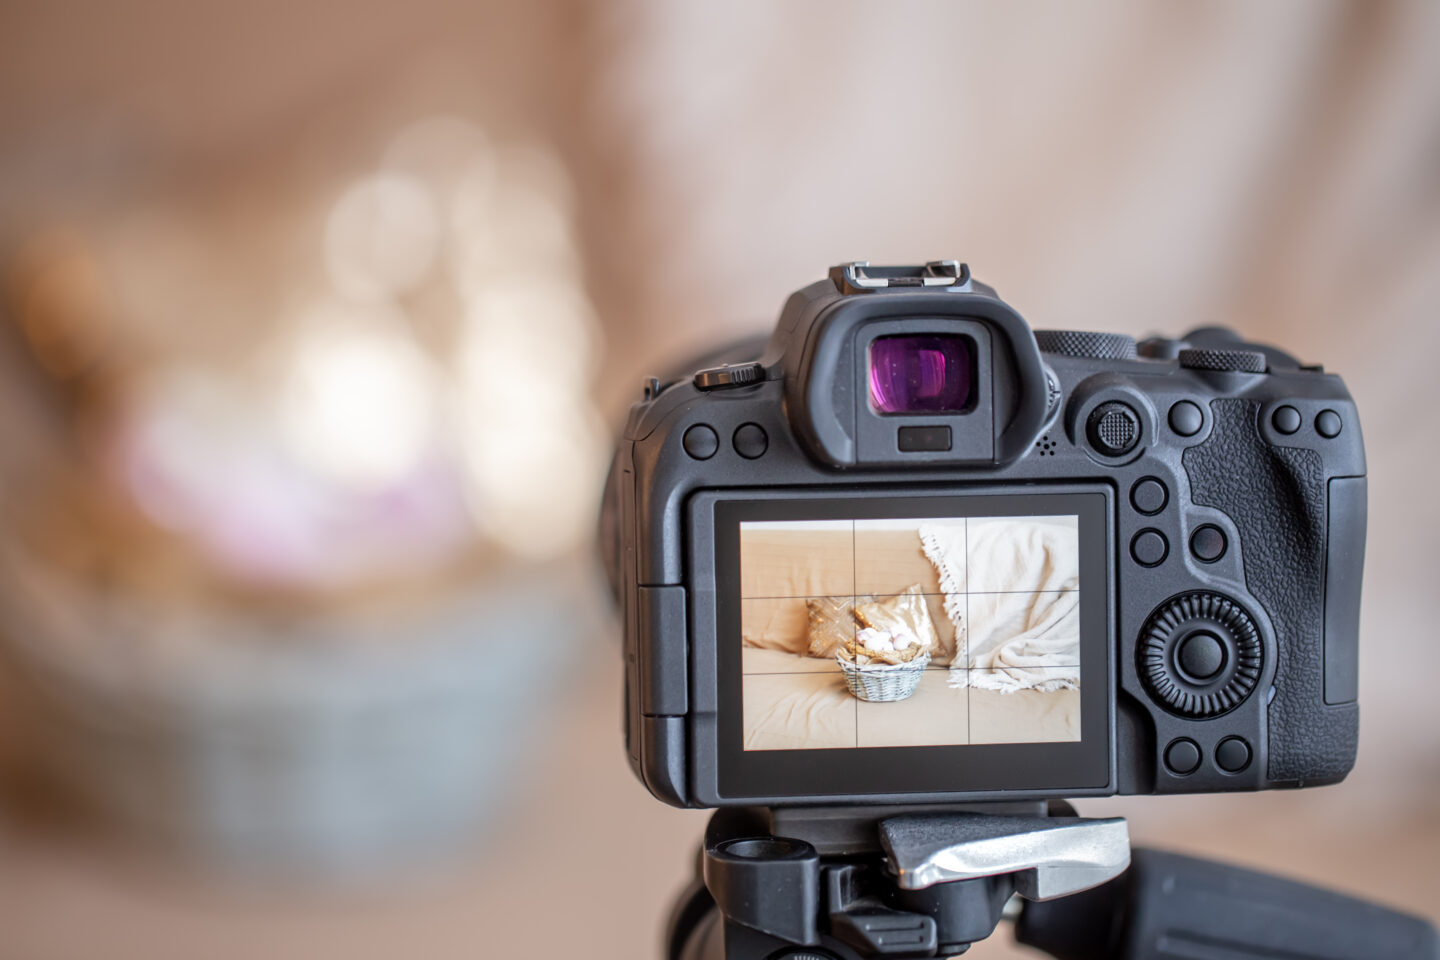
Auto Review…… Automatically shows the photo you just took on screen for a few seconds right after you shoot.
Some people like to check their shot right away.
With this setting, the photo is displayed automatically, so you can instantly see whether it's in focus without having to press the playback button.
When It's Useful
- You want to check the shot right after taking it.
STEP.1
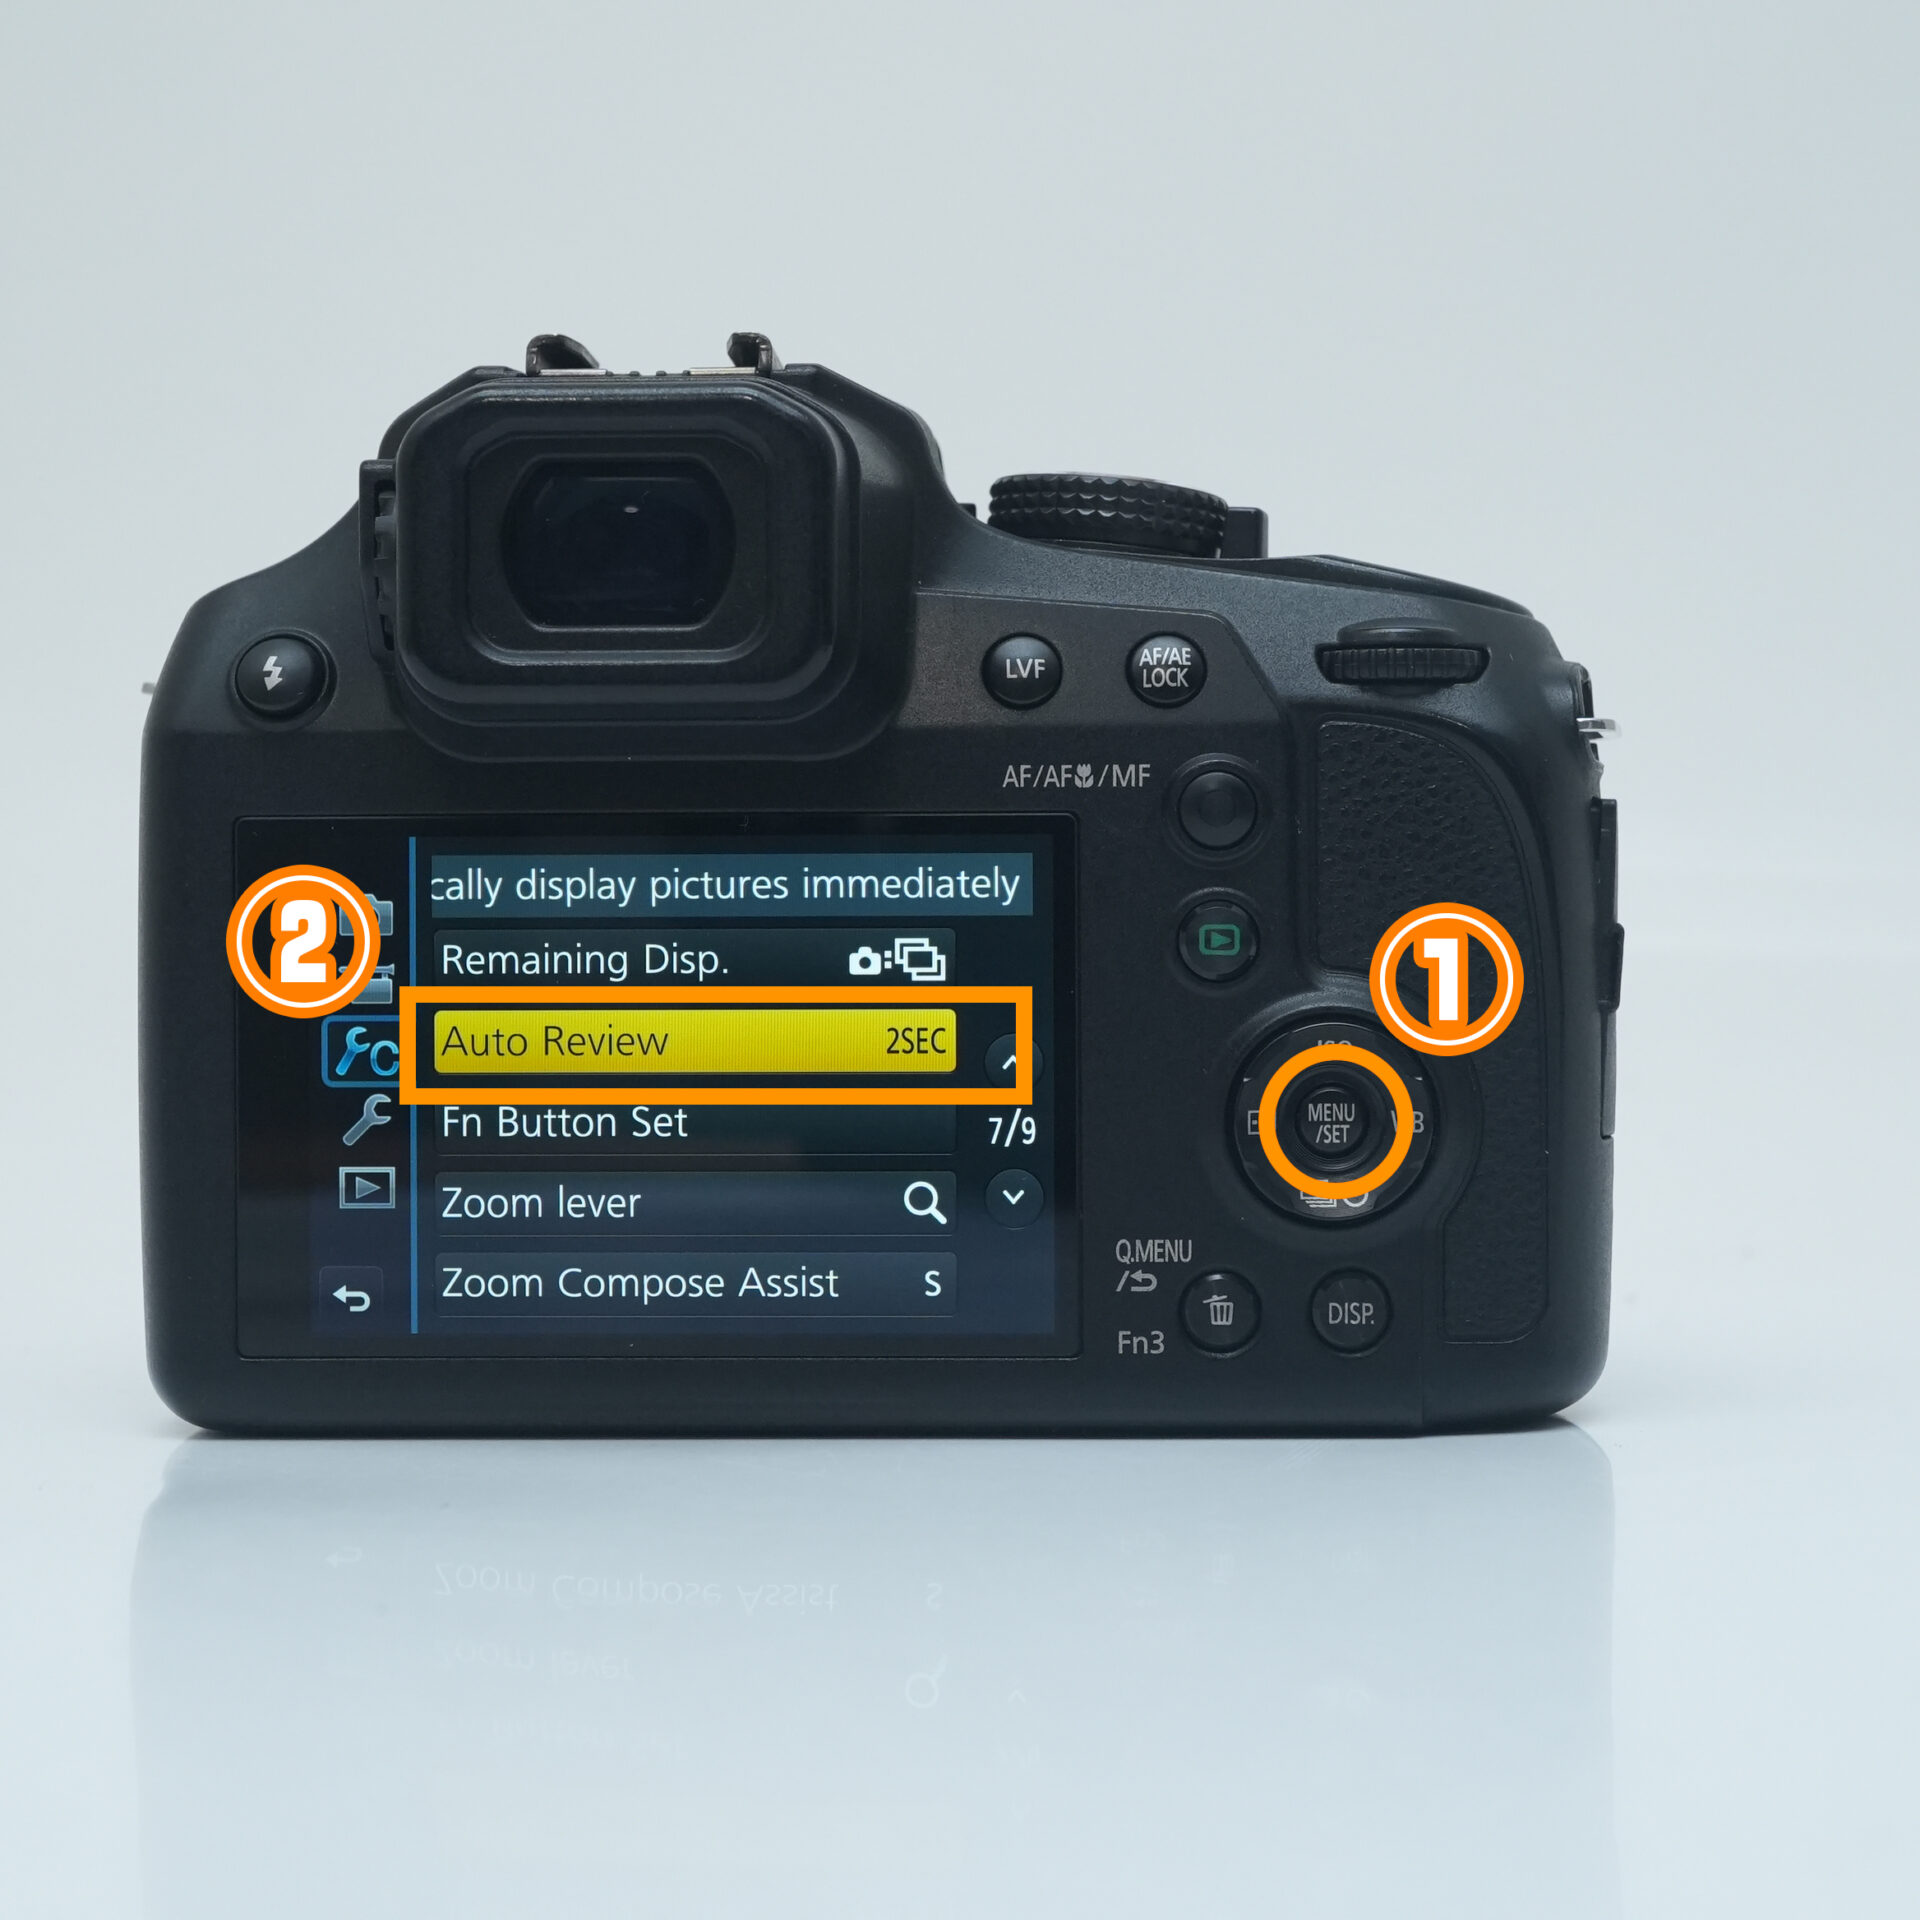 |
| MENU → Select Auto Review and choose your preferred number of seconds |
Display Switching
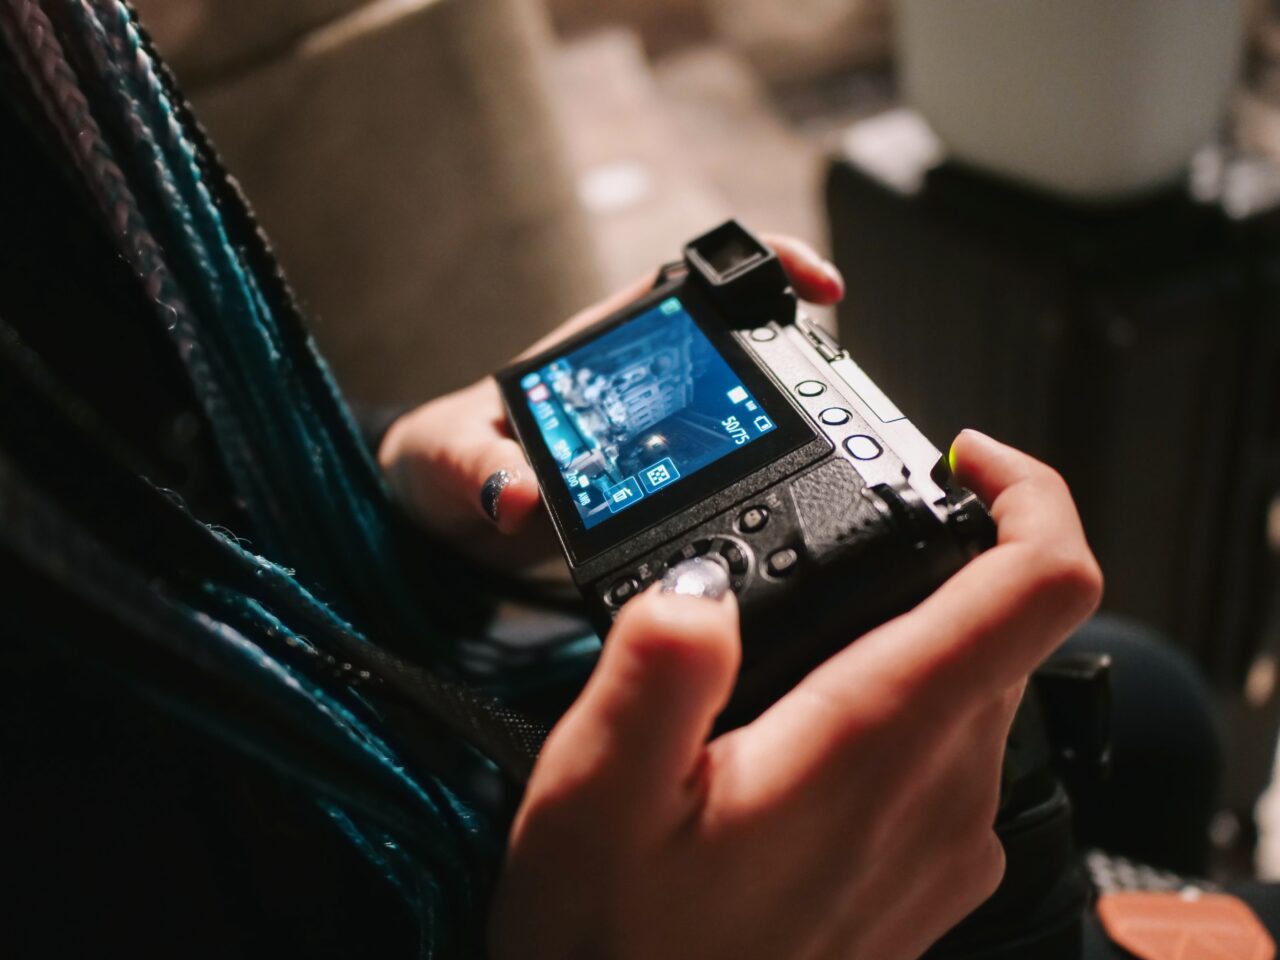
Display Switching..... Lets you change the information shown on screen.
Having a lot of information on screen can be helpful, but sometimes it can also make things harder to see.
In cases like that, you can easily switch what's shown on the display.
When It's Useful
- The on-screen info is in the way and hard to see.
- You want to see the info more clearly.
STEP.1
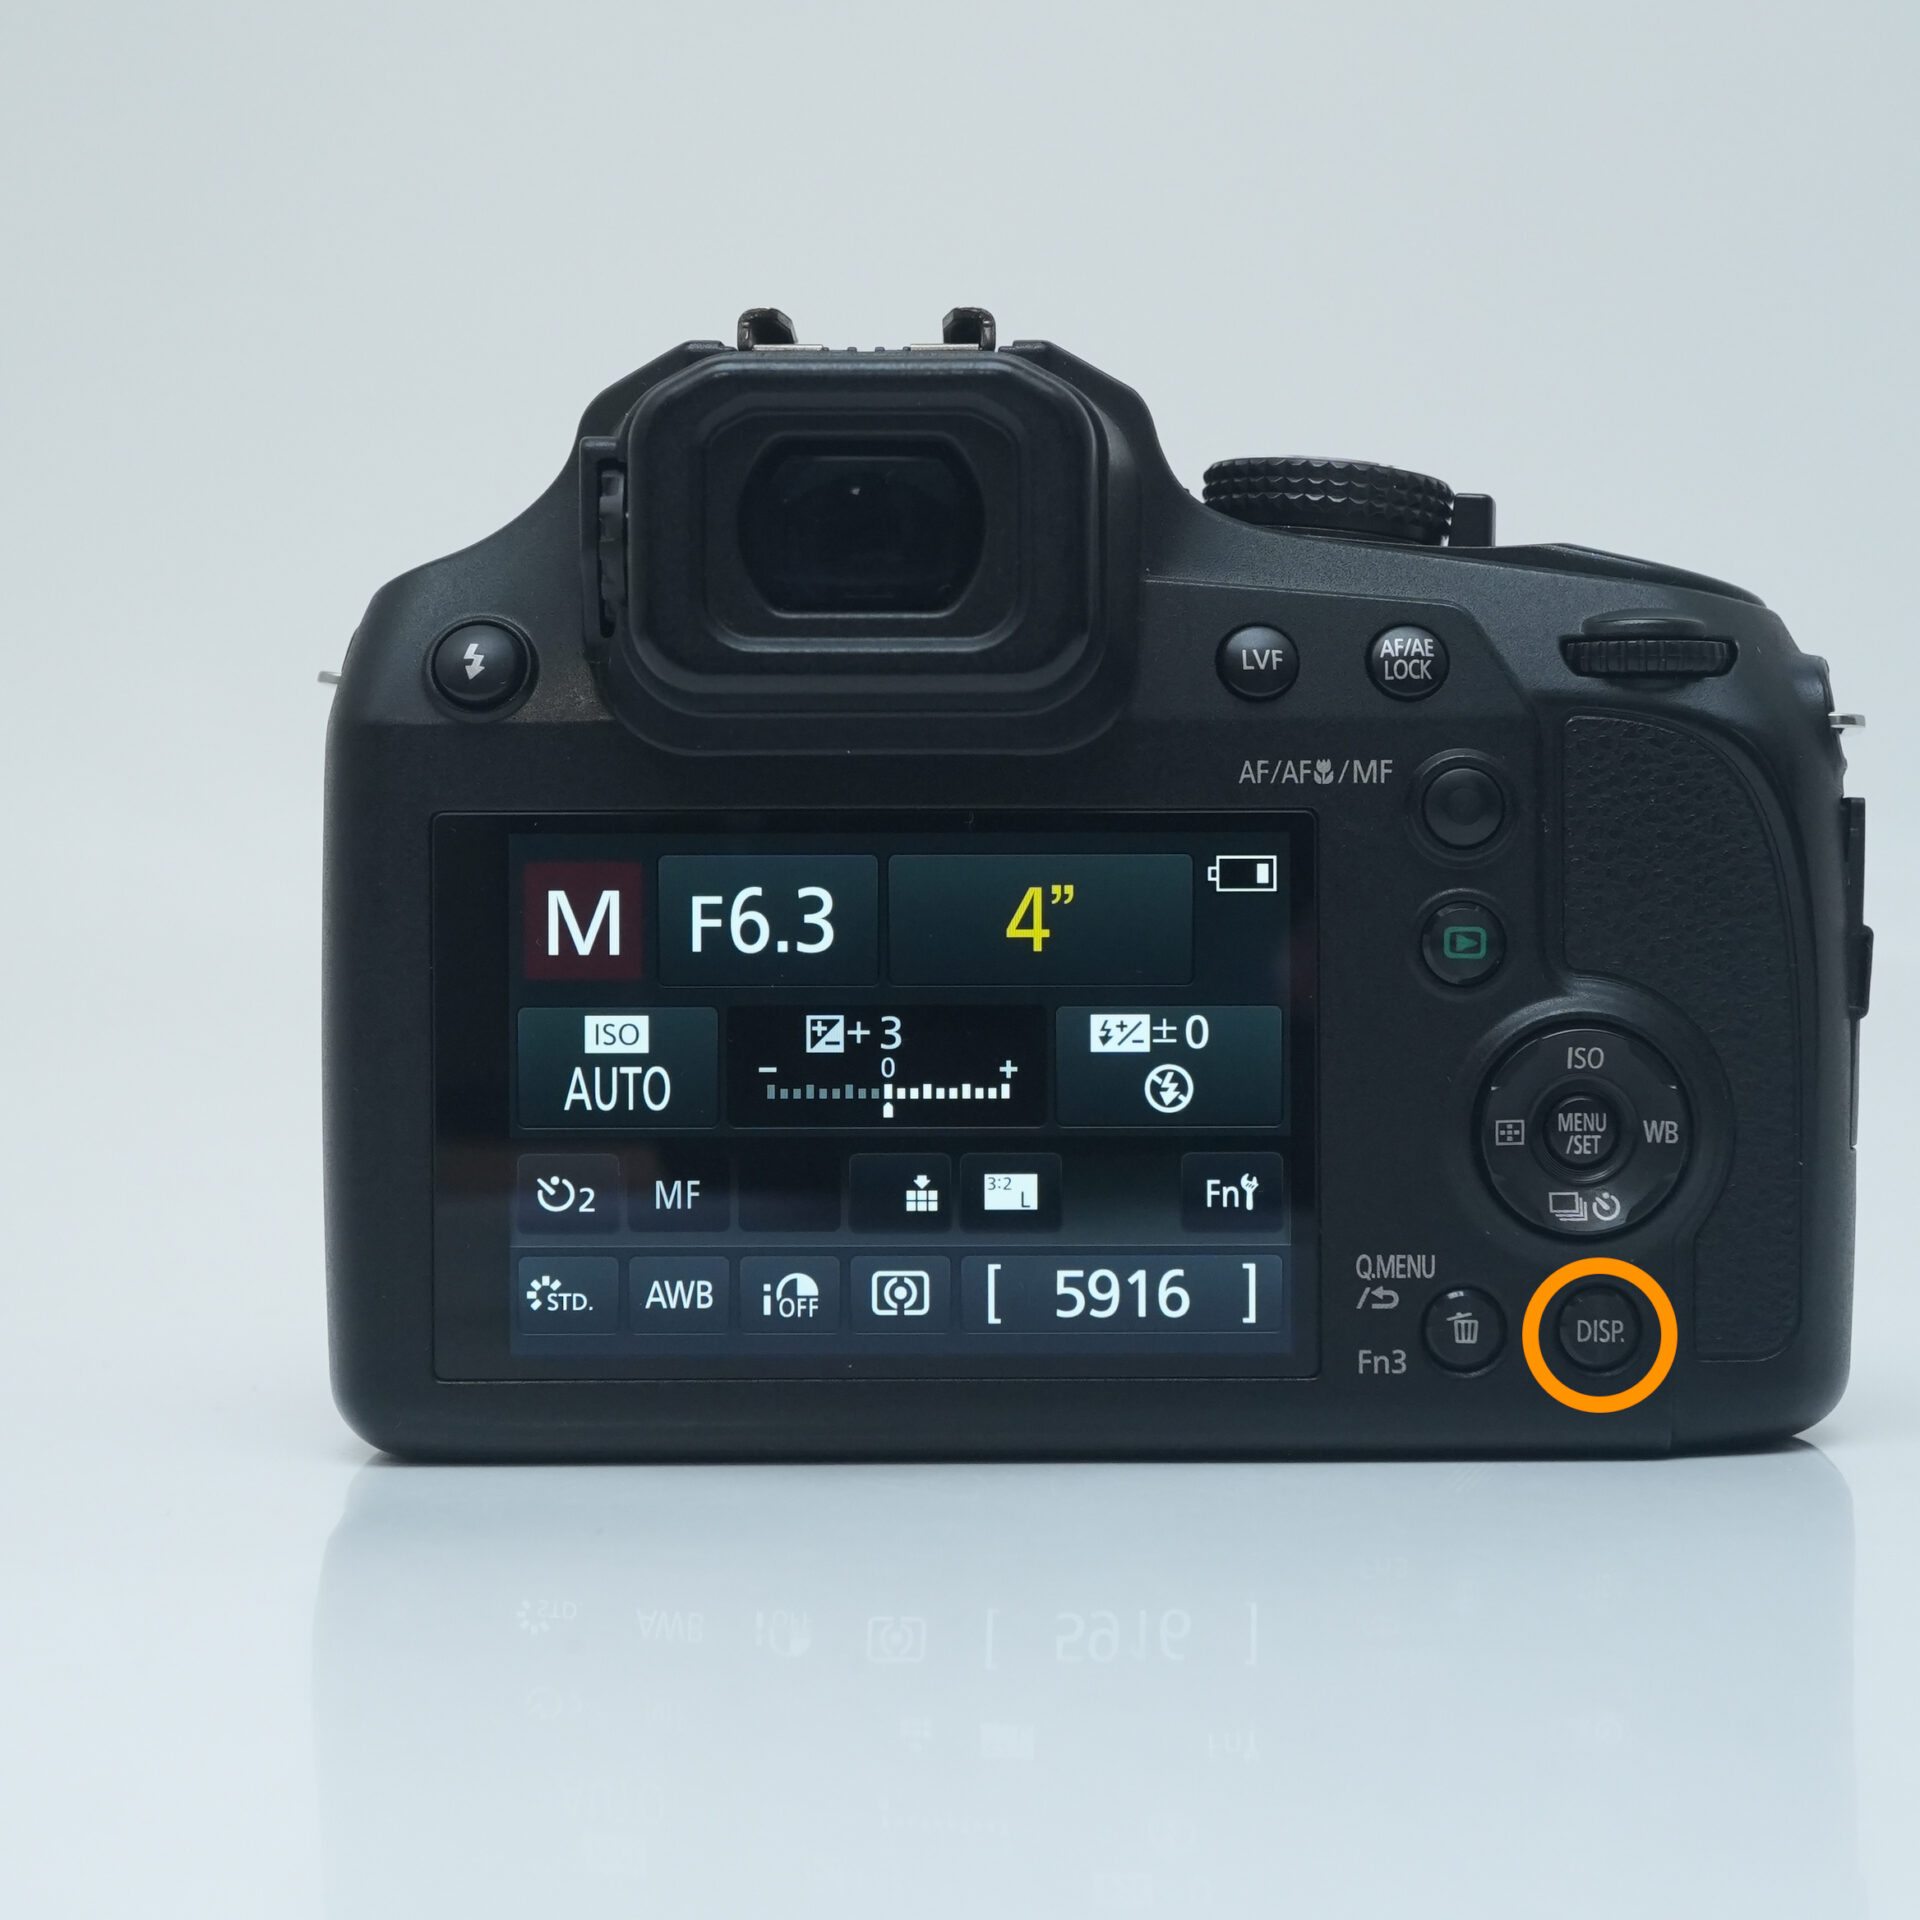 |
| Press DISP to switch the display |
White Balance
Have you ever looked at a photo and thought, "Hmm, the colors look a bit off"?
That's where the "White Balance" setting comes in handy! Adjusting it to match your light source helps you capture more natural-looking colors.
Auto white balance is convenient, but depending on the scene it can sometimes produce unnatural colors, so it's worth switching it manually depending on the situation.
When It's Useful
- The colors look off.
- You want consistent colors within the same scene.
- You want to shift the colors on purpose for a moodier photo.
Recommended Scenes
| Auto (AWB) | A safe bet for pretty much any scene. When in doubt, use this. |
| Sunlight | Sunny outdoor scenes, under a blue sky, beaches, parks, and similar spots |
| Cloudy | Overcast days, shade outdoors, soft evening light |
| Incandescent | Warm-toned indoor lighting (orange-ish bulbs), cafes, living rooms, and similar spots |
| Fluorescent | Offices, schools, supermarkets, and other indoor spaces with cool white lighting |
| Custom | Ideal for special lighting (stage lighting, LED lights, etc.) or product photography |
STEP.1
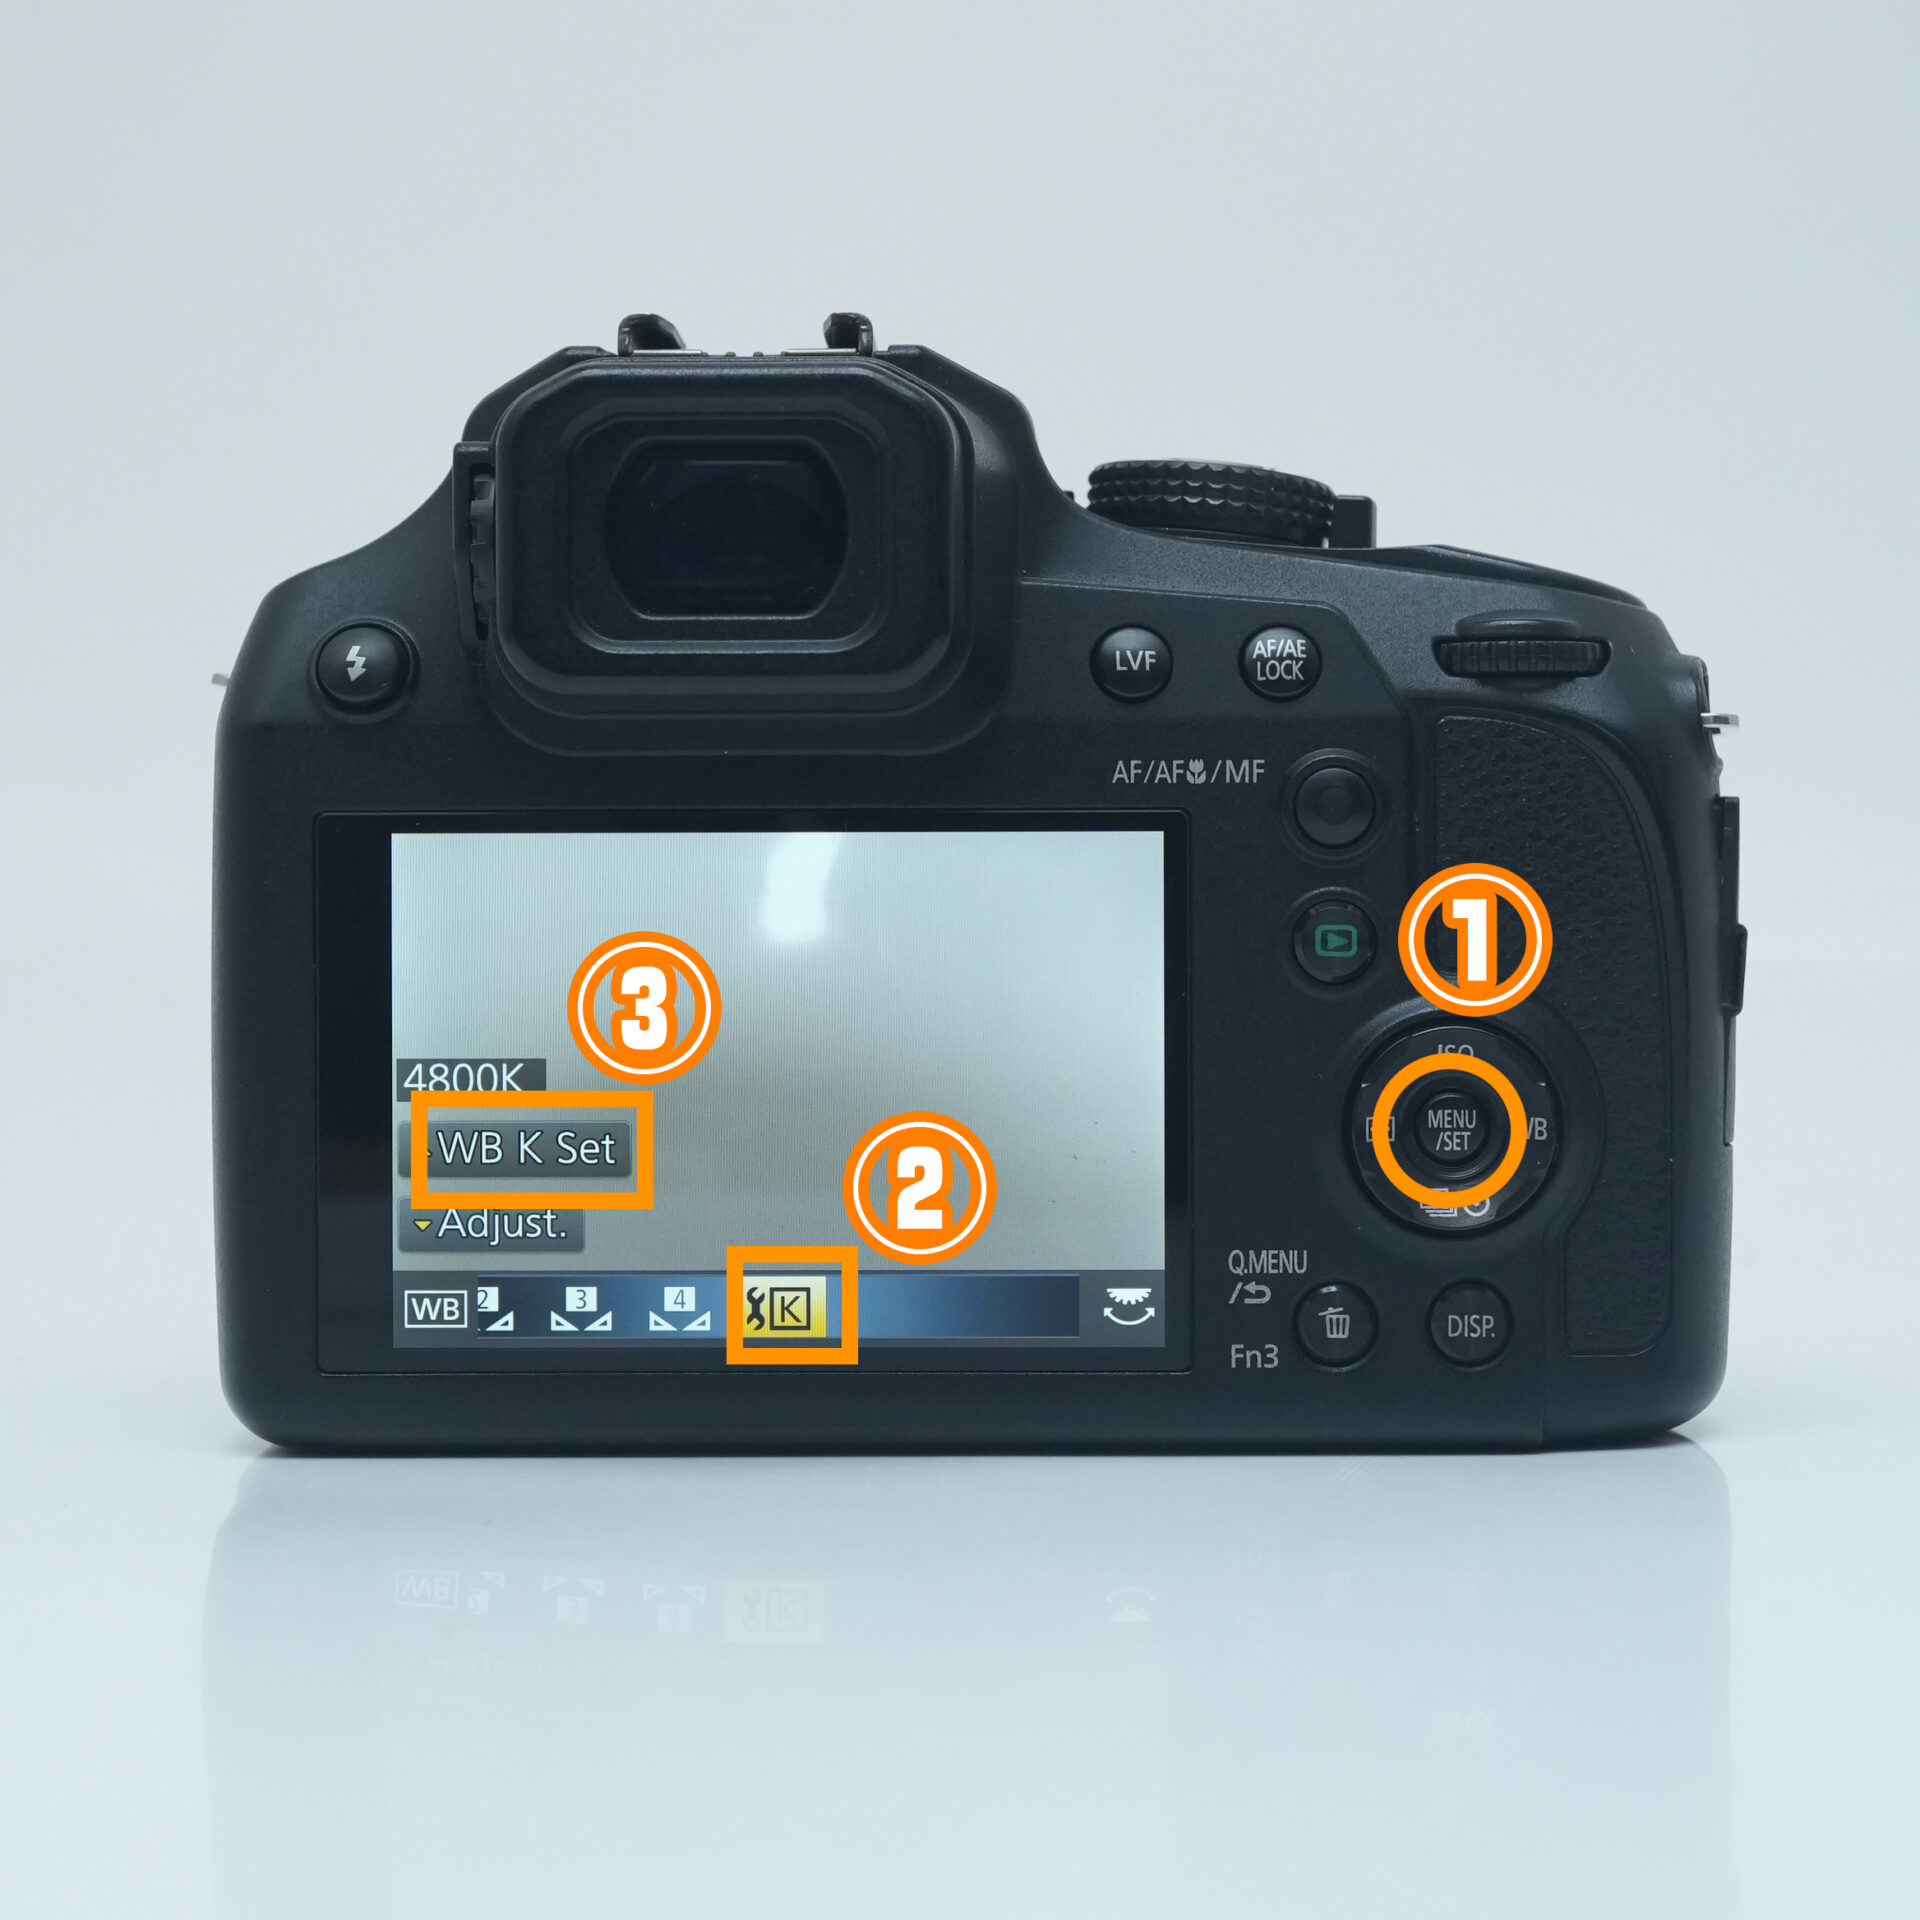 |
| Press right on the cursor button → K → select Color Temperature setting |
STEP.2
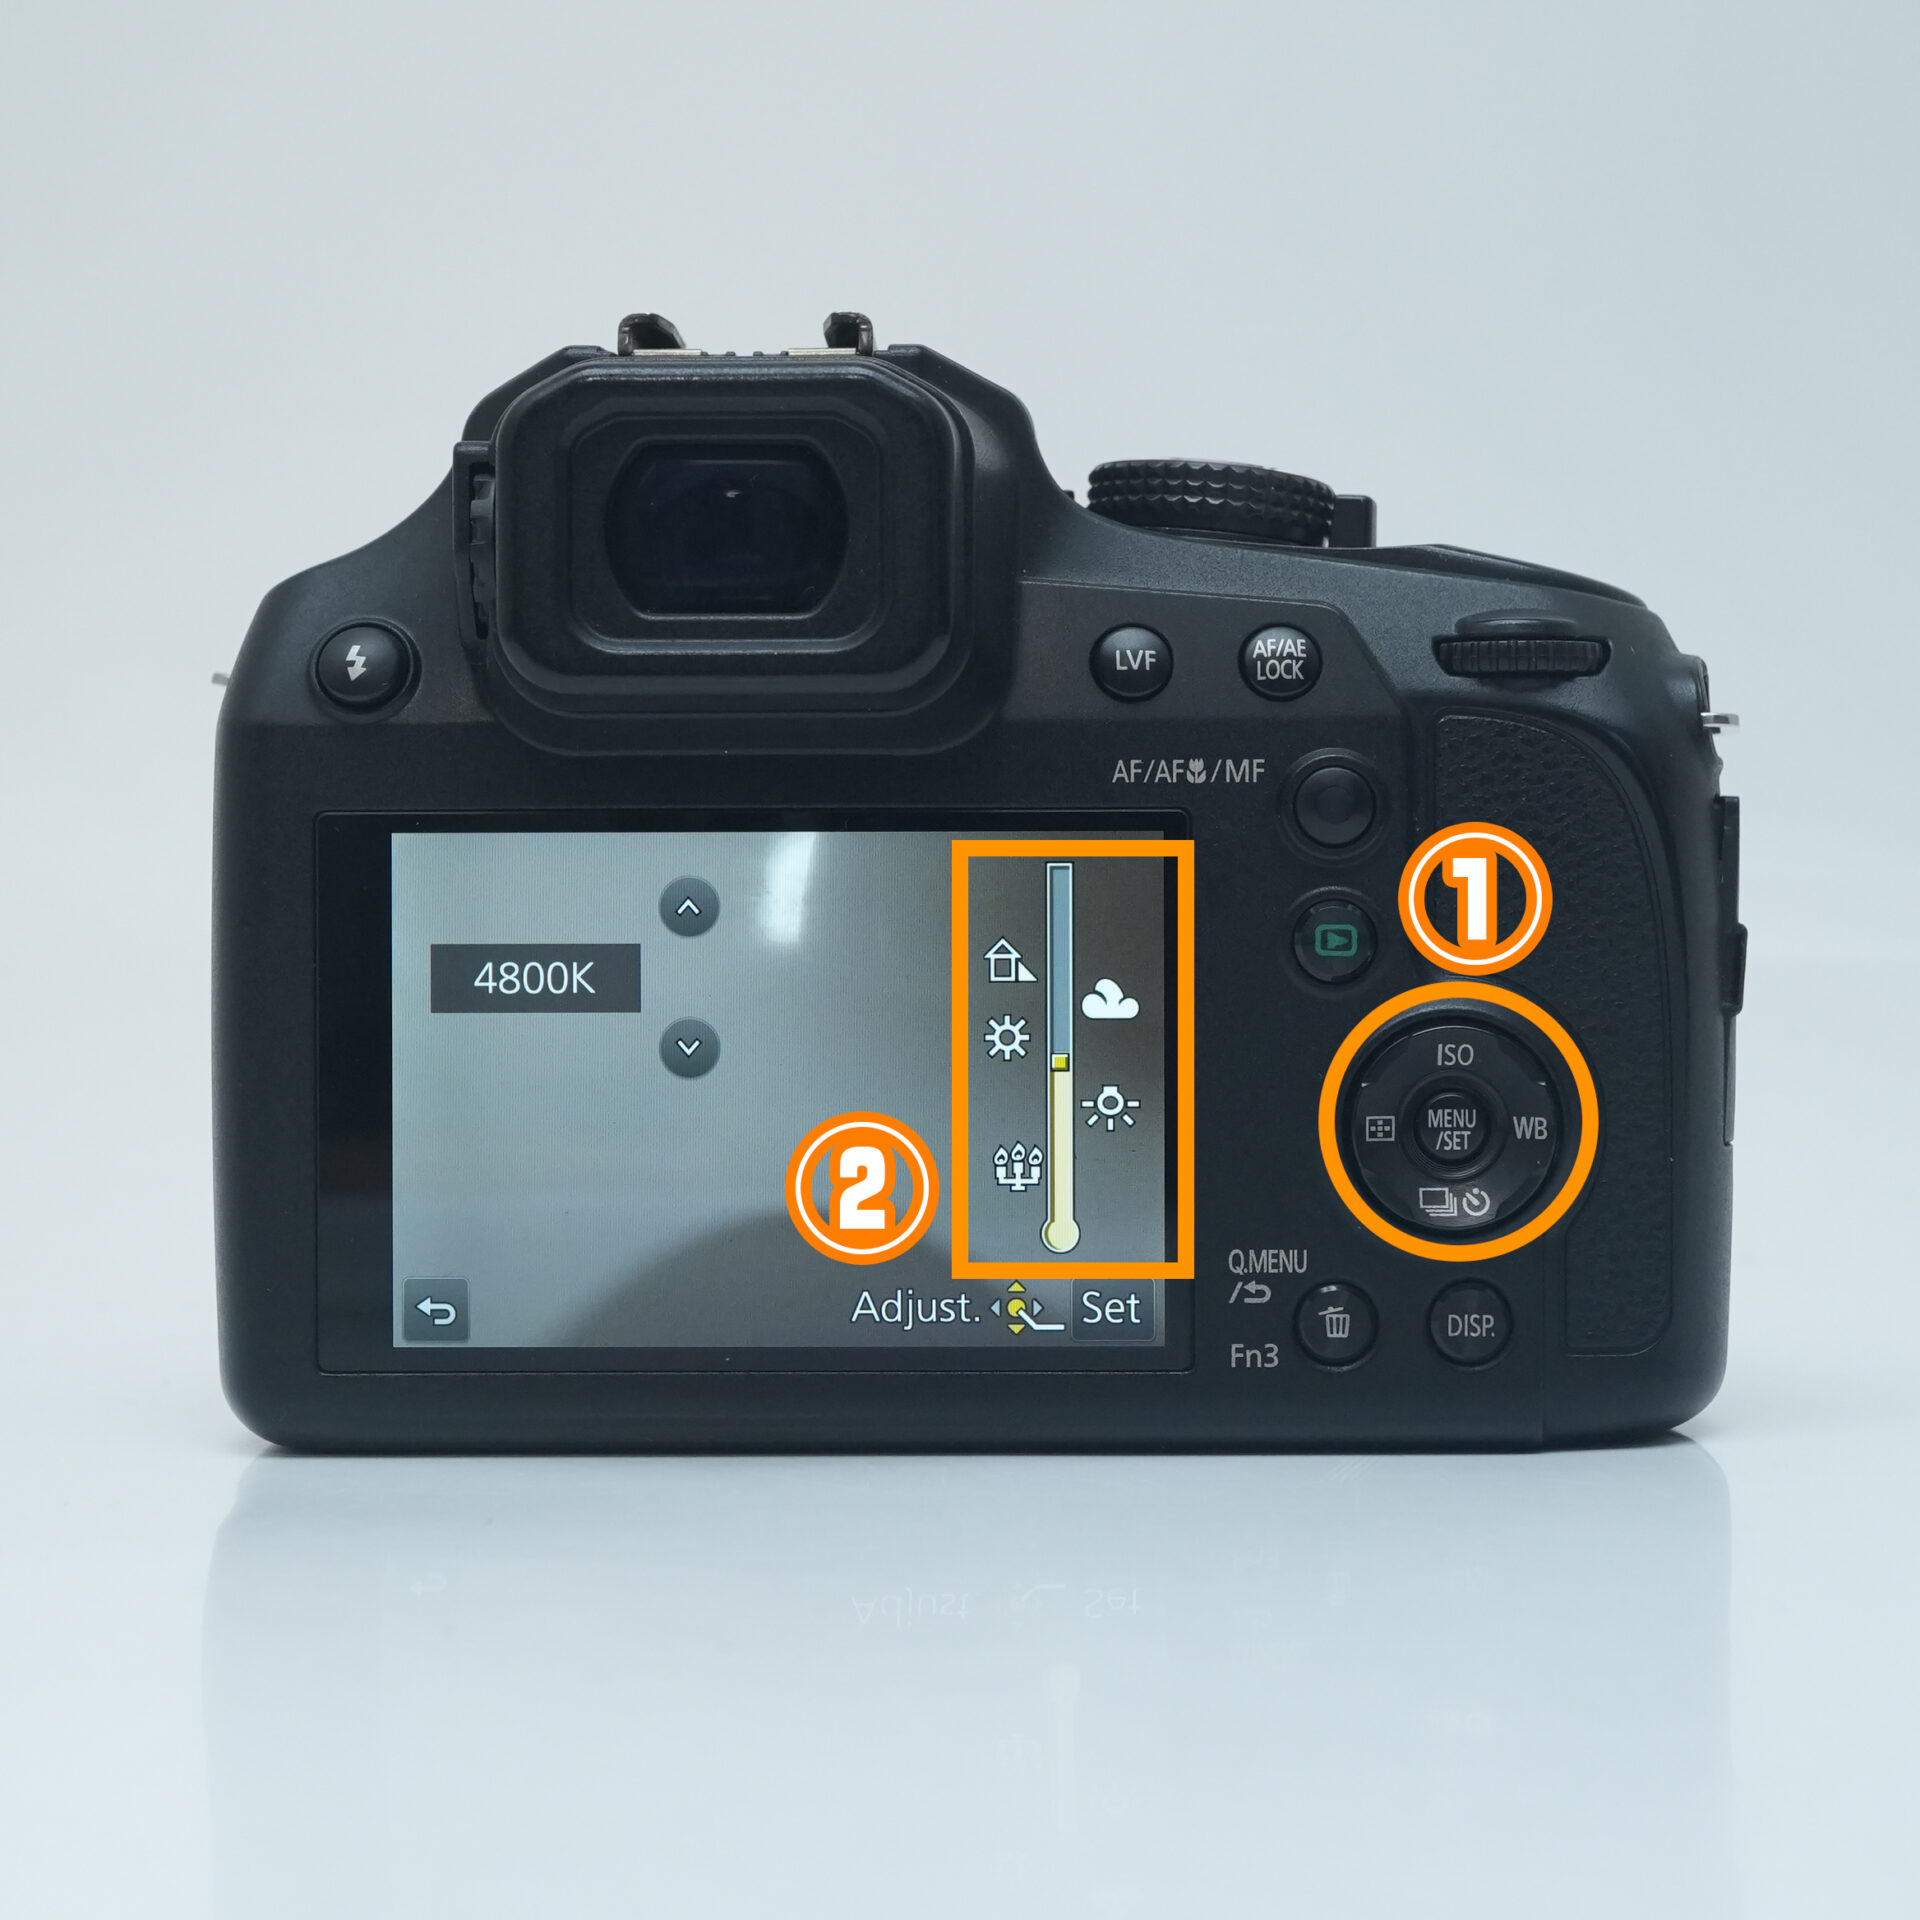 |
| Press up or down on the cursor button to adjust the color temperature |
Summary

And that wraps up our 11 favorite basic settings!
This time I've covered the essentials to get you started.
Using these features will really expand what you can do with your shots, so they're well worth remembering.

See you next time!